Subtitles
The subtitling tool allows you to add and edit subtitles directly in the timeline on a special subtitle track or by using the Subtitle Window. You can also import (ASS/SRT/VTT/SBV) and export (ASS/SRT) subtitles.
Kdenlive allows multiple subtitle files in the subtitle track (only one subtitle file loaded at a time). You can create, duplicate, and delete subtitle files and manage its components with the Subtitle Manager.
Tipp
Kdenlive stores subtitles as .ass files, which means you might be interested in exploring some advanced ASS features. For more details, check out the ASS File Format Guide and Aegisub’s Documentation.
Add Subtitles
Menu
Keyboard
Shift + S adds a subtitle.
Icon and Mouse
Click Add Subtitle icon in the Timeline Toolbar to open the subtitle track in the timeline.
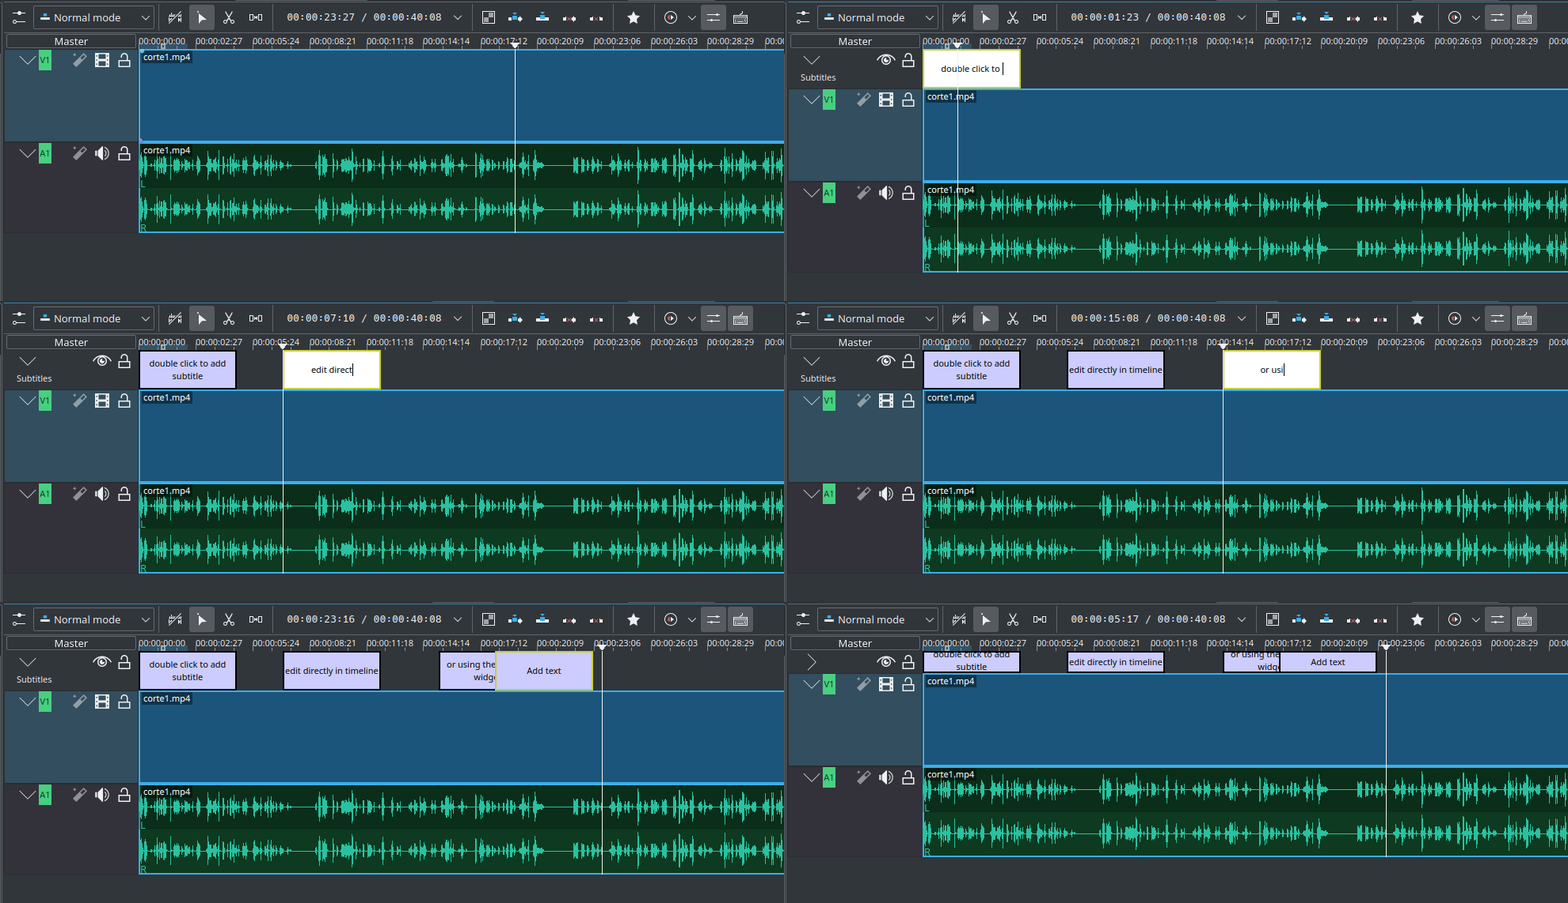
Double-click in the subtitle track to add a subtitle.
Click Add Subtitle in the timeline ruler context menu.
Import
Import subtitles with the import function.
Edit Subtitles
You can add or editing text either directly into the subtitle clip or in the subtitle window.
Split subtitle after first line
Tipp
Use the escaped character \N to insert a new line in the subtitle.
With this feature, you can cut the selected subtitle with the Razor Tool after the first line of the current track position. The first line becomes the left subtitle before the track position, and the rest becomes the right subtitle after the track position. It then selects the right-hand subtitle.
To enable this feature go to Tools and switch to Split after first line
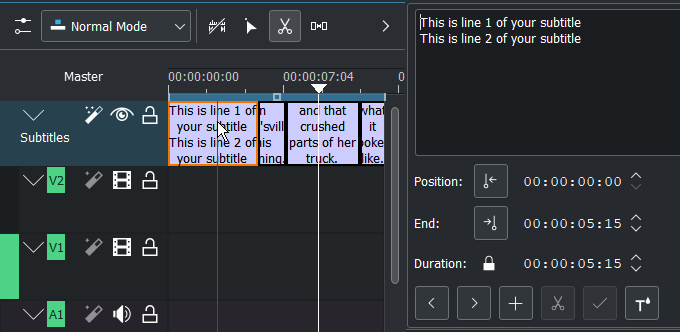
Subtitle split with Razor-Tool
Select the subtitle in the timeline that contains two lines. Click on the subtitle with the Razor-Tool X.
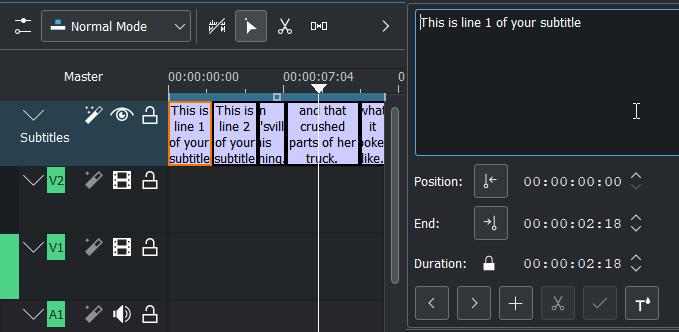
Subtitle after you have split it with the Razor-Tool
This makes it easier to split up subtitles, where you have a transcription with one subtitle per line. This comes from a couple of situations:
You have put the audio through an external transcription service
You are adding subtitles to a song that you have the lyrics for
Resize
Grab the end of a subtitle with the mouse and lengthen or shorten it as needed.
Set subtitle in/out can be achieved with the same shortcut as to set clip in/out (left/right parenthesis shortcut).
Style Subtitles
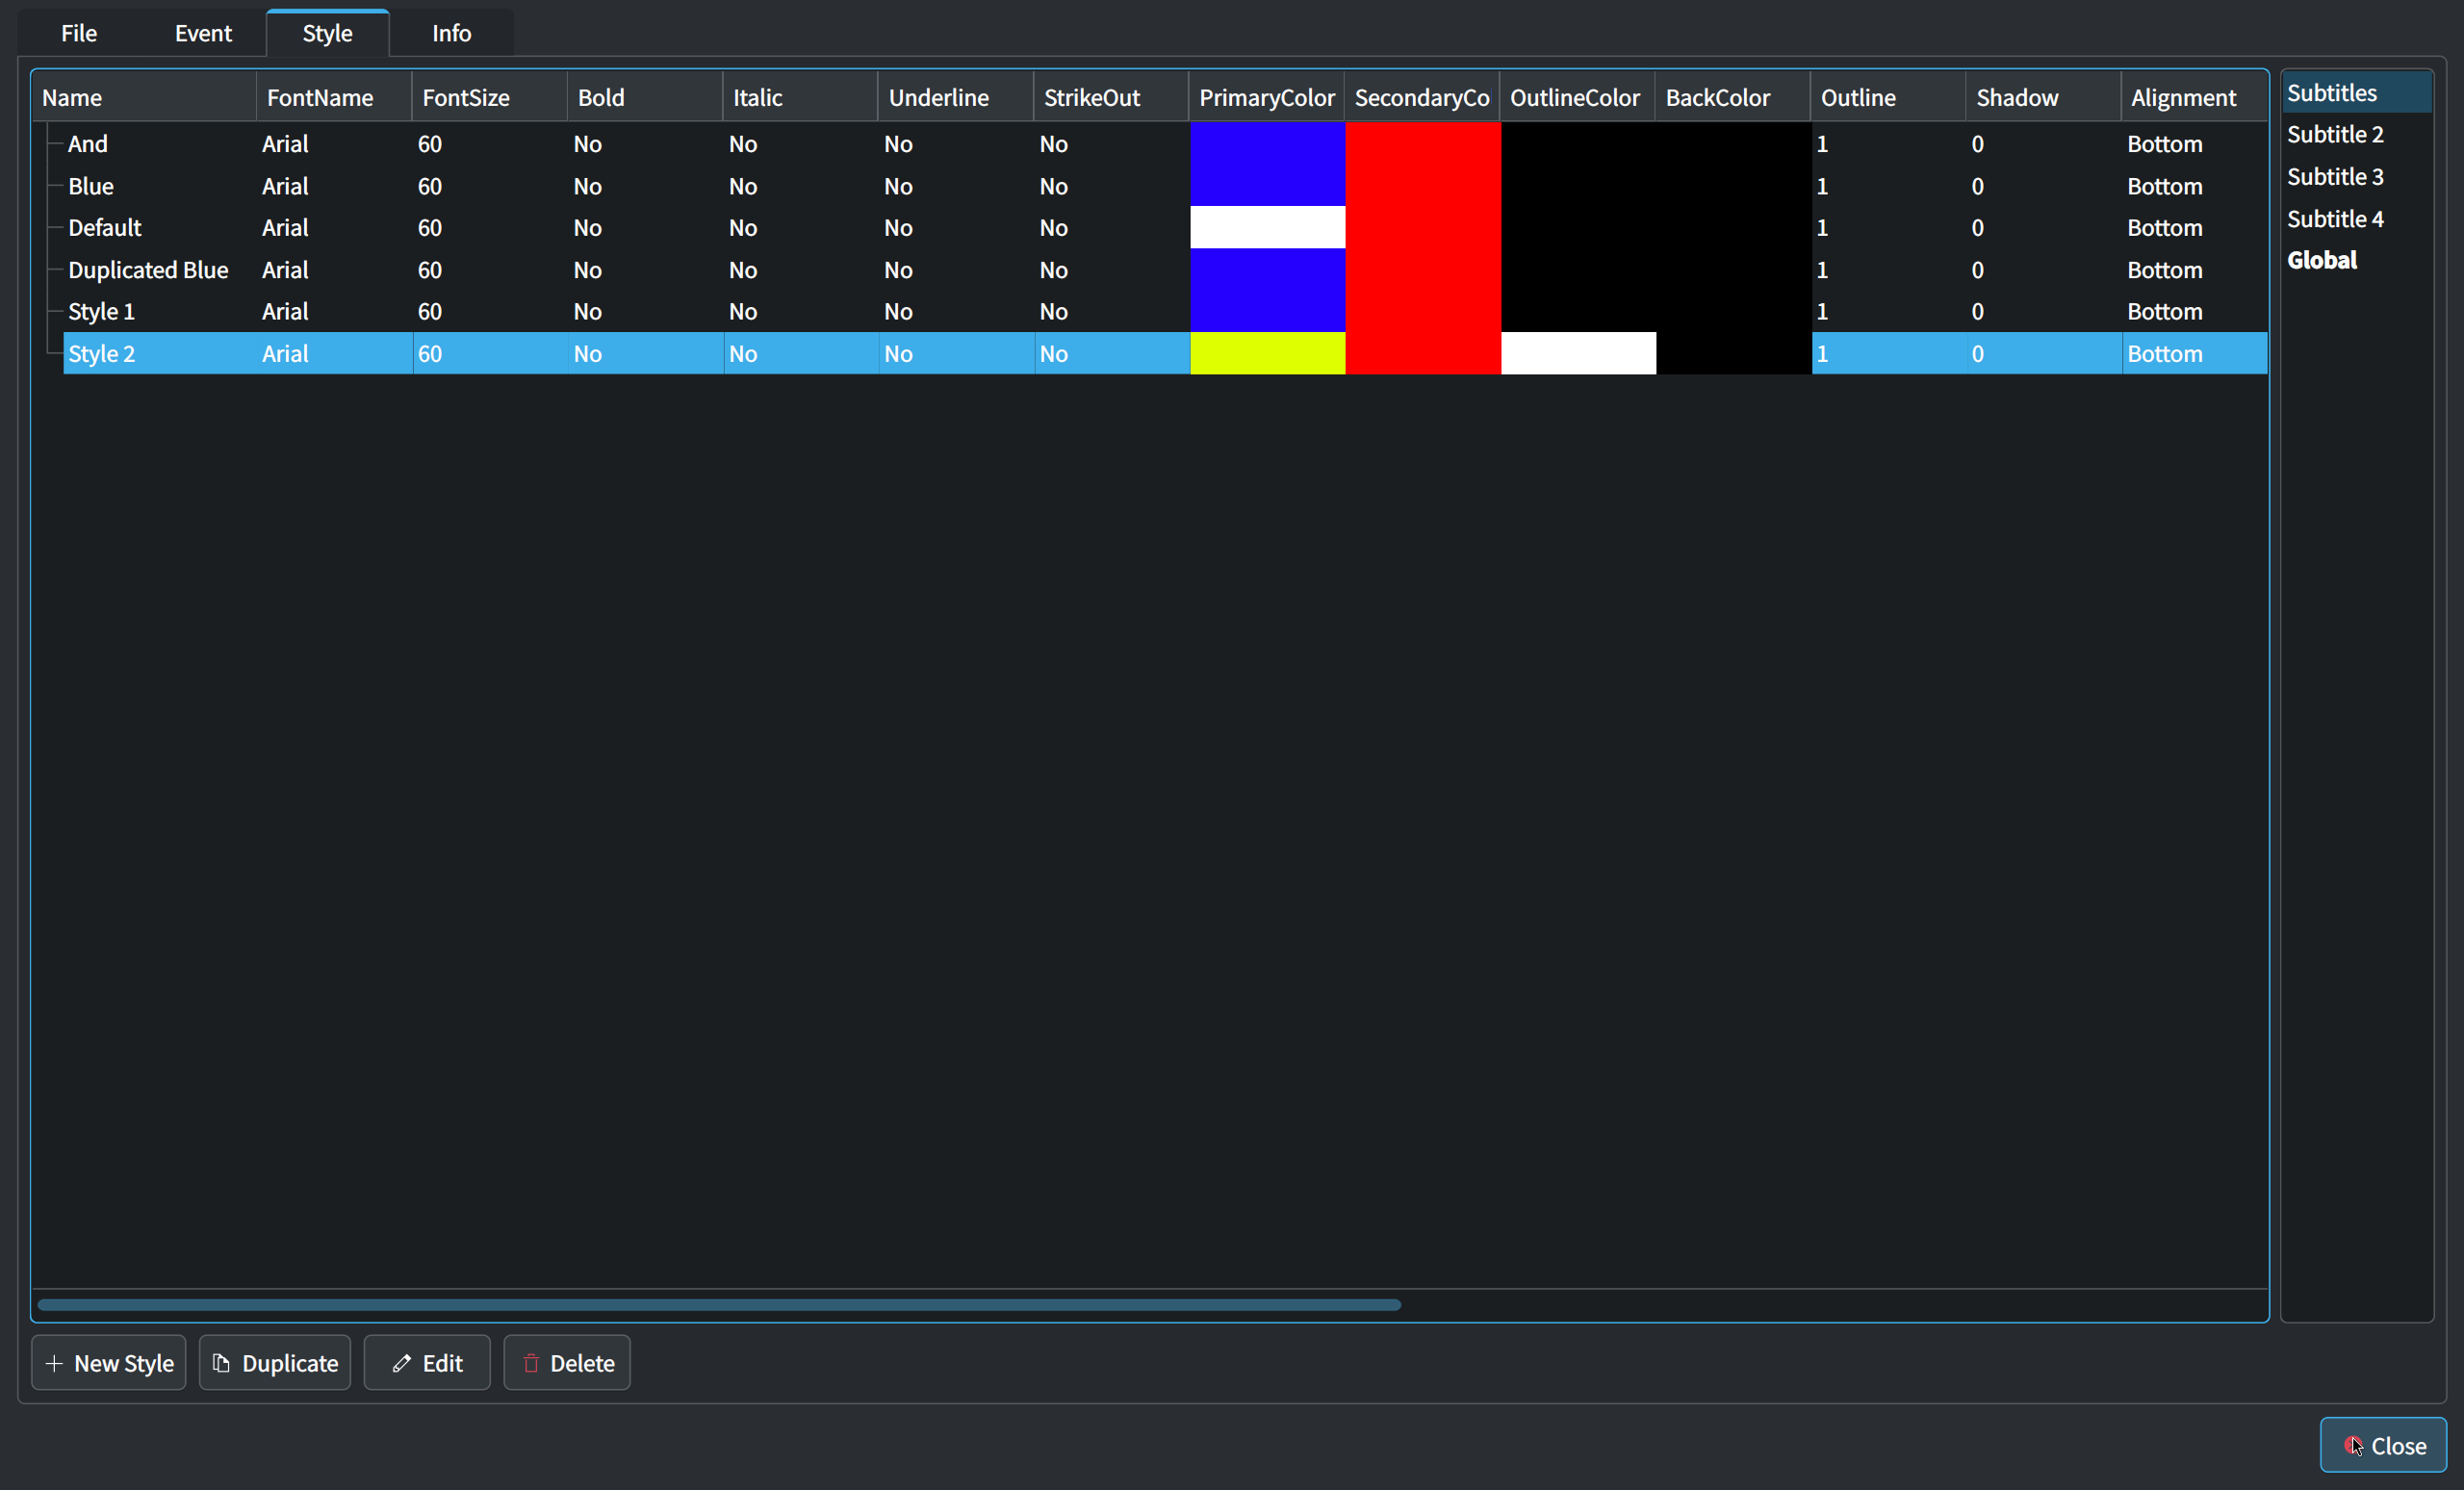
Creating, duplicating, deleting, and editing subtitle styles can be managed through the Subtitle Manager.
Additionally, you can edit the assigned style directly using the edit button in the Subtitle Window.
Create a style
Subtitle styles can be created either within each subtitle file or globally.
Choose a subtitle file or the global space from the sidebar as the location for the new style.
Click + Add Style in the Subtitle Manager.
Enter the properties in the Style editor.
Move/Copy a style
In the style section of the Subtitle Manager, drag a style to the desired item in the sidebar to move or copy it.
Bemerkung
You cannot move or delete the style Default.
Assign a style to a subtitle
You can assign a style to the subtitle you are currently editing using the Style combobox in the Subtitle Window. This style will be applied to the entire subtitle.
Multi-layer Subtitling
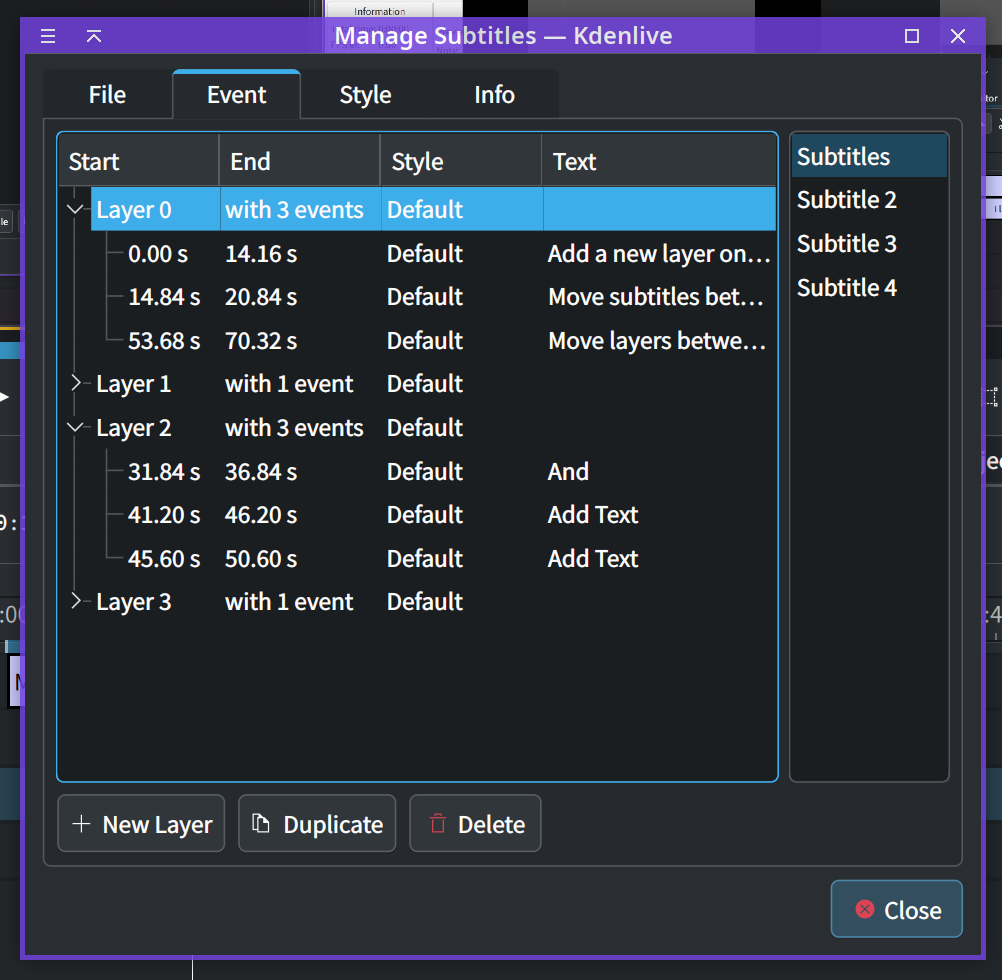
Kdenlive supports multiple subtitle layers. You can create, duplicate, and delete subtitle layers using the Layer tab in Subtitle Manager.
A new subtitle layer can also be created by Shift+drag an existing subtitle down beyond the bottom of the subtitle track or by adjusting the layer indicator in the Subtitle Window.
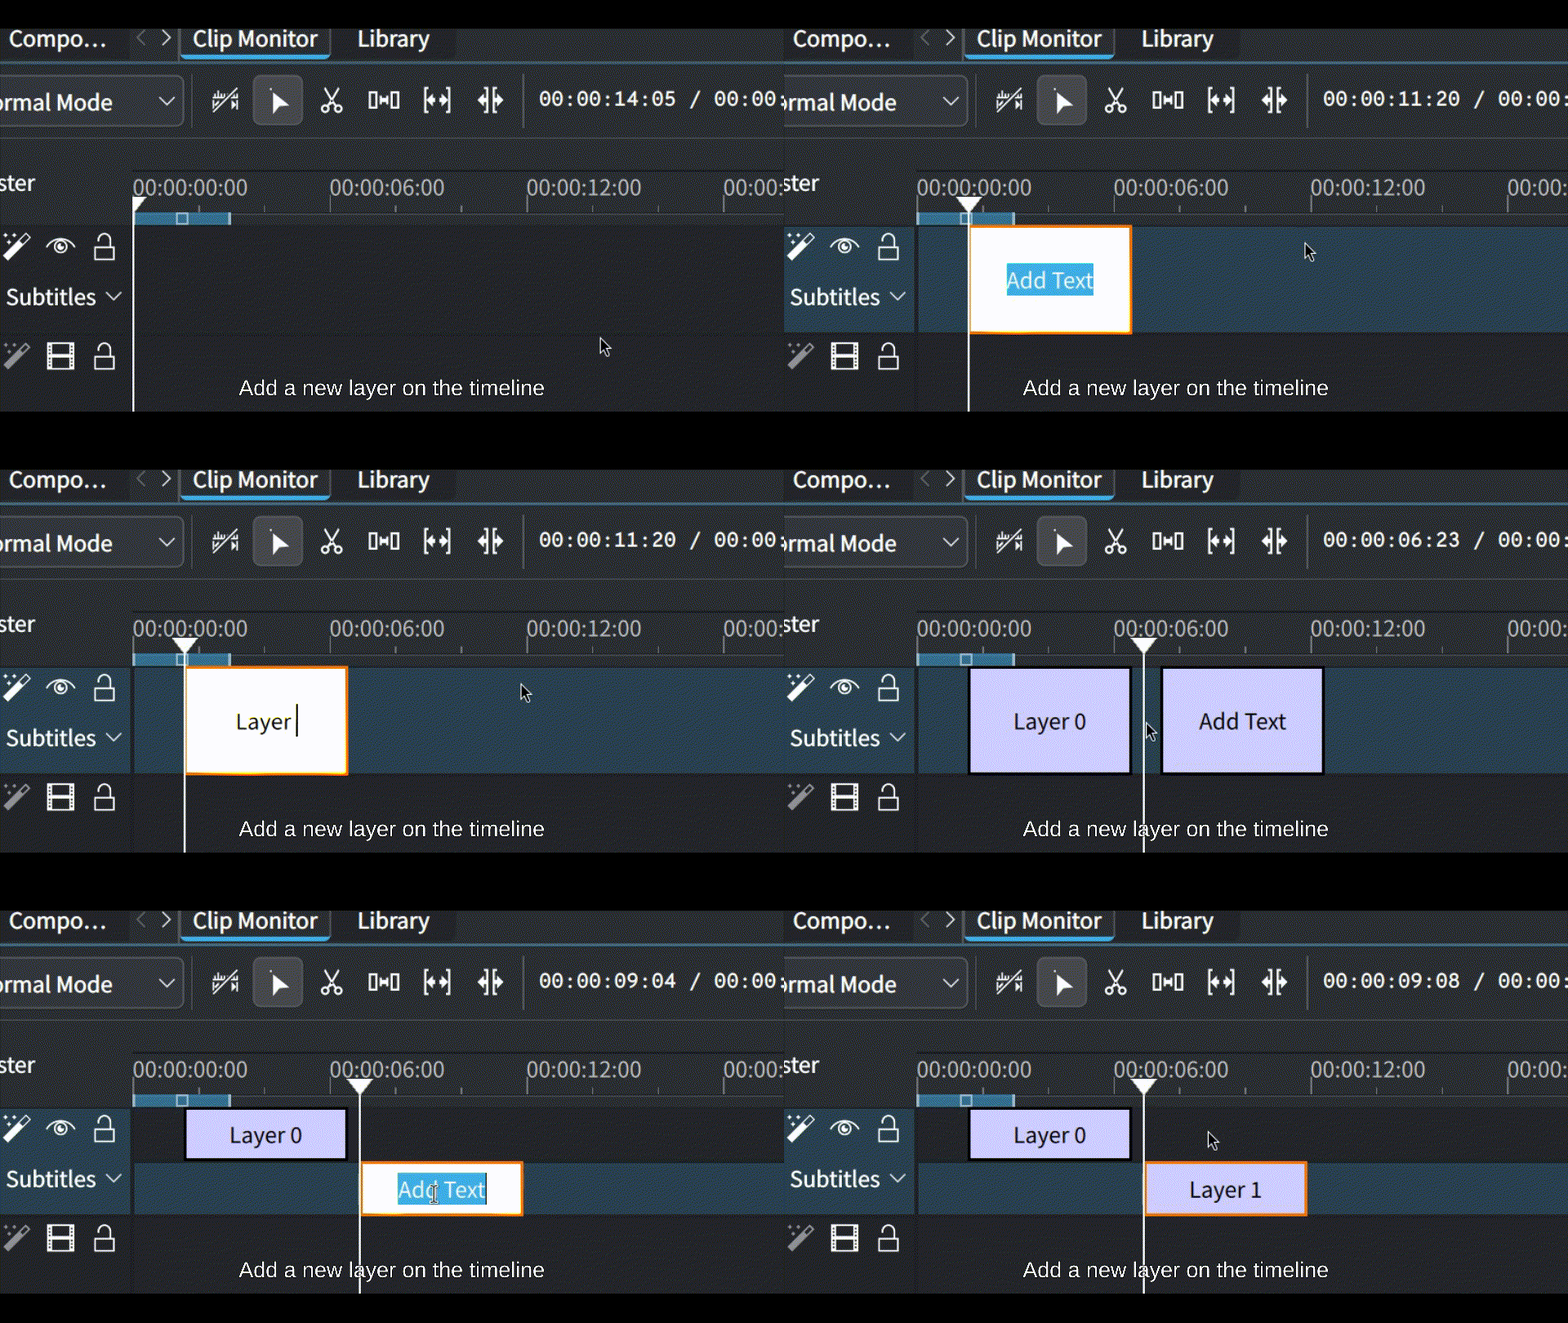
Subtitles with a lower Layer value are placed behind those with a higher value.
Set the layer of a subtitle
When you create a new subtitle by double-clicking on the timeline, the subtitle will be placed on the layer under your cursor.
You can change a subtitle’s layer value using the Layer indicator in the Subtitle Window, or you can simply drag and drop the subtitle from one layer to another on the timeline.
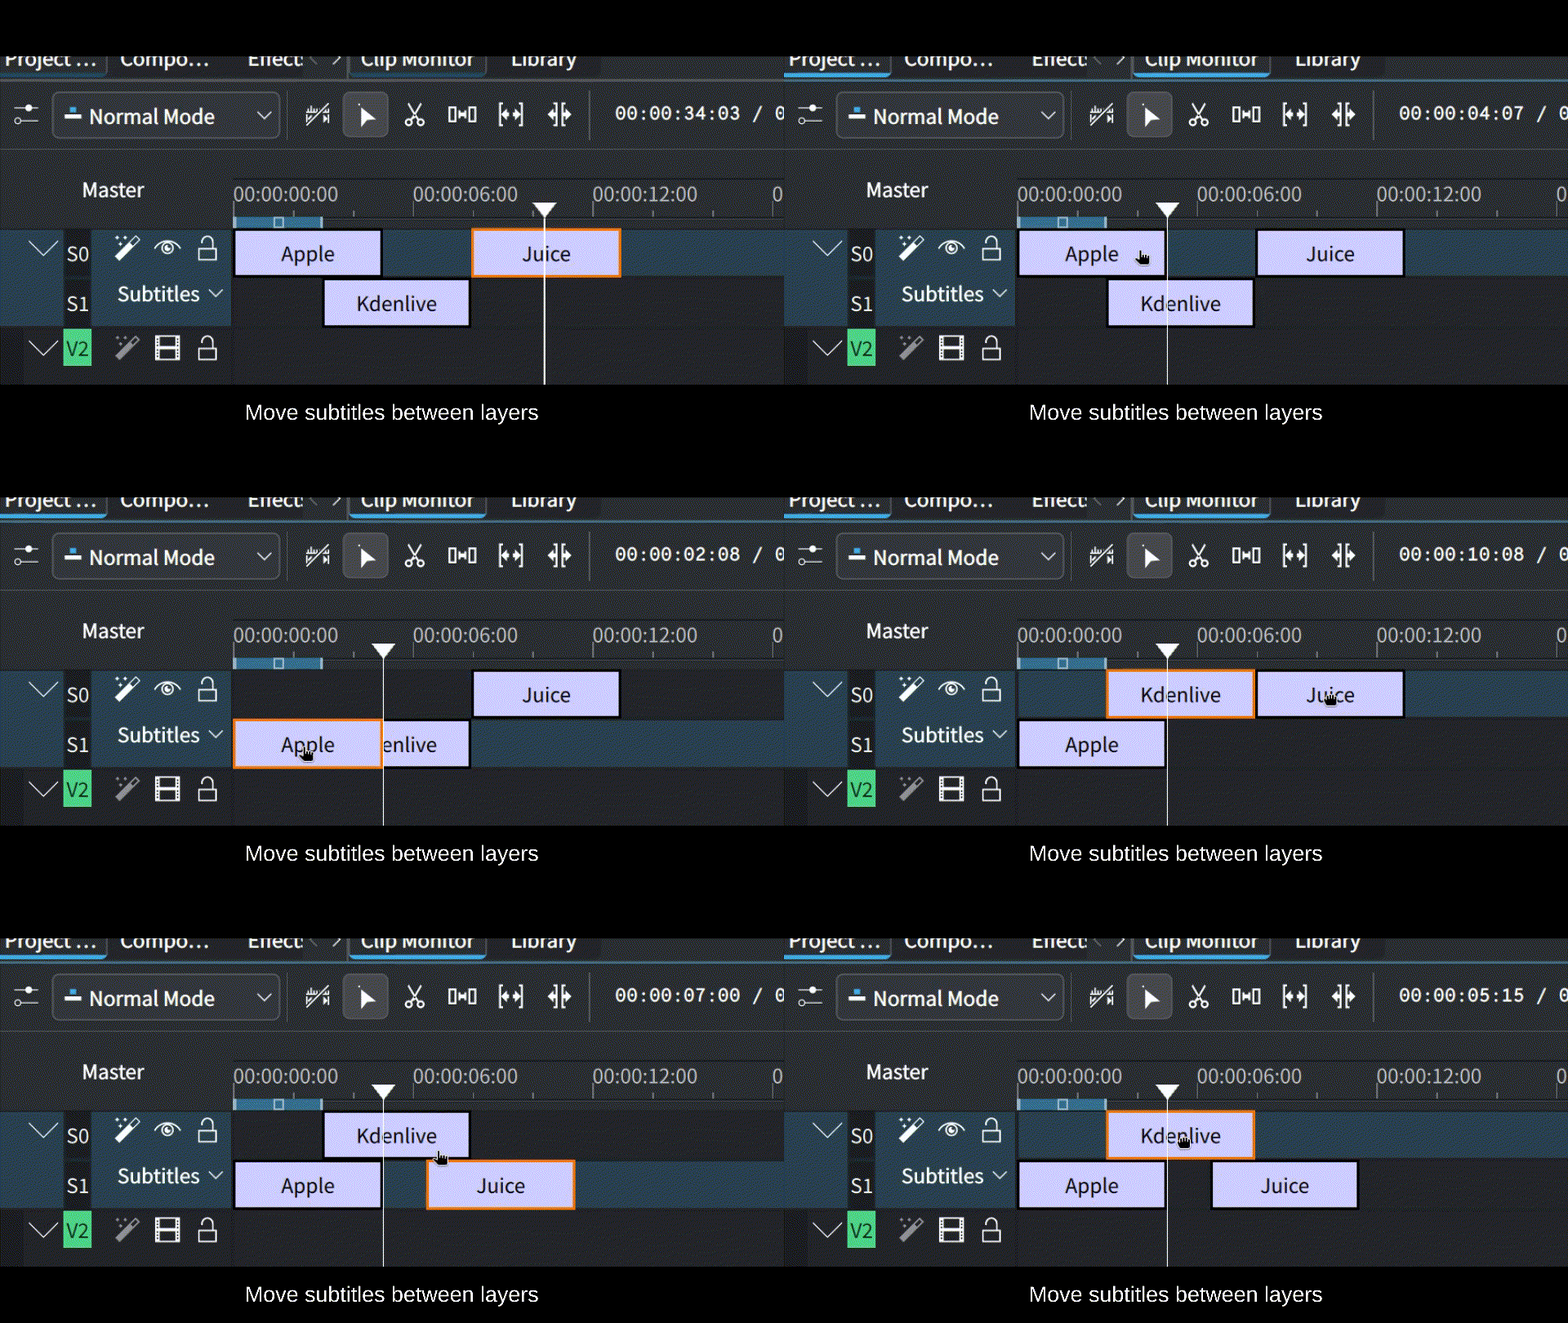
If you set the layer value higher than the current maximum, Kdenlive will automatically add a new layer.
Copy/Move layer between files
You can copy and move layers between different subtitle files using the Subtitle Manager.
In the Layer tab, Simply drag a layer to the desired file in the sidebar. All events within the layer will be copied or moved to the new location.

Default style of layer
You can assign each subtitle layer a default style. Any new subtitles created on that layer will automatically be assigned this style.
To set this, go to the Layer tab in the Subtitle Manager. Click the Style column of a layer item and select the desired style from the pop-up menu.
This feature is particularly useful when working with multiple speakers in a subtitle file, as it allows each speaker to have a distinct style effortlessly.
Import and Export Subtitles
Importing SRT, ASS, VTT and SBV subtitle file:
Exporting ASS or SRT subtitles:
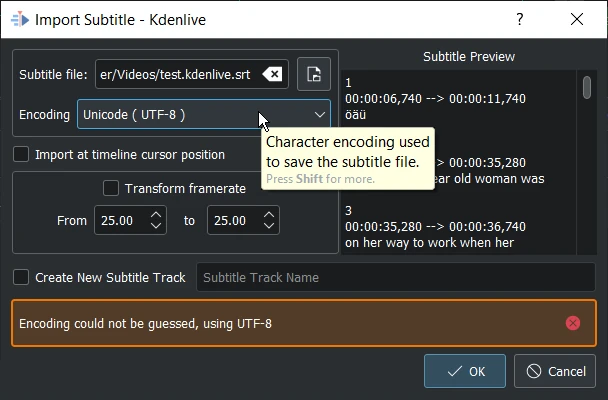
Encoding: Allow overriding of detected codecs through a list of available codecs, and show a preview to make choice easier.
Create New Subtitle Track: Importing an .srt file in the project, you can create a new subtitle track (an entry in the subtitles combo list) instead of overwriting the current subtitle track.
Subtitle Window
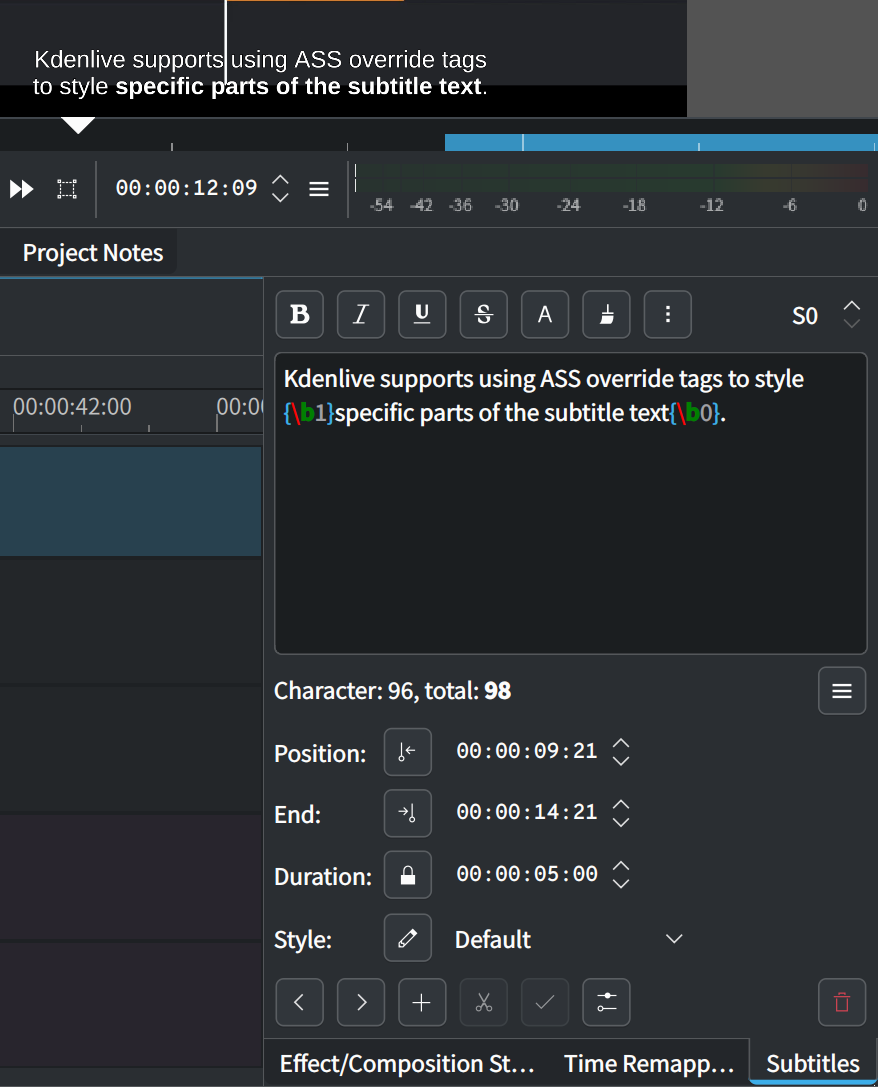
The subtitles window allows easier editing and also makes it possible to easily navigate between subtitles with the < and > buttons
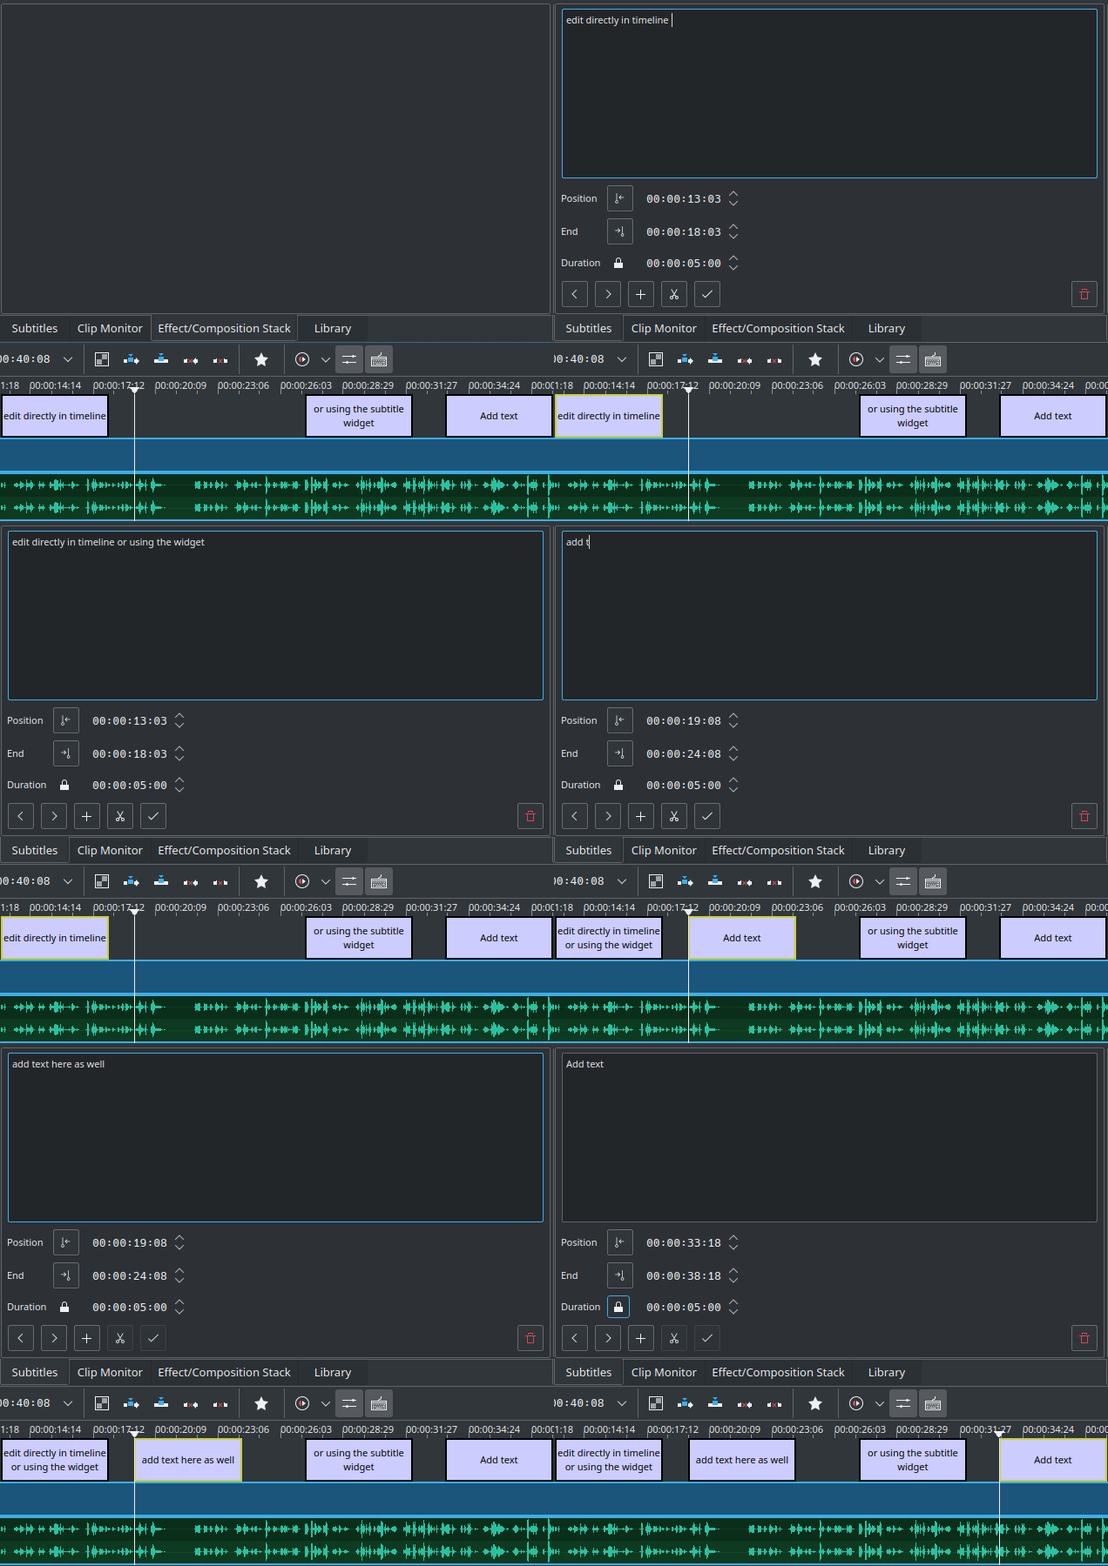
Subtitle window
Add subtitles with the + button
Cut subtitles with the scissors button
Let’s say your subtitle text is too long and you want to make it two different subtitles. Put the cursor in the text widget where you want to cut and click the scissors, it will split the text between two different subtitle items.
Tipp
The scissors only works when the playhead is positioned over the subtitle itself.
Apply changes by clicking the check-mark button, or by pressing Enter
Character count and zoom
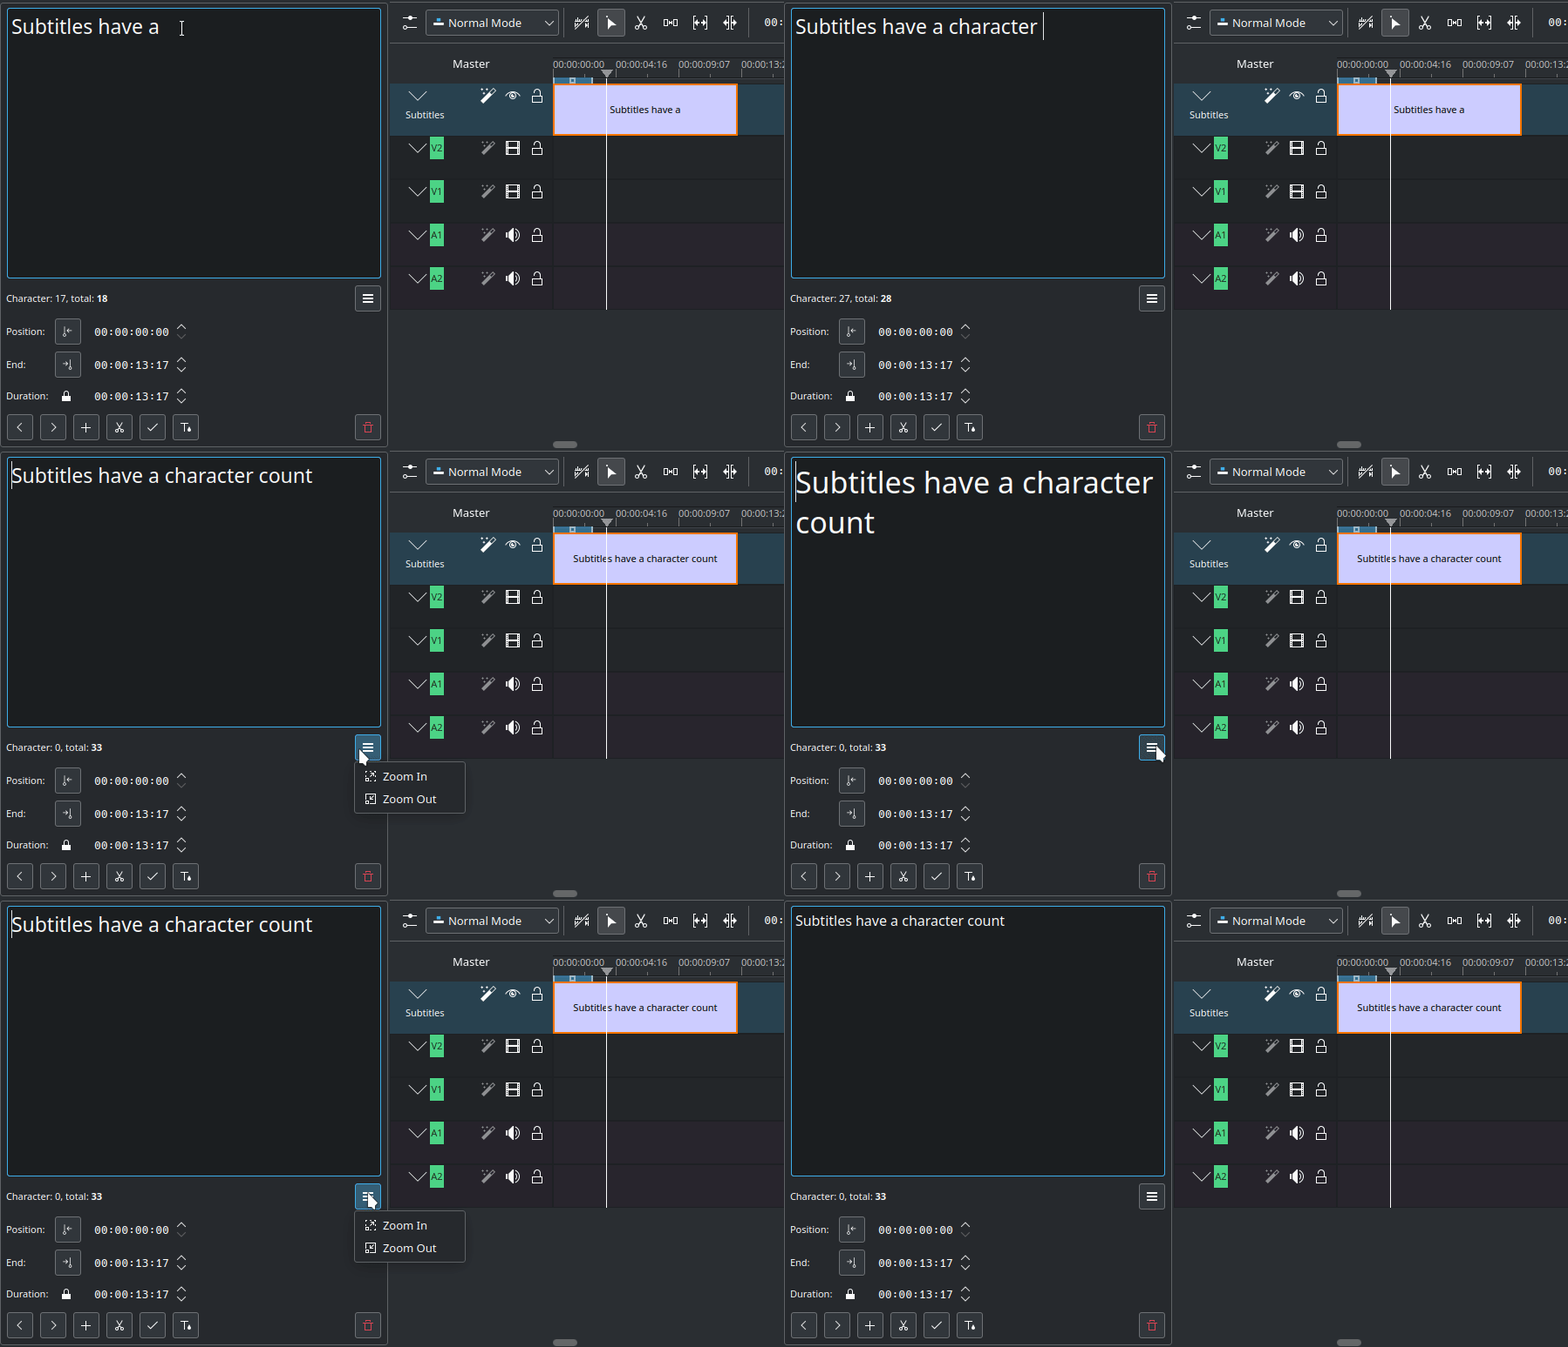
Character: Character number at cursor position
Total: Total number of Character
Zoom in: Zoom into the edit window
Zoom out: Zoom out of the edit window
Alt+Arrow: jumps from subtitle to subtitle.
Spell check
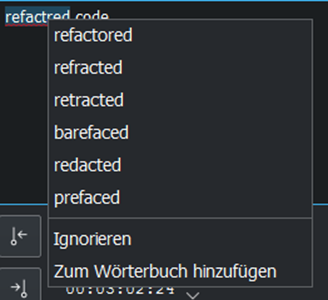
A spell check for subtitle is integrated and shows incorrect words by a red wiggly line. Right-click on the word and you get a list of possible words you can then choose by clicking on it.
To enable spell check, right-click the subtitle text widget in the Subtitle Window and check the Auto Spell Check option.
Warnung
Please note that this feature conflicts with the ASS tag highlighter. To re-enable the highlighter, uncheck the Auto Spell Check option.
Simple editor
A simple text editor that syncs with the normal editor, hides ASS override tag blocks, and translates ‚N‘ into a new line.
Warnung
Due to the complexities of ASS tag rules, style editing in the Simple Editor can sometimes behave unpredictably. So it’s best suited for simpler use cases before or after editing styles.
Scrolling
You can configure subtitle scrolling using the following options:
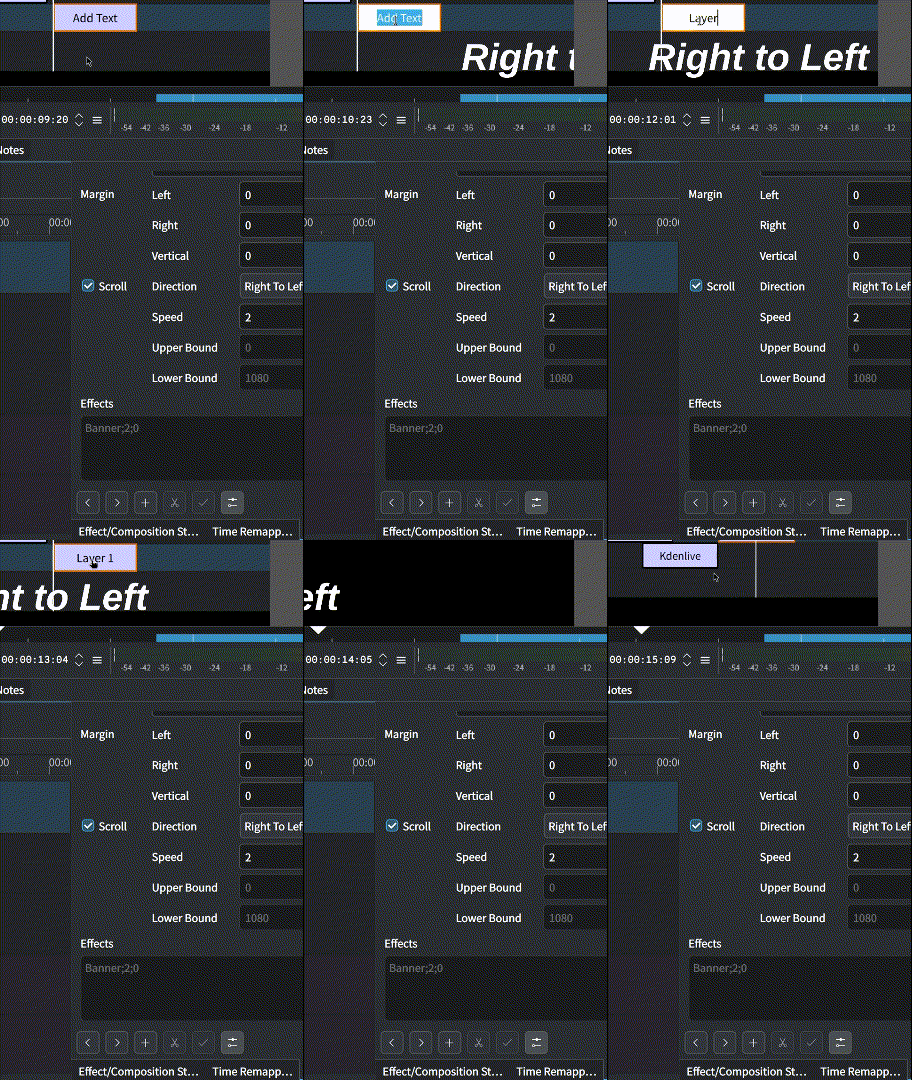
Check the Scrolling checkbox to enable scrolling.
Use the Direction combobox to set the scrolling direction.
Adjust the speed by changing the value of Speed.
For vertical scrolling only, set the Upper Bound and Lower Bound values to clip the text at the top and bottom of the screen.
Subtitle Manager
You can create, duplicate, and delete subtitle files and manage its components with the subtitle manager: or on the timeline as drop-down menu in the subtitle track.
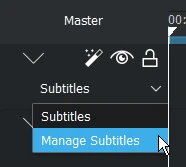
Open the subtitle manager from the drop down menu
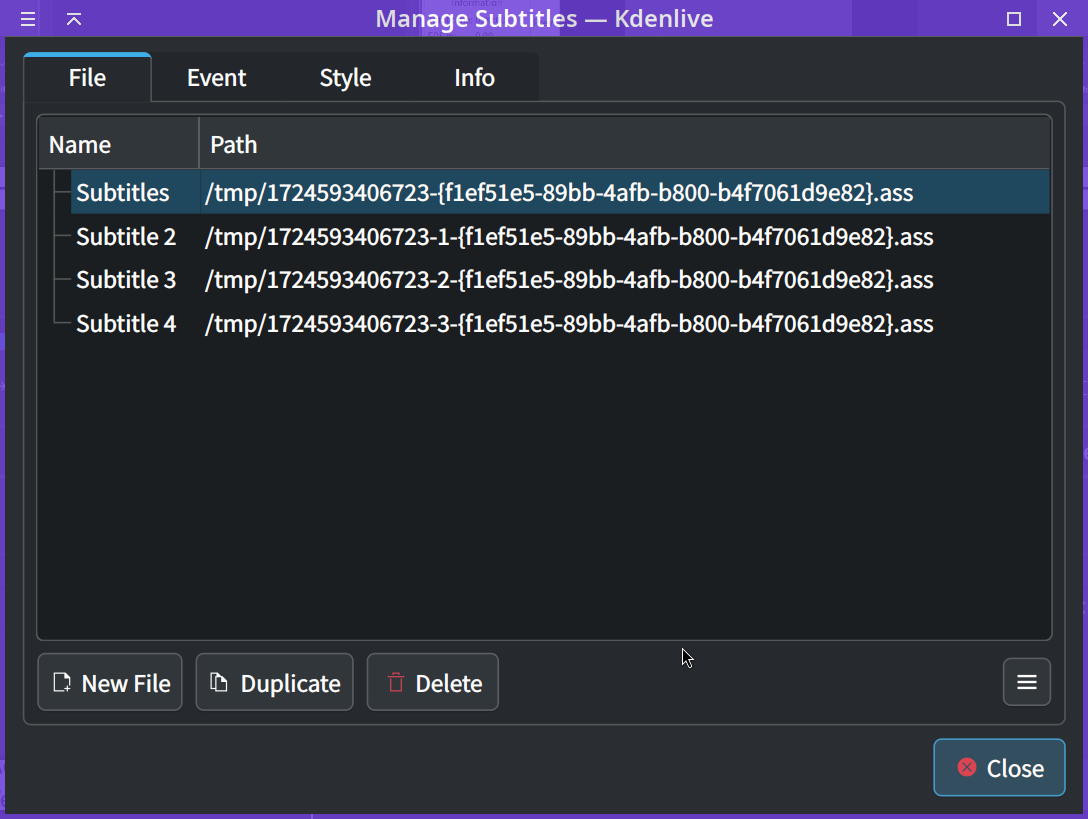
Subtitle manager with 4 subtitle files
Click on Options and select Import Subtitle or Export Subtitle to reach Import and Export Subtitles.
Only one subtitle file can be active. So, rendering will always render using the active subtitle only.
Style editor
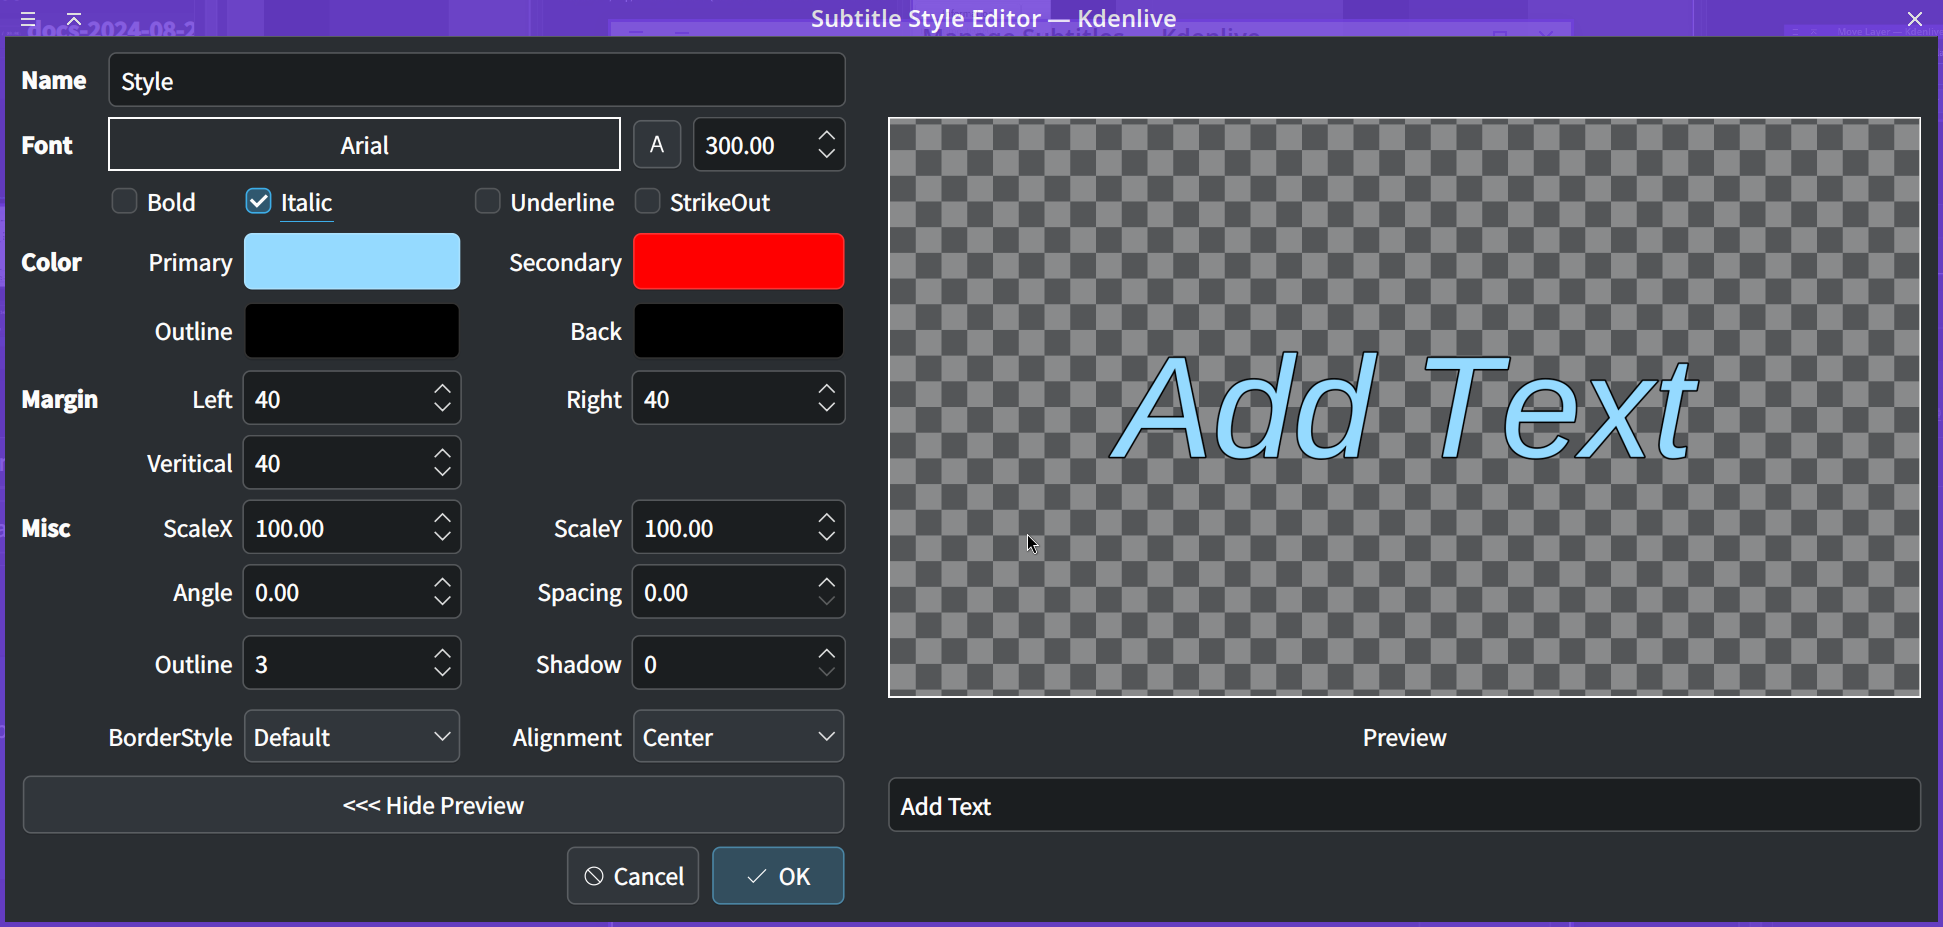
An editor that allows you to adjust style properties with a live preview.
