Démarrage rapide
Création d'un nouveau projet
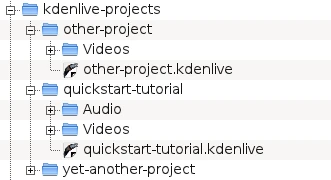
Structure de dossiers de Kdenlive
The first step is creating a new (empty) folder for our new project. We will call it quickstart-tutorial/ in this tutorial. Then get some sample video clips, or download them from here Kdenlive-tutorial-videos-2011-avi.zip (7 MB)[1] and extract them to e.g. a quickstart-tutorial/Videos/ subfolder inside the project folder.
The image on the left shows the suggested directory structure: Each project has its own directory, with video files in the Videos subdirectory, audio files in the Audio directory, etc. (see also chapter Folder Structure)
Note
À partir de maintenant, le tutoriel suppose que vous utilisez nos exemples de vidéos, mais il fonctionne avec n'importe lesquelles.
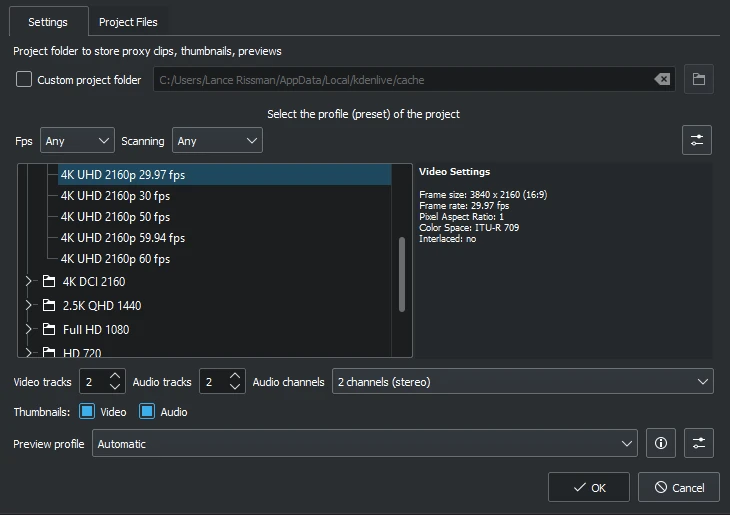
Boîte de dialogue pour un nouveau projet
Ouvrir Kdenlive et créer un nouveau projet .
Choose the previously created project folder (quickstart-tutorial/) and select an appropriate project profile. The video files provided above are 720p, 23.97 fps.[2] If you are using your own files and do not know which one to use, Kdenlive will suggest an appropriate one when the first clip is added [3] , so you can leave the field on whatever it is.
If you like you can change to the dark theme: .
Ajout de vidéos
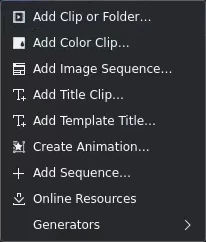
Dossier de projet : ajout de séquences vidéos
Now that the project is ready, let us start adding some clips (i.e. the ones you downloaded). This is done via the Project Bin widget; a click on the icon directly opens the file dialog, a click on the small arrow shows a list of additional clip types that can be added as well. Video clips, audio clips, images, and other Kdenlive projects can be added via the default dialog.
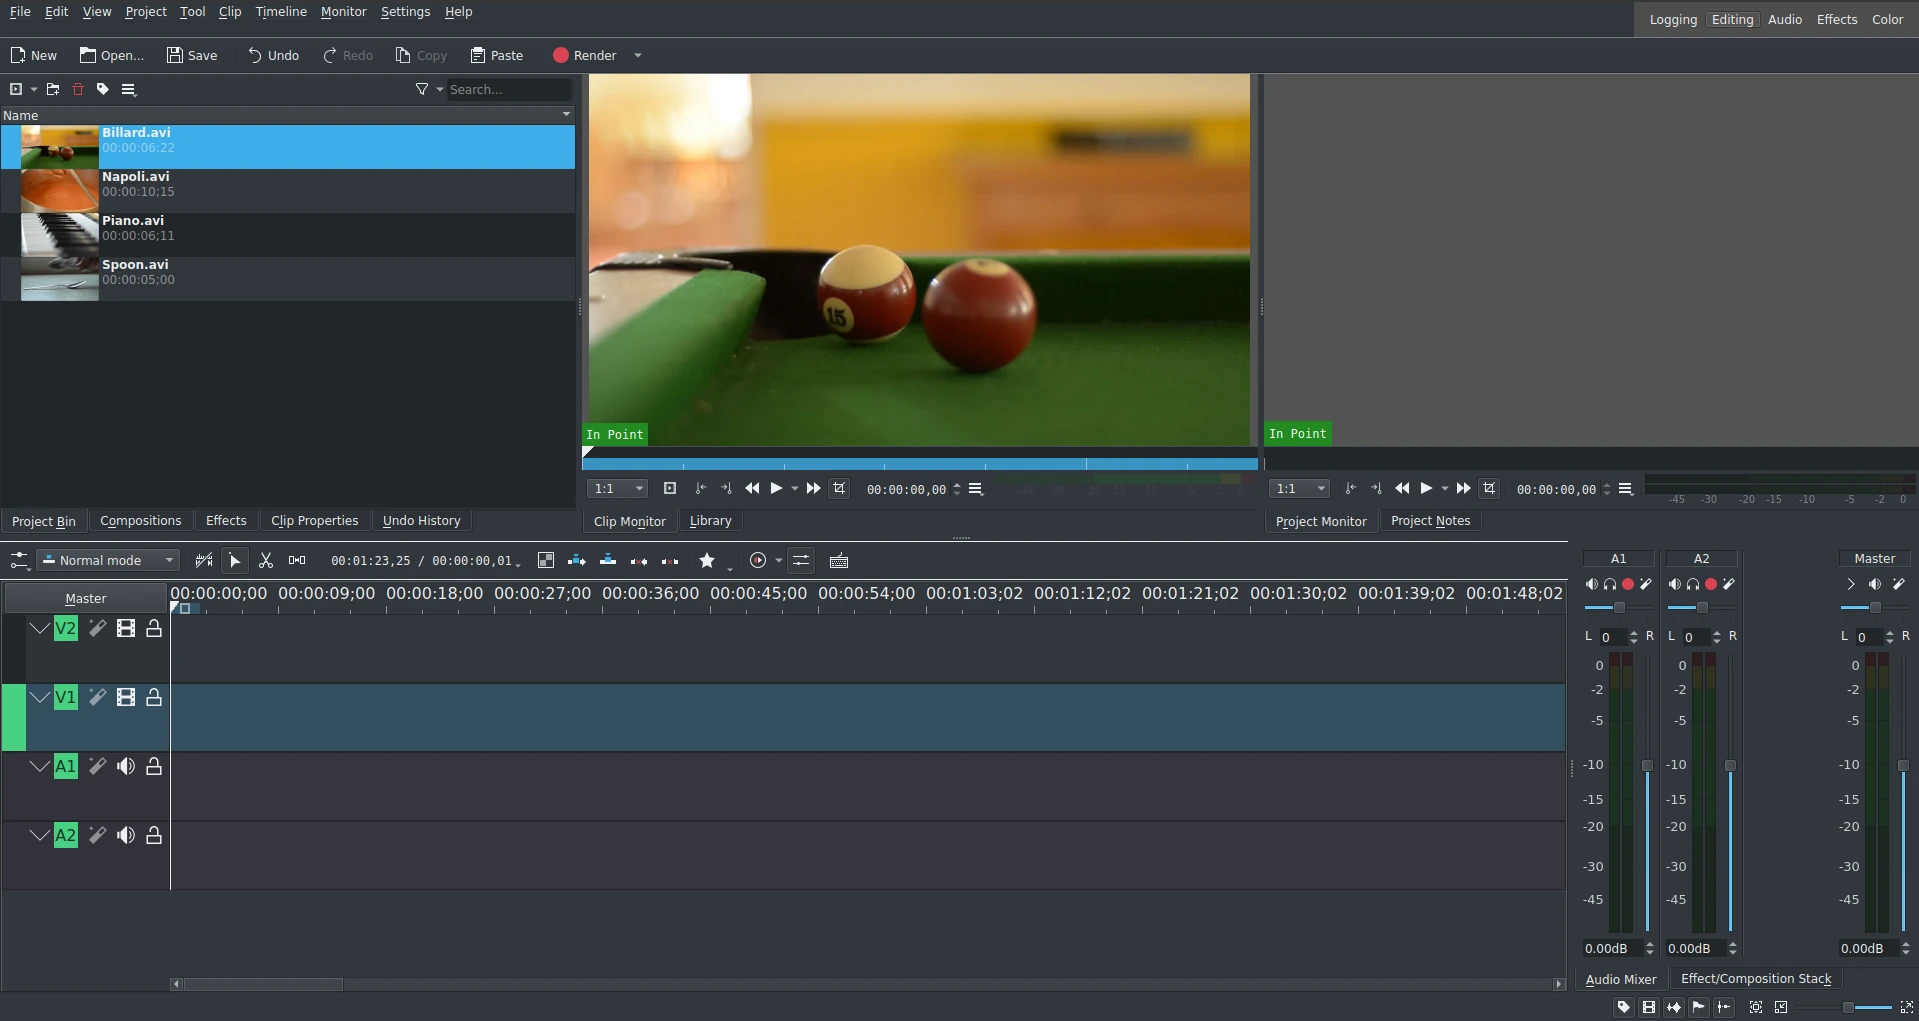
Fenêtre de Kdenlive avec les fichiers de tutoriels
Après avoir chargé les vidéos, Kdenlive aura un aspect similaire à celui-ci. En haut à gauche se trouve le dossier de projet déjà connu. À sa droite, se trouvent les écrans affichant la vidéo : l'écran des vidéos affiche les vidéos originales, l'écran du projet affiche à quoi ressemblera la vidéo de sortie, avec tous les effets, transitions, etc. appliqués. Le troisième élément, également très important, est la frise chronologique (sous les écrans) : c'est l'endroit où les vidéo seront montées. Il existe deux types de pistes, vidéo et audio. Les pistes vidéo peuvent contenir n'importe quel type de vidéo, les pistes audio également - mais lorsque vous déposez un fichier vidéo sur la piste audio, seule l'audio sera utilisé.
Enregistrement d'un projet de Kdenlive.
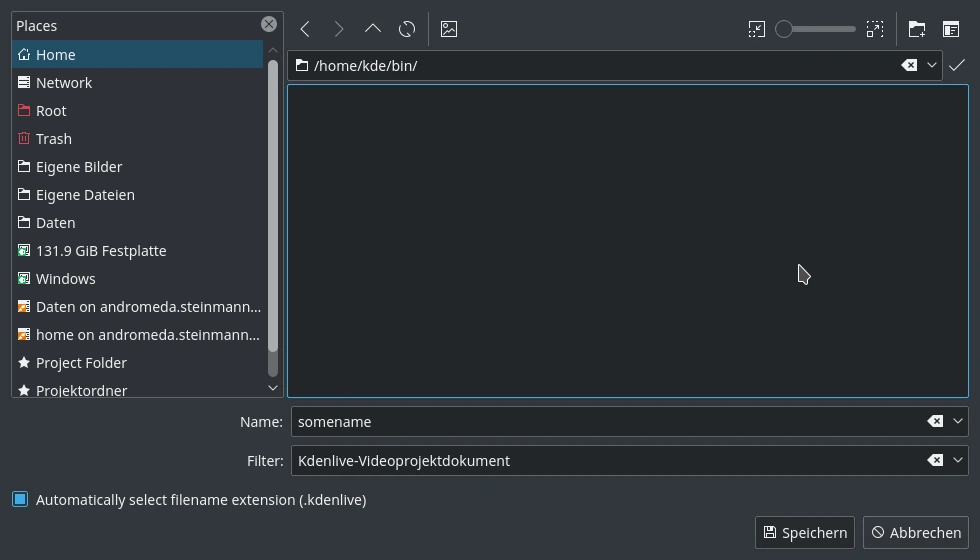
Let us save the work via . This saves our project, i.e. where we placed the clips on the timeline, which effects we applied, and so on. It can not be played.[4] The process of creating the final video is called Rendering.
Frise chronologique
Note
Dans cette section du démarrage rapide, nous n'entrerons pas dans les détails de la frise chronologique et de ses composants. Des informations plus détaillées sont disponibles dans la section frise chronologique de cette documentation.
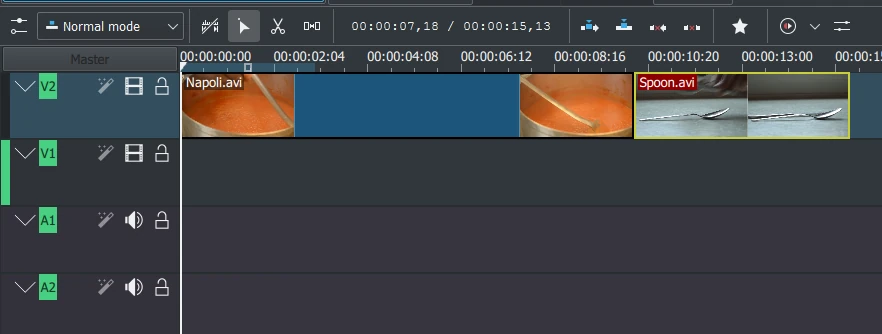
Now comes the actual editing. Project clips are combined to the final result on the timeline. They get there by drag and drop[5]: Drag some Napoli (assuming you are using the files provided above, as in the rest of this quick start tutorial; if not, please make sure your screen is waterproof, and perhaps tomatoproof) from the project bin and drop it onto the first track in the timeline. In this case track V2.
Premières vidéos dans la frise chronologique
Since some cutlery is needed as well, grab the spoon clip and drop it on the first track as well (track V2). Then drag the Napoli to the beginning of the timeline (otherwise the rendered video would start with some seconds of plain black), and the Spoon right after the Napoli, such that it looks like in the image on the left. (Where I have zoomed in with Ctrl+MW.)

Curseur de la frise chronologique
Un aperçu du résultat peut déjà être affiché en appuyant sur Espace (ou le bouton Lire dans l'écran du projet). Vous verrez la vidéo « Naples » directement suivie de celle de la « Cuillère ». Si le curseur de la frise chronologique n'est pas au début, la projection sur l'écran du projet commencera quelque part au milieu. Vous pouvez le déplacer en le faisant glisser sur la règle de la frise chronologique ou dans l'écran du projet. Si vous préférez les raccourcis clavier, « CTRL » + « Accueil » remet le curseur au tout début pour l'écran qui est activé. (Sélectionnez le s'il n'est pas encore sélectionné avant d'utiliser le raccourci).

Re-dimensionner un marqueur
Since after eating comes playing, there is a Billiards clip. Add it to the timeline as well (track V1). For the first 1.5 seconds nothing happens in the clip, so it should perhaps be cut to avoid the video becoming boring. An easy way[6] for this is to move the timeline cursor to the desired position (i.e. the position where you want to cut the video), then drag the left border of the clip when the resize marker appears. It will snap in at the timeline cursor when you move close enough.
Superposition de vidéos
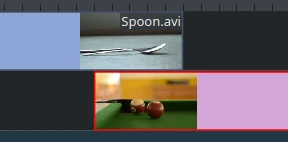
Pour ajouter une transition entre manger (la vidéo de la cuillère) et jouer au billard, les deux vidéos doivent se chevaucher. Pour être précis : placez la deuxième vidéo sur une piste au-dessus ou au-dessous de la première. La première vidéo doit se terminer quelques images après le début de la seconde. Il est utile de zoomer jusqu'à ce que les marques des trames individuelles apparaissent. Cela permet également d'avoir toujours la même durée de transition, cinq trames dans ce cas.
Vous pouvez effectuer un zoom en utilisant soit le dans le coin inférieur droit de la fenêtre Kdenlive, soit avec « CTRL » + Molette de souris. Kdenlive effectuera un zoom sur le curseur de la frise chronologique. Ainsi, il faut d'abord le placer à la position que vous voulez voir agrandie, puis effectuer le zoom.
Marqueur de transition
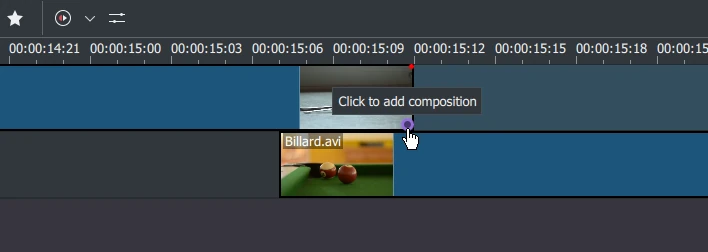
Maintenant que les vidéos se chevauchent, la transition peut être ajoutée. Ceci se fait, soit par un clic droit de la souris sur la vidéo supérieure et en sélectionnant et sélectionnant ou, plus facilement, en survolant avec la souris le coin inférieur droit de la vidéo « Cuillère » jusqu'à ce que le pointeur de doigt s'affiche et que le message « Cliquez pour ajouter une composition » apparaisse. Cette dernière méthode ajoute par défaut une transition « Balayage », ce qui est dans ce cas la meilleure idée de toute façon puisque la vidéo « Cuillère » n'est pas nécessaire pour la lecture.
The wipe transitions fades the first clip into the second one. See also Wipe.

Let us now add the last clip, the Piano, and again apply a wipe transition. When adding it on the first track of the timeline (track V2), you need to click on the new clip's lower left edge to add the transition to the previous clip.
Effets
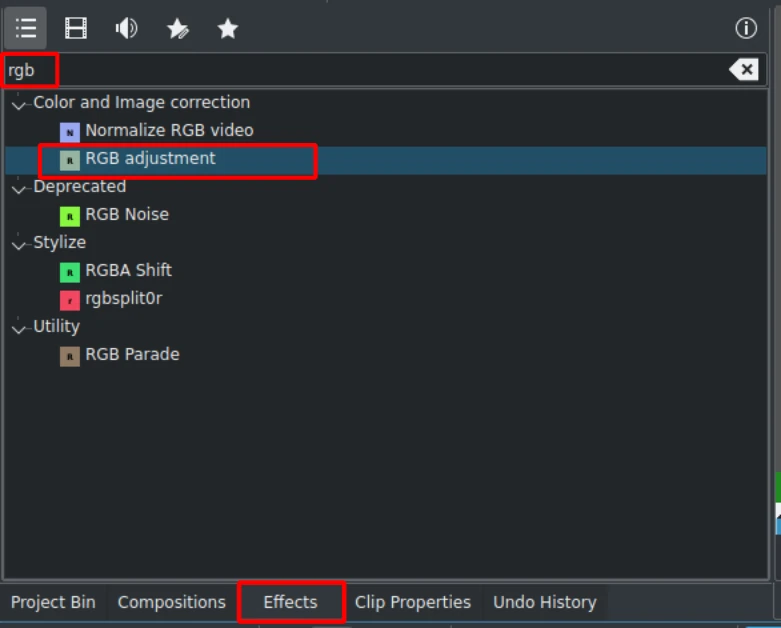
Liste des effets
The Piano can be colorized by adding an effect to it. Click on the effect view (if effect view is not visible enable the view: ). Type rgb in the search field, then double-click the effect.
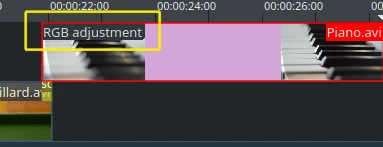
Une fois l'effet ajouté, veuillez cliquer sur une partie vide de la frise chronologique et vous verrez son nom sur la vidéo de la frise chronologique. Il sera également affiché dans le composant graphique .
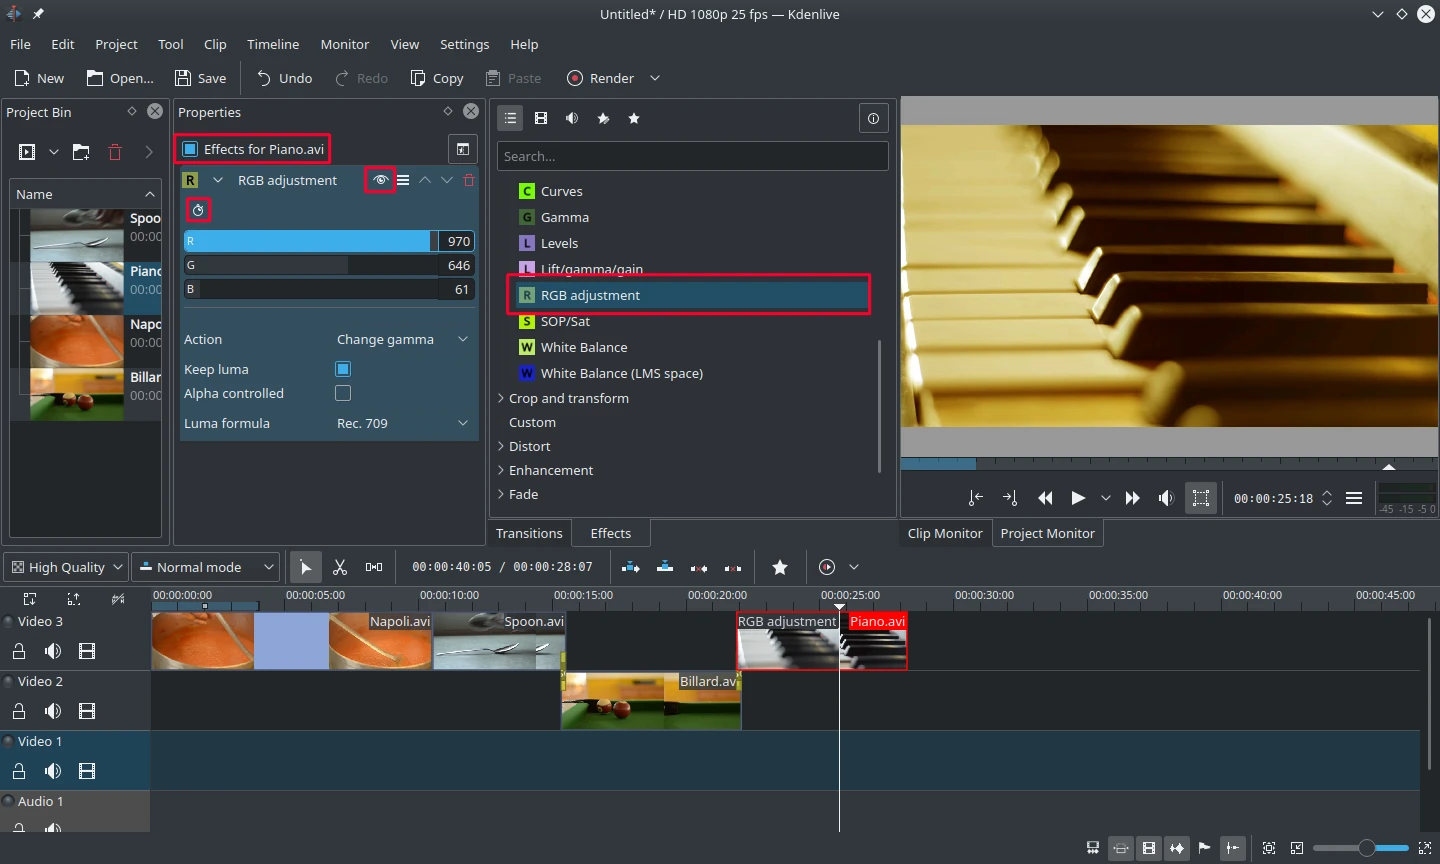
Pile d'effets avec ajustement « RVB »
Pour obtenir un ton chaud jaune-orange sur l'image, adapté à la soirée confortable, le bleu doit être réduit et le rouge et le vert améliorés.
Les valeurs du composant graphique « Pile d'effets / compositions » peuvent être modifiées à l'aide du curseur (le bouton central de la souris rétablit la valeur par défaut) ou en saisissant directement une valeur par un double clic sur le chiffre situé à droite du curseur.
Le composant graphique « Pile d'effets / compositions » fait toujours référence à la vidéo de la frise chronologique actuellement sélectionnée. Chaque effet peut être temporairement désactivé par un clic sur l'icône en forme d'œil. Tous les effets pour cette vidéo peuvent être désactivés en utilisant la case à cocher en haut du composant graphique « Pile d'effets / compositions » (les paramètres sont toutefois enregistrés). Cela est utile, par exemple, pour les effets nécessitant beaucoup de puissance de calcul, de sorte qu'ils peuvent être désactivés lors de l'édition et réactivés pour le rendu.
For some effects like the one used there it is possible to add keyframes. The framed watch icon indicates this. Keyframes are used for changing effect parameters over time. In our clip this allows us to fade the piano's color from a warm evening color to a cold night color.
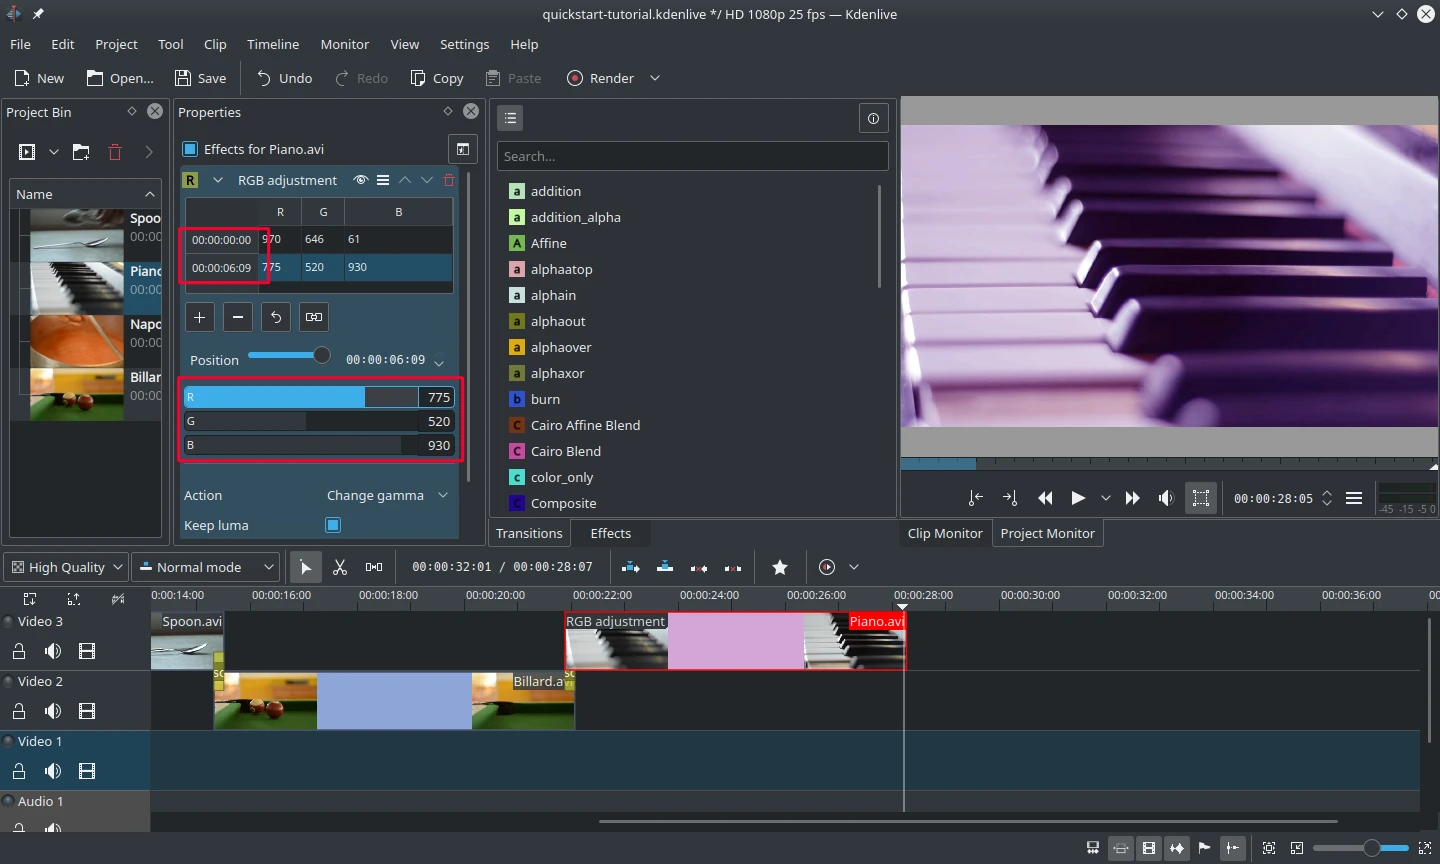
Trames clé pour effets
After clicking the icon (the clock icon framed in the previous image), the Properties widget will re-arrange. By default there will be two keyframes, one at the beginning of the timeline clip and one at the end. Move the timeline cursor to the end of the timeline clip, such that the project monitor actually shows the new colors when changing the parameters of the keyframe at the end.
Veuillez-vous assurer que la dernière image clé est sélectionnée dans la liste des propriétés. Ensuite, vous êtes prêt à inonder la vidéo du piano avec un bleu profond.
En replaçant le curseur de la frise chronologique au début du projet et en visionnant celui-ci (avec Espace ou le bouton Lecture dans le ), le piano devrait maintenant changer de couleur comme souhaité.
La gestion des trames clé était la partie la plus difficile de ce tutoriel. Si vous avez réussi à le faire, vous maîtriserez Kdenlive facilement !
Note
In this Quick Start section we brushed over the effects very quickly. More details about effects and an explanation of each effect is available in the Effects and Filters section of this documentation.
Musique

Atténuation audio
Since the clips do not provide any audio, let us search for some nice piece of music from your local collection or on web pages like Jamendo. After adding the audio clip to the Project Bin, it should be dragged to an audio track on the timeline.
The audio clip can be resized on the timeline the same way as video clips can. The cursor will snap in at the end of the project automatically. To add a fade out effect at the end of the audio clip (except if you found a file with exactly the right length) you can hover over the top right (or left) edge of the timeline clip and drag the red shaded triangle to the position where fading out should start.[7]
Rendu
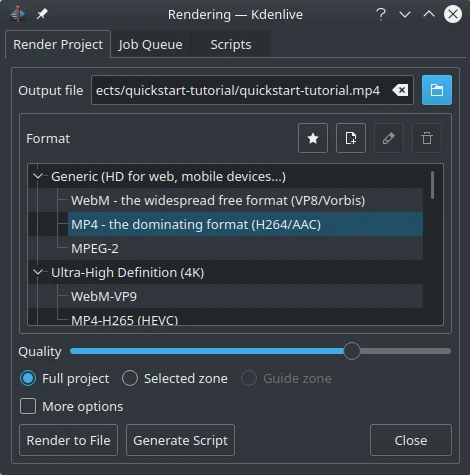
Boîte de dialogue de rendu
A few minutes left, and the project is finished! Click the Render button (or go to , or press Ctrl+Enter) to get the dialog shown on the left. Select the desired output file for our new video with all effects and transitions, choose MP4 (works nearly everywhere), select the output file location and press the Render to File button.
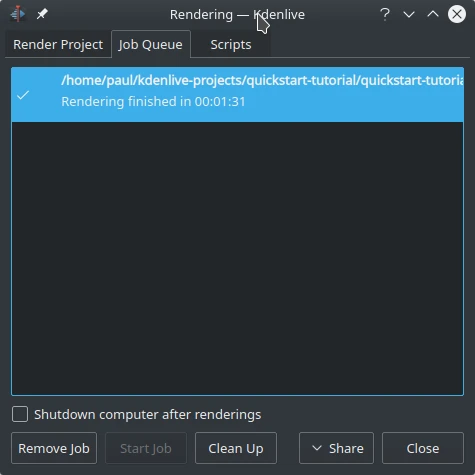
Avancement du rendu
Après quelques secondes, le rendu sera terminé et votre premier projet avec Kdenlive sera terminé. Félicitations !