Smooth Keyframe Interpolation
Did you ever wonder why Kdenlive’s smooth interpolation mode may overshoot between keyframes? And how to tell Kdenlive to avoid such situations?
Let’s start to look behind the scenes and introduce you to the strange world of smoothness. Do not worry, there will not be any mathematics for you to learn and understand. Just watch the figures. We will also show you how to avoid such overshots in those situations you do not want it. And for the really curious who want to know what the mathematics behind “smooth” interpolation are there is some further reading in the Notes section at the bottom of this page.
The Fade-In Ramp
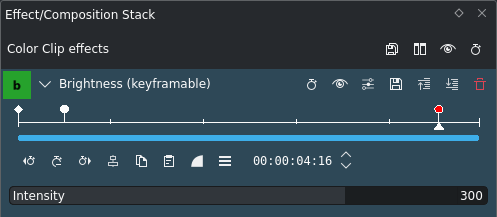
Let’s start with a simple ramp, as shown here. We use two keyframes[1], one with a low value setting, and the other with a high value setting. The particular values do not matter. We set both keyframes to the interpolation mode smooth.
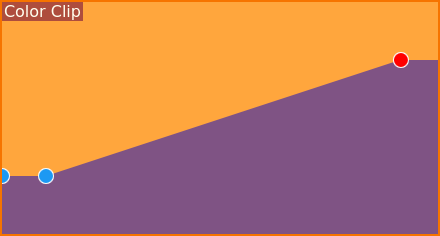
Color clip keyframe display
The effect display inside the timeline clip looks like a straight ramp. But if you watch the interpolated values closely while scrubbing the timeline, you should notice that the slope of the ramp varies. At the end and beginning the slope is smaller than in the middle, where it is higher.
But what exactly is going on here?
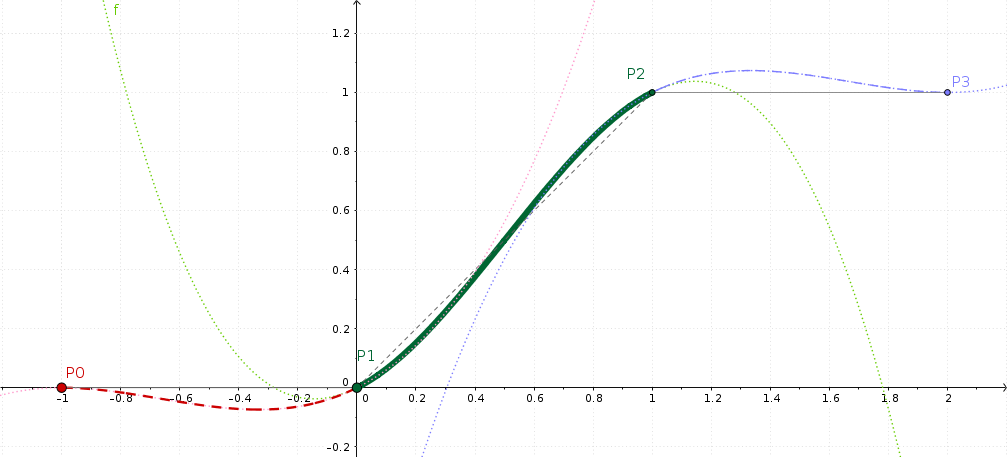
GeoGebra visualization of the Catmull-Rom interpolation
There is this online open source tool GeoGebra for trying out the mathematics inside Kdenlive’s MLT engine.
This figure shows two keyframes P1=0 and P2=1, which is a fairly typical ramp up setting. In case you are already wondering: it does not matter at which exact frames the individual keyframes are.
The smooth interpolation that MLT will calculate is drawn as a thick green line. It is bent a little bit like the capital letter S, but then, not really too much.
And if you look closely, then beginning and ending slope of the green line are not horizontal - at least what could be expected at first.
You may wonder what the two other keyframes P0 and P3 are good for? Well, the math underneath always requires four keyframes in order to interpolate segment-wise between any two adjacent keyframes. And if there is no preceding (P0) or trailing (P1) keyframe, then we will simple repeat the left (P1) or right (P2) keyframe.
Ramp-Up, and … Overshoot
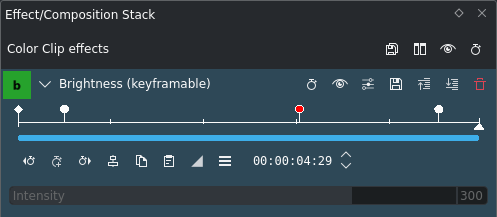
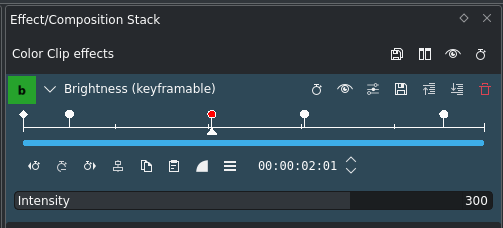
Now let’s add a third keyframe, so this looks like a ramp with a plateau. This is shown in the screenshots.

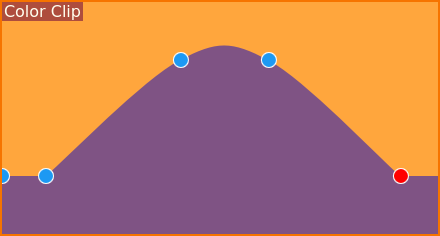
Color clip keyframe display
And now, the ramp gets a clearly visible bump instead of a sharp bend. Well, this looks smooth, but not exactly what we may have intended? So why is this the way it is?
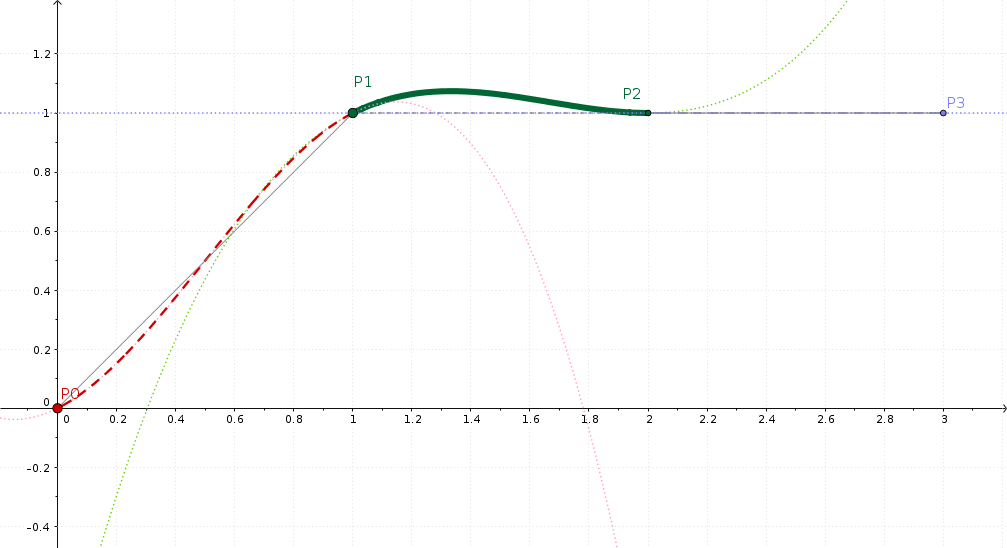
GeoGebra visualization of the Catmull-Rom interpolation
This is now our ramp with a plateau: P0=0, P1=1, P2=2. Do not worry about the keyframe numbering, though.
Did you expect the plateau to be, well a straight plateau? Of course you did. But you may have already noticed that Kdenlive does not exactly behave like this. Instead, the interpolation math causes the interpolated values to overshoot, as you can easily see in the figure.
What the underlying math does is this: the interpolation is smooth, so that the slope to the left of P1 is the same as to the right of P1. Yeah, that is a slightly different “smooth” from what you might have been expecting.
If you want the plateau to be straight instead, then you must set the interpolation mode of the keyframe P1 to linear instead. By the way, this does not change the previous smooth segment in any way. And this results in a “rough bent” at P1, but luckily you probably will not notice in most situations.
Ramp Up-Flat-Down
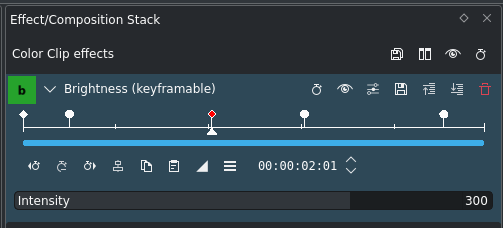
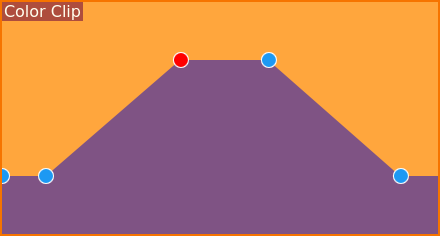
Color clip keyframe display
Let’s add another, fourth keyframe, so we have: ramp-up first, then flat, then ramp-down. A fairly typical fade-in and fade-out keyframe template.
And look, what is happening: we have got a hump, but not a nice and flat middle section.
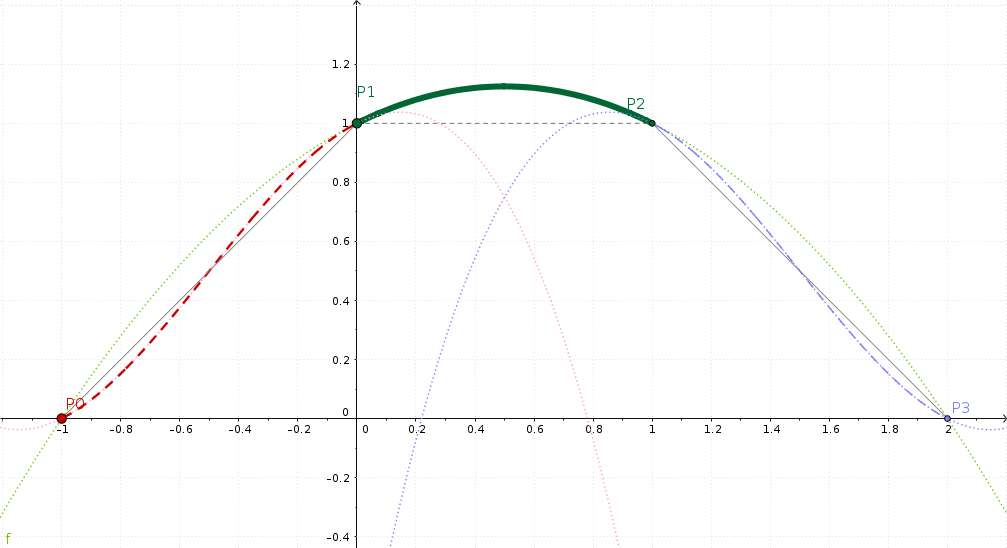
GeoGebra visualization of the Catmull-Rom interpolation
This time, we look at the middle section P1-P2. To the left, we see the up ramp, to the right, the down ramp.
Again, smooth now means that there is no sharp bend in the segments. Instead, the left and right slopes are continuous at P1 and P2; that is, in the middle section. And this causes our interpolated value to overshoot.
Make Flat Great Again
Now, how do we get a flat top? Fortunately, that is easy to achieve, as you can see from the screenshots.
Notes
- Further Reading
As you may (or rather may not) remember, Kdenlive’s rendering engine is the MLT Multimedia Framework. While MLT has smooth interpolation since around mid-2013, Kdenlive only later caught up and now supports all three interpolation modes linear, discrete, and smooth. As can be seen from the MLT source code, smooth interpolation is done using a Catmull-Rom spline. In particular, MLT uses the so-called uniform variant, because it is so simple. The downside is that this smoothing sometimes has the unwanted property of overshooting, especially when you least expect it.
- Sources
The original text was submitted by user TheDiveO to the now defunct kdenlive.org blog. For this documentation it has been lifted from kdenlive.org, updated and adapted to match the overall style.