Rotoscoping
Description
„In the visual effects industry, the term rotoscoping refers to the technique of manually creating a matte for an element on a live-action plate so it may be composited over another background.“[1]
This effect[2] is used to draw a region on one clip, and everything outside/inside that region will disappear showing the video track underneath. Effectively, the region defines the matte or mask for the clip.
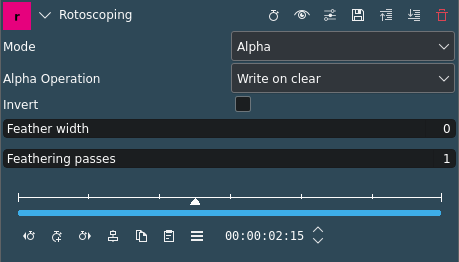
Parameters
Parameter |
Value |
Description |
|---|---|---|
Mode |
Selection |
Defines the channel to apply rotoscoping to |
Alpha Operation |
Selection |
Determines how compositing is done |
Invert |
Switch |
Inverts the rotoscoping selection |
Feathering width |
Integer |
Determines the amount of feathering. Default is 0 (no feathering). |
Feathering passes |
Integer |
Sets the number of passes. The more passes the finer and more accurate the feathering will be. Default is 1. |
The following selection items are available:
Mode
Alpha |
The rotoscoped area will be the alpha channel (default) |
Luma |
|
RGB |
Alpha Operation
Write on clear |
(default) |
Maximum |
|
Minimum |
|
Add |
|
Subtract |
Screenshots
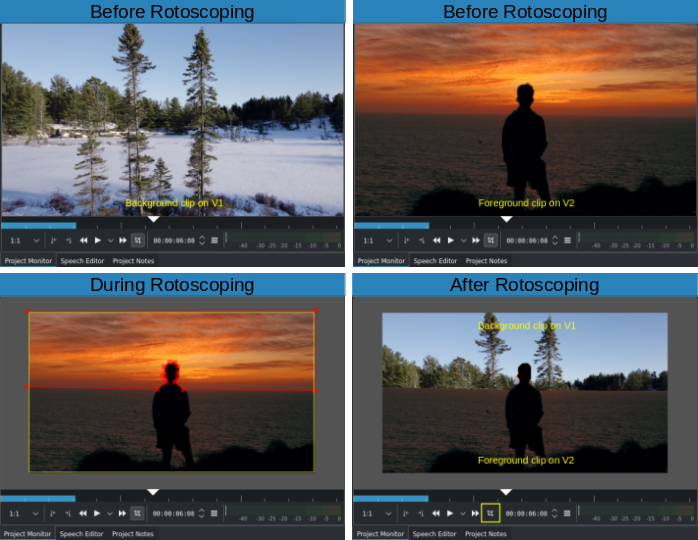
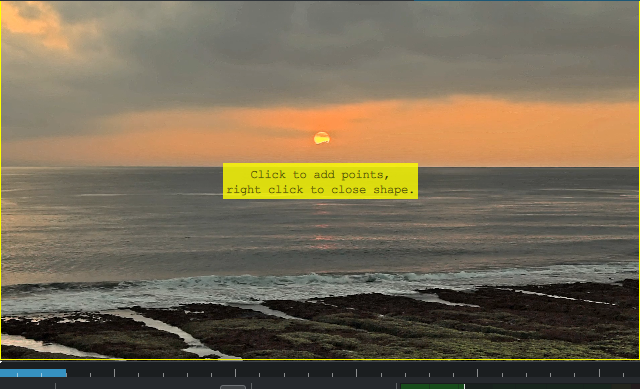
Before, during and after Rotoscoping. Note the disabled Edit Mode (bottom right)
Drawing the Region
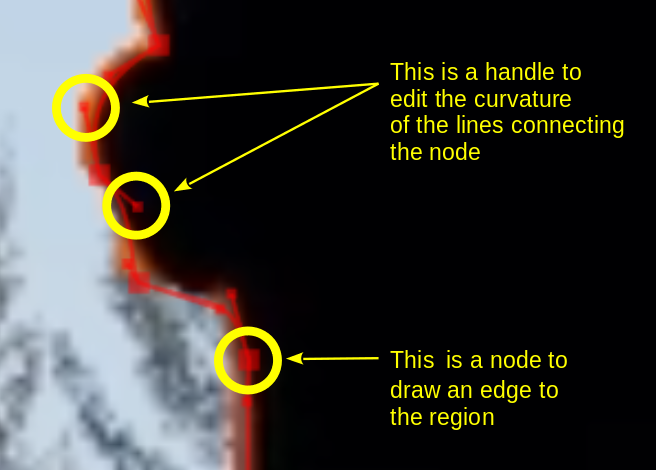
Nodes and Handles
The region is drawn by adding nodes along your region. These act as edges for your rotoscope, and there is a line between each node. The line can be made into a curve[3] using „handles“.
Nodes and Handles
Add nodes to the region by left clicking the mouse. You can draw nodes outside of the active frame: Zoom out in the Project Monitor (Ctrl+Wheel or by hovering over the edge of the Project Monitor until the monitor tools show up and then selecting the Zoom-out icon) and then draw nodes. This is useful if the mask is to include/exclude regions all the way to the edge(s) of the clip (like the example screenshots at the beginning of this chapter).
Close the region by right clicking the mouse on one of the nodes. Kdenlive will draw a straight line between the first node created and the last.
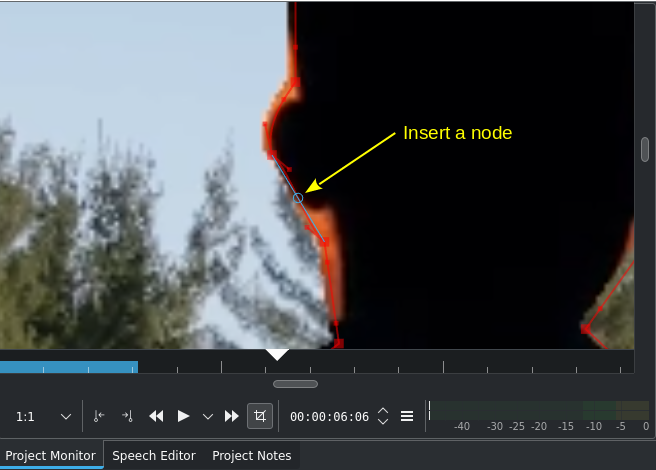
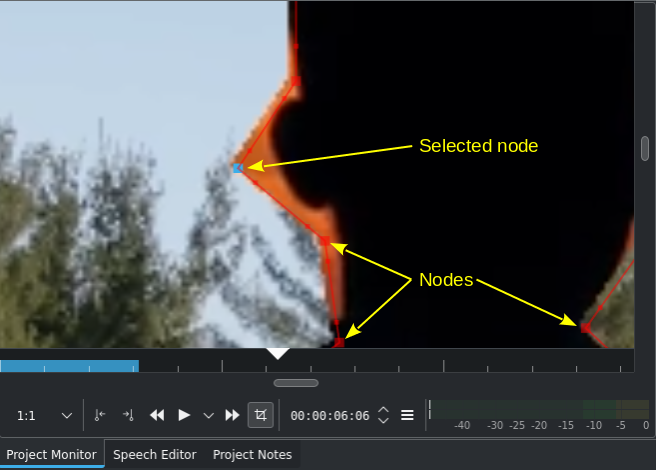
Inserting a node for better edge control
Change the edge of the region by moving a node. You can insert a node between two existing nodes by hovering over the line connecting the two nodes until a circle appears and then double-click the mouse. The more nodes the finer the region/mask can be controlled to follow („hug“) a shape, object or scenery.
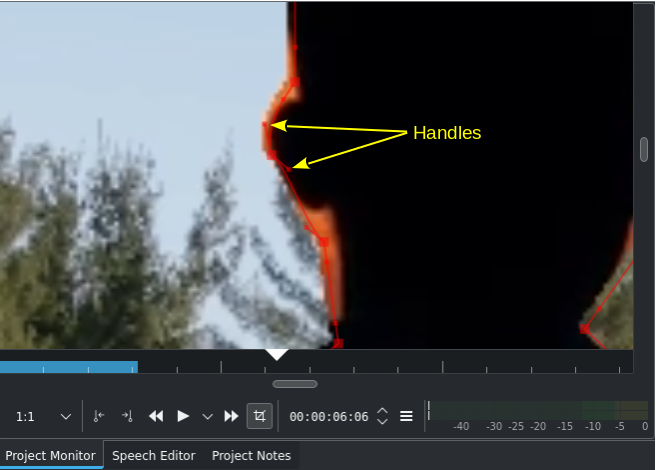
Using handles to create curves
Make a line curved by dragging the control „handles“. These are the two dots on the ends of the straight lines that appear on the curve.
Once the region is created (closed) you can move individual nodes, insert and delete nodes (delete a node: double-click on the node), create curves to better follow the shape you want to rotoscope out or in, and move the entire region. For the latter action grab the x in the middle of the region and drag it around.
By default, the inside of the region you created is transparent (the video track underneath is visible). Use the Invert checkbox to make the outside of the region transparent.
Bemerkung
The Rotoscope effect can be keyframed. In contrast to other effects, keyframes not only can be created individually on the keyframe ruler[4] but are created automatically whenever the region is changed (nodes added, deleted or moved; curves created or changed; region moved). It is therefore important to create the rotoscope region on the very first frame of the clip.
Using Keyframes to Make the Region Follow the Action
Bemerkung
The keyframe ruler and icons[4] may be greyed out initially. They become available once the first node is created.
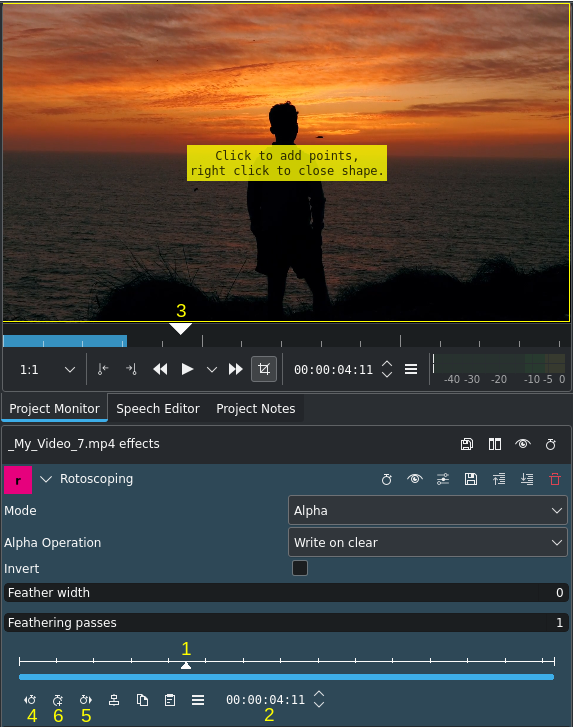
Using keyframes for Rotoscoping
Move the position in the clip by dragging the playhead on the timeline (3) or by using the keyframe ruler[4] in the Rotoscope effect (2).
Click  Add keyframe (6).
Now adjust the position of the nodes in the curve to match the action.
Kdenlive will calculate a path to move the nodes from the position they were in the previous keyframe to the position you put them in at this keyframe. So you do not have to draw a curve for every frame in the clip.
To remove a keyframe select it by clicking on the keyframe symbol (diamond, circle or square), or move to the frame with the keyframe using the  Go to previous keyframe (4) or
  Go to next keyframe (5) and then click on
  which becomes Delete keyframe (6) when you are on an existing keyframe.
Examples
Examples on YouTube of what you can do with the Rotoscoping effect
No Mirror for you! (by Everything and Even Gaming)
Putting yourself in a Movie (by Arkengheist)
Text Reveal (by TJ FREE)
ROTOSCOPING (by NBtech)
Example „How to use Rotoscoping for Changing Color Tone“

Layout changed to Color
We will be using the Color layout. This will allow us to work with the color vectorscope. Make sure it is enabled: . But for now we will stay in the Edit layout.
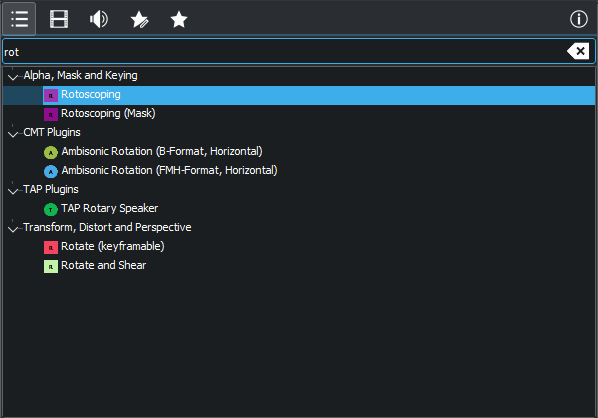
Selecting Rotoscoping from the list of effects
In the Timeline, select the clip with the sunset. Open the effects tab, type in „Rotoscoping“, then drag it over the video to see further instructions.
Object selection
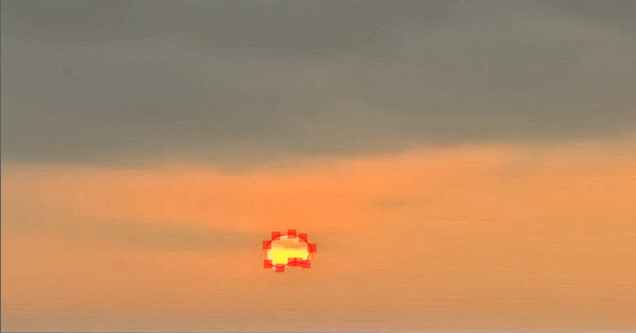
Start creating the region/mask around the sun by putting nodes around it. Use Mouse left-click to create nodes. If needed, zoom into the Project Monitor by using Ctrl+Wheel or the Project Monitor controls.
Object selection
Close the region/mask by Mouse right-click. If needed make adjustments by moving, adding or deleting nodes. For round object like the sun in this example curves come in handy.

YUV selection
Switch back to the Color layout. In the vectorscope tab use the Paint mode and select YUV.
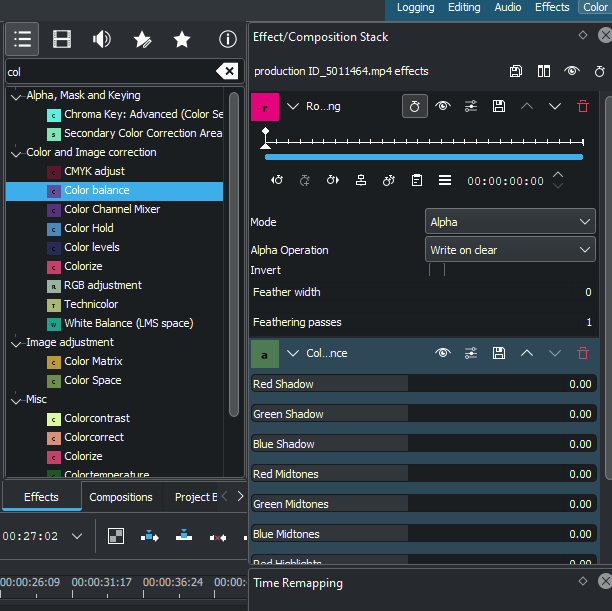
Color balance selection
In the effects tab choose Color Balance and adjust the various red, green and blue values to the color of the sun you like.