Schnellstart
Ein neues Projekt erstellen

Kdenlive-Ordnerstruktur
The first step is creating a new (empty) folder for our new project. We will call it quickstart-tutorial/ in this tutorial. Then get some sample video clips, or download them from here Kdenlive-tutorial-videos-2011-avi.zip (7 MB)[1] and extract them to e.g. a quickstart-tutorial/Videos/ subfolder inside the project folder.
The image on the left shows the suggested directory structure: Each project has its own directory, with video files in the Videos subdirectory, audio files in the Audio directory, etc. (see also chapter Folder Structure)
Bemerkung
The tutorial from now on assumes that you use the sample videos provided, but it works with any.
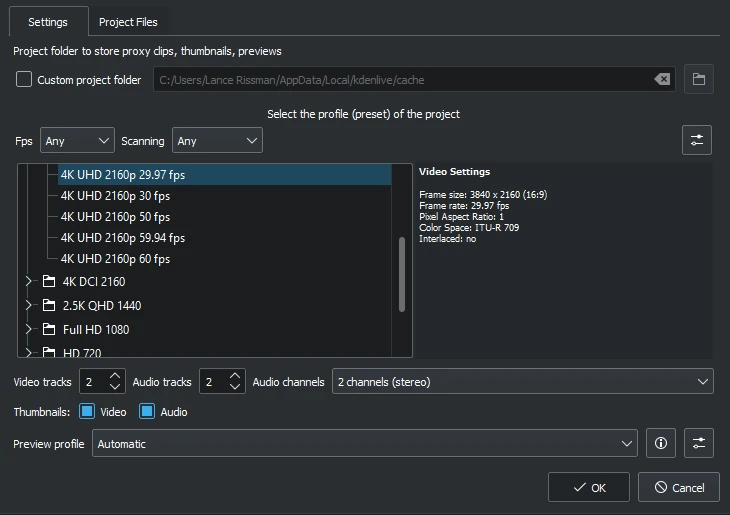
Dialog Neues Projekt
Starten Sie Kdenlive und erstellen Sie ein neues Projekt .
Choose the previously created project folder (quickstart-tutorial/) and select an appropriate project profile. The video files provided above are 720p, 23.97 fps.[2] If you are using your own files and do not know which one to use, Kdenlive will suggest an appropriate one when the first clip is added [3] , so you can leave the field on whatever it is.
If you like you can change to the dark theme: .
Clips hinzufügen
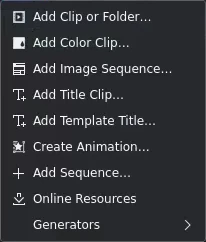
Projektinhalt: Video-Clip hinzufügen.
Now that the project is ready, let us start adding some clips (i.e. the ones you downloaded). This is done via the Project Bin widget; a click on the  icon directly opens the file dialog, a click on the small arrow shows a list of additional clip types that can be added as well. Video clips, audio clips, images, and other Kdenlive projects can be added via the default dialog.
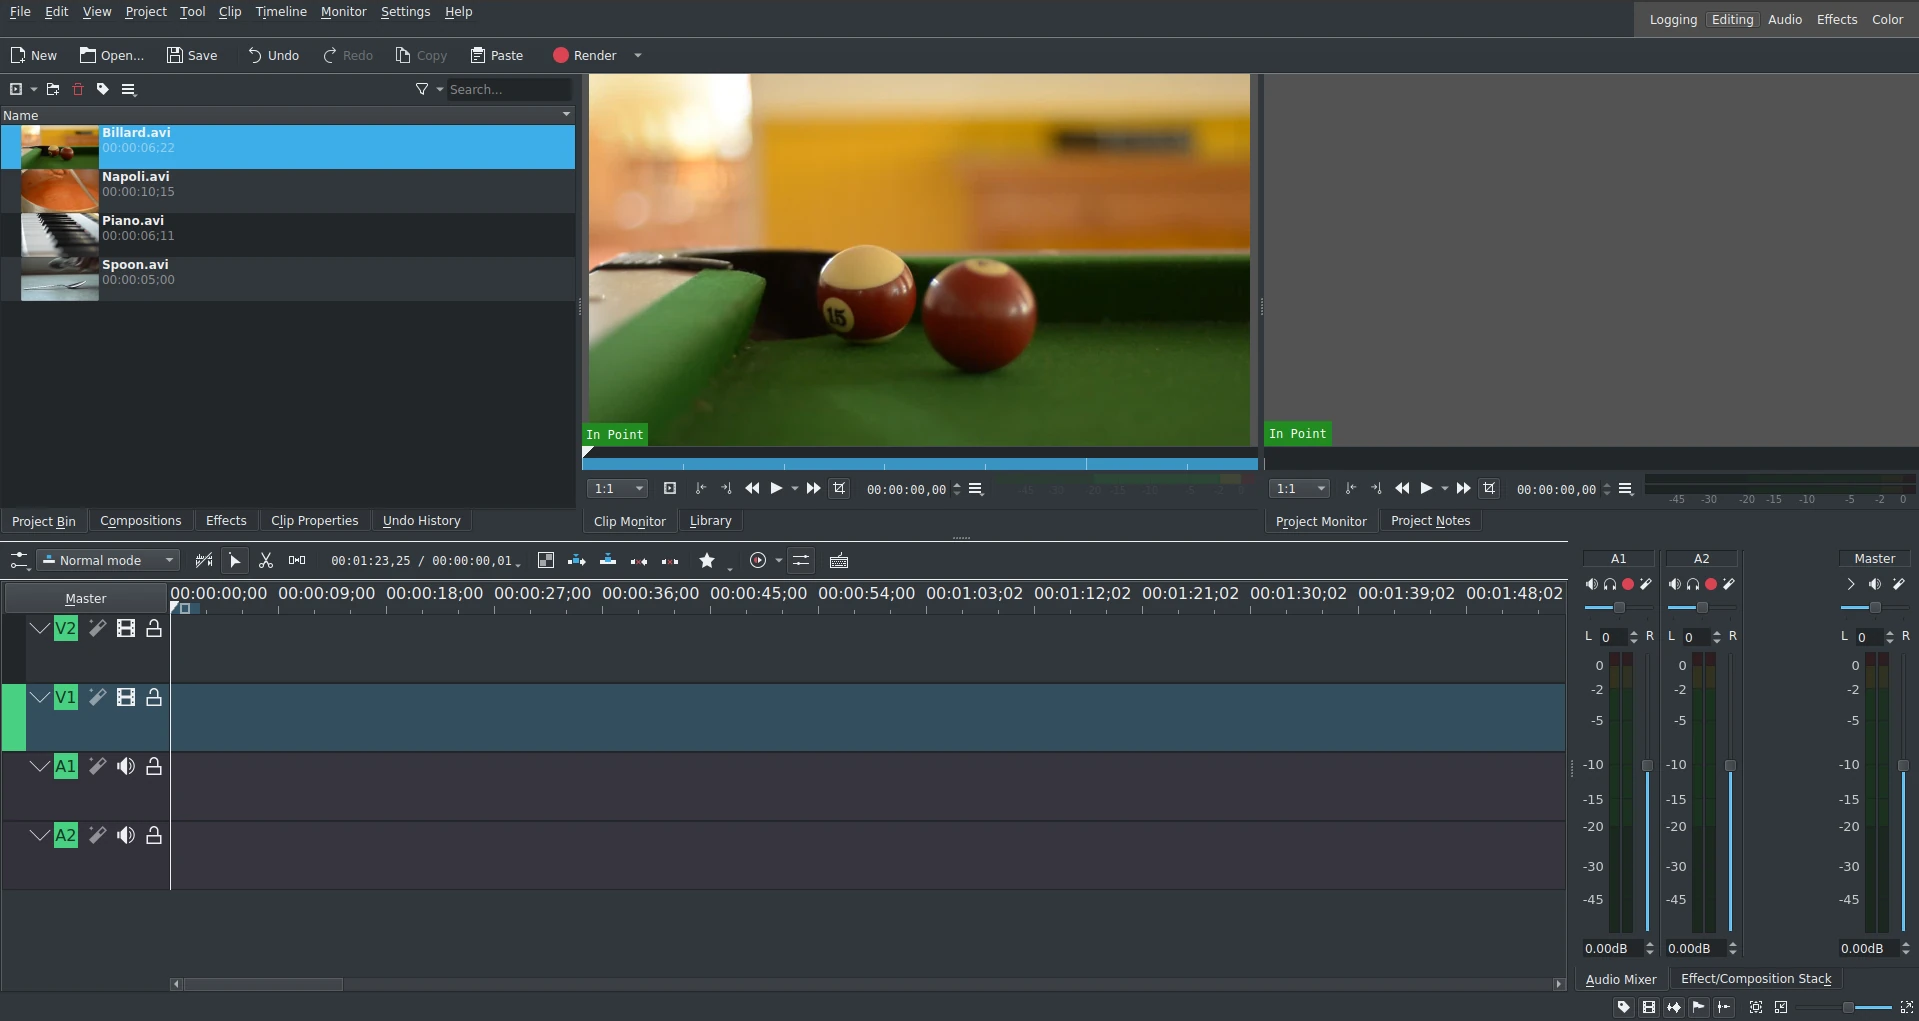
Kdenlive Fenster mit den Tutorial-Dateien
After loading the clips, Kdenlive will look similar to this. On the top left there is the already known Project Bin. To the right of it are the monitors that show video: The clip monitor displays video from the original clips, the project monitor shows how the output video will look with all effects, transitions, etc. applied. The third, also very important, item is the timeline (below the monitors): This is the place where the video clips will be edited. There are two different types of tracks: Video and audio. Video tracks can contain any kind of clip, audio tracks as well but when dropping a video file to the audio track, only the audio will be used.
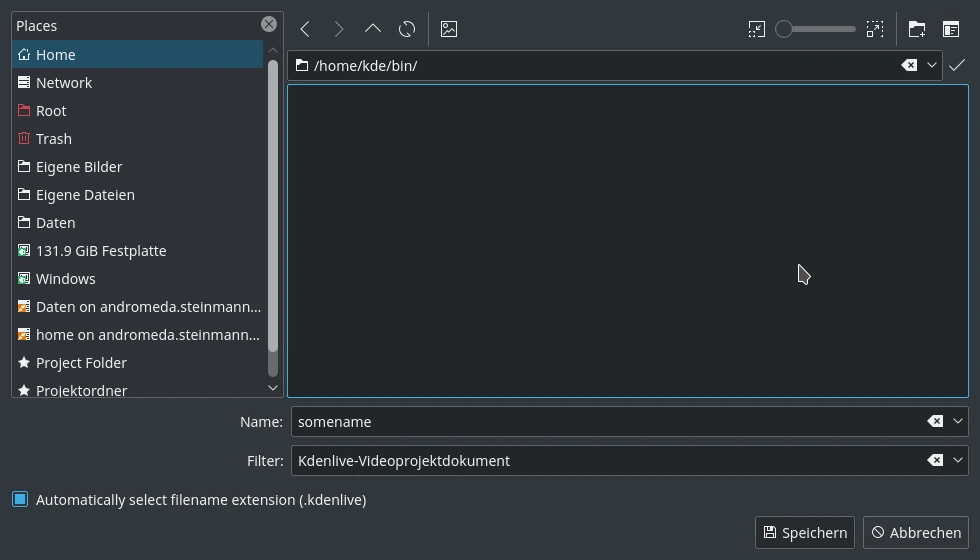
Ein Kdenlive-Projekt speichern
Let us save the work via . This saves our project, i.e. where we placed the clips on the timeline, which effects we applied, and so on. It can not be played.[4] The process of creating the final video is called Rendering.
Zeitleiste
Bemerkung
In this Quick Start section we will not go into the details of the timeline and its components. More detailed information is available in the Zeitleiste section of this documentation.
Now comes the actual editing. Project clips are combined to the final result on the timeline. They get there by drag and drop[5]: Drag some Napoli (assuming you are using the files provided above, as in the rest of this quick start tutorial; if not, please make sure your screen is waterproof, and perhaps tomatoproof) from the project bin and drop it onto the first track in the timeline. In this case track V2.
Erster Clip in der Zeitleiste
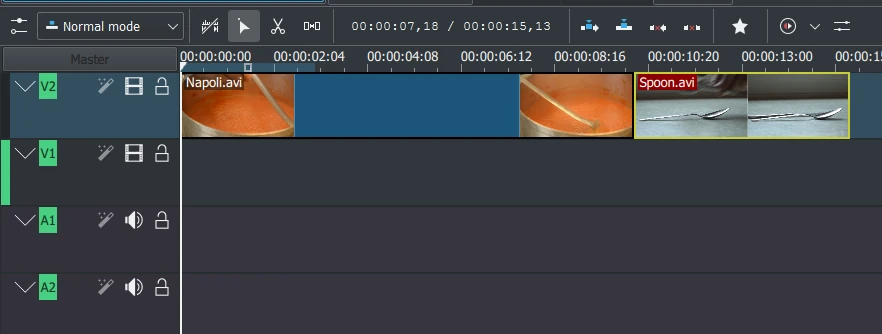
Since some cutlery is needed as well, grab the spoon clip and drop it on the first track as well (track V2). Then drag the Napoli to the beginning of the timeline (otherwise the rendered video would start with some seconds of plain black), and the Spoon right after the Napoli, such that it looks like in the image on the left. (Where I have zoomed in with Ctrl+MW.)

Zeitleiste Abspielkopf
The result can already be previewed by pressing Space (or the Play button in the project monitor). You will see the Napoli directly followed by a Spoon. If the timeline cursor is not at the beginning, the project monitor will start playing somewhere in the middle; you can move it by dragging it either on the timeline ruler or in the project monitor. If you prefer keyboard shortcuts, Ctrl+Home does the same for the monitor that is activated. (Select the if it is not selected yet before using the shortcut.)
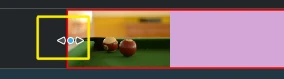
Größenänderungsmarkierung
Since after eating comes playing, there is a Billiards clip. Add it to the timeline as well (track V1). For the first 1.5 seconds nothing happens in the clip, so it should perhaps be cut to avoid the video becoming boring. An easy way[6] for this is to move the timeline cursor to the desired position (i.e. the position where you want to cut the video), then drag the left border of the clip when the resize marker appears. It will snap in at the timeline cursor when you move close enough.
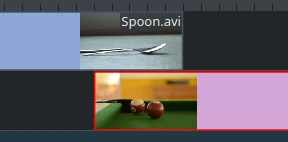
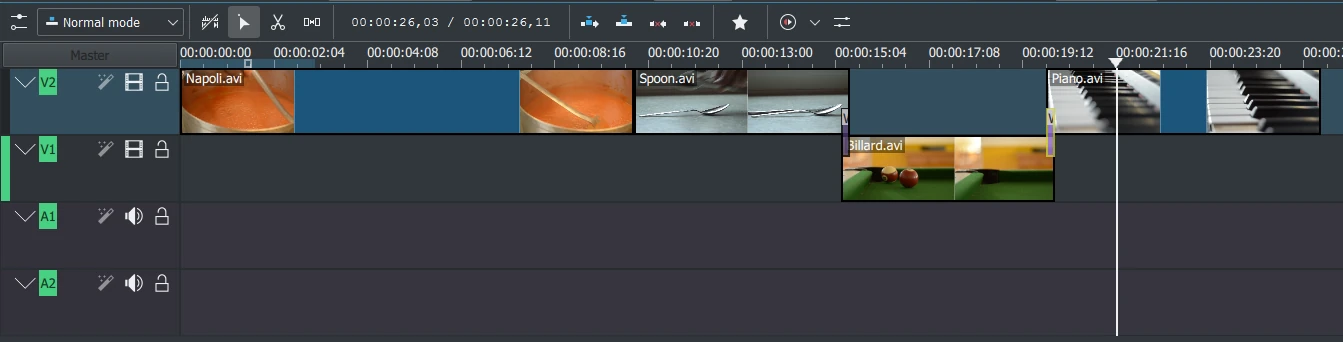
Clips überlagern
Um einen Übergang zwischen dem Essen (dem Löffel) und dem Billardspielen einzufügen, müssen sich die beiden Clips überlappen. Platzieren Sie den zweiten Clip über oder unter dem ersten. Der erste Clip sollte einige Bilder nach dem Beginn des zweiten Clips enden. Zoomen Sie heran, bis Sie am Ende des Clips die Kreise für die Übergänge sehen (siehe Bild unten).
You can zoom in by either using the at the bottom right corner of the Kdenlive window, or with Ctrl+Mousewheel. Kdenlive will zoom to the timeline cursor, so first set it to the position which you want to see enlarged, then zoom in.
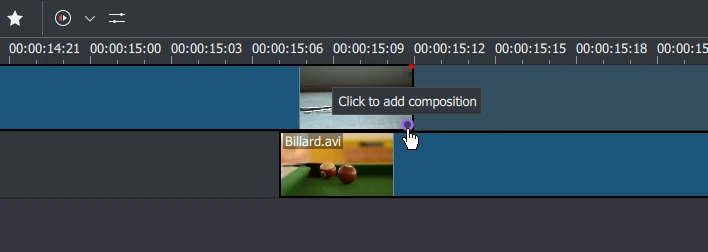
Übergangsmarkierung
Now that the clips overlap, the transition can be added. This is done either by right-clicking on the upper clip and choosing and choose or, easier, by hovering the mouse over the lower right corner of the Spoon clip until the pointing-finger pointer is shown and the message „Click to add composition“ appears. The latter, by default, adds a wipe transition, which is in this case the best idea anyway since the Spoon is not required for playing.
The wipe transitions fades the first clip into the second one. See also Wipe.
Let us now add the last clip, the Piano, and again apply a wipe transition. When adding it on the first track of the timeline (track V2), you need to click on the new clip’s lower left edge to add the transition to the previous clip.
Effekte
Effekt-Liste
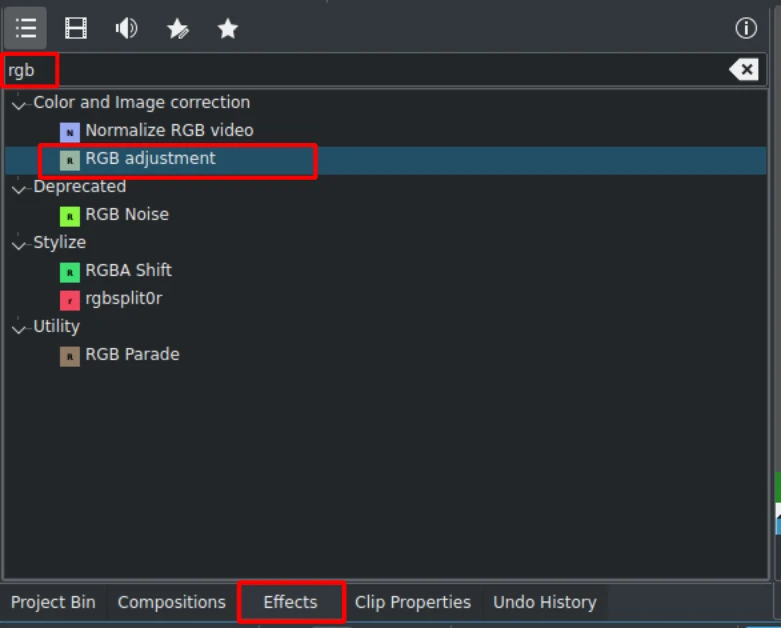
The Piano can be colorized by adding an effect to it. Click on the effect view (if effect view is not visible enable the view: ). Type rgb in the search field, then double-click the effect.
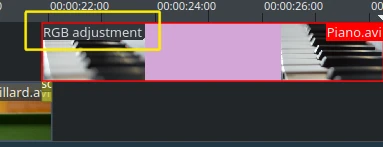
Sobald der Effekt hinzugefügt wurde, klicken Sie auf einen leeren Bereich in der Zeitleiste, und Sie sehen den Namen des Effekts im Clip. Wenn Sie den Clip anklicken, sehen Sie den Effekt ebenfalls im Fenster.
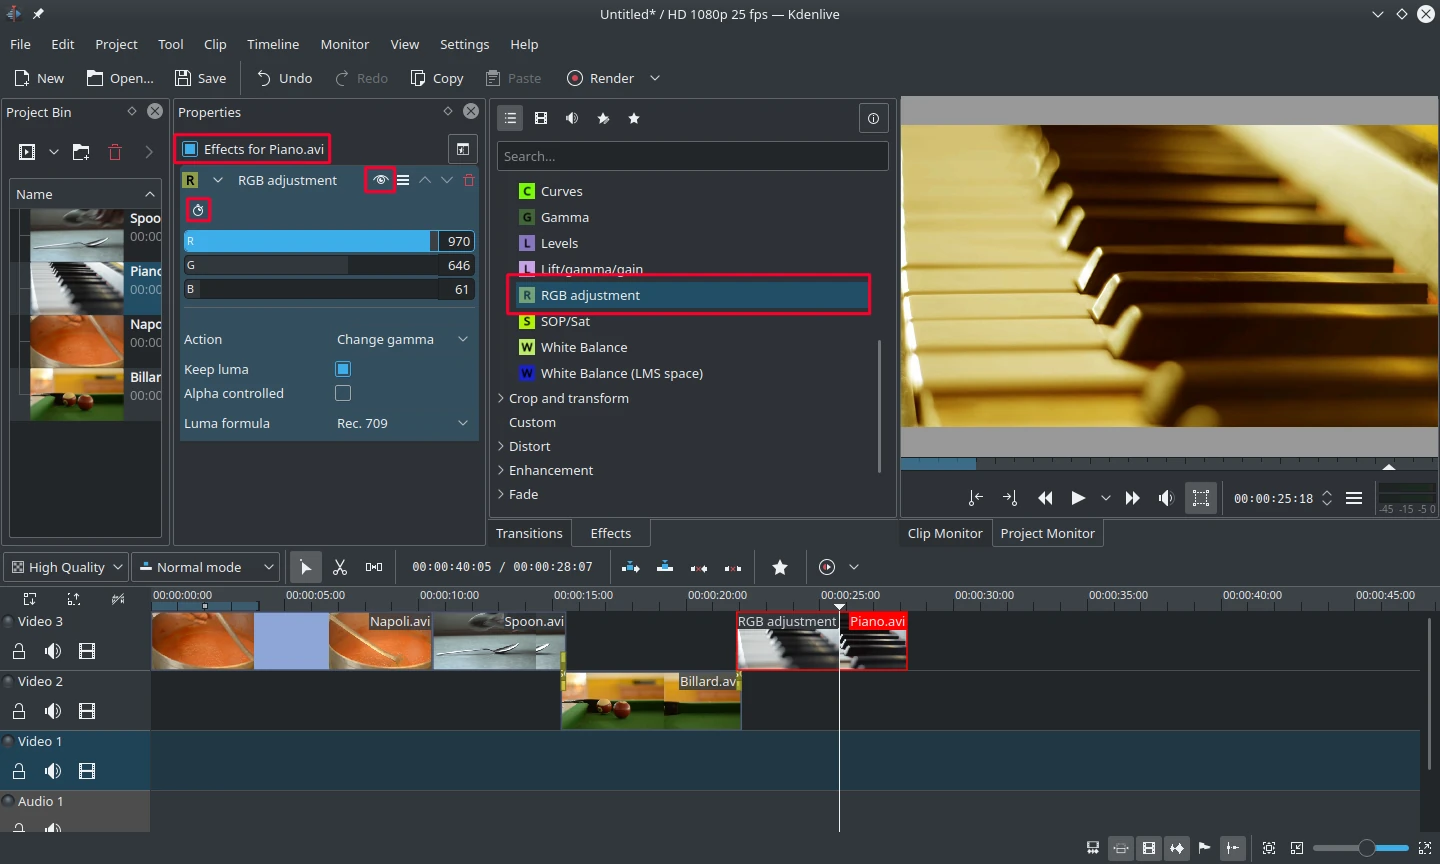
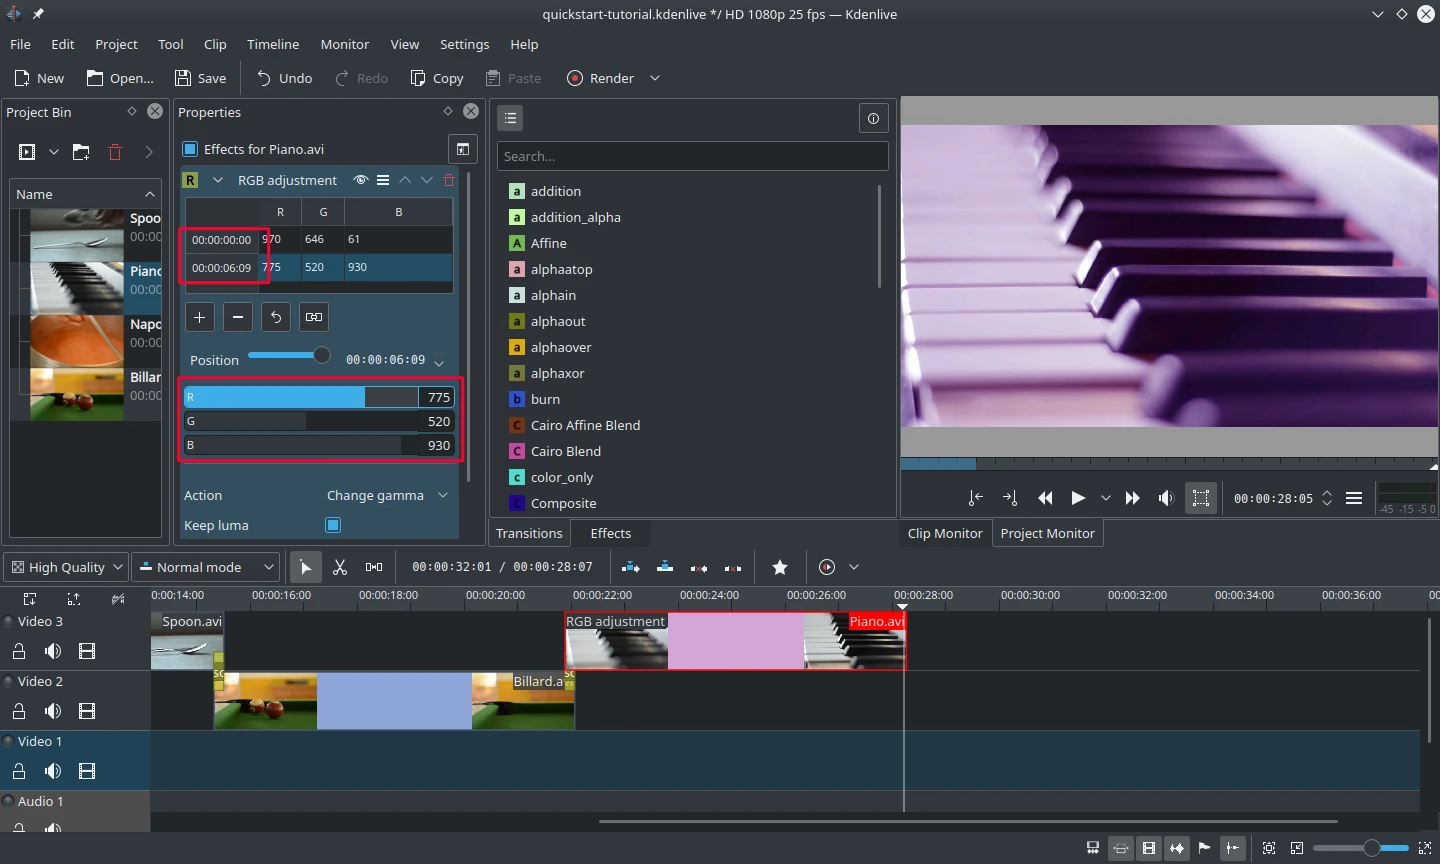
Effekt-Stapel mit RGB-Anpassungen
Um einen warmen Gelb-Orange-Ton auf dem Bild zu erhalten, muss der Blauanteil reduziert und der Rot- und Grün-Anteil erhöht werden.
Die Werte im Fenster „Effekt-/Übergangs-Stapel“ können mit dem Schieberegler geändert werden (mit der mittleren Maustaste wird er auf den Standardwert zurückgesetzt). Alternativ können Sie mit einer Tastatureingabe den Wert direkt verändern.
The Effect/Composition Stack widget always refers to the timeline clip that is currently selected. Each effect can be temporarily disabled by clicking the eye icon, or all effects for that clip can be disabled using the check box at the top of the Effect/Composition Stack widget (the settings are saved though). This is e.g. useful for effects that require a lot of computing power, so they can be disabled when editing and enabled again for rendering.
For some effects like the one used there it is possible to add keyframes. The framed watch icon indicates this. Keyframes are used for changing effect parameters over time. In our clip this allows us to fade the piano’s color from a warm evening color to a cold night color.
Keyframes für Effekte
After clicking the icon (the clock icon framed in the previous image), the Properties widget will re-arrange. By default there will be two keyframes, one at the beginning of the timeline clip and one at the end. Move the timeline cursor to the end of the timeline clip, such that the project monitor actually shows the new colors when changing the parameters of the keyframe at the end.
Vergewissern Sie sich, dass der letzte Keyframe in der Liste Eigenschaften ausgewählt ist. Nun können Sie das Klavier mit einem tiefen Blau überfluten.
Wenn Sie den Abspielkopf an den Anfang des Projekts bewegen und es abspielen (mit Leertaste, oder dem Play- Knopf im ), sollte das Klavier nun die gewünschte Farbe annehmen.
Das Keyframing war der schwierigste Teil dieses Tutorials. Wenn Sie das geschafft haben, werden Sie Kdenlive leicht beherrschen!
Bemerkung
In this Quick Start section we brushed over the effects very quickly. More details about effects and an explanation of each effect is available in the Effects and Filters section of this documentation.
Musik
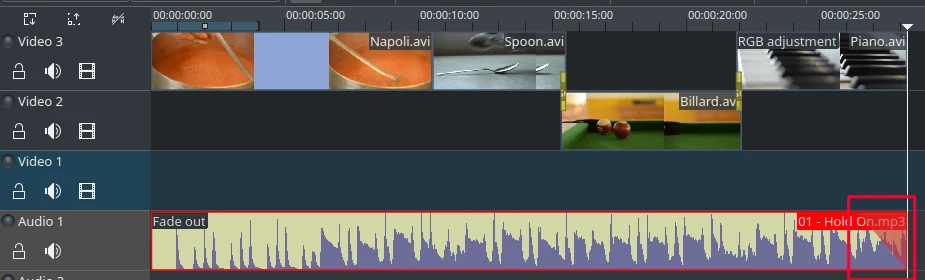
Audio ausblenden
Since the clips do not provide any audio, let us search for some nice piece of music from your local collection or on web pages like Jamendo. After adding the audio clip to the Project Bin, it should be dragged to an audio track on the timeline.
The audio clip can be resized on the timeline the same way as video clips can. The cursor will snap in at the end of the project automatically. To add a fade out effect at the end of the audio clip (except if you found a file with exactly the right length) you can hover over the top right (or left) edge of the timeline clip and drag the red shaded triangle to the position where fading out should start.[7]
Rendern
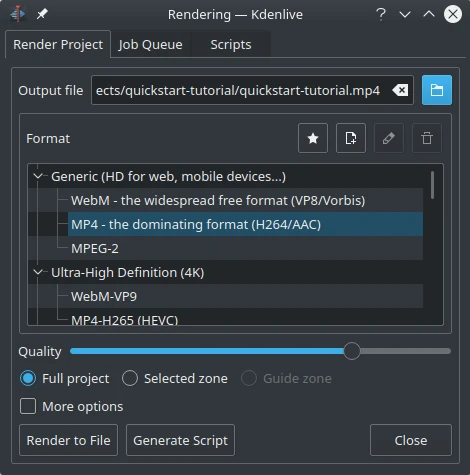
Rendern-Dialog
A few minutes left, and the project is finished! Click the Render button (or go to , or press Ctrl+Enter) to get the dialog shown on the left. Select the desired output file for our new video with all effects and transitions, choose MP4 (works nearly everywhere), select the output file location and press the Render to File button.
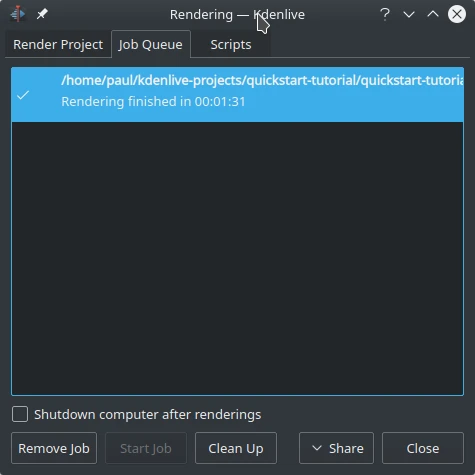
Render-Fortschritt
After some seconds rendering will be finished and your first Kdenlive project is completed. Congratulations!