Effects Everywhere
Did you know that you can apply effects not only to clips in the timeline, but also to clips in the project bin and even to specific tracks in the timeline?
Effects on Timeline Clips
Most of the time effects or filters are assigned to individual clips in the timeline. For instance, as lighting conditions vary within the same source clip, multiple scenes taken from it might be in need of individual grading. Or you need to crop and place an individual clip, separately from others.
But in some situations it is easier and faster to add effects or filters to clips in the bin or an entire track.
Hinweis
Did you know that you can temporarily disable all timeline effects? Use .
Effects on Project Bin Clips
Effects on bin clips allow you to, for instance, color grade a clip itself. All copies of it that you use in the timeline will automatically use these effects. Also, all changes you make to the bin clip effect will immediately be applied to all instances of that clip in the timeline.
Bemerkung
Bin clip effects are applied before any timeline clip effects.
Applying effect to a clip in the project bin
Apply Effects to Bin Clips
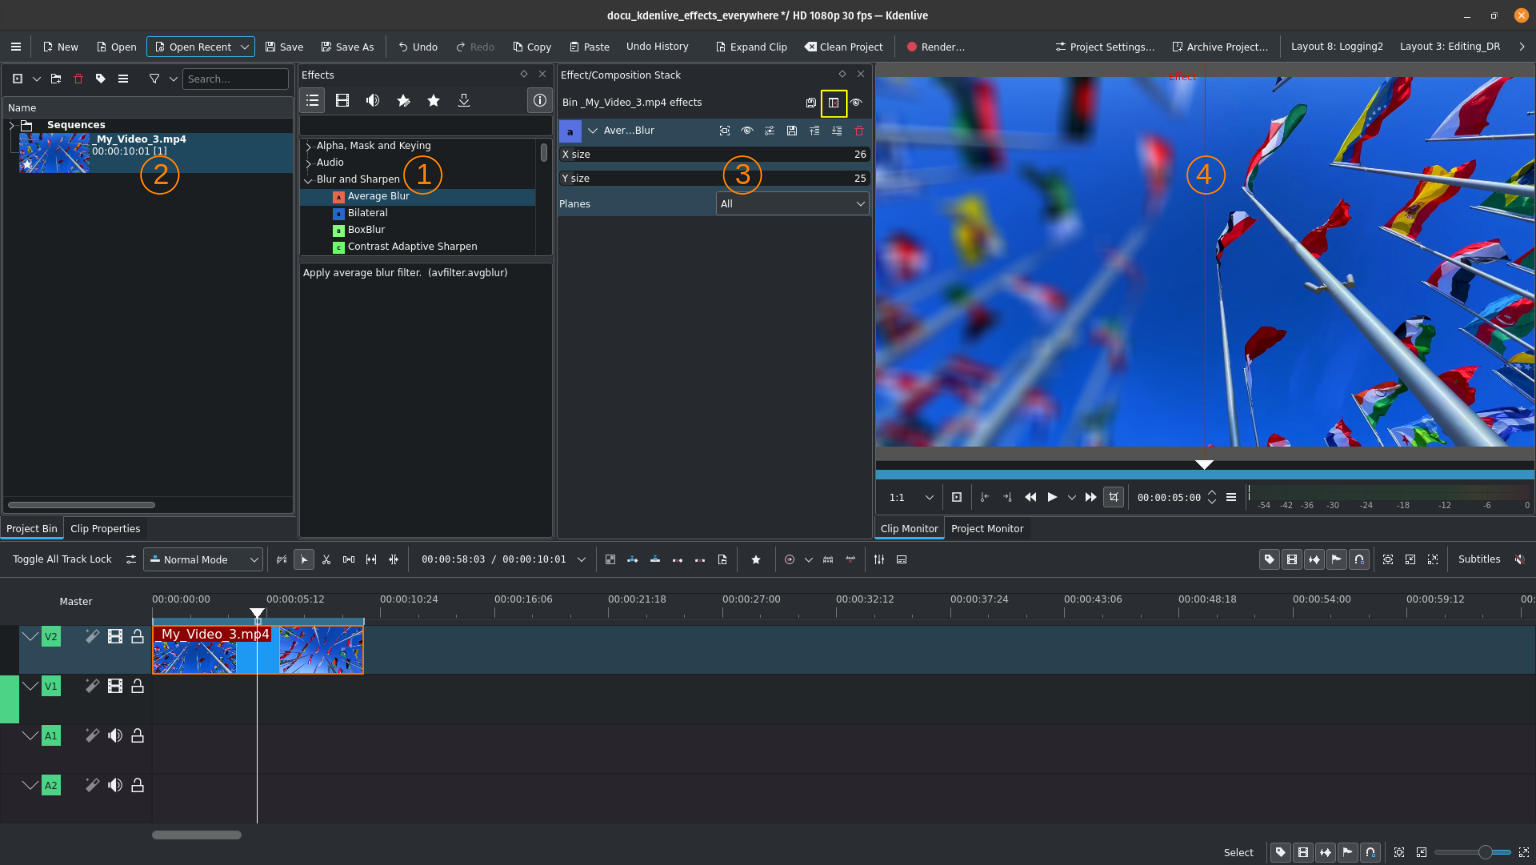
To apply effects to a clip in the project bin in general, simply drag and drop an effect from the effects widget (1) onto your clip in the project bin (2). The effect stack widget (3) then will switch to the effects applied to this particular bin clip. Adjust as you like.
If you later need to return to the bin clip effects in order to edit them again, simply select the clip in the project bin. The effect stack widget (3) will automatically switch to your bin clip’s effect stack.
Compare Before/After Effects
There is a very handy tool available: The Compare effect  button at the top of the effect stack widget (3). When active, the clip monitor (4) shows your clip in a before/after fashion:
Left half of clip monitor (4) shows your bin clip with all effects applied; the text «Effect» to the left of the red divider (4) is the indicator of which side is showing effects and which side is without effects.
Right half shows your (bin) clip without any effects applied.
While hovering your mouse cursor over the clip monitor, you should notice a red vertical divider line appearing. Drag it to dynamically change the split between the clip parts with and without effects.
Temporarily Disable Bin Clip Effects
You can (temporarily) disable all effects on a single bin clip by selecting it and then clicking the Effects enabled  icon at the top of the effect stack widget (3). This works exactly the same as with effects applied to timeline clips. To turn effects back on click the Effects disabled
  icon. The icon effectively works as a toggle and the indicator for enabled or disabled effects.

Indicator for bin clip effect
Bin clips that have effects directly applied on them show a star in the bottom left-hand corner of the thumbnail.
Temporarily disable ALL bin effects
You can also temporarily disable all bin effects at once by clicking on the hamburger menu  of the project bin widget and checking Disable Bin Effects. In case you prefer using a keyboard shortcut or a toolbar button:
To configure a keyboard shortcut go to , then search for Disable Bin Effects. Now set your desired shortcut and click OK
For a toolbar button go to , then search for the available action Disable Bin Effects. Add it to whatever toolbar you like, such as the Timeline Toolbar by clicking the > button. Click OK.
You can now quickly disable and enable all bin effects at once using either the shortcut or toolbar button you have configured above.
Effects on Tracks
Similar to effects on bin clips you can also add effects to a specific timeline track. For instance, you can set the crop and placement of clips on a specific track, so you do not need to copy these settings over and over again onto all clips in this track. When you change track effects, it immediately applies to all clips on this track.

Applying effect to an entire track
Apply Effects to Tracks
To apply effects to a track in the timeline, simply drag and drop an effect from the effects widget (1) into the desired track in your timeline (2). The effect stack widget (3) will switch to the effects applied to this track. Adjust effects as you like.
Bemerkung
The split compare button does not work for timeline tracks.
If you later need to return to track effects in order to edit them again, simply click into the header of the desired track. The effect stack widget (3) will automatically switch to your track effect stack.
Temporarily Disable Track Effects
You can (temporarily) disable all effects for a track by clicking into the track header and then clicking the Effects enabled icon at the top of the effect stack widget (3). This works exactly the same as with effects applied to timeline clips. To turn effects back on click the Effects disabled icon. The icon effectively works as a toggle and the indicator for enabled or disabled effects.
Effect indicator in the track
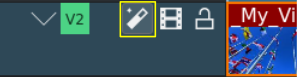
For timeline tracks with effects the effects indicator  changes slightly.
Effect Zones
Effect Zones allow you to apply effects to specific regions of tracks or the timeline. Zones can be set from the effect zone bar in the Timeline or from the interface in the effect panel.
Track Effect Zone
Master Effect Zone
Effects on Master
Finally, you can apply effects to the Master. They apply to all clips on all tracks. There are certain effects that can only be applied to the Master (see the On Master chapter for more details).
Applying effect to the Master
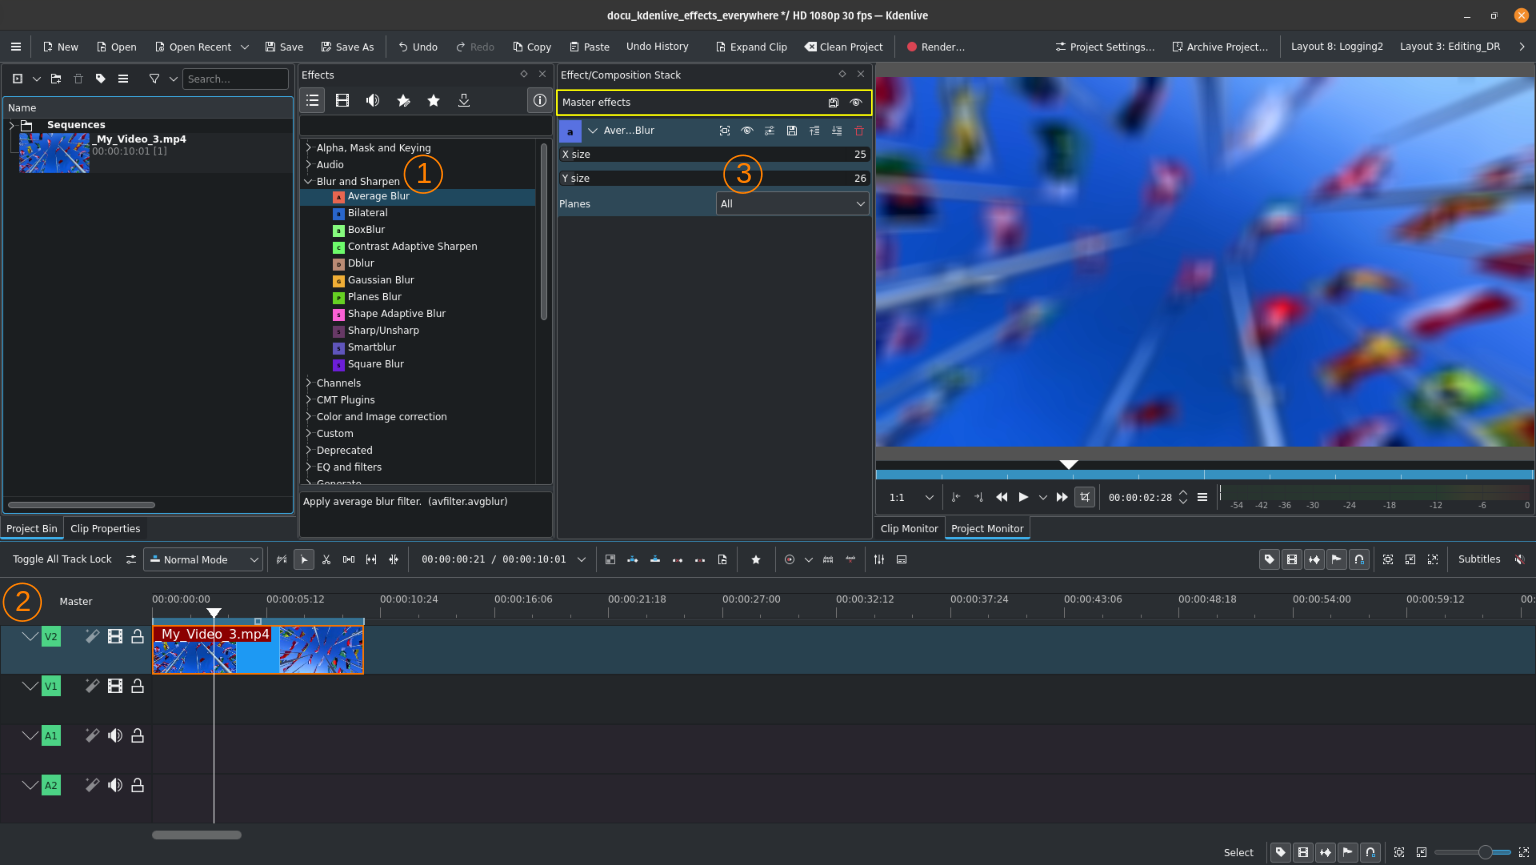
Apply Effects to Master
To apply effects to the Master, simply drag and drop an effect from the effects widget (1) into the Master (2). The effect stack widget (3) will switch to the effects applied to the Master. Adjust effects as you like.
As with effects on tracks, the split compare button does not work for the Master.
If you later need to return to Master effects in order to edit them again, simply click into Master. The effect stack widget (3) will automatically switch to your Master effect stack.
Temporarily Disable Master Effects
You can (temporarily) disable all effects for the Master by clicking Master and then clicking the Effects enabled icon at the top of the effect stack widget (3). This works exactly the same as with effects applied to a track. To turn effects back on click the Effects disabled icon. The icon effectively works as a toggle and the indicator for enabled or disabled effects.
Bemerkung
There is no indicator for effects on Master.
Notes
- Sources
The original text was submitted by user TheDiveO to the now defunct kdenlive.org blog. For this documentation it has been lifted from kdenlive.org, updated and adapted to match the overall style.