Timeline Preview Rendering
Timeline preview rendering is an outstanding feature of Kdenlive. It officially debuted in version 16.08.
Preview rendering allows you to render parts or your complete timeline in the background, so you can smoothly play it back. This is especially useful when you work with complex track compositions or use effects that are computationally intensive. Instead of stuttering playback, you now get smooth playback. This way you can check that your timing of keyframes and effect is working out nicely.
Full-FPS Preview of Effect-Heavy Timeline Clips
Raw source footage
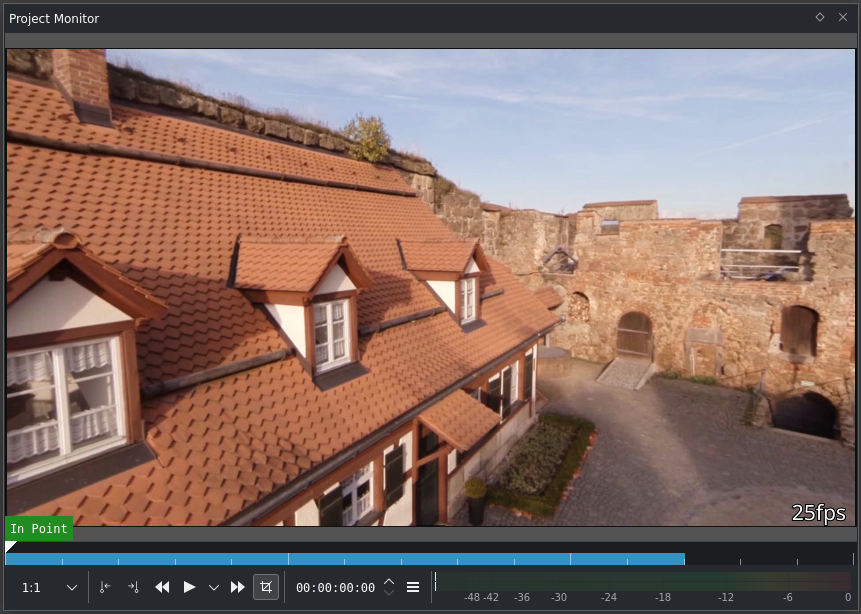
Raw source footage: a good example for Kdenlive’s timeline preview rendering is this: say, you have some FullHD source footage. Raw, your system easily plays this clip back at its original frame rate of 25fps. This is not even a job for proxy clips on a decent system.
But this raw footage needs some serious processing before it can be shown to any audience.

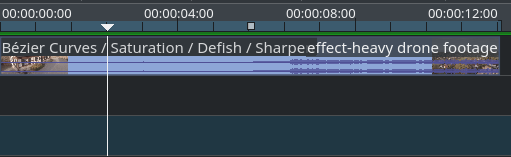
Effects applied
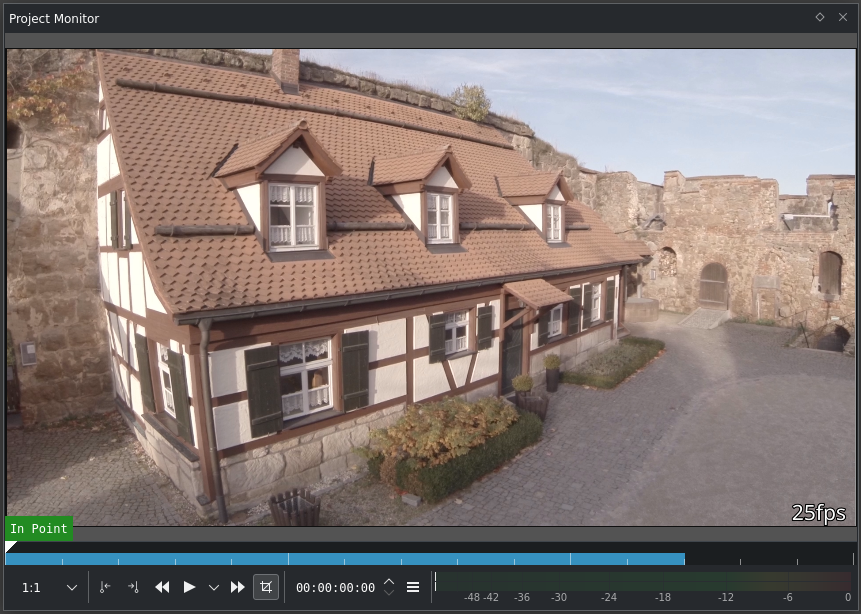
Cue effects. For production, we need to de-fish this footage (action cams have this tendency). After defishing, we need some sharpening. And then, we also have to do some color grading (e.g. decompress the tonal curve, correct saturation).
With these innocent four effects applied, look at the playback rate that is shown in the bottom right corner of the monitor: a dismal six frames per second!
Unfortunately, proxy clips do not help in this situation: proxy clips are low-res and low-quality variants of the source clips, without any effects applied. So our effects will also slow down proxy clips considerably.
Using Timeline Preview Rendering
Achtung
Timeline preview rendering does not speed up timeline editing. It speeds up the timeline playback.
Bemerkung
Preview rendering only deals with the video part of the timeline. Kdenlive renders audio always independent of the preview rendering. In particular, you can make audio changes at any time without affecting preview rendering. Any change to the video portion covered by the preview render zone triggers a new render pass.
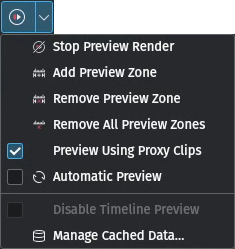
Timeline preview rendering is best controlled using the dedicated Timeline Preview menu in the timeline toolbar. In addition, you can find most of the menu items also in which opens a fly-out menu with all the options.
Step 1: Set Preview Zone
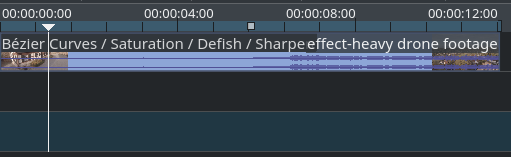
Set the timeline zone in (I) and out (O) points for the zone you want to render for preview.
Next, select Add Preview Zone  (alternatively via ).
For the first time, you will not see any change yet.
Step 2: Render Preview Zone in Background
Select Start Preview Render (). Or press Shift+Return, or click on  .
.
Bemerkung
You can even add multiple, non-contiguous preview rendering zones.
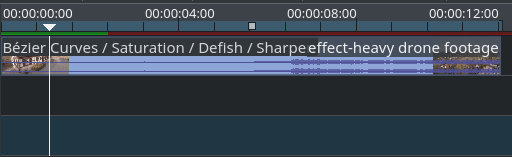
A red bar appears between the timeline ruler and the topmost track. As background rendering progresses, this bar will slowly turn yellow then green, chunk by chunk.
You can continue to work at any part of your timeline while preview rendering is active. However, as soon as you edit clips or transitions that touch your preview zones, rendering will stop and the affected preview zones turn back to red. Simply restart rendering if needed.
The preview is divided into chunks of 25 frames each in size - this corresponds with one second of playback length for 25fps projects.
Step 3: Enjoy Smooth Timeline Preview
All green chunks of your timeline will now play back at full speed. You should immediately notice that scrubbing such timeline zones will be much faster, too.
Preview Rendering enables smooth playback
Timeline playback is now full 25fps, even as the corresponding timeline clip makes heave use of effects (especially de-fish is computational intensive).
Good to Know
Smart Preview Undo/Redo
Kdenlive is smart enough to support some levels of undo and redo. So you can check out the results of two different effect settings by quickly undoing and redoing the effect change without having to render the preview once again.
Preview Cache Storage

You can easily find out how much storage you are currently using for the timeline preview. Use , then select the tab Cache Data.
Kdenlive displays a pie chart showing the cache data disc space consumption. You can purge the cache used for the timeline preview by clicking on the  button next to Timeline Preview.
Preview Profiles
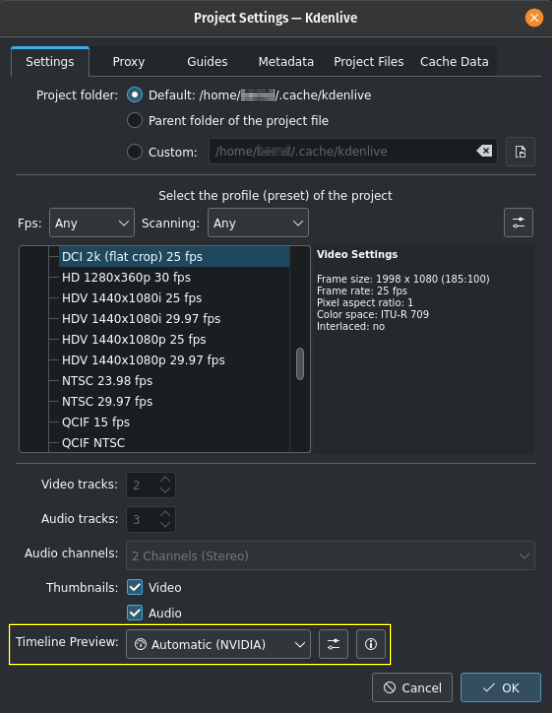
Most of the time it should suffice to leave the preview profile set to Auto. Kdenlive then will select a suitable preview profile based on your project profile.
In some rare cases, as with unusual frame rates, or when you want to control the preview rendering encoding quality, you can change the preview profile or create your own preview profile. Use the Show Profile Parameters  button next to the Timeline Preview profile selection.
De-synchronized Preview
If, for some reason, the rendered preview should get out of sync with your timeline editing, simply remove the corresponding preview zone ( ) or all preview zones (
 ). This gets you back to a sane preview state. Then add the zone(s) back again (using I and O and ), and rerender ().
Notes
- Sources
The original text was submitted by user TheDiveO to the now defunct kdenlive.org blog. For this documentation it has been lifted from kdenlive.org, updated and adapted to match the overall style.