Kdenlive is released about every three month. See the Kdenlive news page to get the latest information and release notes. And check out What’s New for the most recent feature additions.
You can install Kdenlive in two different ways:
Using an installer
As a self-contained executable (Windows: standalone; Linux: appimage).
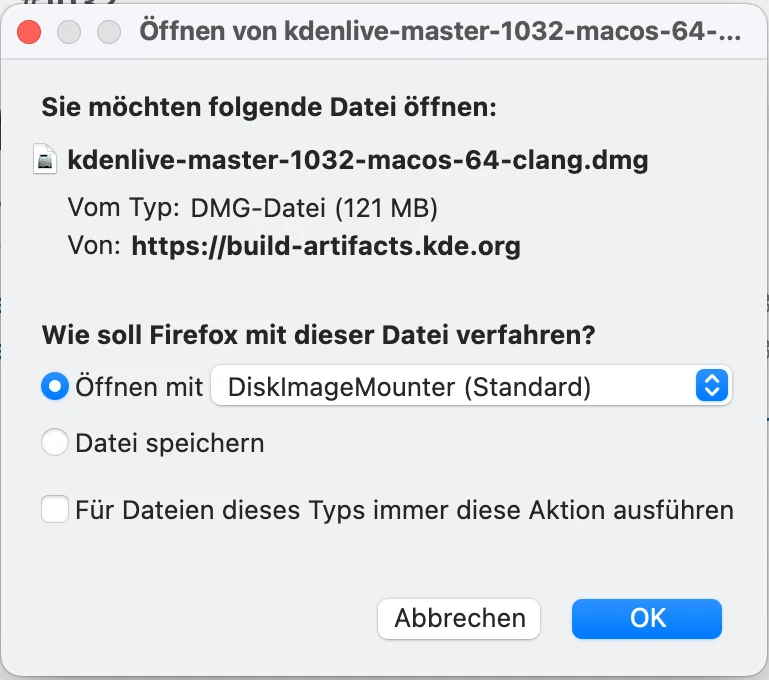
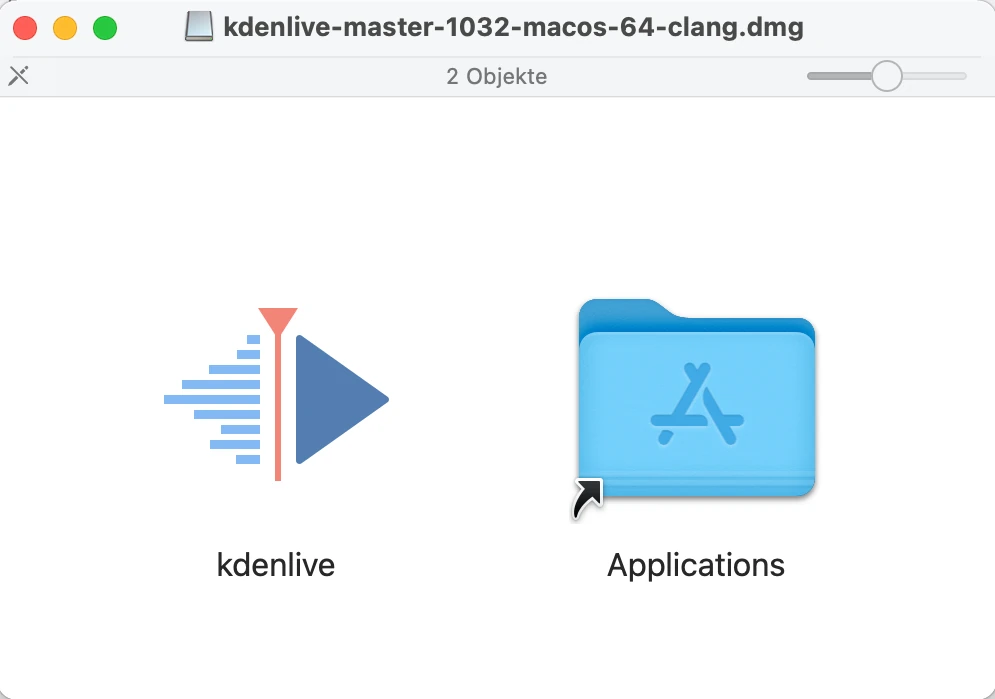
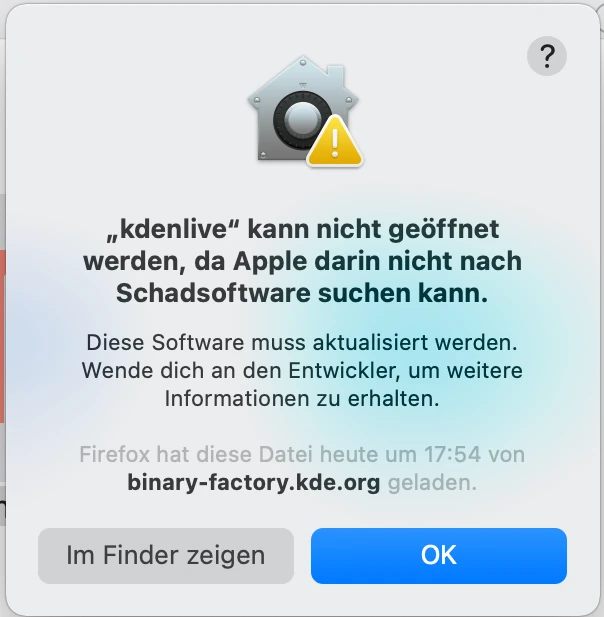
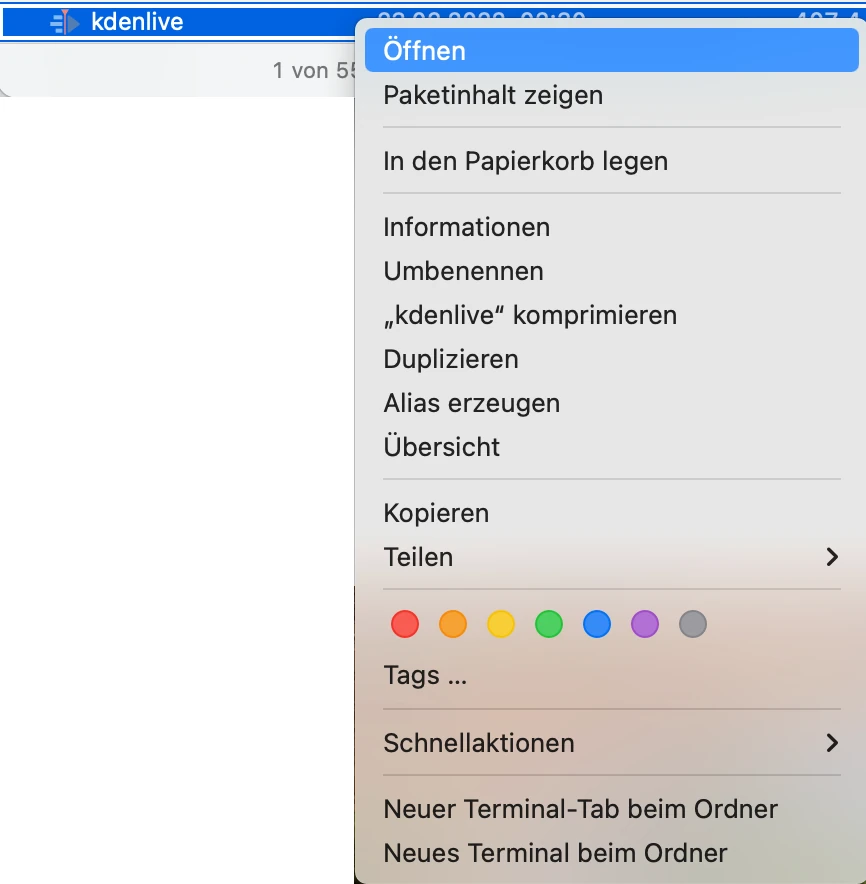
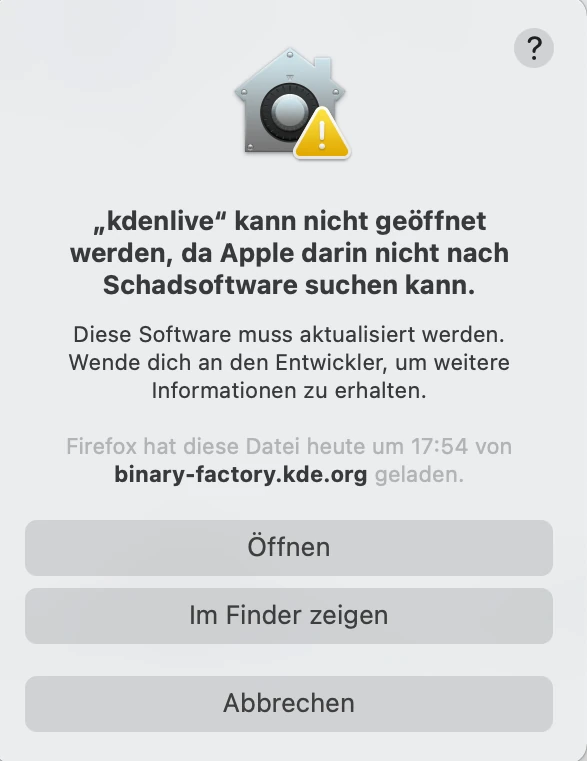
On macOS you can only use the installer version.
Visit the download page of the Kdenlive web site to get the latest release for your operating system.
You will find all previous Kdenlive versions in the attic.
Video editing is in general relying heavily on CPU power. While Kdenlive has render profiles with GPU support, timeline playback uses the CPU. Therefore, the more powerful your CPU the better the playback performance of Kdenlive. More and better GPU support is on the near-term roadmap.
Kdenlive can be installed on non-KDE Desktops without any issues.
Packages: AppImage or Flatpak are the official packages Kdenlive maintains.
Note
As of Kdenlive release 24.02, PPA is no longer supported. Only AppImage and Flatpak releases are officially supported.
If you use the Flatpak version, it installs properly in your desktop environment. No further action required.
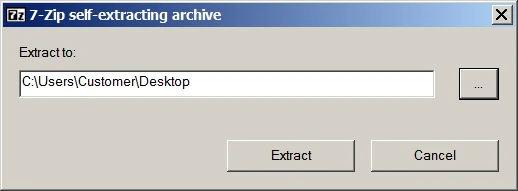
If you want to use the AppImage, download the AppImage and move it to a directory of your choice and make it executable. Normally you can do this using the file manager of your desktop environment (like Dolphin in KDE Plasma). Right-click the AppImage and select Properties and then Make executable. Alternatively, you can use the Linux shell command chmod777<appimage_name> in a terminal. Now you can simply double-click the AppImage file to start Kdenlive or type the AppImage name in a terminal.
Kdenlive runs only on 64bit version of Windows. Kdenlive runs on Windows 10 (1809 or later) and newer. We cannot guarantee that Kdenlive runs on server or embedded Windows version.
Kdenlive is available as an install and as a standalone version.
Install version: Needs administrator rights and gets installed on your local machine. It is also listed as a program.
It is available for all users on your computer.
The Kdenlive files are always located in the same folder.
Standalone version: Does not need administrator rights and isn’t installed. It is not listed as a program. Is only accessible for the user who has downloaded the file.
If you work with a normal user on your computer, you can use Kdenlive.
You can copy the Kdenlive folder on any external drive and run it on a different computer without installing it. However, your personal settings and downloads within Kdenlive are stored on the computer you work on.
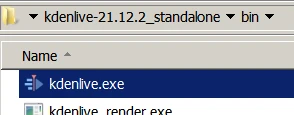
To start Kdenlive navigate to the bin folder and double-click kdenlive.exe. You can also create a shortcut to your Desktop for easy access. Right-click on kdenlive.exe and select Send to … and then Desktop (create shortcut).
If you want to use Kdenlive with domain users using Windows Active Directory and/or Group Policies (GPOs), make sure all users have read/write access to the following folders:
%AppData%\kdenlive
%LocalAppData%\kdenlive
%LocalAppData%\kdenliverc
%LocalAppData%\kdenlive-layoutsrc
%LocalAppData%\kxmlgui5\kdenlivekdenliveui.rc
%AppData%\kdenlive\.backup
%LocalAppData%\knewstuff3
Also make sure no GPO is blocking the access to these folders.