User Interface
This section introduces the Kdenlive user interface (UI), explains the various elements, icons and buttons, the menu options, the default keyboard shortcuts that can speed up your editing work, and how you can customize the layout to fit your specific post-production workflow.
After starting Kdenlive the window should look similar to the image below. Kdenlive’s user interface (UI) is consistent across all platforms, so it doesn’t matter whether your operating system is Linux, Windows or MacOS. Of course, icons and text look different.
The UI is separated into four main parts:
[A] The Workspace with the various widgets that can be arranged to your needs. See the View Menu and Workspace Layouts for more details.
[B] The Menu Bar with the Menu and list of Workspace Layouts.
[C] The Toolbars below the menu bar and above the Timeline.
[D] The Status Bar at the bottom of the screen.
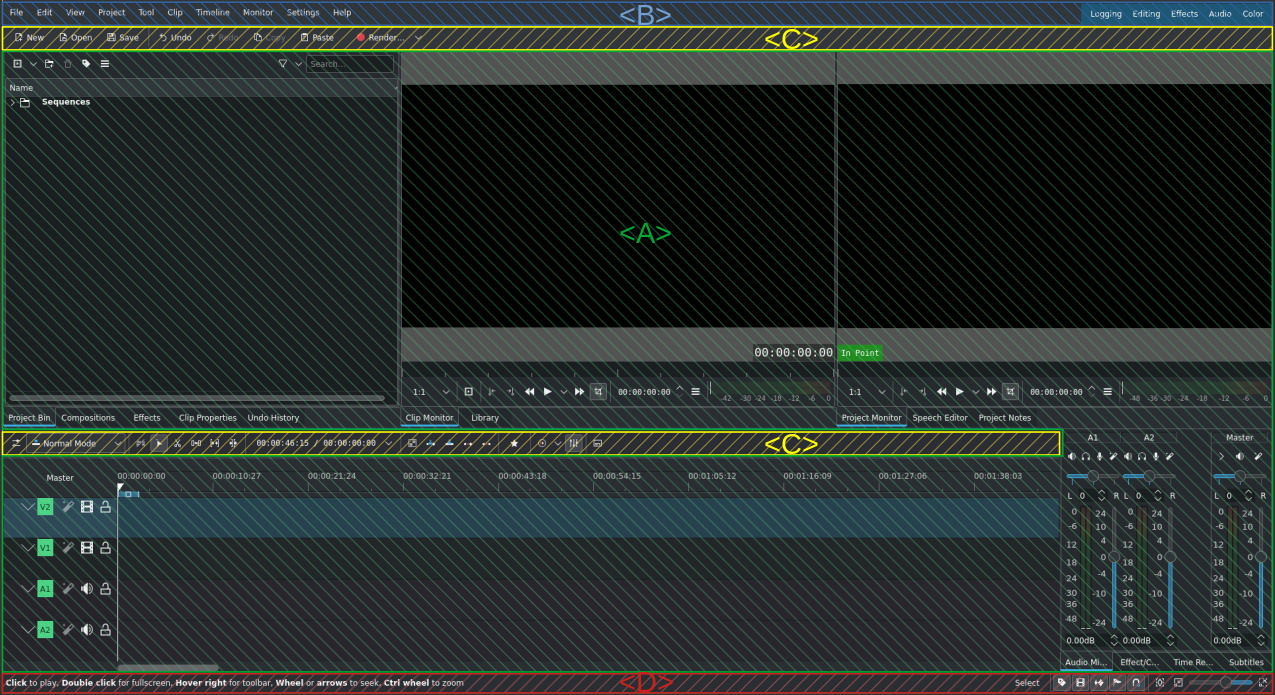
Kdenlive’s default screen layout (example uses the Editing view): Menu Bar (blue), Toolbars (yellow), Workspace (green) and Status Bar (red).
Workspaces
The Workspace model follows the video editing workflow and can be adapted to your individual style and preferences. By default, Kdenlive starts with the Editing workspace model that looks like this:
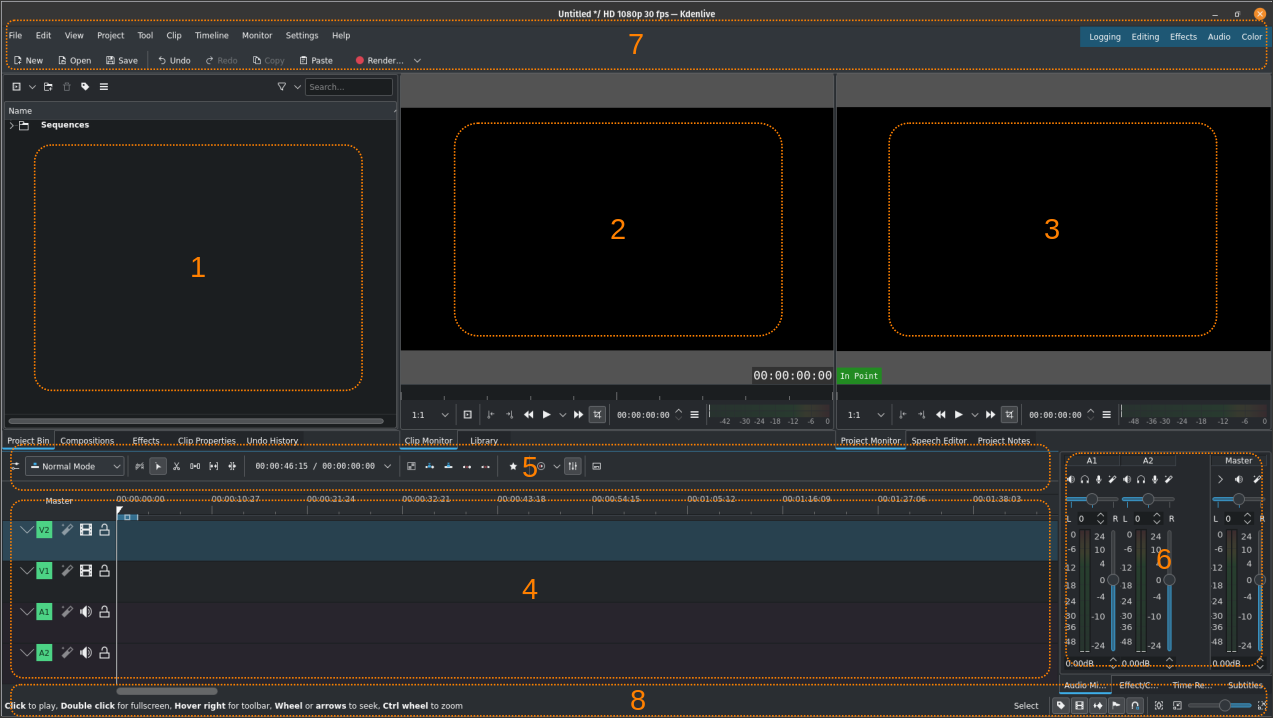
Kdenlive’s default workspaces (example uses the Editing view)
- [1] Project Bin, Library:
This is where you keep your source files (video clips, images and image sequences, title and color clips, animations, audio files). In this screenshot the widgets for Undo History, Compositions, and Effects have been added to this section.
- [2] Clip Monitor:
This is where the clip selected in the project bin is displayed. In this screenshot the widget for Library has been added to this section. See the chapter Clip Monitor for more details.
- [3] Project Monitor:
This is where the content of the timeline is being displayed with all effects and compositions applied. In this screenshot the widgets for Speech Editor and Project Notes have been added to this section. See the chapter Project Monitor for more details.
- [4] Timeline:
Most of the action is taking place in the timeline. Here you put your sources in the order in which they will appear in the final video, make your edits (cuts and trimmings), apply effects, add compositions and transitions, and add audio and sound tracks. See the chapter Timeline for more details.
- [5] Timeline Toolbar:
This is where you find all the tools you need to edit your video project. See the chapter Timeline Toolbar for more details.
- [6] Audio Mixer:
This section holds the audio mixing panel where you control the volume and pan of the various audio tracks and the master.
- [7] Menu Bar, Toolbar:
At the top of the screen you have access to the menu (see Menubar and Menu for more details), the Workspace Layouts and the Main Toolbar. The menu bar can be switched on and off with Ctrl+M.
- [8] Status Bar:
Kdenlive displays context-specific information or hints on the left-hand side of the status bar depending on where you hover the mouse pointer. In the middle you see the names of the clips you hover over in the timeline. This is also where error messages come up when working with clips in the timeline. On the right-hand side Kdenlive displays the currently selected timeline edit tool and the icons to toggle various timeline features. See the sections about status bar icons and the status bar for more details.