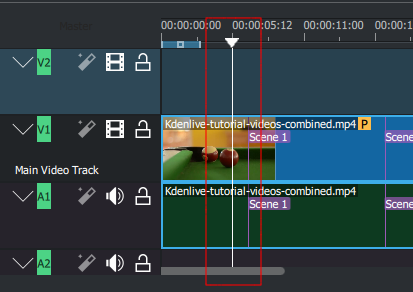
Timeline
The timeline is the central part of Kdenlive. It is made of four different areas:
Timeline Areas
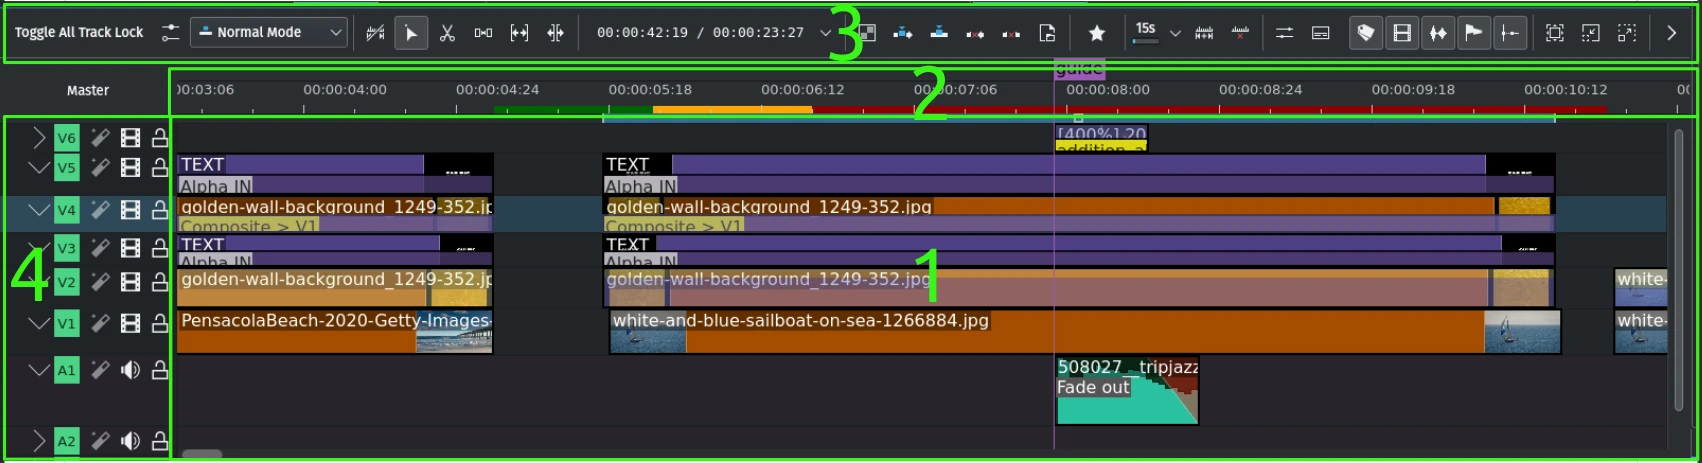
- 1:
Timeline. This is the area where you drop your clips to the various tracks. It shows the clips with or without thumbnails, with or without the audio frequency curve, with or without clip names and other info, transitions and compositions, as well as the markers, timeline markers and keyframes (if any). All this can be toggled in the status bar.
- 2:
Timeline ruler. This area shows the time in hh:mm:ss:ff notation. It also shows the current zone (if defined) and the preview render zones and their respective render status. A more detailed description can be found further down here. Left-clicking in the timeline ruler will move the Timeline and seek to that position. For the right-click menu see the detailed description.
- 3:
Timeline Toolbar - This is an important area where the tools for working with the clips in the timeline are easily accessible. Feel free to adjust the timeline toolbar to accommodate your workflow. For details how to do that refer to the section about toolbar configuration.
- 4:
Track Header. This area displays track header data like track type (V for video, A for audio), track number, with your without track effects, hidden or muted, locked or unlocked, and an optional track name. Each track can be adjusted in height individually as well as expanded or collapsed. A more detailed description can be found further down here. For the right-click menu see the detailed section.
Timeline
Zoombars
Besides the availability of zoombars in the monitor and keyframe scroll bars, zoombars are now available in the timeline as well. You can easily zoom in/out in the timeline by dragging the edges of the timeline scrollbar. (Vertical zoombars coming soon.) Recommend playing this video in full-screen mode.
Scrolling and Panning
Scrolling the timeline
Dragging the horizontally or vertically zoombar with the LMB.
Or inside the timeline horizontally with the MW and vertically with Shift+MW (you can invert this behavior in the Timeline settings).
Panning continuously the timeline
Either with Ctrl+LMB or holding down the MMB and dragging the timeline left or right.
Key binding information

Key binding info has been added on the left while context item information has been moved to the right of the Status Bar. Recommend playing this video in full-screen mode.
Timeline visuals
The timeline got a visual overhaul with more and better looking timeline marker/marker colors, the timeline marker have been moved above the timeline ruler while preview and zone bars have been moved below.
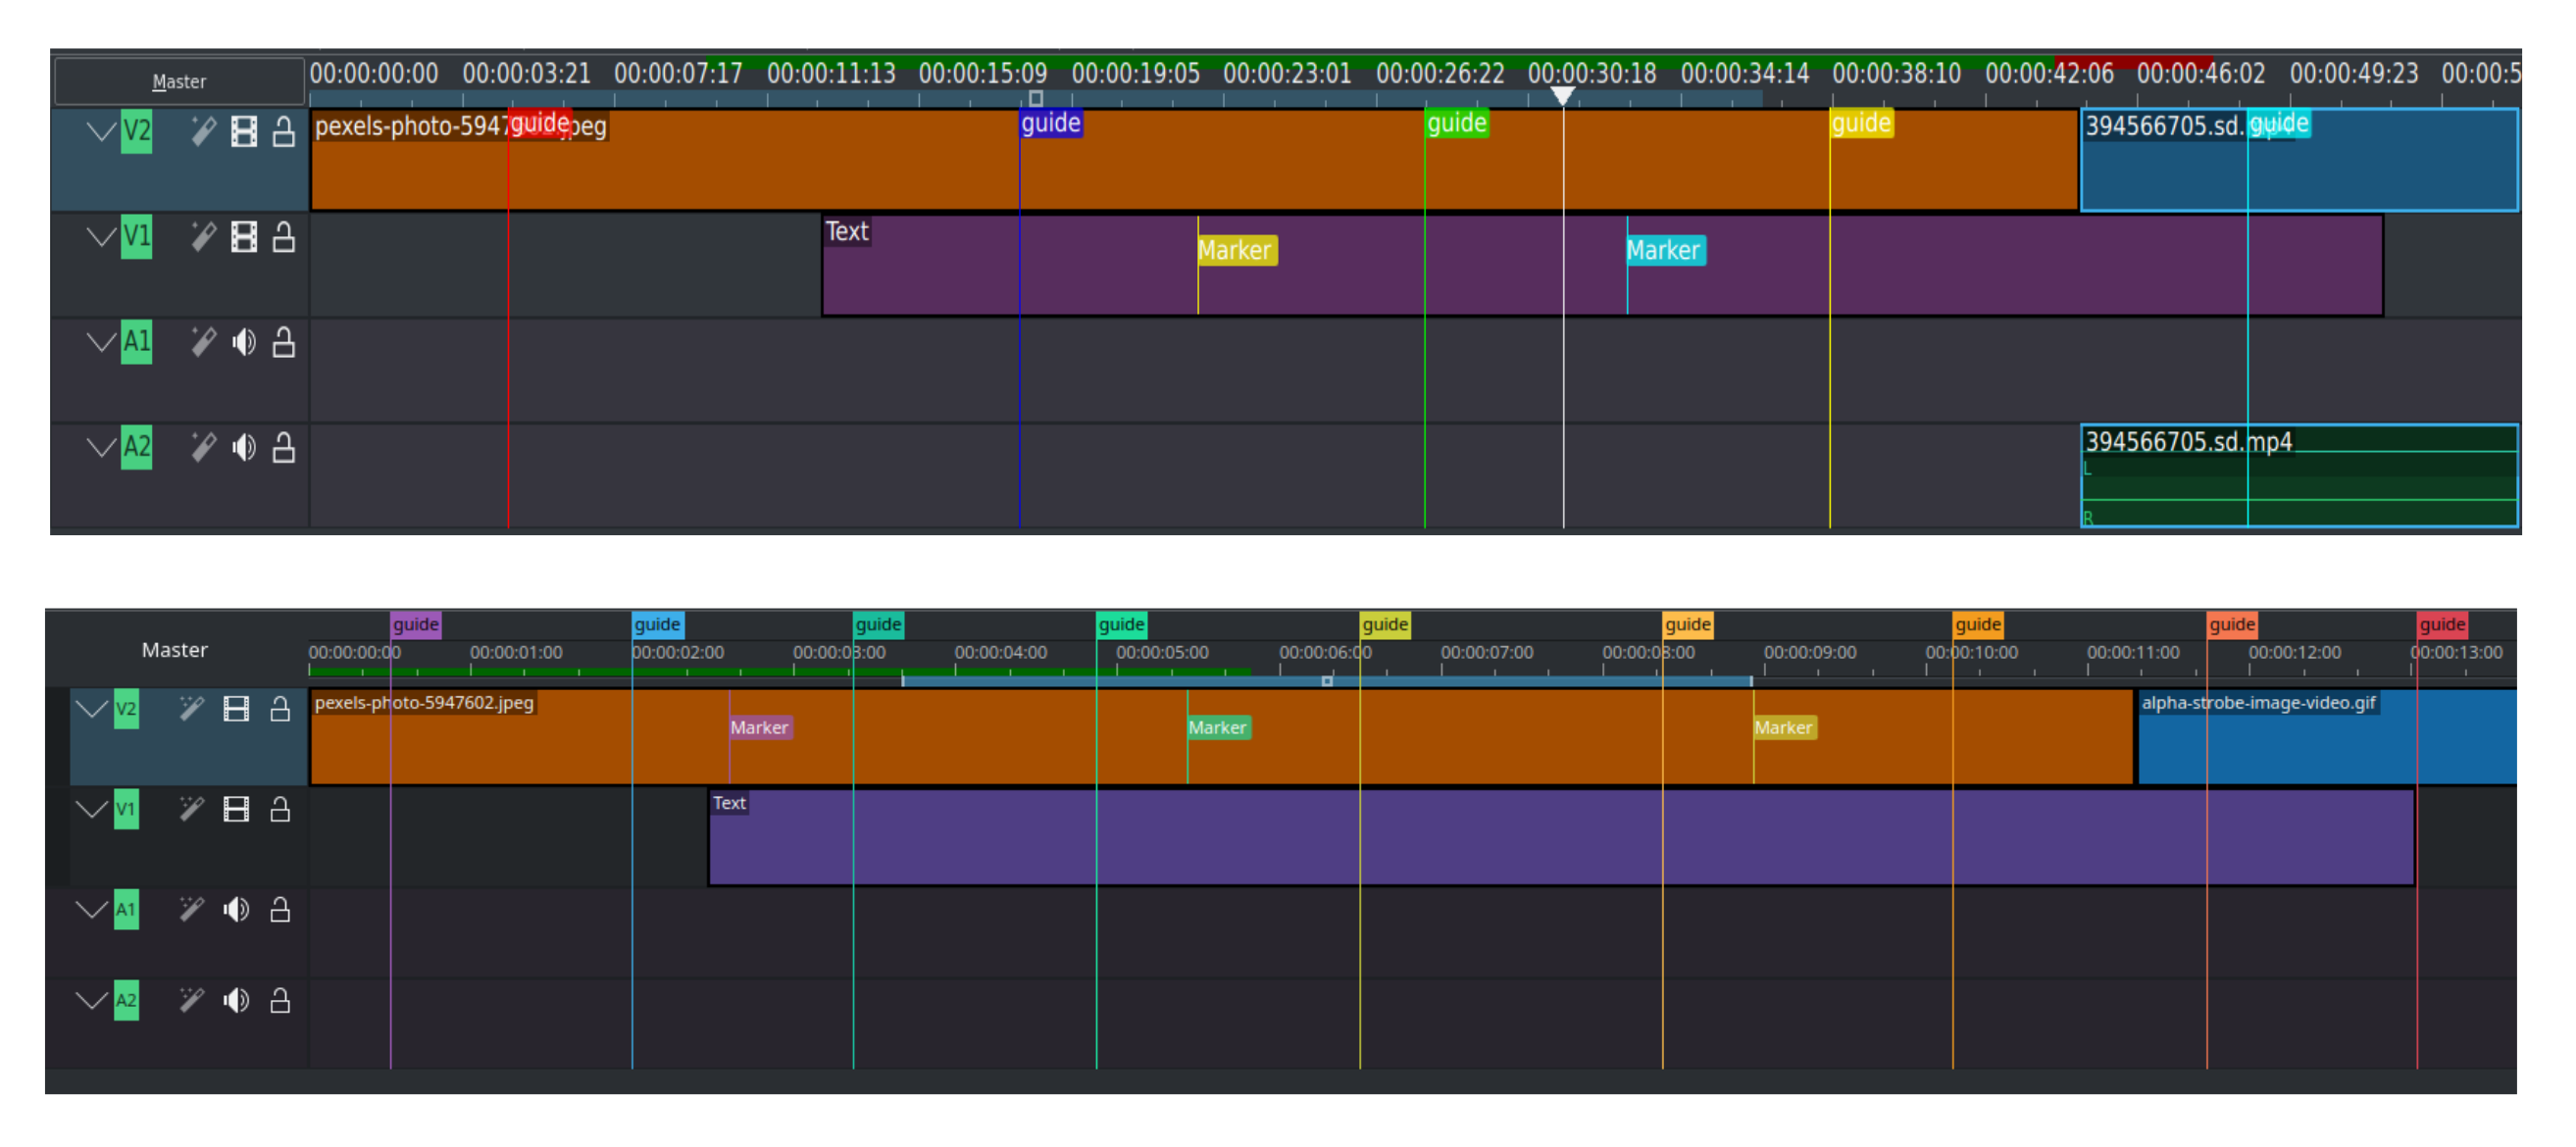
Before (above) and after (below)
Split Audio/Video
The way timeline tracks work has changed. Each track is now either audio or video, and will only accept audio and video clips respectively. When dragging an AV clip from the project bin to the timeline the clip will be automatically split with the video part going on a video track, and the audio part on an audio track.
The separation of audio/video is important for implementing same-track-transitions.
Timeline Cursor/Position Caret/Playhead
This indicates the position we are displaying in the Monitors. You can scroll the position by dragging the Timeline cursor (a.k.a Position Caret or Playhead).
A fixed centered playhead can be enabled in Fixed centered playhead. When enabled, the playhead remains locked at the center of the timeline view while the timeline content scrolls smoothly beneath it during playback, scrubbing, and seeking.
Keyboard Navigation
You now have the possibility to move clips and compositions with your keyboard. To do it, select a clip in the timeline and use the Grab Current Item function from the menu or use the default shortcut of Shift+G.
You can then move the item with the arrow keys.
Keyframes can also be moved individually. Just click on a keyframe in the timeline, then move it Left or Right, change its value with + and -. Use Alt+arrow to go to another keyframe.
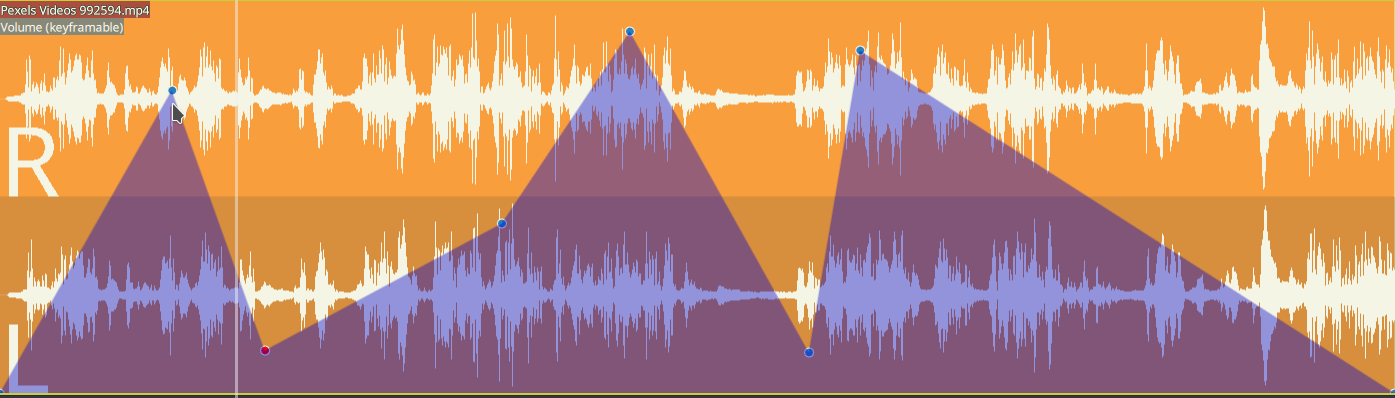
Keyframe handling
Add a new keyframe by double clicking in timeline.
You can move a keyframe without altering its value by using the vertical line that appears when you are above or below a keyframe.
Remove a keyframe by dragging it far above or below the clip limits.
Disable/enable effect stack of a clip
Clip stack can be enabled/disabled by clicking on the effect.
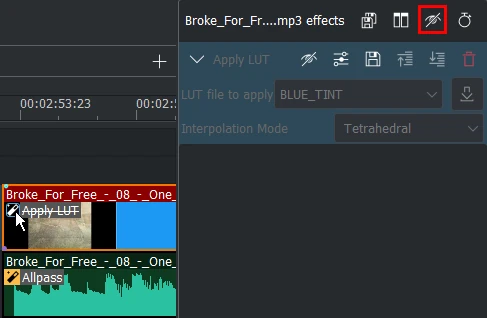
Kdenlive Effect Stack disabled by click on the effect of a clip
Disabling individual clips
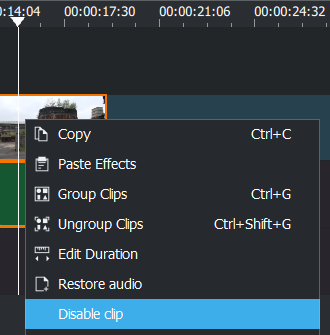
Individual clips can be disabled while still in the timeline but with no audio and no video – (works for all clip types). Right-click on the clip and choose Disable clip or Enable clip.
Toggle between sequence tabs
With following keyboard shortcuts you can toggle between sequence tabs:
Go to next sequence Ctrl+Tab
Go to previous sequence Ctrl+Shift+Tab
Timeline Ruler
The timeline ruler shows the timecode information in the notation of hh:mm:ss:ff (default) or in frames. It displays the currently defined timeline zone (1) and the preview render zone (2) and its respective rendering status (red: not yet rendered; yellow: being rendered; green: finished).

The timeline zone can be moved by dragging the square in the middle, and sized by either dragging the left or right edge or by positioning the playhead in the timeline and pressing I or O to set in-point and out-point, respectively. For more detailed information on preview render please refer to this section of the documentation.
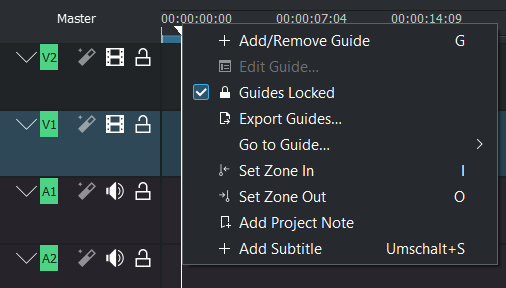
Right click into the timeline ruler opens the context menu and allows you to:
Timeline Toolbar
The timeline toolbar controls various aspects of the editor. It can be configured to accommodate your workflow (see Configuring the Toolbars for more details).

This is a quick overview of the main sections of the toolbar. A more detailed description can be found in the Timeline Toolbar section of this documentation.
- 1:
Enable track compositing and switching split view of audio and video (see Switching between mixed or split audio)
- 2:
Selects the editing mode: Normal, Overwrite, Insert (see Track Compositing)
- 3:
Edit Tools: Selection Tool, Razor Tool, Spacer Tool, Slip Tool, Ripple Tool (see Timeline Edit Tools)
- 4:
Clip and Zone Tools: Mix Clips, Insert Clip Zone in Timeline, Overwrite Clip Zone in Timeline, Extract Timeline Zone, Lift Timeline Zone, Expand Clip (see also 3-point editing)
- 5:
Preview Render Tools - Start/Stop Render, Open Preview Render Options Dialog, Add Preview Render Zone, Delete All Preview Render Zones
- 6:
Toggle Audio Mixer Widget
- 7:
Status Bar icons (in lieu of the status bar which can be switched off in the View menu)*
* Please note this is a customized version of the timeline toolbar and the section #7 is not part of the default toolbar
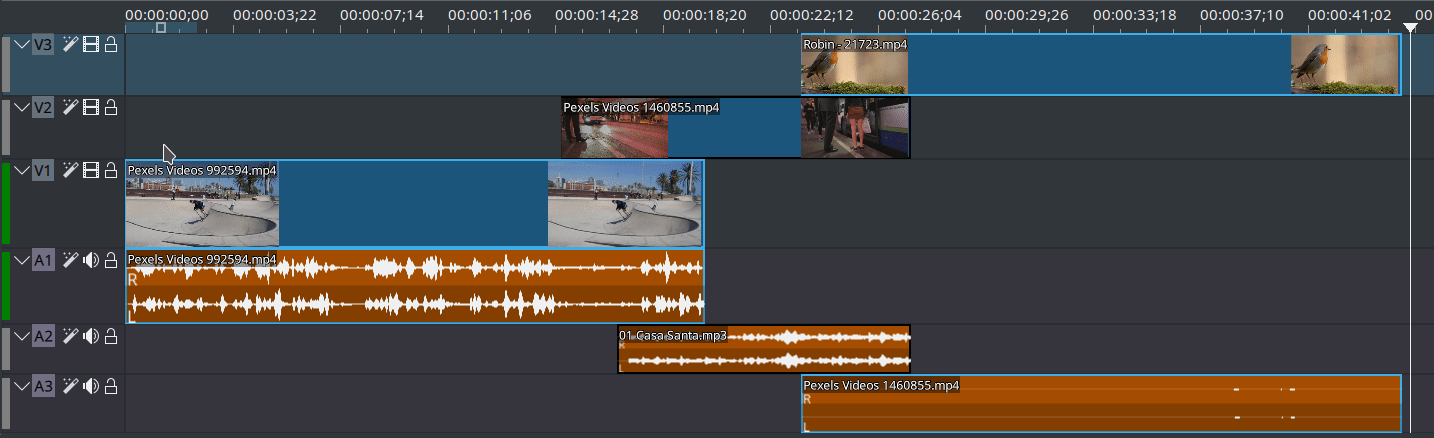
Tracks
The timeline is made of tracks. There are two kinds of tracks: audio and video. The number of tracks is defined when creating a new project in the project settings. Adding a clip to the timeline can be achieved by dragging it from the project bin or the Monitors.
Track Header
This area shows some options for a track:
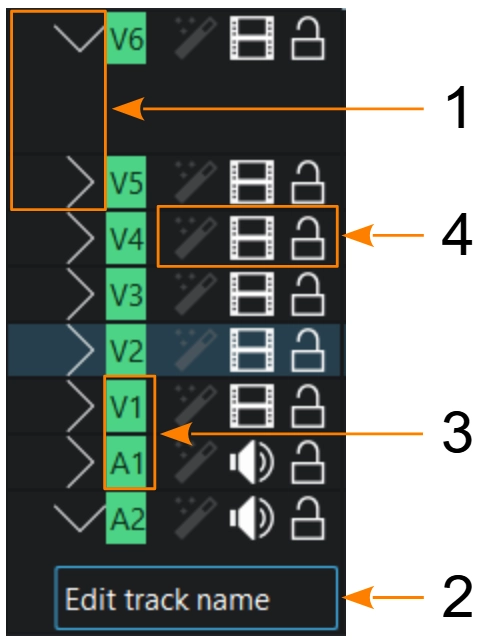
- 1:
 Expand/collapse the track. Shift+LMB to expand/collapse all tracks of the same type.
- 2:
Track name. Click on it to enter or change the name of the track.
- 3:
Track type and track number
- 4:
Track control icons. Use them to:
Lock the track
 which will prevent adding clips, removing clips, or moving of clips on the timeline;
Mute the track
 (audio tracks only) Ctrl+Shift+H
Hide video
 from this track Ctrl+Shift+H; and,
Enable/Disable track effects
 allows you to enable or disable the effects applied to the track.
arrow up/down goes to the next track
Adding Tracks
In order to add a track, right-click anywhere in the track header area. In the Add Track dialog window specify what type of track, where and how many you want to insert.

You can specify the number of tracks for a new project in in the Project Defaults tab.
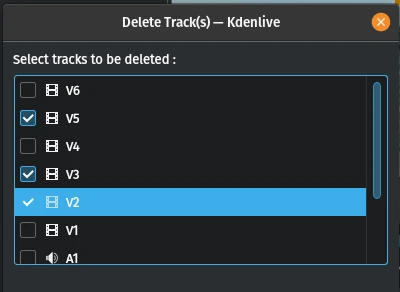
Deleting Tracks
In order to delete a track right-click anywhere in the track header area. In the Delete Track dialog window select the tracks you want to delete.
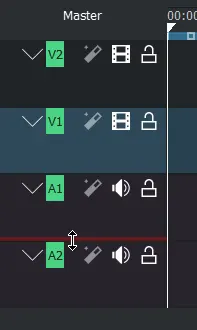
Resizing Tracks
Tracks can be individually resized. Holding down Shift makes all video or audio tracks change in height simultaneously.
Fit Tracks to view height
All tracks height can be adjusted following the height of the timeline view.

Reset track to default height
Shift+double-click on the track divider resets the track back to its default height.
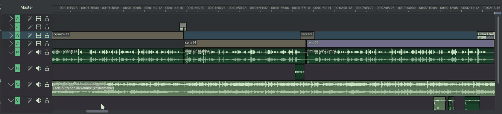
Switching between mixed or split audio
Switch live between two different layout modes (Mixed or Split).

Configurable Tracks
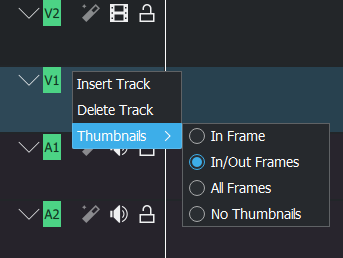
Video track - You can choose to display either
In Frame
In/Out Frames
All Frames or
No Thumbnails
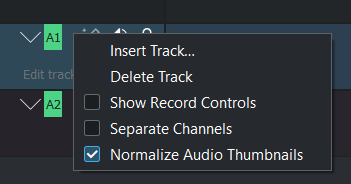
Audio track - You can enable:
Show Record Controls to record audio direct into the track. More details see Audio recording.
Separate Channels to see each channel of an audio track (i.e stereo, 5.1)
Normalize Audio Thumbnails maximize the audio level peak to -3dB.
Continuously loop playback
Disable Pause playback when seeking in Configure Timeline settings ().
Make a timeline zone the length you like to loop.
Loop Zone (Ctrl+Shift+Space)