Project Monitor

kdenlive_ui-monitors_pm_elements

Project Monitor elements

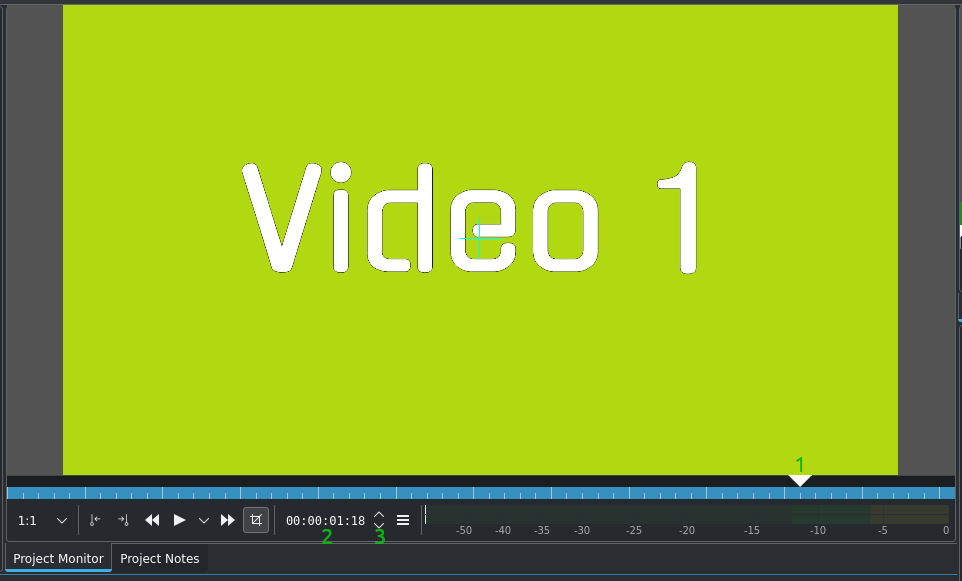
The Project Monitor displays your project’s timeline - i.e. the edited version of your video. It has the same functions and options as the Clip Monitor except for the edit-mode icon which switches Edit Mode on or off.

For more details about the icons in the monitor toolbar refer to this section of the manual.

Project Monitor Controls

  1. The position caret. Shows the current location in the project relative to the whole project. You can click and drag this to move the position in the project.

  2. The timecode control. You can type a timecode here and press Enter to bring the playhead to an exact location.

  3. Timecode control arrows. You can move the Project Monitor one frame at a time with these. Alternatively, you can use left and right (keyboard arrow keys).

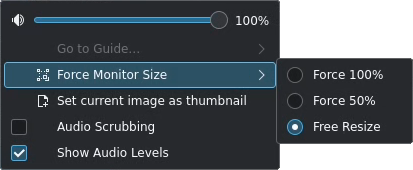
Hamburger Menu

kdenlive2304_ui-monitor_pm_options

Project Monitor options

  • Volume - Set the Project Monitor playback volume. This does not affect the master volume setting.

  • Go to Guide - If guides are defined the list of guides is displayed and selecting one positions the playhead at the guide’s timecode.

  • Force Monitor Size - You can force the Project Monitor to display the video at 100% (original size), 50% or adjust it to the Project Monitor widget’s size.

  • Set current image as thumbnail - Takes the a snapshot of the current frame and uses that as the thumbnail for the clip.

  • Audio Scrubbing - If enabled plays the audio track while scrubbing through the timeline. You may want to turn this off to improve scrubbing performance or if the noise is distracting.

  • Show Audio Levels - If enabled shows the frequency curve of the master audio in the Project Monitor.

Creating Zones

kdenlive_ui-monitors_pm_zone

Project Monitor zone

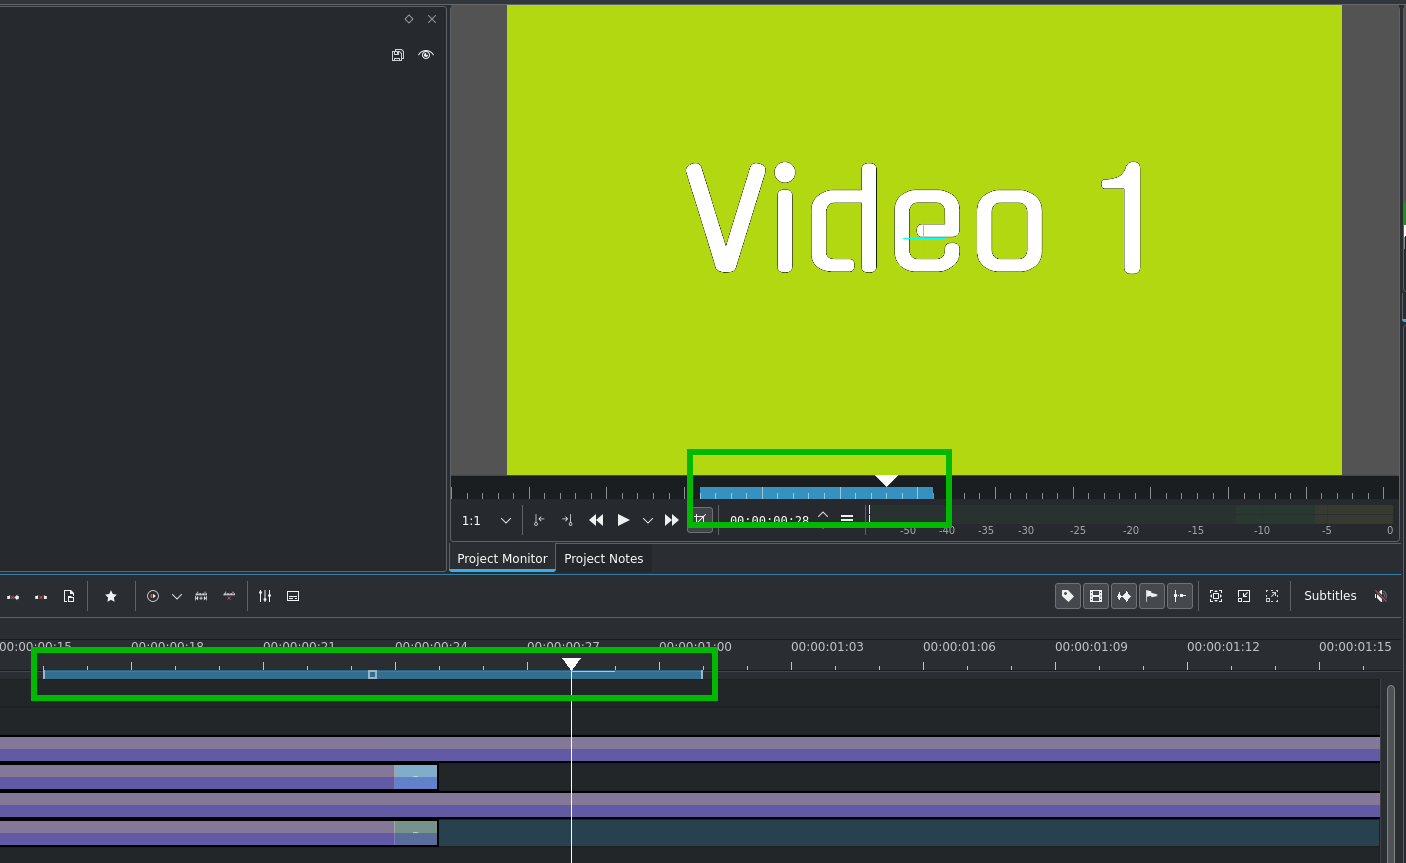
You can use the I and O keys or the zone-in and zone-out icons to create a zone in the Project Monitor the same way you make zones in the Clip Monitor with the notable exception that the zone defined in the Project Monitor also sets the zone in the Timeline. The zone will be indicated by a colored bar both on the timeline and underneath the Project Monitor.

You can have Kdenlive only render the selected zone - see Selected Zone.

Right-click Menu

kdenlive2304_ui-monitor_pm_right-click

Project Monitor right-click menu options

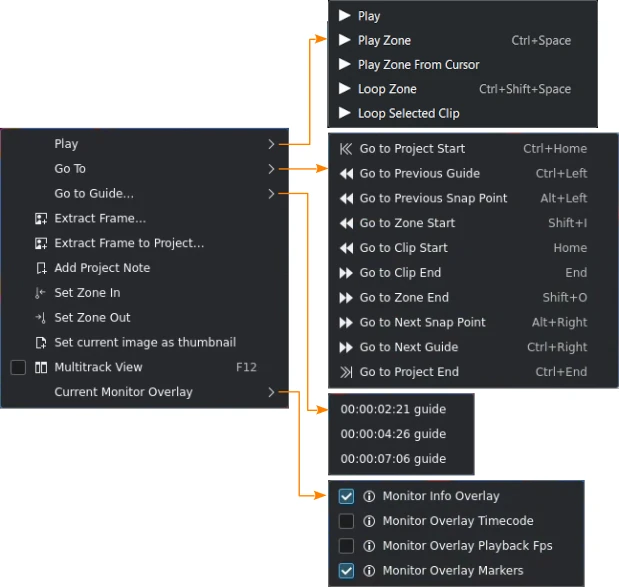
These are the menu items that are available when you right-click in the Project Monitor. These actions affect the clip that is currently selected in the Timeline. Similar menu items are available from a right-click menu in the Clip Monitor. However, the clip monitor menu items affect the currently selected clip in the project bin.


Item

Shortcut

Description

Play

Plays the clip currently selected in the project bin

Play Zone

Ctrl+Space

Plays the current zone and stops

Loop Zone

Ctrl+Shift+Space

Plays the current zone in a continuous loop

Loop Selected Clip

Plays the currently selected clip in a continuous loop

Go to Project Start

Ctrl+Home

Goes to the beginning of the clip

Go to Previous Guide

Ctrl+Left

Goes to the previous guide

Go to Previous Snap Point

Alt+Left

Moves the playhead to the previous snap point

Go to Zone Start

Shift+I

Goes to the start of the zone

Go to Clip Start

Home

Moves the clip playhead to the beginning of the clip

Go to Clip End

End

Moves the clip playhead to the end of the clip

Go to Zone End

Shift+O

Goes to the end of the zone

Go to Next Snap Point

Alt+Right

Moves the playhead to the next snap point

Go to Next Guide

Ctrl+Right

Goes to the next guide

Go to Project End

Ctrl+End

Goes the end of the clip

Go to Guide…

The menu item pops out a list of existing guides to select from. When one is selected the playhead moves to that guide.

Extract Frame

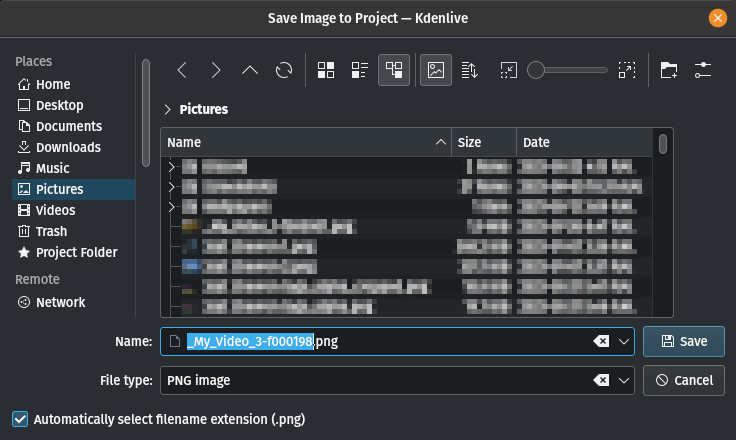
Opens the Save Image dialog window to save the current frame as an image file (default is .png) to your file system

Extract Frame to Project

Same as Extract Frame but in addition the image file is brought into the project bin

kdenlive2308_ui-monitors_save_image

Save Image dialog for extracting frames

Add Project Note

Opens the Project Notes widget and adds a hyperlink to the current frame in the clip. You can enter more text to describe the scene.

Set Zone In

I

Sets the in-point for the zone

Set Zone Out

O

Sets the out-point for the zone

Set current image as thumbnail

Uses the current frame as the thumbnail for the clip in the project bin

Multitrack View

F12

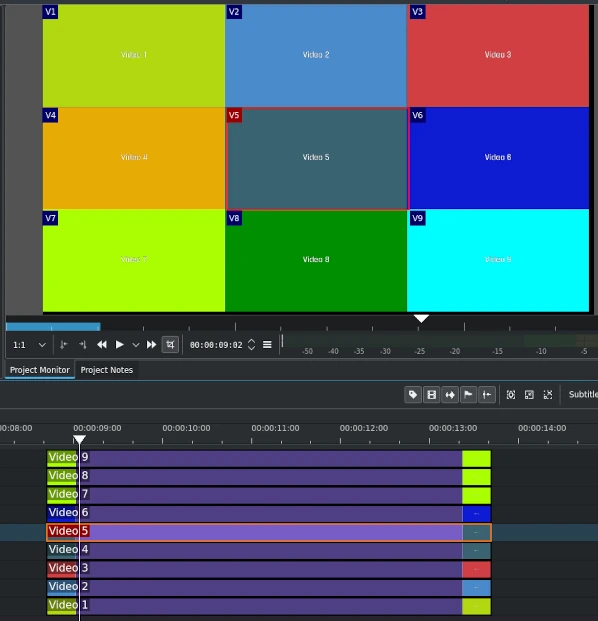
Switches the project monitor area to the Multitrack View. All active tracks will be displayed. For more details about how to use this in Editing refer to the Multicam Tool chapter.
Current Monitor Overlay

Opens a fly-out for the various available monitor overlays

Monitor Info Overlay

Switches all monitor overlays on or off

Monitor Overlay Timecode

Switches the display of the timecode on or off

Monitor Overlay Playback FPS

Switches the display of the frame-per-seconds (fps) on or off

Monitor Overlay Markers

Switches the display of the marker lines and thumbnails on or off

Multitrack View

kdenlive_ui-monitors_pm_multitrack

Selecting this allows you to view all the video tracks at once in a split screen in the project monitor. Kdenlive starts with video track #1 in the top left corner and displays the other tracks sequentially. Hidden tracks are not displayed.

For more details about how to use this in Editing refer to the Multicam Tool chapter.