Using Tags
Tags are a good way to stay organized as they give you a quick overview of the nature of your assets. You can create as many tags as you need, assign different colors, and change the default tags. After you assigned tags to your assets you can then quickly filter by tags making it much easier to assemble the clips in the timeline and building your story.
Attention
Kdenlive adjusts the width of the project bin widget to accommodate all tags and their description. It is recommended to keep the number of tags and the length of the description as small as possible to conserve valuable screen real estate for other widgets (in particular the timeline and monitors). If you have multiple monitors at your disposal consider undocking some of the widgets and moving them off the main screen used for editing.

Enabling the tags panel
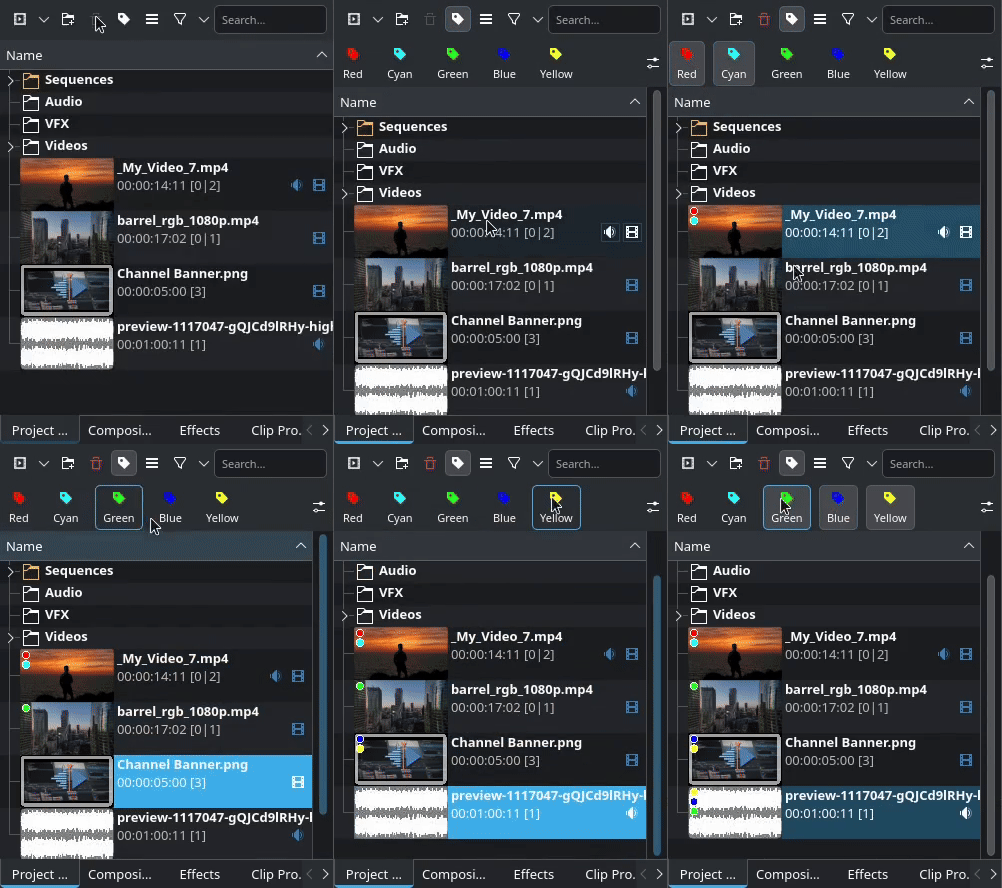
Click on the Tags Panel icon in the project bin toolbar to enable the panel.
Assigning Tags
Assigning tags is as simple as selecting a clip and then clicking the appropriate tag in the panel.

Assigning tags to clips
A clip can have more than one tag.
Click the tag again to remove it from the clip
Editing Tags

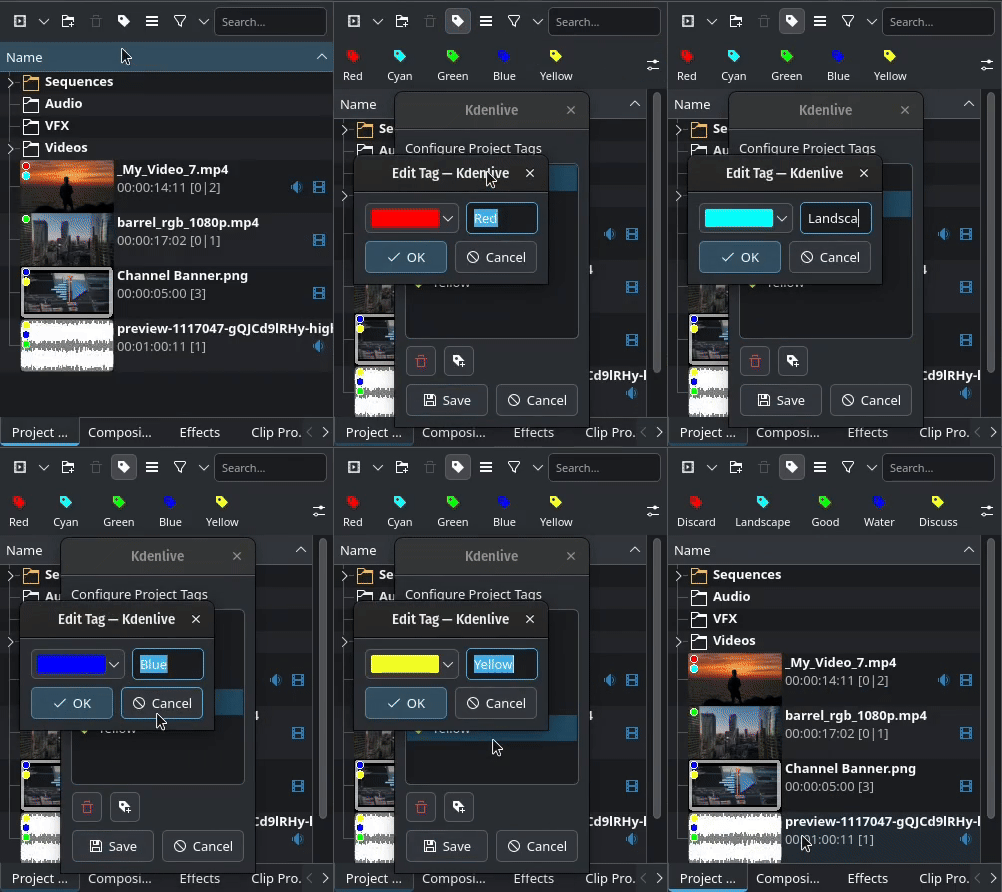
Editing tags
You can change the description and color of existing tags.
Click on Delete to delete a tag.
Click on Add tag to add a new tag.
Make sure to click Save to save the changes.
Hint
You can change the order of the tags in the panel by simply grabbing a tag and dragging it to the desired place in the panel.
Filtering by Tags
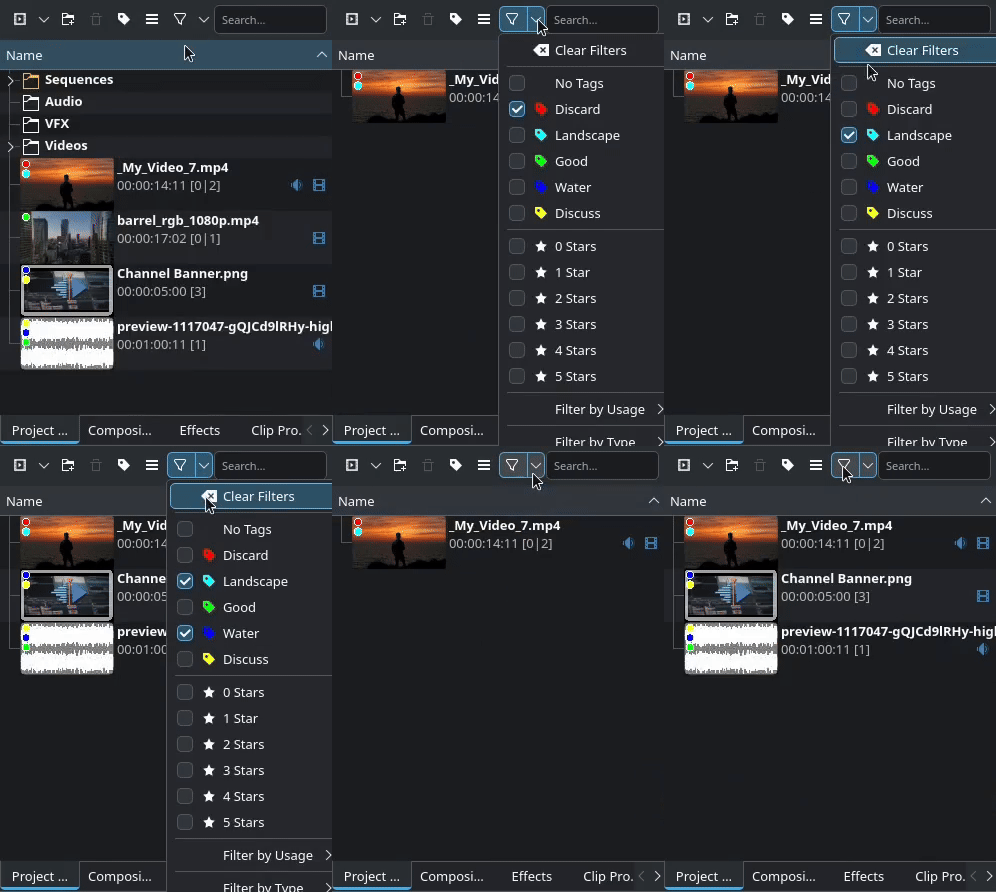
You can filter the project bin list using tags.

Filtering using tags
Note how the background of the icon changes as soon as filter criteria have been selected.
Filter criteria within the same category (like tag or rating) are applied in an OR fashion, meaning that all clips with any of the selected criteria will be listed (red OR green tag).
Filter criteria across different categories are applied in an AND fashion, meaning that clips with criteria from both categories will be listed (red OR green tag AND with four OR five stars)
For more details refer to the chapter about using filters.