Anpassa gränssnittet
The user interface model allows you to freely adjust the different panels to support your workflow. You can add widgets to and delete them from the different panels, rearrange them, change the size of the panels, and save the workspace layout so you can have different layouts with different widgets depending on the stage of your post-production work. For example, you can have different workspace layouts for video editing, color correction and sound editing. Kdenlive comes with four different workspace layouts already defined. See the Arbetsytans layouter chapter.
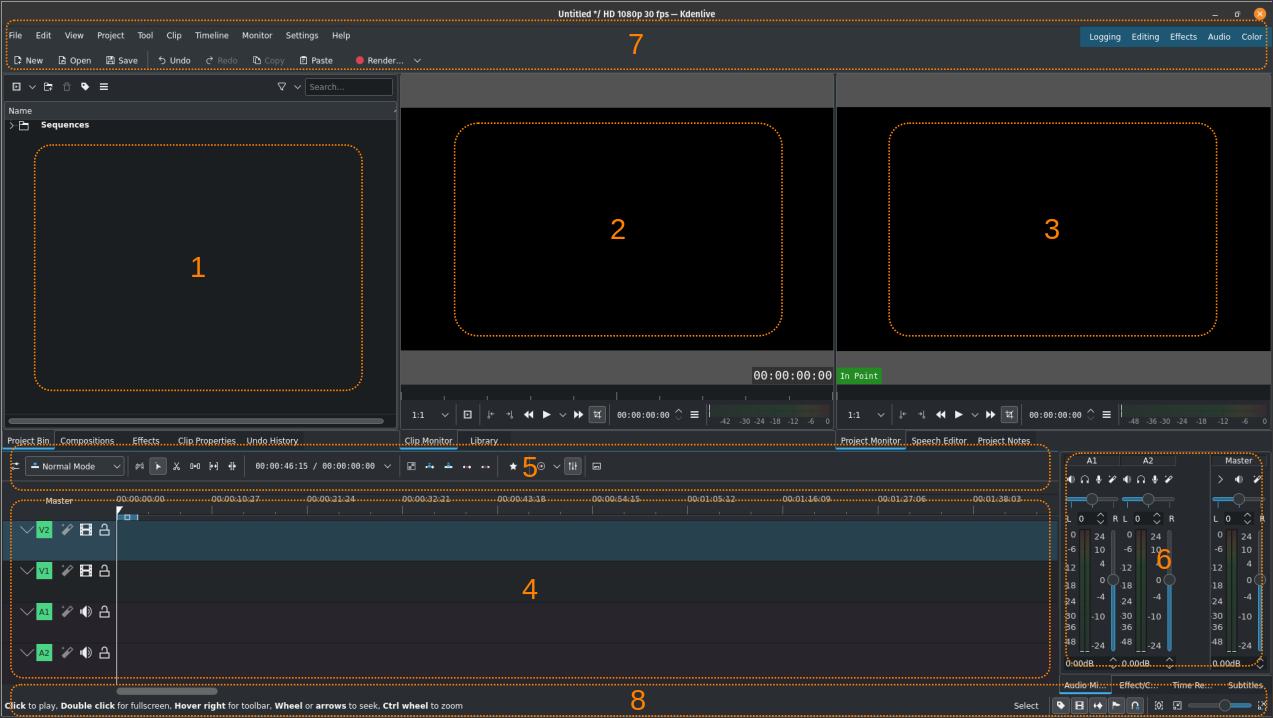
Kdenlives standardarbetsytor (exemplet använder redigeringsvyn; klicka för att förstora)
Här är en snabb påminnelse om de olika panelerna på arbetsytan (se Användargränssnitt). I det här avsnittet fokuserar vi på panel 1 till 4 och panel nr. 6. Panel nr. 5 (tidslinjens verktygsrad) är egentligen inte en panel i sig utan är en del av tidslinjen. Panel 7 och 8 beskrivs mer i detalj i kapitlen Statusrad (nr. 8) och Verktygsrader (nr. 7).
Kdenlive allows you to arrange the predefined five panels as you like by grabbing an empty part where there are no tabs.
Widgets can be rearrange the same way.
Here an example where the layout is arranged in column or rows:
|
|
Kolumner (klicka för att förstora) |
Rader (klicka för att förstora) |
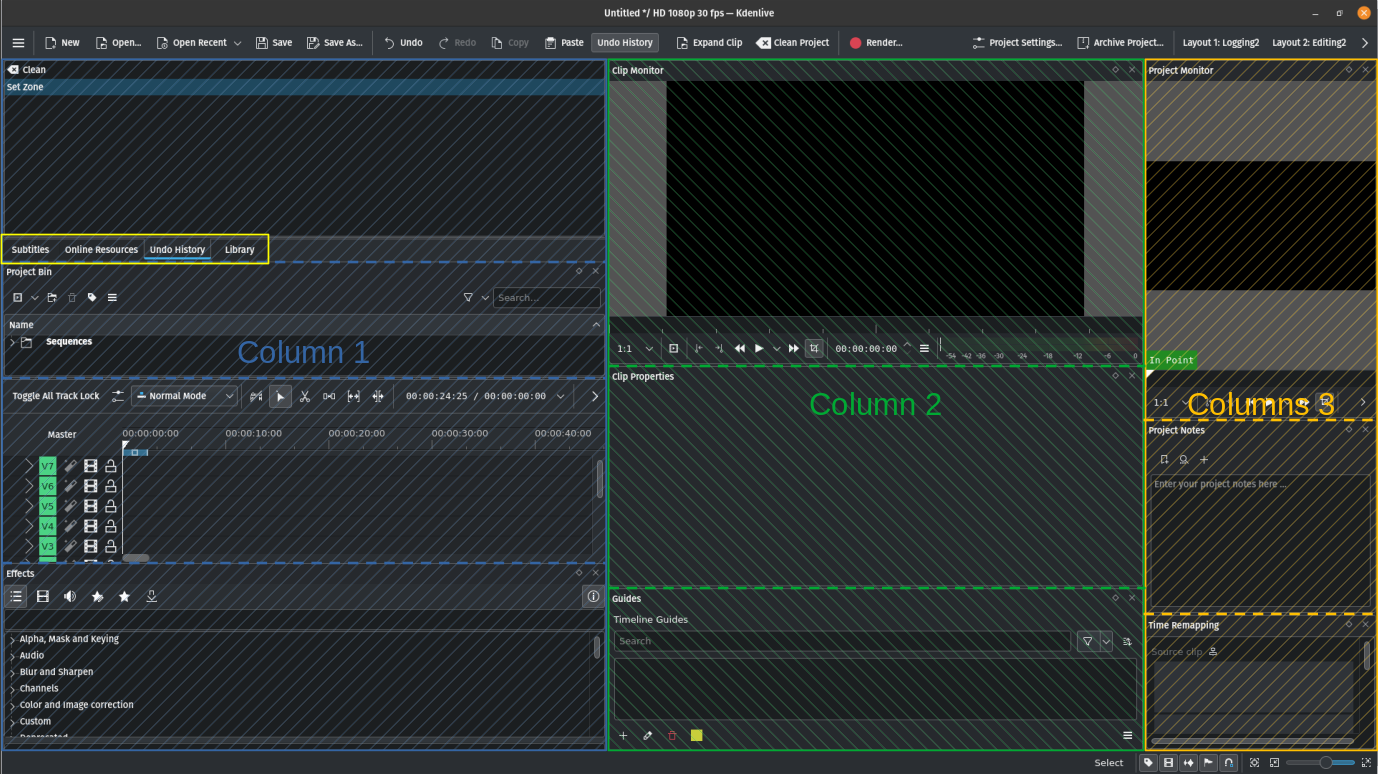
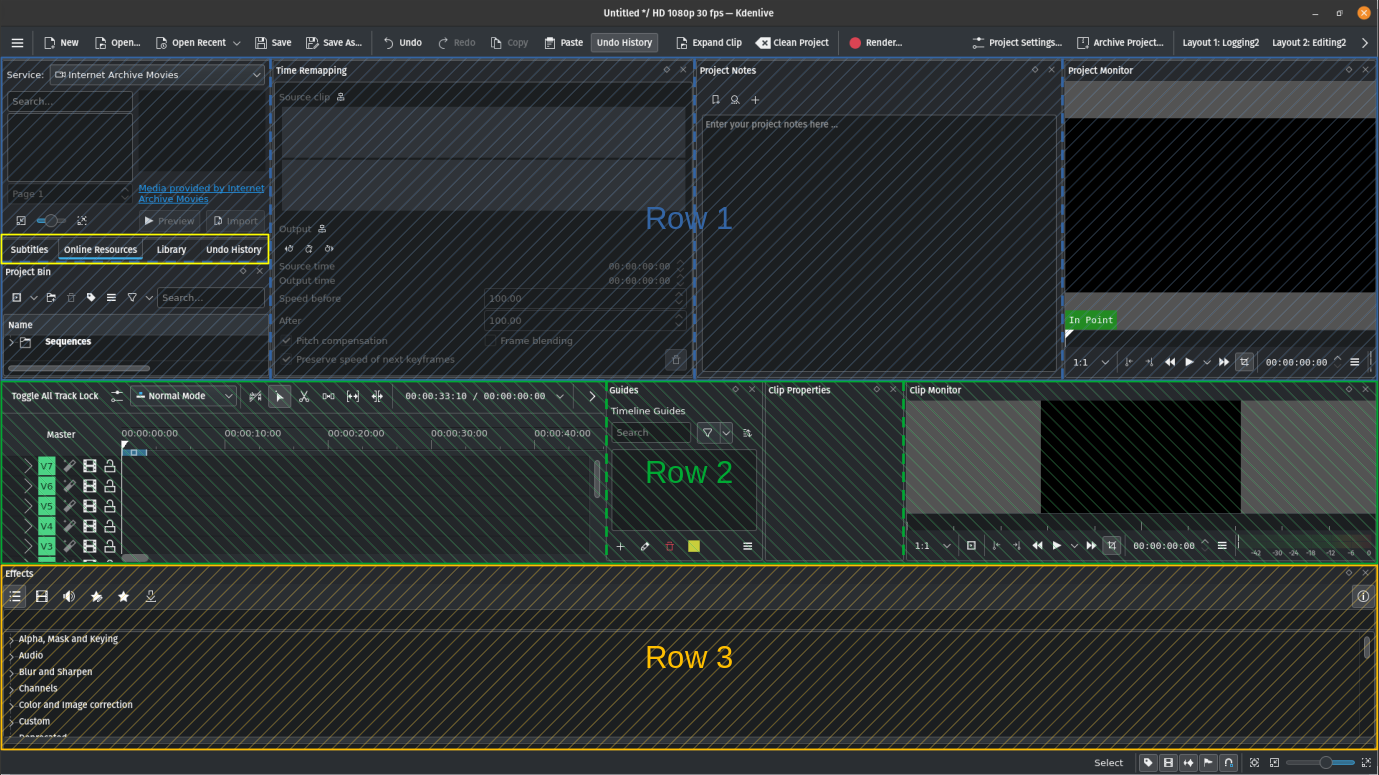
You can have widgets as tabs (see the yellow box in the screenshots above) regardless of the dock orientation setting.
Rearranged layouts are stored in the project file when saving.
Lägga till grafiska komponenter
You can add widgets (e.g. Bibliotek, Projektanteckningar) by enabling them in . Likewise, disable them by taking off the check mark right next to their entry in the menu.
Flytta grafiska komponenter
Man flyttar en grafisk komponent genom att ta tag i fliken eller titelraden och flytta den till en ny position. Det är möjligt att flytta komponenten till en annan position inom samma panel och därigenom helt enkelt ändra flikarnas ordning.
A widget can also be moved to a new panel, to its own (new) column or row, or undocked as a floating window. Put a floating window on a second screen on which you can dock other widgets to create a new panel.
Observera
In order to move widgets without a tab they must have title bars. You can switch them on and off in .
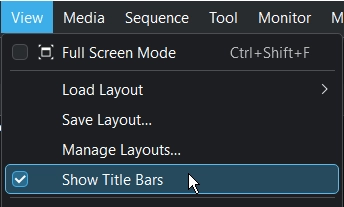
Make sure Show Title Bars is enabled
This shows you the title bar of each widgets when un-docked

Title bar of the timeline view
On the title bar are 3 icons
Auto-hide. Let’s you save space by hiding window until needed.
Undock window. The window get undocked and ready for moving.
Close. The window get closed and can be re-opened in
In the example below the Clip and Project Monitor widgets are being undocked and turned into floating windows:
Flytta klippskärmen och projektskärmen till sina egna oberoende fönster (koppla loss)
The Kdenlive layout reacts to your dragging of the widget and you need to pay close attention which docking indicator change color when you move over them.
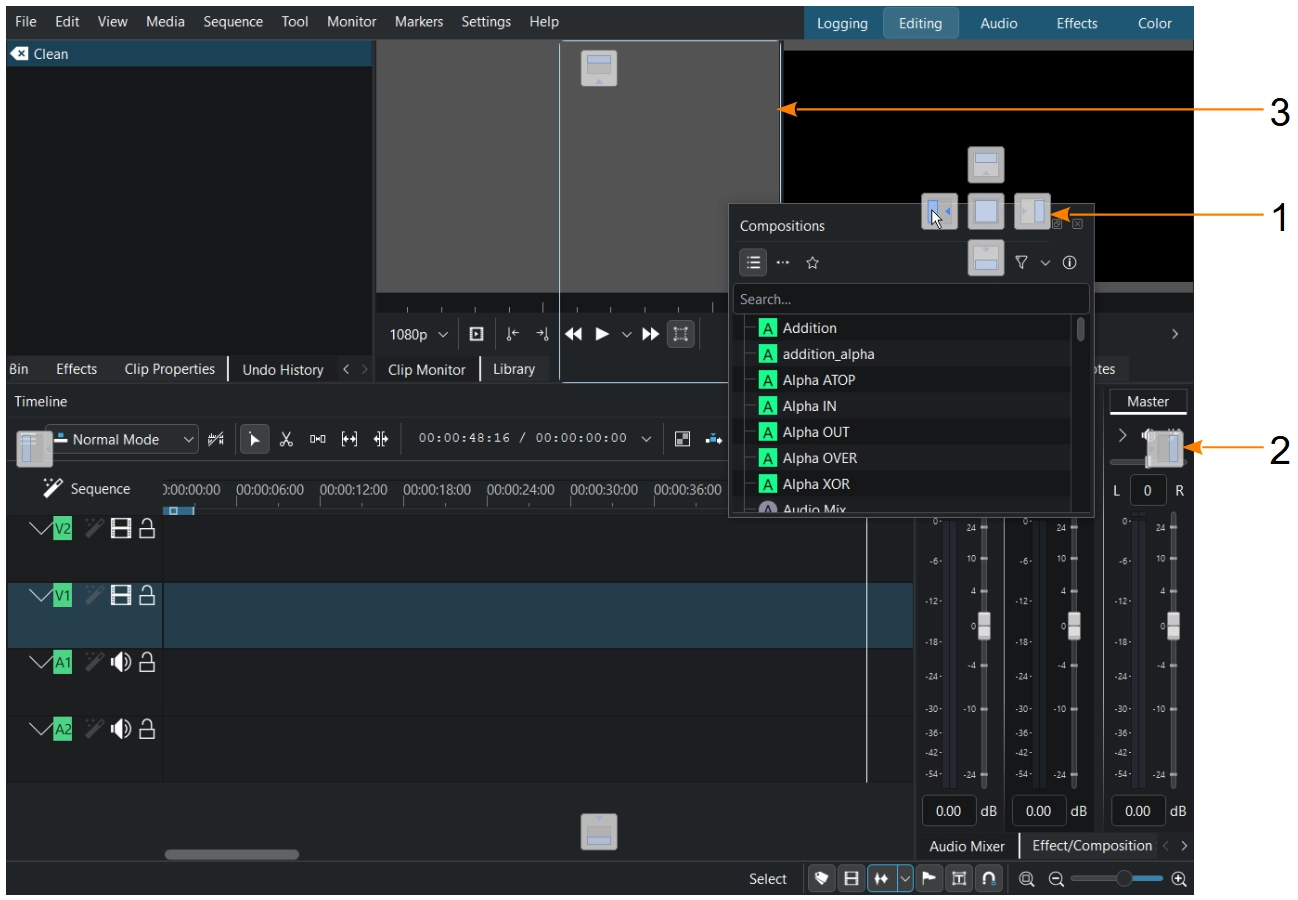
Docking indicators when a widget is undocked and hovered over a panel
- 1:
Panel docking indicator. Docking inside the panel: top, right, bottom, left or center. In this example it would be placed to the left side showed by the blue indicator.
- 2:
Edge docking indicator. Docking outside of a panel: top, right, bottom, left. Here a window can be auto-hided
- 3:
Blue indicator where the widget would land if you release it
Tips
När man försöker flytta ett fritt fönster till en ny position kanske Kdenlive tror att man vill flytta det till en panel eller skapa en ny rad eller kolumn. Det rekommenderas att använda de vanliga storleksgreppen i fönsterhanteraren för att därefter justera de övre vänstra och nedre högra hörnen.
Auto-hide
Space Saving: Displays more content by hiding panels until needed.
Click the pin icon (first icon in the title bar) to enable the auto-hide feature which lets you pin dockable window (widgets) to the edges (top, right, bottom, left; See point 2 above) of the main window, making them disappear into a sidebar and reappear as overlays when clicked.
Restoring: Click the pin icon again (now on the overlay) to restore it to its original docked position.
Ändra storlek grafiska komponenter
Man kan bara ändra storlek på kolumnen eller raden komponenten är dockad i. Håll muspekaren över komponentens kant på vardera sidan så ändras muspekaren till pekaren för att ändra storlek. Dra nu kanten tills önskad storlek uppnås. Man kan bara dra horisontellt eller vertikalt individuellt.
Spara layouten
Once you have arranged the widgets to your liking you can save the layout via . A dialog windows opens where you can name the new layout. If you enter the name of an existing layout a warning will appear but you can overwrite the layout.
The current layout is saved within the Kdenlive project file.
Det är god praxis och till stor hjälp att ha olika layouter för efterproduktionens olika uppgifter. Se kapitlet Arbetsytans layouter för mer information.
Läsa in en layout
Man kan läsa in en layout genom att antingen välja den i , eller genom att klicka på den önskade som listas i menyraden (hörnet längst upp till höger på skärmen).
Hantera layouter
Kdenlive visar bara åtta sparade layouter när man väljer , och i menyraden visas bara fyra. Men man kan ha många fler.
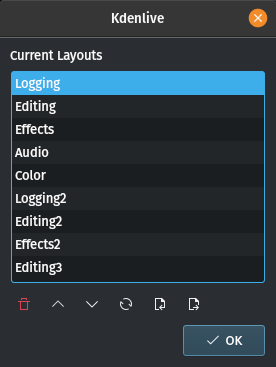
Lista över tillgängliga layouter
Att välja öppnar fönstret där man kan hantera tillgängliga layouter för arbetsytan.
Använd  och
och  för att flytta den markerade layouten uppåt eller neråt. De åtta första i listan är tillgängliga från menyn.
Klicka på  för att uppdatera listan. Använd
  för att ta bort den markerade posten.
Man kan exportera  och importera
  sparade layouter.