CMYK Adjust
This how-to is about applying CMYK correction to specific color ranges using the CMYK Adjust effect.
Color Correction is an important process when dealing with footage that was shot with different equipment or in different lighting conditions. See also the how-to about white balance. CMYK Adjust is an interesting filter for some special tasks in color correction.
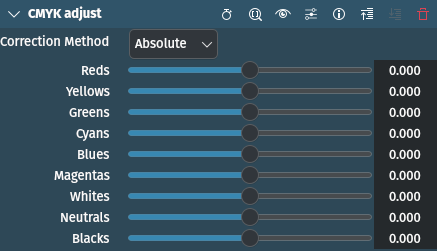
Naturally, digital video footage uses the RGB color space. But CMYK Adjust in addition has parameters (or sliders) for Cyans, Magentas, Yellows, and Whites, Neutrals and Blacks.

CMYK Adjust effect
The effect works by changing the color intensity (or saturation) of the color individually with the respective slider - all the other colors are not affected. For example, you can increase or decrease the intensity (or saturation) of the color red using the slider Reds without changing other pixels (i.e. those parts of the image that are not red). Most important is that neutral color tones remain unchanged. So this effect/filter is very useful for reducing redishness in skin tones.
Using the Whites slider you can make bright color tones more redish (move the color tone more toward red-magenta) or blueish (move the color tone more towards blue-cyan). The same applies for Neutrals to change the mid-tones and Blacks for the dark tones.
The effect works like a mask for a specific color tone but limited to one of the six basic colors. The advantage is that you do not have to create a precise selection and that you can directly change the intensity (saturation).
注意
When moving the Reds, Yellows or Magentas slider to the right (increases the value) the intensity (saturation) decreases; moving it to the left (decreasing the value) increases the intensity (saturation). All other sliders work as one might expect: higher values increase intensity (saturation).