使用者介面
此章節介紹 Kdenlive 的使用者介面 (UI),解釋各個元素、圖示與按鈕,以及選單項目。此章節也介紹能加快您的編輯作業的預設鍵盤快捷鍵,以及如何自訂版面配置使其符合您的工作流程。
開啟 Kdenlive 後視窗會如同下圖一般。Kdenlive 的使用者介面在不同平台上是一致的,因此介面的介紹適用於任何平台,不論您是使用 Linux、Windows 還是 MacOS。當然圖示跟文字還是會有不一樣的地方。
介面分為四大部分:
[A] The Workspace with the various widgets that can be arranged to your needs. See the 「檢視」選單 and 作業空間版面配置 for more details.
[D] 螢幕底部的狀態列。
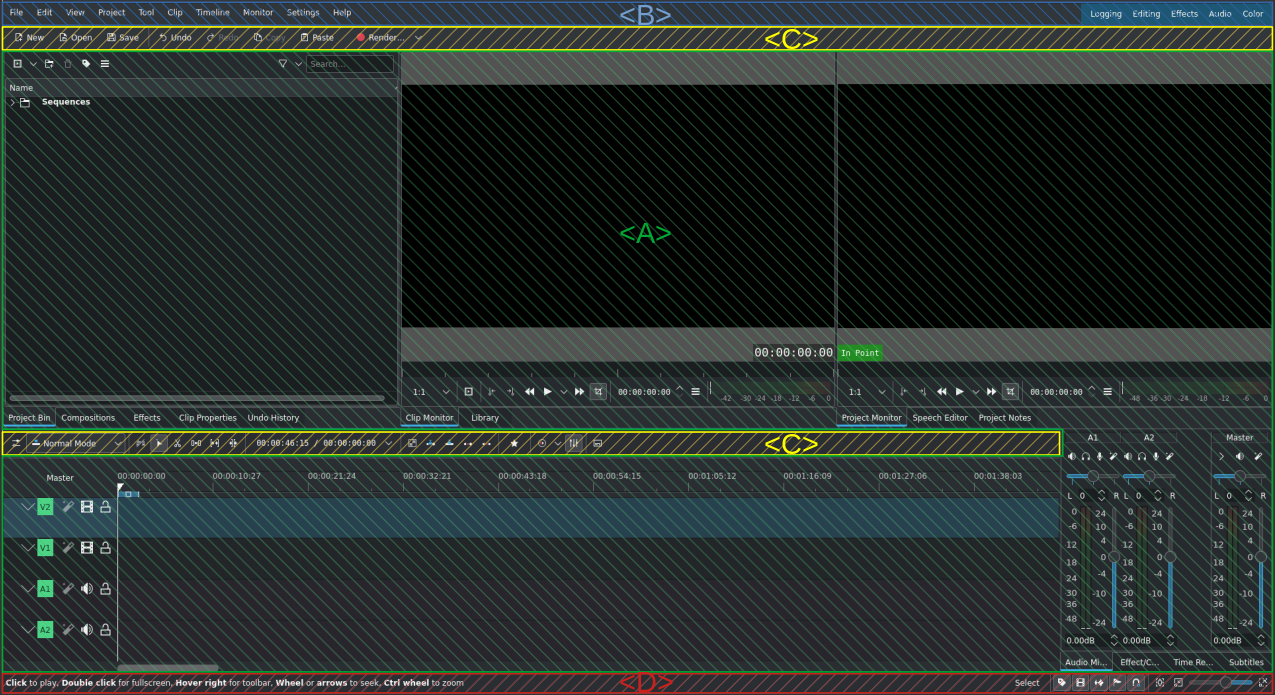
Kdenlive 的預設螢幕版面配置(此範例使用編輯檢視):選單列(藍色)、工具列(黃色)、作業空間(綠色)以及狀態列(紅色)。
作業空間
作業空間運作方式符合影片編輯的作業流程,但也可以調整以符合您個人的風格與偏好。Kdenlive 預設以「編輯」作業空間開啟,它長這樣:
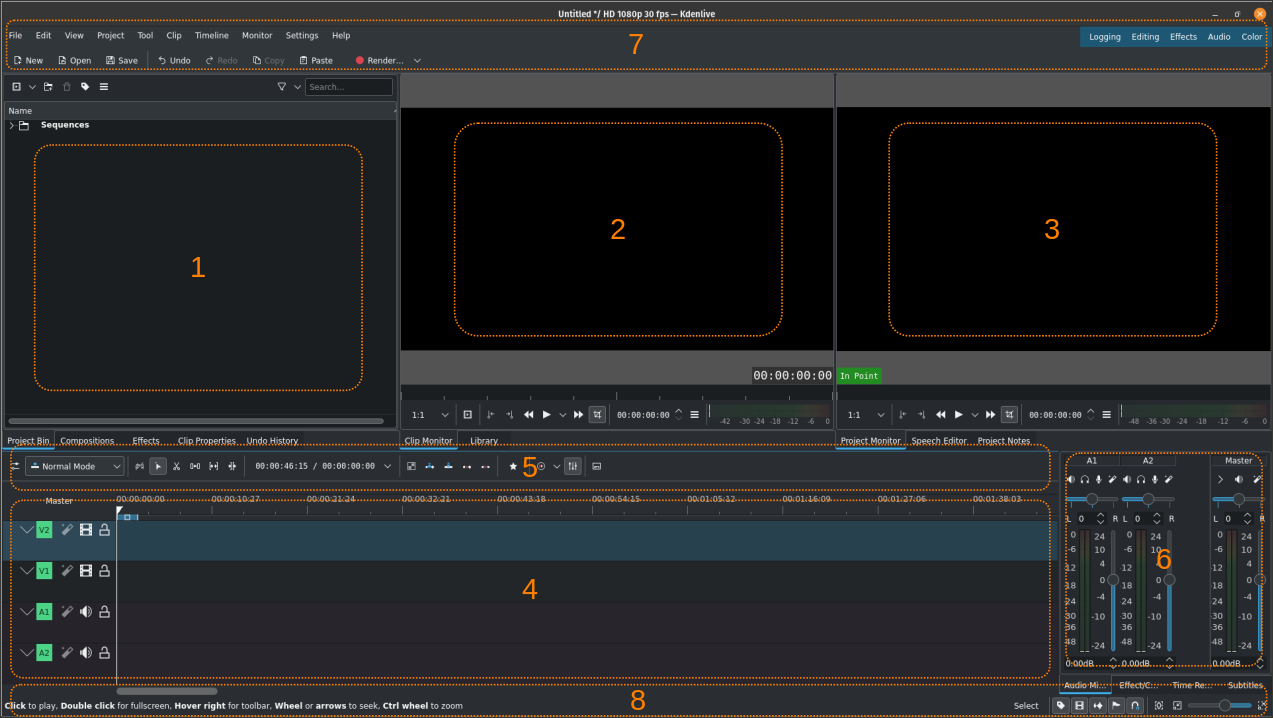
Kdenlive 的預設作業空間(範例使用「編輯」檢視)
- [1] 專案素材庫、資料庫:
This is where you keep your source files (video clips, images and image sequences, title and color clips, animations, audio files). In this screenshot the widgets for Undo History, Compositions, and Effects have been added to this section.
- [2] 素材預覽視窗:
This is where the clip selected in the project bin is displayed. In this screenshot the widget for Library has been added to this section. See the chapter 素材預覽視窗 for more details.
- [3] 專案預覽視窗:
This is where the content of the timeline is being displayed with all effects and compositions applied. In this screenshot the widgets for Speech Editor and Project Notes have been added to this section. See the chapter 專案預覽視窗 for more details.
- [4] 時間軸:
Most of the action is taking place in the timeline. Here you put your sources in the order in which they will appear in the final video, make your edits (cuts and trimmings), apply effects, add compositions and transitions, and add audio and sound tracks. See the chapter 時間軸 for more details.
- [5] 時間軸工具列:
This is where you find all the tools you need to edit your video project. See the chapter 時間軸工具列 for more details.
- [6] 混音器:
This section holds the audio mixing panel where you control the volume and pan of the various audio tracks and the master.
- [7] 選單列、工具列:
At the top of the screen you have access to the menu (see Menubar and Menu for more details), the 作業空間版面配置 and the 主工具列. The menu bar can be switched on and off with Ctrl+M.
- [8] 狀態列:
Kdenlive displays context-specific information or hints on the left-hand side of the status bar depending on where you hover the mouse pointer. In the middle you see the names of the clips you hover over in the timeline. This is also where error messages come up when working with clips in the timeline. On the right-hand side Kdenlive displays the currently selected timeline edit tool and the icons to toggle various timeline features. See the sections about status bar icons and the status bar for more details.