Customizing the Interface
The user interface model allows you to freely adjust the different panels to support your workflow. You can add widgets to and delete them from the different panels, rearrange them, change the size of the panels, and save the workspace layout so you can have different layouts with different widgets depending on the stage of your post-production work. For example, you can have different workspace layouts for video editing, color correction and sound editing. Kdenlive comes with four different workspace layouts already defined. See the 作業空間版面配置 chapter.
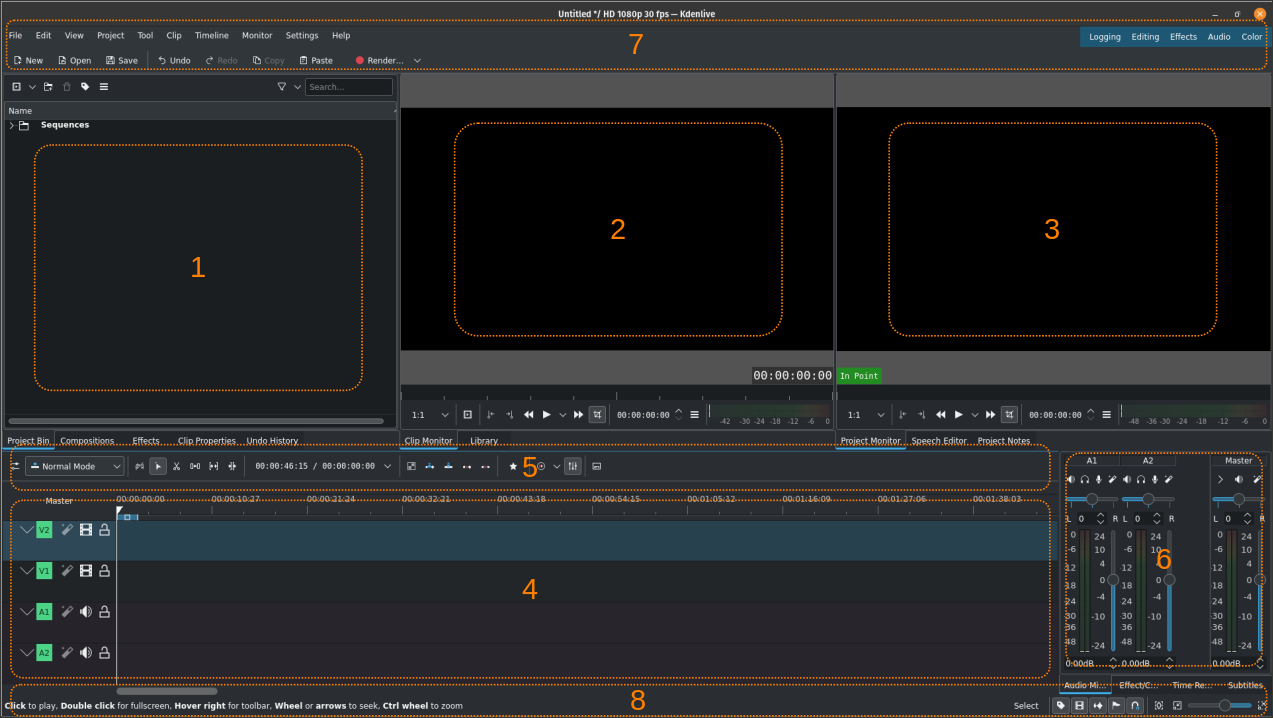
Kdenlive’s default workspaces (example uses the Editing view; click to enlarge)
Here is a quick reminder of the different workspace panels (see 使用者介面). In this section we want to focus on the panels 1 thru 4 and panel #6. Panel #5 (timeline toolbar) is not really a panel by itself but is part of the timeline. Panels 7 and 8 are described in more detail in the 狀態列 (#8) and 工具列 (#7) chapters.
Kdenlive allows you to arrange the predefined five panels as you like by grabbing an empty part where there are no tabs.
Widgets can be rearrange the same way.
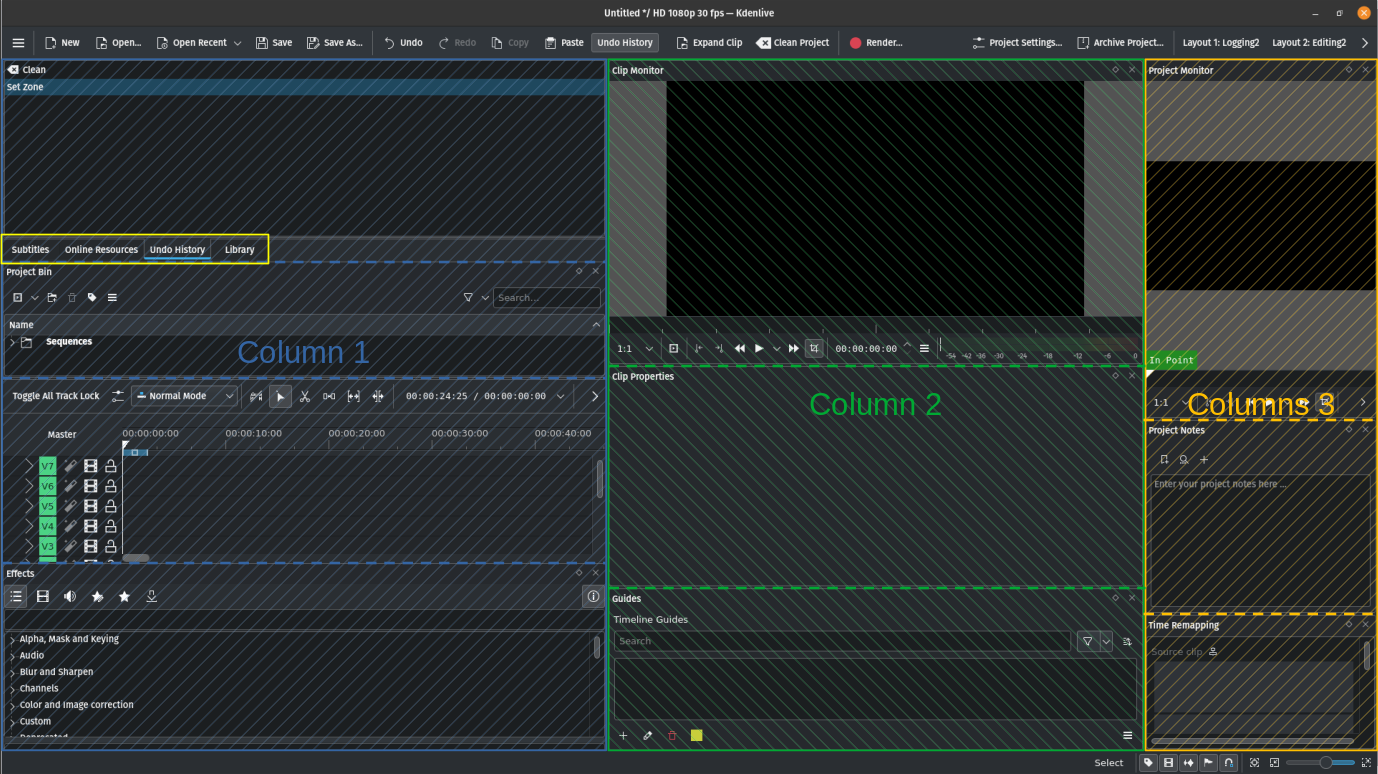
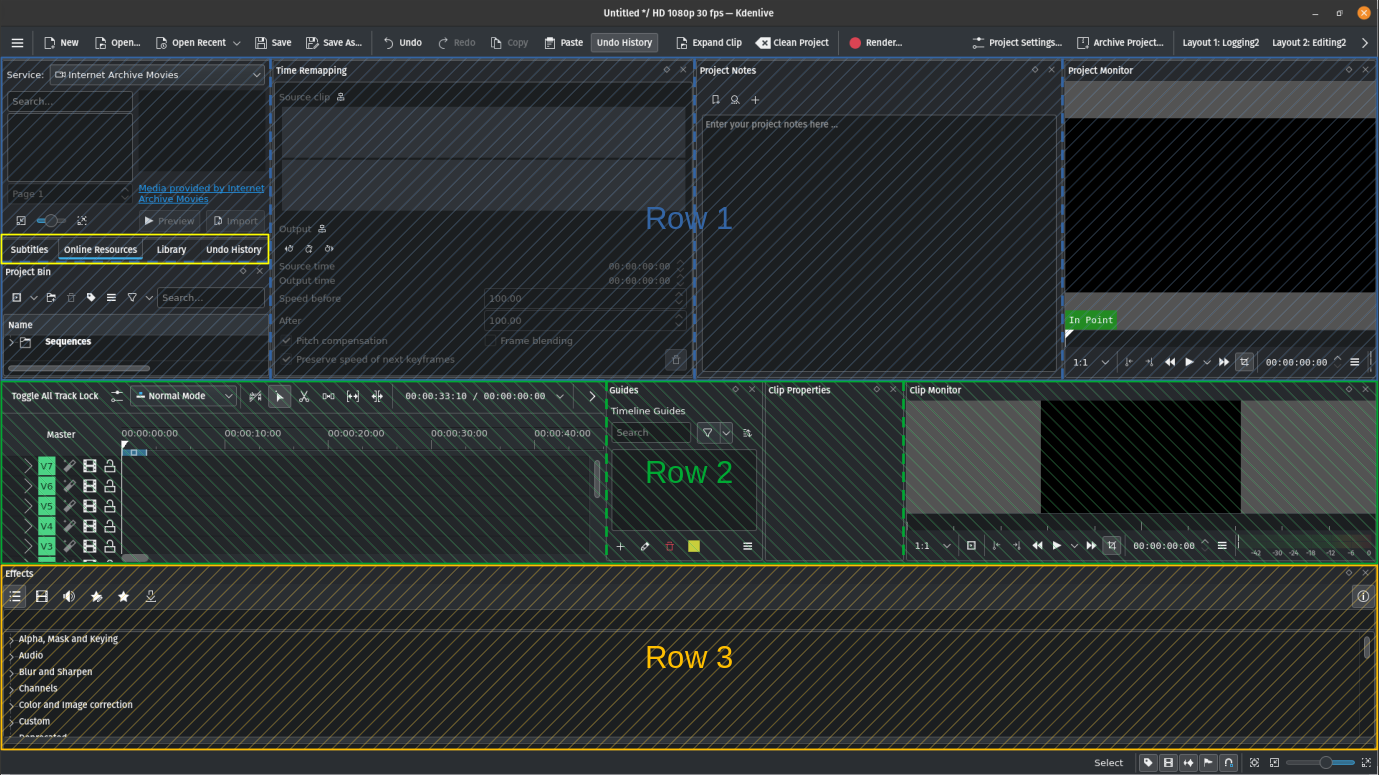
Here an example where the layout is arranged in column or rows:
|
|
Columns (click to enlarge) |
Rows (click to enlarge) |
You can have widgets as tabs (see the yellow box in the screenshots above) regardless of the dock orientation setting.
Rearranged layouts are stored in the project file when saving.
Adding Widgets
You can add widgets (e.g. 圖書館, 專案備註) by enabling them in . Likewise, disable them by taking off the check mark right next to their entry in the menu.
Moving Widgets
You move a widget by grabbing the tab or the title bar and moving it to a new position. It is possible to move the widget to a different position within the same panel thereby simply changing the sequence of the tabs.
A widget can also be moved to a new panel, to its own (new) column or row, or undocked as a floating window. Put a floating window on a second screen on which you can dock other widgets to create a new panel.
備註
In order to move widgets without a tab they must have title bars. You can switch them on and off in .

Make sure Show Title Bars is enabled
This shows you the title bar of each widgets when un-docked

Title bar of the timeline view
On the title bar are 3 icons
Auto-hide. Let’s you save space by hiding window until needed.
Undock window. The window get undocked and ready for moving.
Close. The window get closed and can be re-opened in
In the example below the Clip and Project Monitor widgets are being undocked and turned into floating windows:
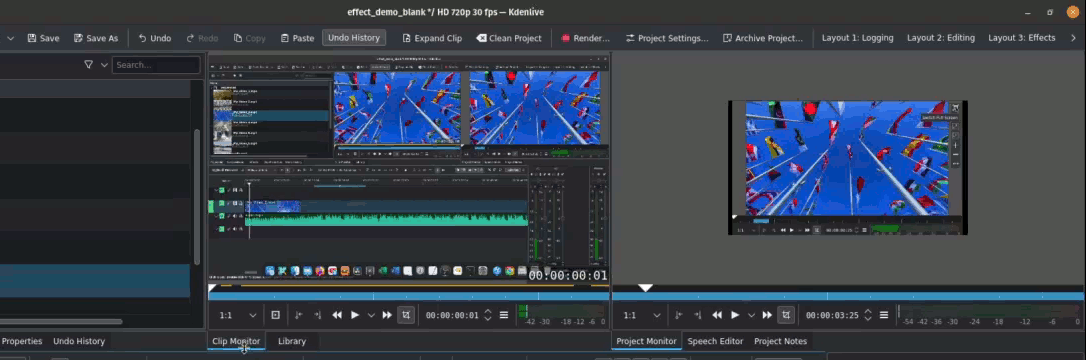
Moving Clip and Project Monitor to their own independent windows (undocking)
The Kdenlive layout reacts to your dragging of the widget and you need to pay close attention which docking indicator change color when you move over them.

Docking indicators when a widget is undocked and hovered over a panel
- 1:
Panel docking indicator. Docking inside the panel: top, right, bottom, left or center. In this example it would be placed to the left side showed by the blue indicator.
- 2:
Edge docking indicator. Docking outside of a panel: top, right, bottom, left. Here a window can be auto-hided
- 3:
Blue indicator where the widget would land if you release it
小訣竅
When trying to move a floating window to a new position Kdenlive may think you want to move it to a panel or create a new row or column. It is recommended to use the standard size handles of the window manager to adjust the top left and bottom right corners accordingly.
Auto-hide

Space Saving: Displays more content by hiding panels until needed.
Click the pin icon (first icon in the title bar) to enable the auto-hide feature which lets you pin dockable window (widgets) to the edges (top, right, bottom, left; See point 2 above) of the main window, making them disappear into a sidebar and reappear as overlays when clicked.
Restoring: Click the pin icon again (now on the overlay) to restore it to its original docked position.
Resizing Widgets
You can only resize the column or row the widget is docked in. Hover over the widget’s edge on either side and the mouse pointer will change into the re-size pointer. Now drag the edge until the desired size is reached. You can only drag horizontally or vertically individually.
Saving the Layout
Once you have arranged the widgets to your liking you can save the layout via . A dialog windows opens where you can name the new layout. If you enter the name of an existing layout a warning will appear but you can overwrite the layout.
The current layout is saved within the Kdenlive project file.
It is good practice and very helpful to have different layouts for the different tasks of post-production. See the 作業空間版面配置 chapter for more details.
載入佈局
You can load a layout either by selecting it from , or by clicking on the desired one listed in the menu bar (top-right hand corner of the screen).
Managing Layouts
Kdenlive displays only eight saved layouts when selecting , and in the menu bar only four are displayed. But you can have many more.
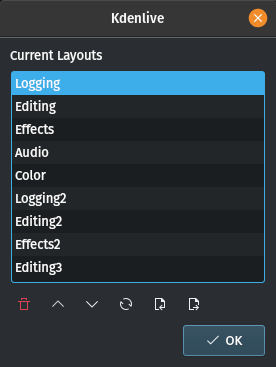
List of available layouts
Selecting opens this window where you can manage the workspace layouts available.
Use  and
and  to move the highlighted layout up and down in the list. The first eight from this list will be available through the menu.
Click on  to refresh the list. Use
  to delete the highlighted entry.
You can export  and import
  saved layouts.