Značky
Markers in the picture below are the yellow flags inside the clip. Not to be confused with timeline markers (red flags in the picture below). Markers are inside the clips and move with the clips.
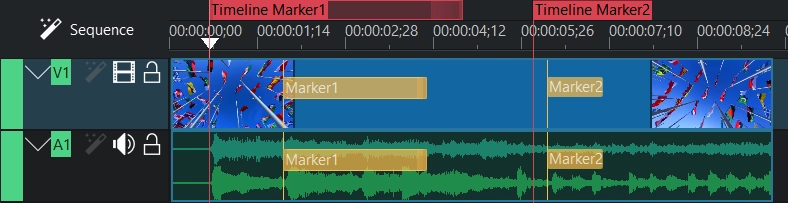
Markers can be used for certain points (Marker2) or ranges (Marker1) in a clip that are important.
Markers are clip related and „fix“ to this clip. When you put the same clip again in the timeline and you change a marker, this marker is changed on both clips simultaneously.
2 ways to add markers
Add markers to your clips via the Monitor klipu. That allows you to preview the clip at the location where you are adding a marker.
Following procedures add a marker at the playhead position (clip monitor, timeline):
Nabídka
Clip monitor: From the main menu choose , Add Marker
Timeline: Click on the clip. From the main menu choose , Add Marker
Clip monitor: Right click on the clip monitor and choose
Timeline: Right click the clip in the timeline and choose . The marker is added at the play-head position.
Klávesnice
Clip monitor: numeric keypad * adds a marker
Timeline: Move the playhead on the desired position on the clip. Click on the clip. Numeric keypad * adds a marker
1 - 0 (number 1 to 0 on the NumPad)
Myš
not possible
Markers With Range
The following two procedures generate markers with a range:
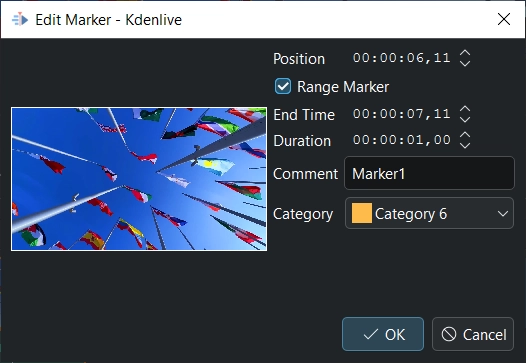
In the Edit Marker window you can enable Range Marker which allows you to determine a Duration of the marker. Default Duration is 1 second.
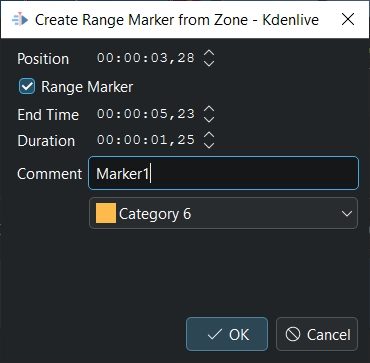
You can create a marker with range from a clip zone.
Výstraha
Make sure you select the desired clip in the project bin.
Define a zone in the clip monitor with I and O. Then you can:
Right click on the zone and choose Create Marker from Zone. This opens a window (see above) and you can adjust all settings.
Right click on the zone and choose Create Marker from Zone Quickly. This creates a marker with the text Zone Marker in the currently active category.
Now the advantage is, that you can select this zone marker in the markers windows and drag it to the timeline. In this way you can mark interesting parts of a clip with zone marker instead of Insert Zone in Project Bin and creating sub clips.
Managing categories and markers
Kategorie
Markers using the same categories as Timeline Markers. More details about Kategorie.
Markers in the clip monitor
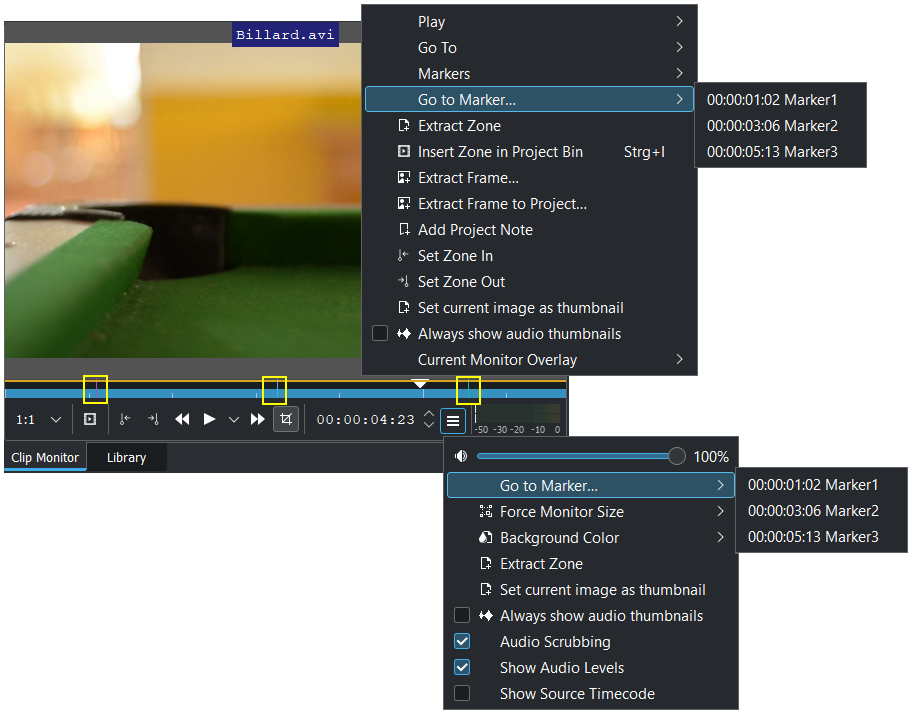
Once markers are put in your clip, you can access them in the Monitor klipu by right-clicking and selecting or by the hamburger menu (see picture). Also note how the markers appear as vertical lines according the category color you have chosen (see yellow highlighted regions in the picture). You can turn on the display of the marker comments in the timeline too (see Úpravy).
Markers View
Markers are using the same window as timeline marker. Yellow markings show the differences compared to the guide view.
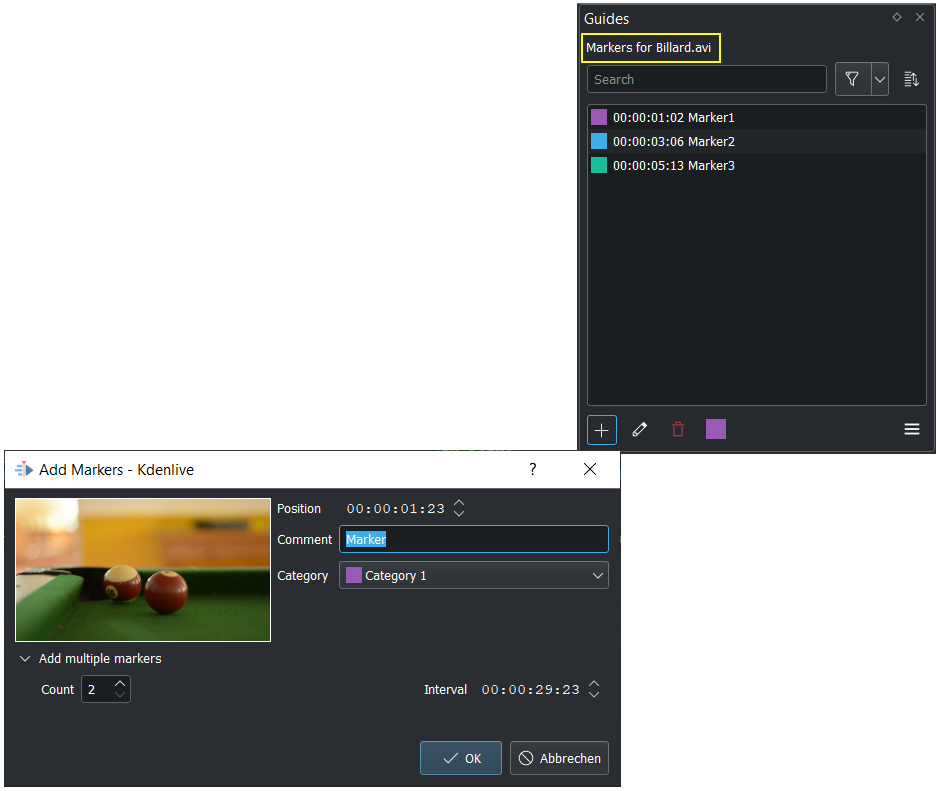
opens the markers window where you can manage your markers.
To show clip markers in this view you have to:
Project bin: click on the desired clip and the markers of the clip show up in the window.
On the timeline: right click on the desired clip and choose and the markers of this clip show up in the window.
The complete description of the view see Markers View.
You can put a comment in the marker and make the comment display by choosing Úpravy in the menu or by clicking on the Úpravy button.
Export markers as chapters description
You can export markers of a single clip as chapters like guides. You have to select a clip before you export.
More details see Export Timeline Markers as Chapters Description
Move and Edit Markers
A double-click on a marker text in the timeline opens the edit window (besides the possibility in markers view)
Markers can only be moved by changing the Position in the edit window.
Comment text and Category can be changed in the edit window.