Efekty a filtry
Effects and Filters are very important components in video editing. In Kdenlive, effects and filters are provided by frei0r or avfilter (Kdenlive does not have built-in effects or filters of its own).
Effects are used to change the appearance of or manipulate a clip. For example, the Transform effect allows to scale and move the clip; the Brightness effect changes the brightness of the clip; effects in the Alpha, Mask and Keying category provide very specific filters for masking or rotoscoping.
Kdenlive has two groups of effects: Video Effects and Audio Effects.
Je několik způsobů použití efektů:
On the clip in the Project Bin, which makes the effect available in all instances of that clip in the Timeline
On the clip in the Timeline, which makes the effect only applicable for that clip in the Timeline at that point
On the track, which applies the effect to all clips in that particular track
On Master, which applies that effect to all clips in all tracks
Poznámka
Not all effects can be used at the track or Master level nor does it make sense.
Built-in Effects
The built-in effects are disabled by default. So you have to enable it before you can use it.
All built-in effects can be disabled/enabled globally in
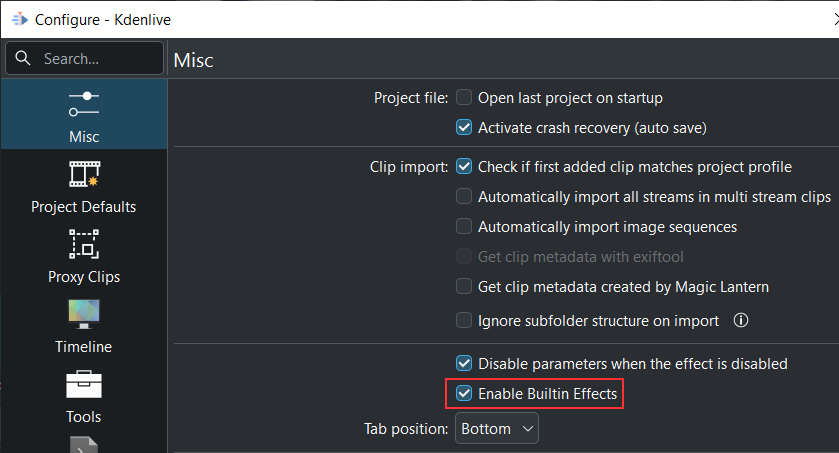
Under Misc you can disable/enable all built-in effects. Default is disabled.
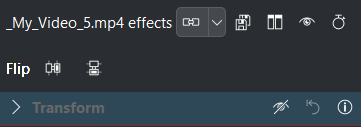
When dragging a clip into the timeline, the Flip and Transform effects are always added to the video part of the clip; for the audio part the Volume effect is added by default.
These are the most used effects which you now have at your fingertips without the need to add them manually.
Built-in effects can be used in four places:
Karta efektů
Make the Effects widget visible in .
The Effects widget has eight control icons that show or hide the different effect categories:
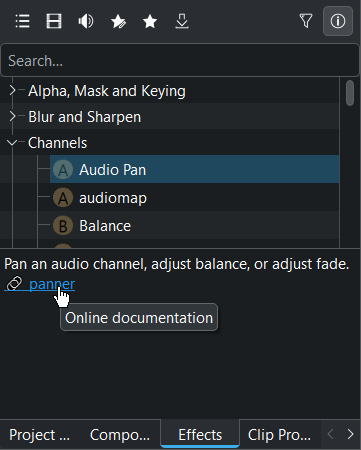
Kdenlive Effects widget as a tab in the Project Bin area
Main effects shows all video and audio effects (default view)
Show all video effects shows all video effect categories only
Show all audio effects shows all audio effects categories only
Show all custom effects shows all effects you have created by saving an effect stack.
Show all favorite items shows all effects that were flagged as a favorite effect. This is the same list that appears when selecting Insert an effect from the right-click menu of a clip in the Timeline, or by clicking the Favorite Effects in the Timeline toolbar.
Download New Effects opens a dialog window where effect templates are listed from the KDE Store
Only show reviewed assets toggles between the effects which are reviewed and tested by the Kdenlive team and not tested effects (still in test phase).
Show 10 bit compatible only it hides assets not compatible with a 10-bit pipeline. Use the 10 Bit category or the NVENC H265 ABR 10 bit codec for rendering.
Show/hide description of effects toggles the information display below the effect list where a short description of what the effect does is displayed when on. Click on the blue effect text opens the online documentation to this effect.
Effect/Composition Stack
This widget is also known as the Properties Tab as it lists all effects applied to the currently selected clip as well as each effect’s settings or properties. If a Composition is selected the widget displays the composition’s settings or properties.
Poznámka
Only Effects can be stacked, Compositions cannot.
Effect/Composition Stack Functions
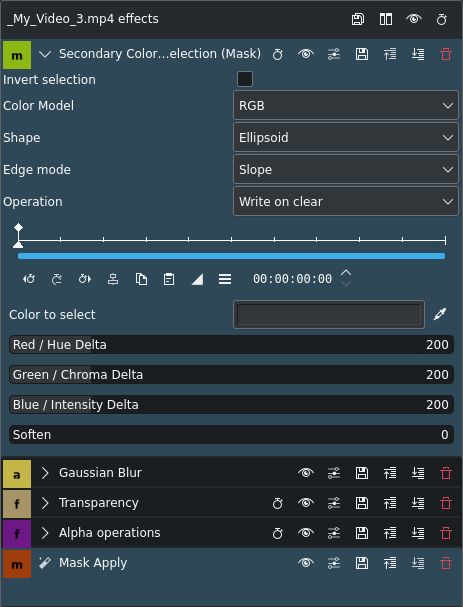
Kdenlive Effect Stack
Save Effect - Opens a dialog window for entering a name for the effect stack under which it will be listed in the Custom effect category and a comment which will be displayed in the information display
Compare Effect - Splits the Preview Monitor vertically to do a side-by-side comparison of the clip with and without effects
Effects enabled - Switches the effect stack on or off. This is equivalent to disabling all effects in the effect stack.
Hide/Show keyframes in Timeline - Switches the display of keyframes in the clip in the Timeline on or off
When an effect is applied to a clip in the timeline you can click on the effect button to enable/disable the clip stack of this clip. When disabled the effect name on the clip is strikeout.
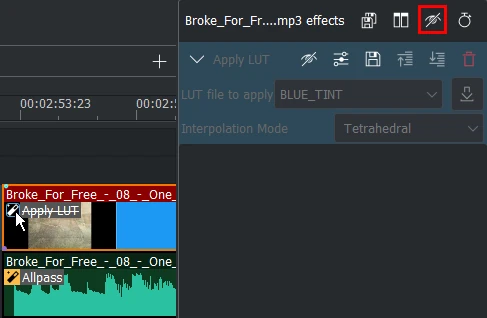
Kdenlive Effect Stack disabled by click on the effect of a clip
Funkce efektu
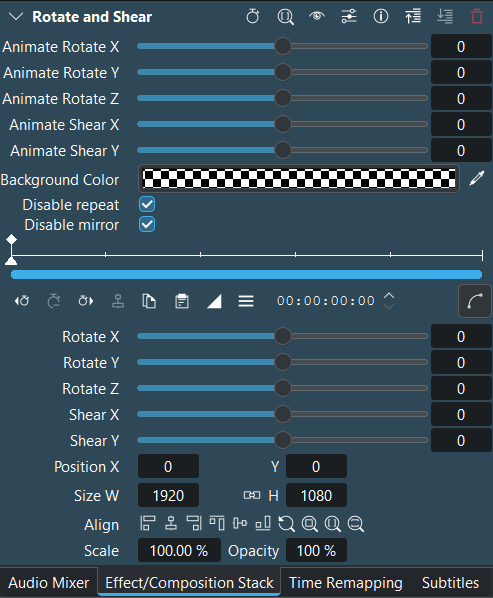
Kdenlive Effect Panel
- 1:
Expand/collapse the effect panel. Shift + click to expand/collapse all effects
Hide/show keyframes - Turns the display of the keyframe ruler off or on
Use effect zone - Toggles the display to show the effect zone
Disable effect - Turns the effect off or on. The effect stays in the stack but is not applied during playback or rendering.
 Presets - Opens a list of advanced options to manage presets for the effect (e.g. reset the effect to its default parameters).
Save effect - Opens a dialog window for entering a name for the effect under which it will be listed in the Custom effect category and a comment which will be displayed in the information display
Open effect documentation in browser - This opens the online documentation to this effect
 Move effect up - Moves the effect up one notch in the list (effect sequence from top to bottom is important)
 Move effect down - Moves the effect down one notch in the list (effect sequence from top to bottom is important)
Delete effect - Removes the effect from the effect stack
arrow up/down goes to the next effect in the list
- 2:
Effect function with check box only
- 3:
Effect function with selector
- 4:
Effect with keyframes
- 5:
Effect values and action button (
).
The tooltip Support basic math expression shows if the following basic math functions are possible: + - * / ( ). It doesn’t follow standard order of operations: multiplication (×) and division (÷) must be performed before addition (+) and subtraction (-). For standard order of operations you have to use parentheses ( ).
The tooltip use „%…“ to reference other spinbox’s value shows which other parameter you can use in the formula: positions, size, scale, opacity, number of value field (use %x %y %w %h %s %o %1-n). If an effect has several fields with the same type of value, it shows a number like %3. You can add a basic math to that link like: %y*2
If an effect has a timecode field, you can add or subtract time by starting with + or -. The format is [+/-]hh:mm:ss:ff. You can add time in short form:
1:: adds/subtracts 1 hour 1:00:00:00
2: adds/subtracts 2 minutes 00:02:00:00
12. adds/subtracts 12 seconds 00:00:12:00
9 adds/subtracts 9 frames 00:00:00:09
2:.9 adds/subtracts 2 minutes and 9 frames 00:02:00:09
Reset value to default by clicking with the MMB [3] on the slider or value.
Applying an Effect
Where to apply an effect
An effect can be applied at four different levels of your project:
On a clip in the timeline: it will affect only this clip
On an clip in the bin: it will affect all the occurrences of this clip in the timeline
On a track: it will affect all the clips on this track
On the Master: it will affect your global output
How to apply an effect
For applying an effect to a clip in the Project Bin or in the Timeline, you can choose one from the Effects Tab and drag it onto the clip.
You can also double-click on an effect in the Effects Tab which adds the effect to the clip in the Project Bin which appears in the clip monitor. In the Timeline, it adds the effect to the clips which are selected. So you can apply an effect to several clips at once in the timeline.
Another method is to use the Favorite Effect icon in the Timeline toolbar and select the effect from there (you add an effect to the favorite effects by right-click on the effect in the Effects Tab and select Add to favorites).
Alternatively, you can use to select an effect from the various categories and add it to the selected clip(s) in the Timeline.
And last but not least you can copy effects with all their settings from any clip (Timeline or Project Bin) and paste them to other clips.
For applying an effect to a track, see Track Effect.
For applying an effect to the Master, see Master Effect.
Poznámka
Effects are always added at the bottom of the effect stack, and since the effect order is important, can be re-arranged.
Keyframes in Effects
Many effects use the concept of „Keyframes“. Keyframes are user-defined points in your clip where you want an effect to start, stop or change. You can set the parameters for your effects to different values at different keyframes and Kdenlive will then gradually change the parameters between the two keyframes so that by the time the video has arrived at the next keyframe it will have adjusted the parameter to match that keyframe. It interpolates between keyframes.
Keyframes types, interpolation
Select the keyframe interpolation icon for selecting the keyframe type. See Rychlý start for an example on keyframing the RGB adjustment effect.
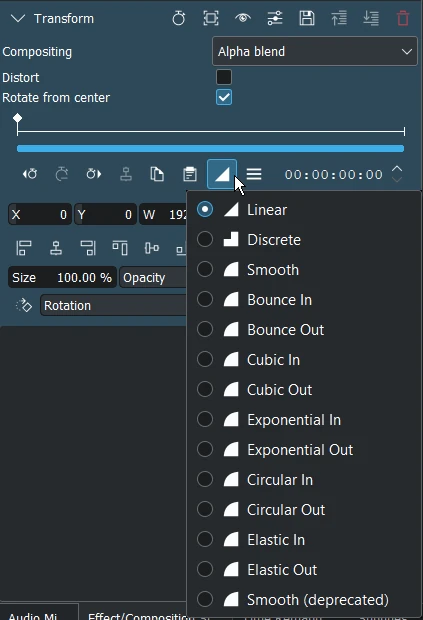
Kdenlive keyframe types
The first three keyframes are: Linear, Discrete and Smooth (Centripetal Catmull-Rom spline interpolation). This are standard keyframes. More details about keyframes are here.
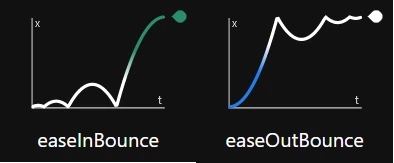
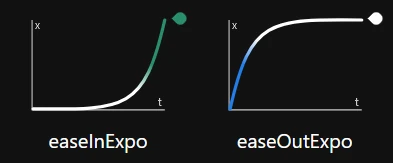
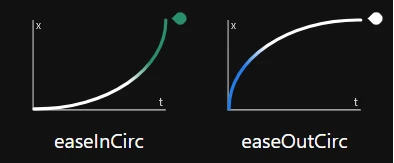
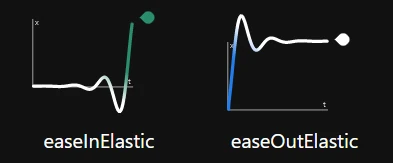
The next ten keyframes are easing keyframes which calculations are based on Robert Penners equations[2].
Objects in real life don’t just start and stop instantly, and almost never move at a constant speed. When we open a drawer, we first move it quickly, and slow it down as it comes out. Drop something on the floor, and it will first accelerate downwards, and then bounce back up after hitting the floor.
Easing keyframes: The left end is the start of the movement, and the segments in blue and green represent faster movement.

Smooth (deprecated): Is the smooth Catmull-Rom spline interpolation keyframe before Kdenlive 24.02.
Keyframe ruler
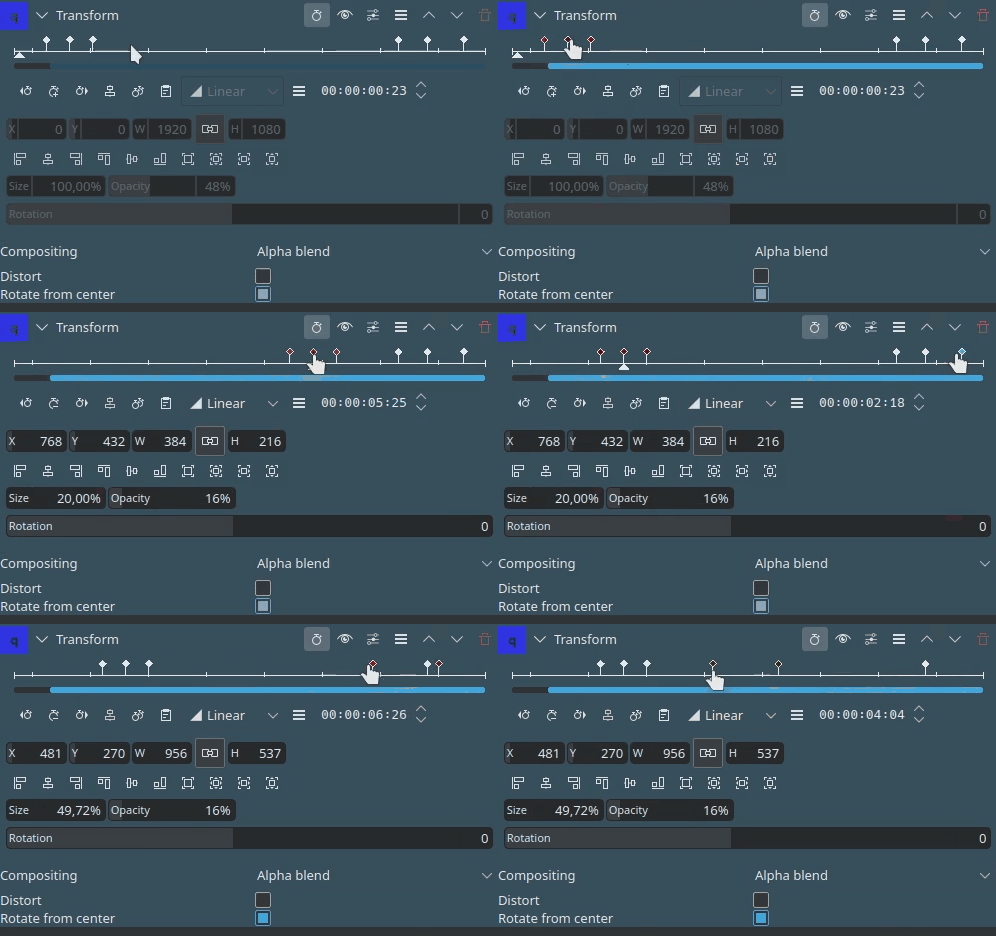
The keyframe ruler has zoom bars which makes adjusting keyframes a lot easier if the clip’s duration is relatively long and the effect stack widget is too narrow to display all keyframes nicely spaced.
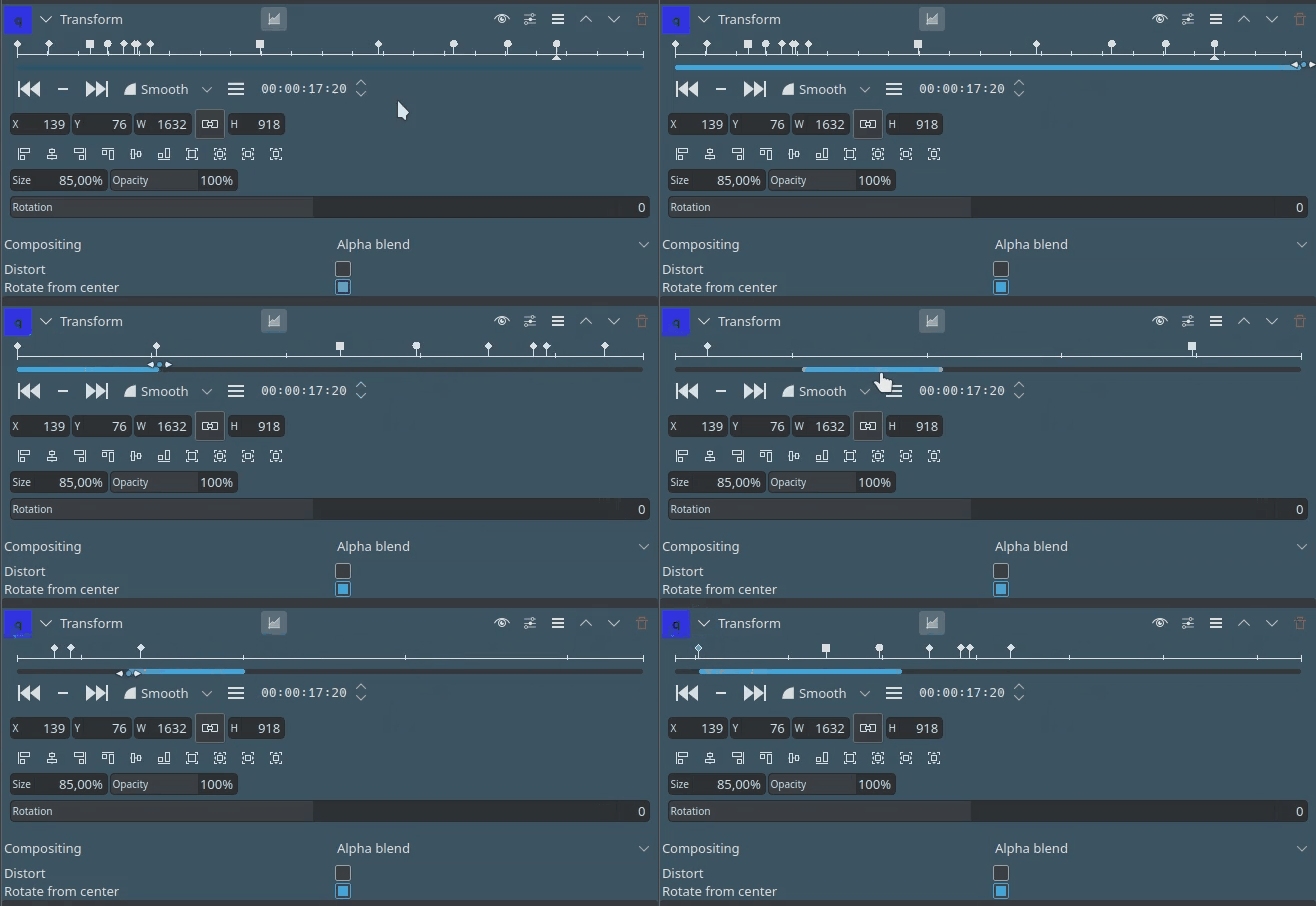

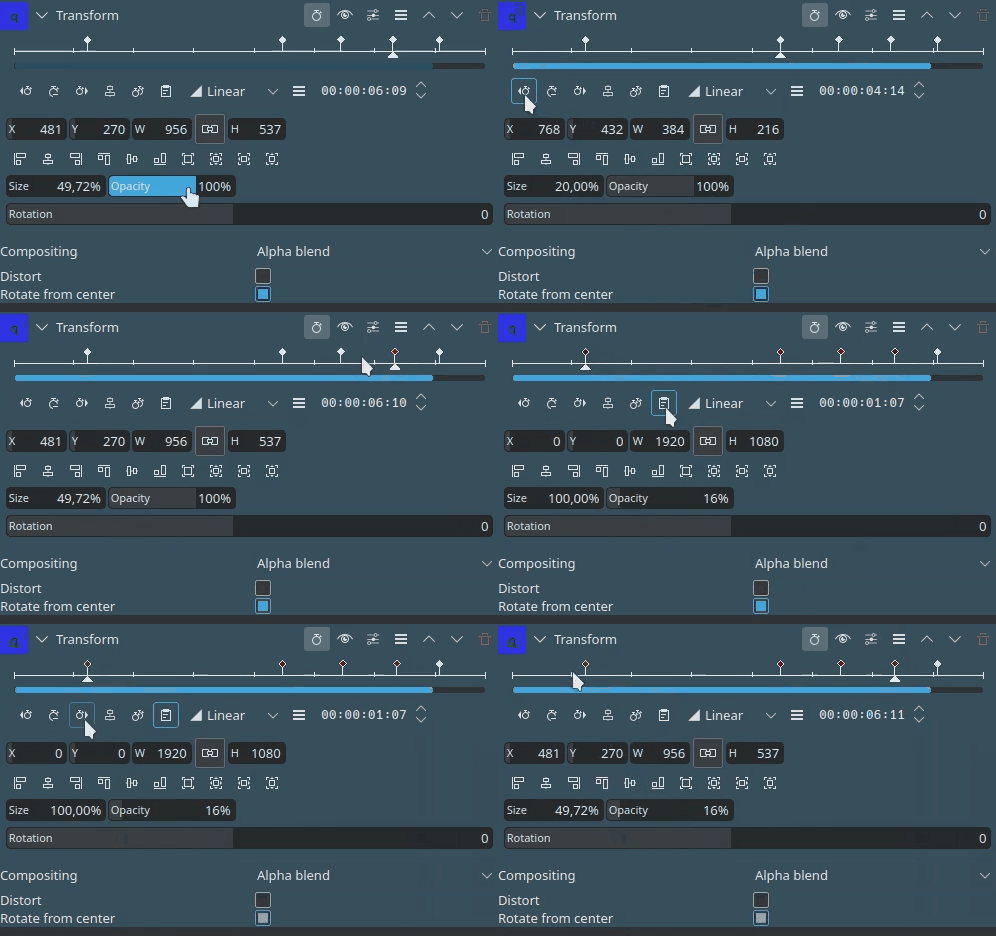
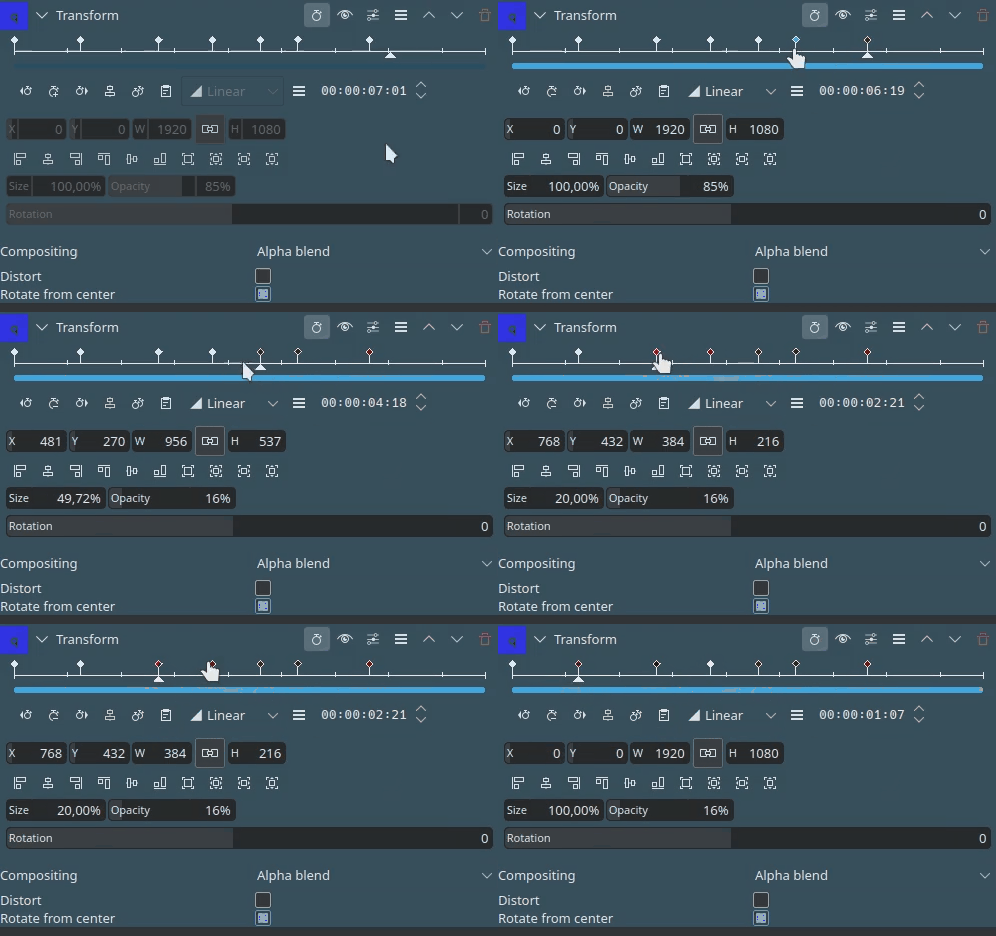
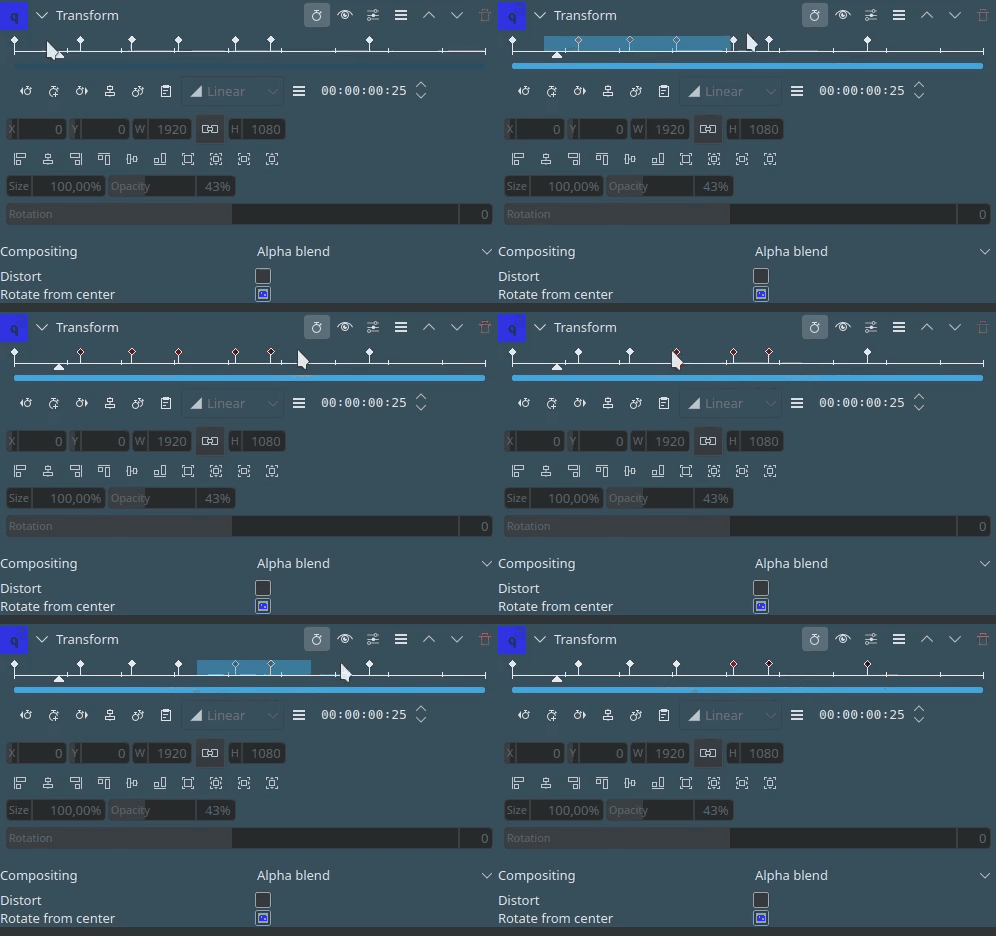
Keyframes can be copied and pasted between effects and even across clips using the standard shortcuts Ctrl+C, Ctrl+V
Keyframe Curve Editor
Implemented with version 24.08 the keyframe curve editor is still in alpha state. Improvements will come with upcoming versions.
The curve editor is showing the keyframe type and their curves.
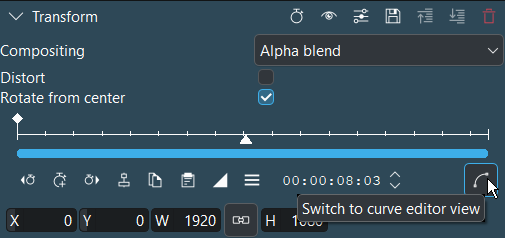
To switch to the curve editor click on Switch to curve editor view.
The curve editor can only be enabled on effects which have the following parameters: X, Y, width, height, opacity (alpha, optional) and rotation. For all other effects the curve editor is greyed out.
By double clicking into the window new keyframes get added. Hovering over a keyframe, the cursor changes to a cross and you can:
move the keyframe to change the value, depending on which tab you are (X position, Y position, Width, Height, Opacity, Rotation). Hold Ctrl moves the keyframe vertically only.
click on the keyframe and change the keyframe type
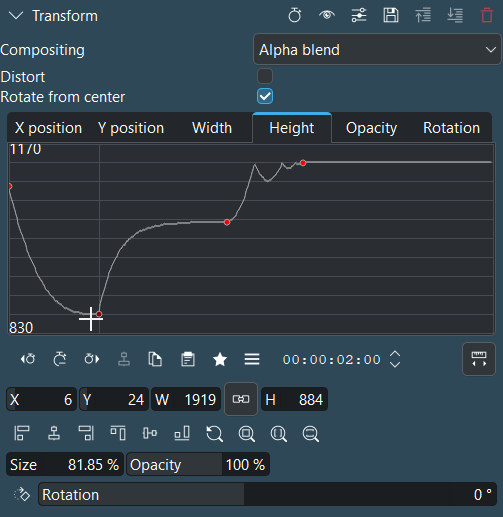
In this example, the cursor enables the second keyframe and you can either change the values by moving the keyframe or change the values directly in the boxes below the curve editor view.
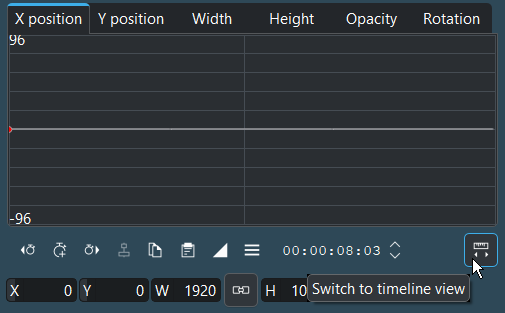
To switch back to the timeline view click on Switch to timeline view.
Working with Keyframes in the Effect Stack
The effect keyframe panel allows comprehensive manipulation of keyframes:
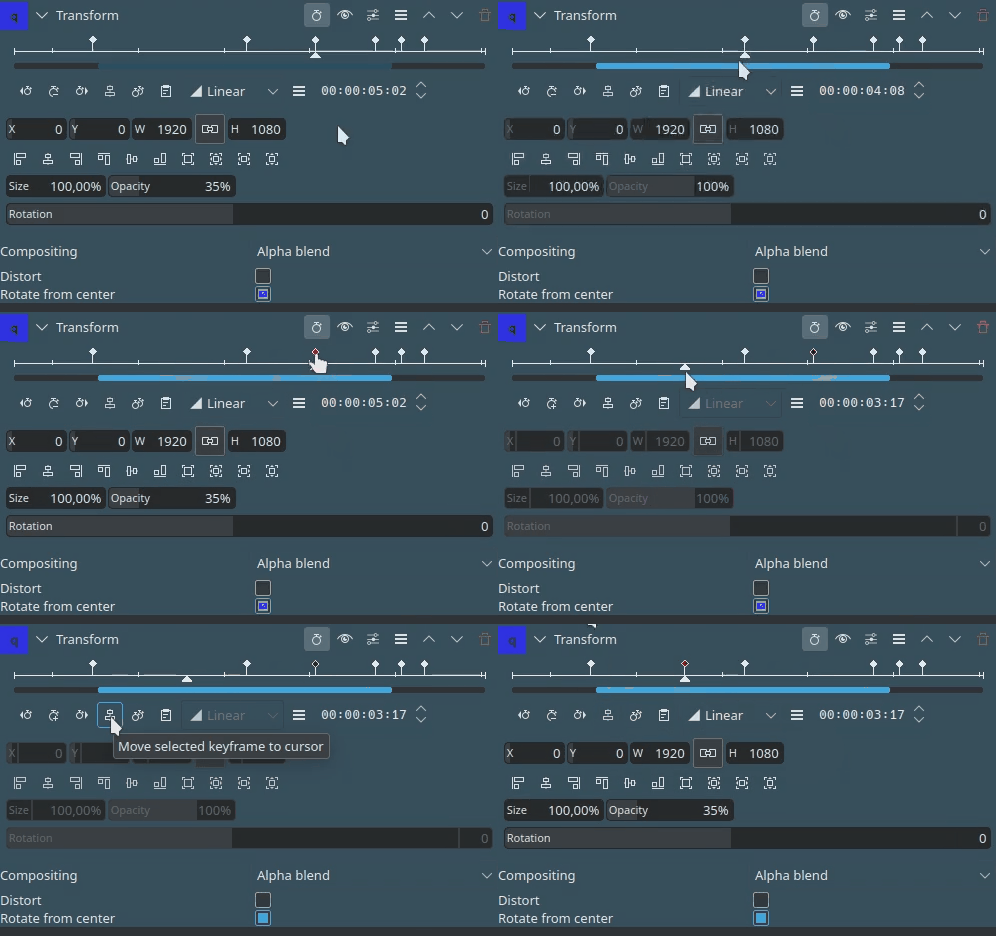
Select the keyframe you want to move
Move the cursor to the position where you want to move the keyframe to
Click on
Move selected keyframe to cursor
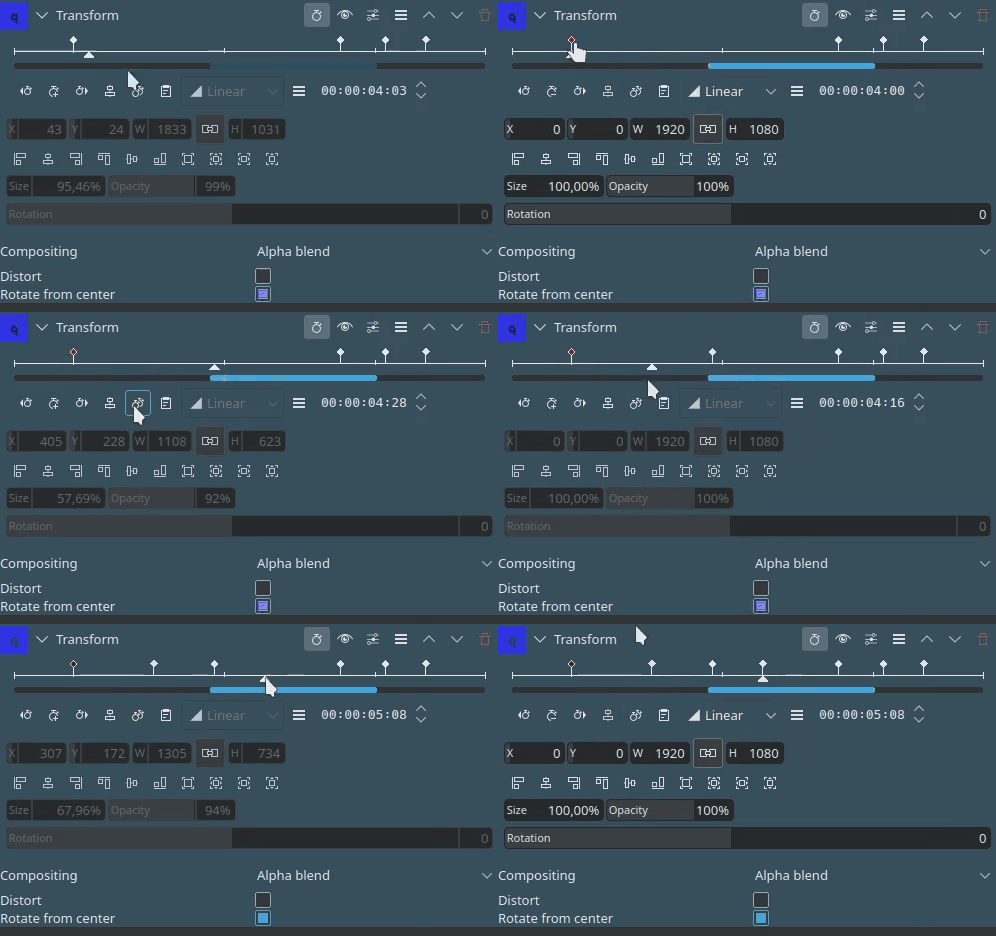
Select the keyframe you want to duplicate
Click on
Copy keyframe
Move the cursor to the position where you want to insert the new keyframe
Click on
Paste keyframe
Typy klíčových snímků
Easing functions are based on Robert Penner's Easing Functions.
Exchanging Keyframes Across Effects
You can import and export keyframes from/to the clipboard. This feature is not only useful to copy keyframes from one clip to another, it can also be used for example to copy the results of the motion tracker to the Transform effect.
To export the keyframes to the clipboard click on Options in the keyframe panel[1] and choose Copy keyframes to clipboard.

Importing keyframes
To import keyframes from the clipboard click on Options inside the keyframe panel[1] and choose Import keyframes from clipboard. If you have valid data on your clipboard you should see this dialog window where you can adjust the mapping of the data.
For most use cases the default settings suffice. But you may want to copy only a subset of the data and perhaps enter an offset value, for example.
Track Effect
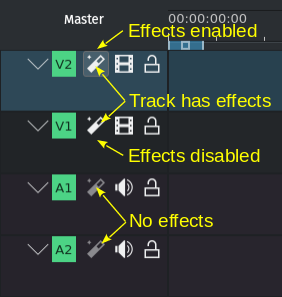
Track effect indicators
Effects can be added to an entire track affecting all clips in that track. Simply drag an effect from the Effects Tab to the header of the desired track, or click on the Track Effect icon and drag the effect to the track’s effect stack.
Hlavní efekt
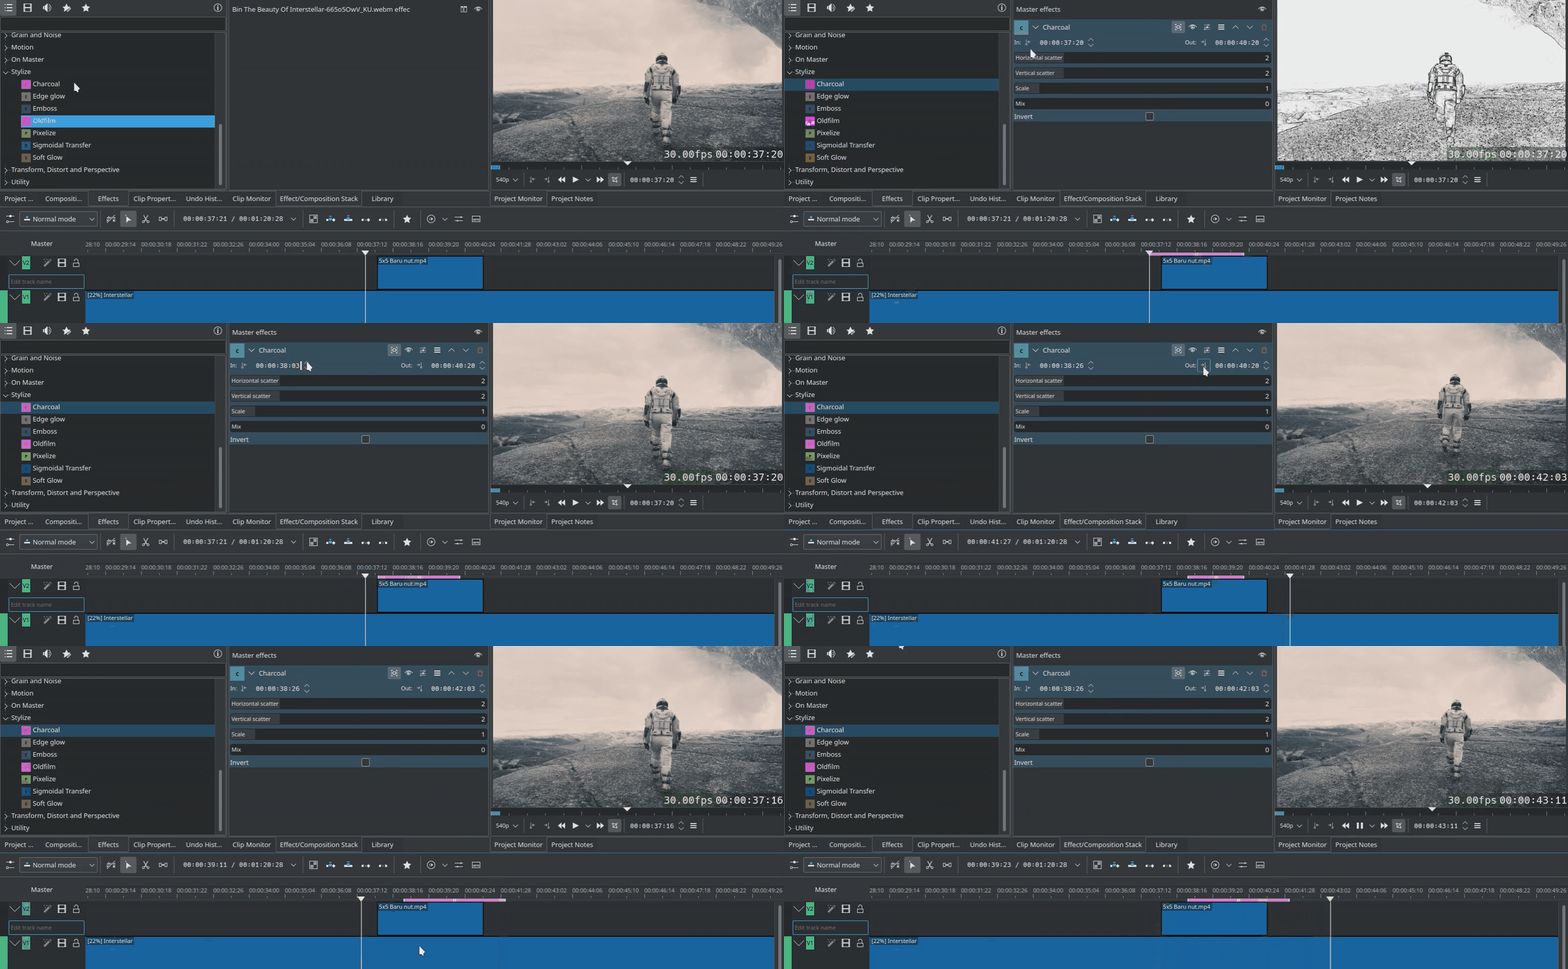
If you want to apply audio or video effects throughout the whole video. Click on the Master button above the track headers to see the Master Effect Stack where you can add effects just like with clips or tracks.
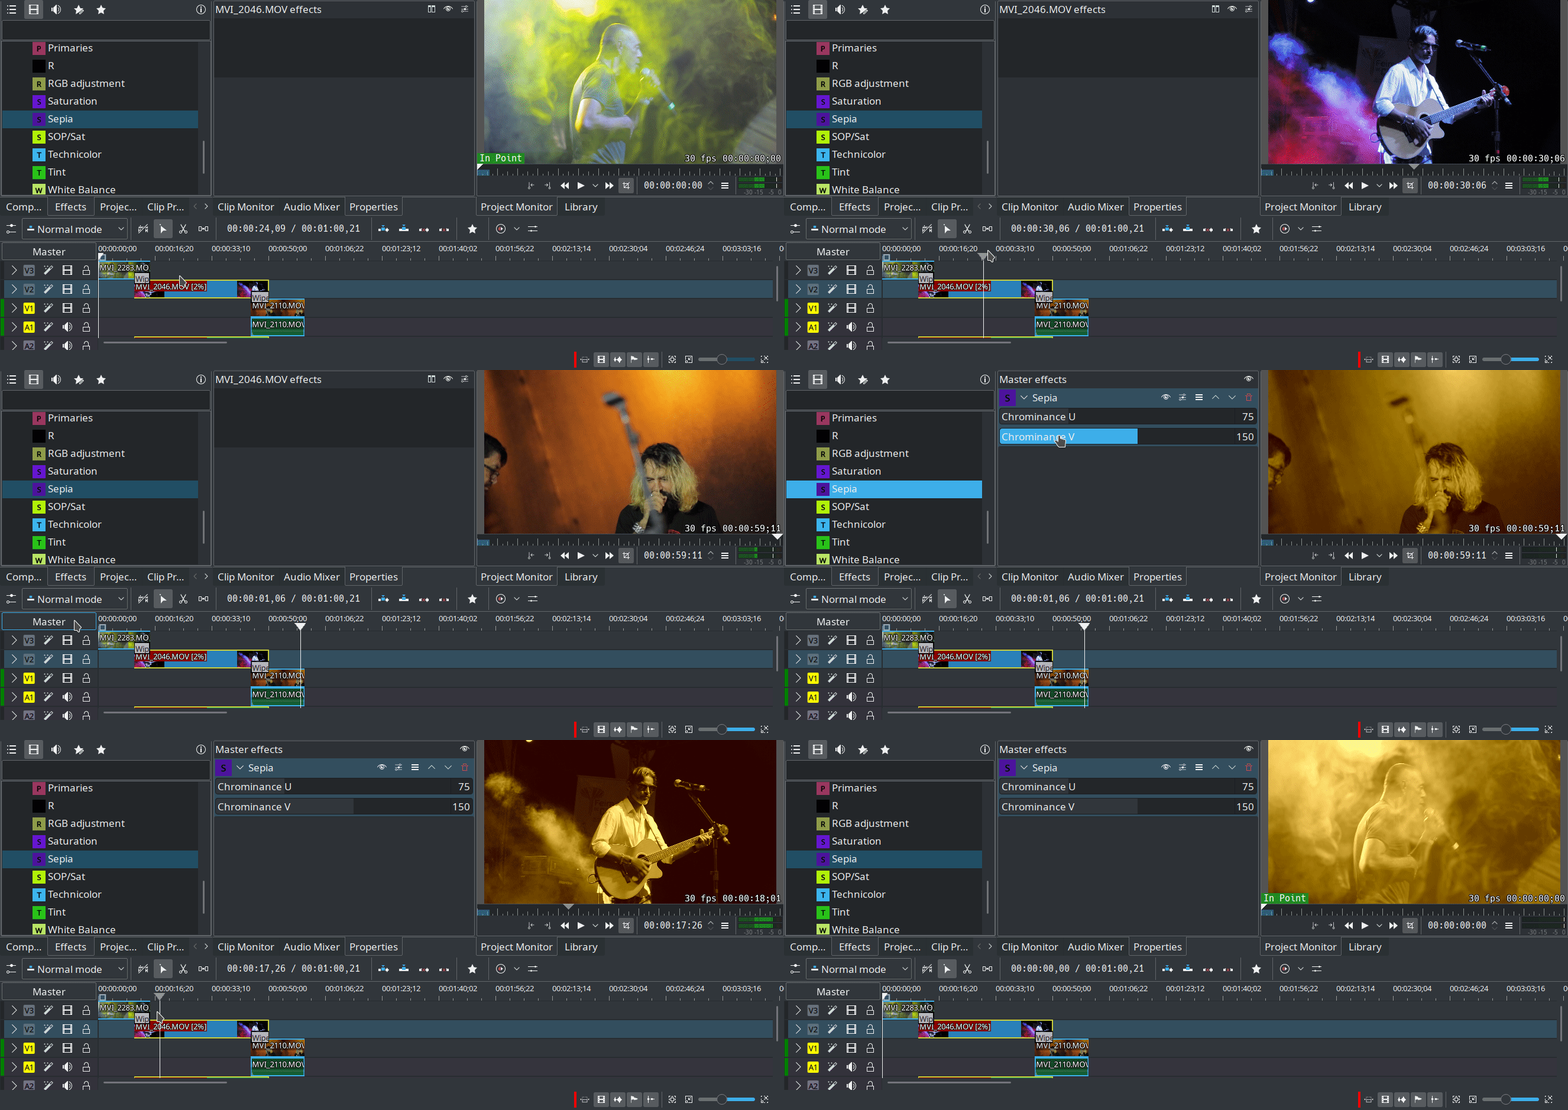
Adding a Sepia effect to the entire video
There are specific effects and filters that work Na Hlavním only.
Effect Zones
Effect Zones allow you to apply effects to specific regions of tracks or the timeline. Zones can be set from the effect zone bar in the Timeline or from the interface in the effect panel.
Track Effect Zone
Master Effect Zone
Masking Effects
This feature allows to apply effects only to specific regions of a clip by using masks. In its current implementation the process requires three steps:
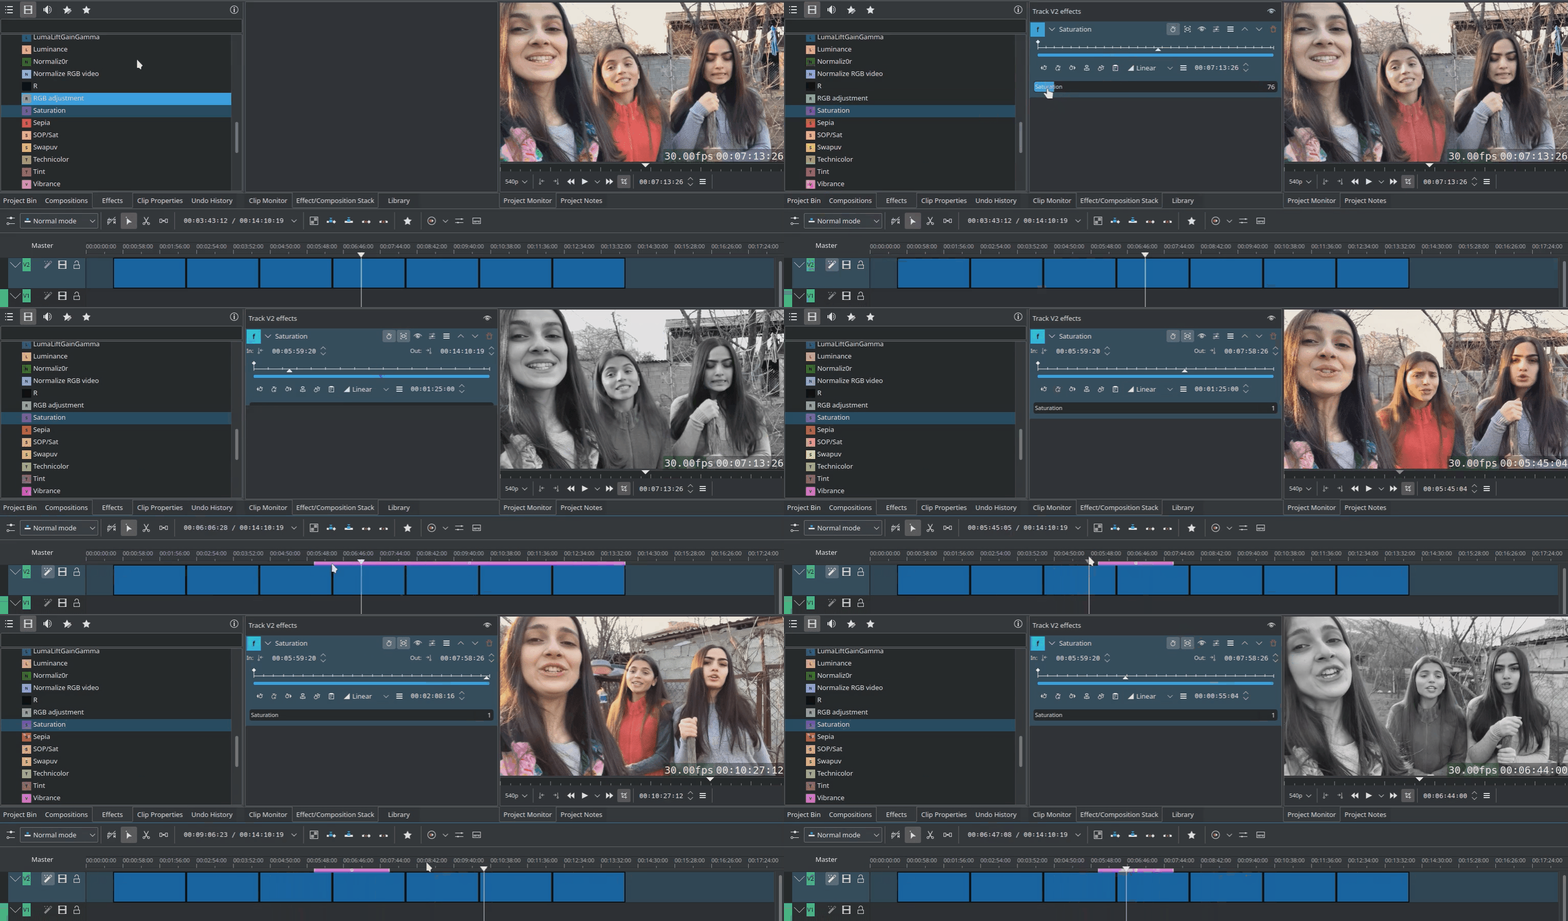
Add one of the three available masks: Shape alpha (mask), Rotoscoping (mask) or Alpha shapes (mask).
Add an effect (or effects) to be applied to the masked region
Add the Mask Apply effect to activate the mask to the effects in step 2

Using Rotoscoping (mask) to apply the Saturation effect in one specific region only
You can apply more than one mask per clip by following the same three-step process.
Video Effects
The video effects are divided into the following categories:
The available effects are defined by .xml files found in .local/share/kdenlive/effects (e.g. /usr/share/kdenlive/effects).
These .xml files contain the default values for the effects parameters. So if you don’t like the default values for the effects in Kdenlive, you can modify the defaults by editing these .xml files.
See also here for an alphabetical list of effects and filters.
Afekty audia
The audio effects are divided into the following categories:
The available effects are defined by .xml files found in .local/share/kdenlive/effects (e.g. /usr/share/kdenlive/effects).
These .xml files contain the default values for the effects parameters. So if you don’t like the default values for the effects in Kdenlive, you can modify the defaults by editing these .xml files.
See also here for an alphabetical list of effects and filters.
Alphabetical List of all Effects and Filters
Zvukové nástroje
Time Remapping
The Time Remap feature allows to keyframe the speed of a clip to achieve effects like speed ramping.

Example of using Time remapping for speed ramping
See also this tutorial.
Speech-to-Text
Titulky
Effects Demos
The following three YouTube videos display the results of a number of the video effects available in Kdenlive (Spanish captioning).
Another YouTube video (English Captions).
See also this YouTube play list from Franz M.P.
