Proxy Clips

The Proxy Clips section
- 1:
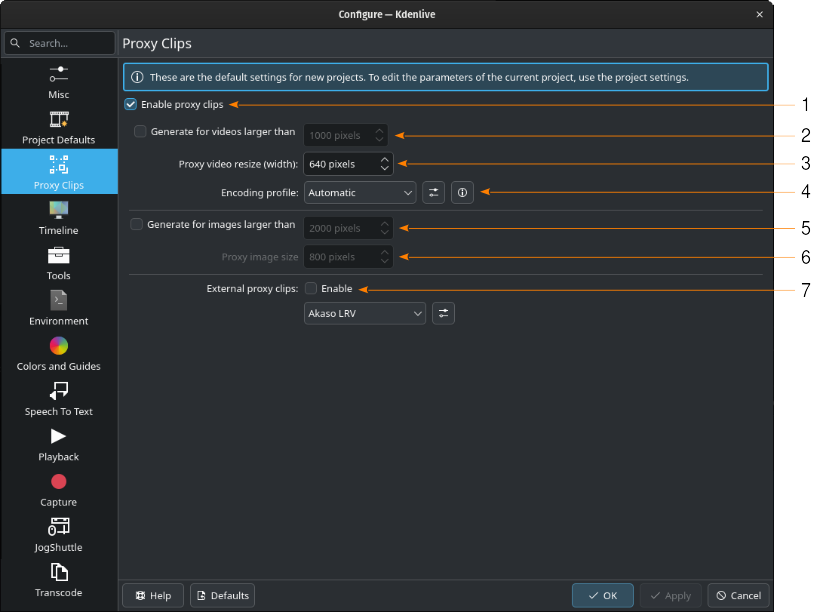
Enable proxy clips. In order to be able to use proxy clips at all, they have to be enabled.
- 2:
Generate for videos larger than. If checked, proxy clips will be automatically generated for video files larger than the selected amount of pixels wide upon adding them to the project bin.
- 3:
Proxy video resize (width). Specify the target width of the proxy clips in pixels.
- 4:
Encoding profile. Select the profile you want Kdenlive to use for creating the proxy clips. The available options depend on your HW. Choose one that offers a good compromise of speed and compression. Click on
to manage the available profiles.
- 5:
Generate for images larger than. If checked, proxy clips will be automatically generated for image files larger than the selected amount of pixels wide upon adding them to the project bin.
- 6:
Proxy image resize (width). Specify the target width of the proxy clips in pixels.
- 7:
External proxy clips. If enabled, Kdenlive will use proxy files of the specified type that are generated by certain cameras already. Examples are GoPro and Sony cameras, and DJI drones. Click on
to manage the available profiles.
Encoding Profiles

Proxy Clips encoding profiles
- 1:
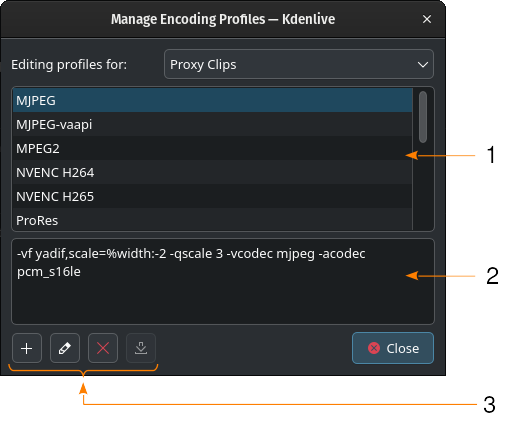
List of available profiles
- 2:
The parameters used in the selected profile
- 3:
Click on
to create a new profile based on the selected one,
to edit the selected profile,
to delete the selected profile.
does not have a function yet.