Títulos
Titles are text elements that can be added to the timeline and appear over the top of other clips. Titles are created in the Bandeja del proyecto and then dragged to the timeline like other video clips.
If you want titles to overlay other footage, you put title clips above (on video track 2 for example) and have the other footage below (on video track 1 for example). You also need to retain the affine transition that is automatically added to the title clips if you want the footage visible underneath.
Crear y editar un título
Create a Title: Choose or right-click in an empty area in Bandeja del proyecto and choose .
Edit a Title: Double click the title clip either in the project bin or in the timeline. Or right-click the title clip in the project bin and select .
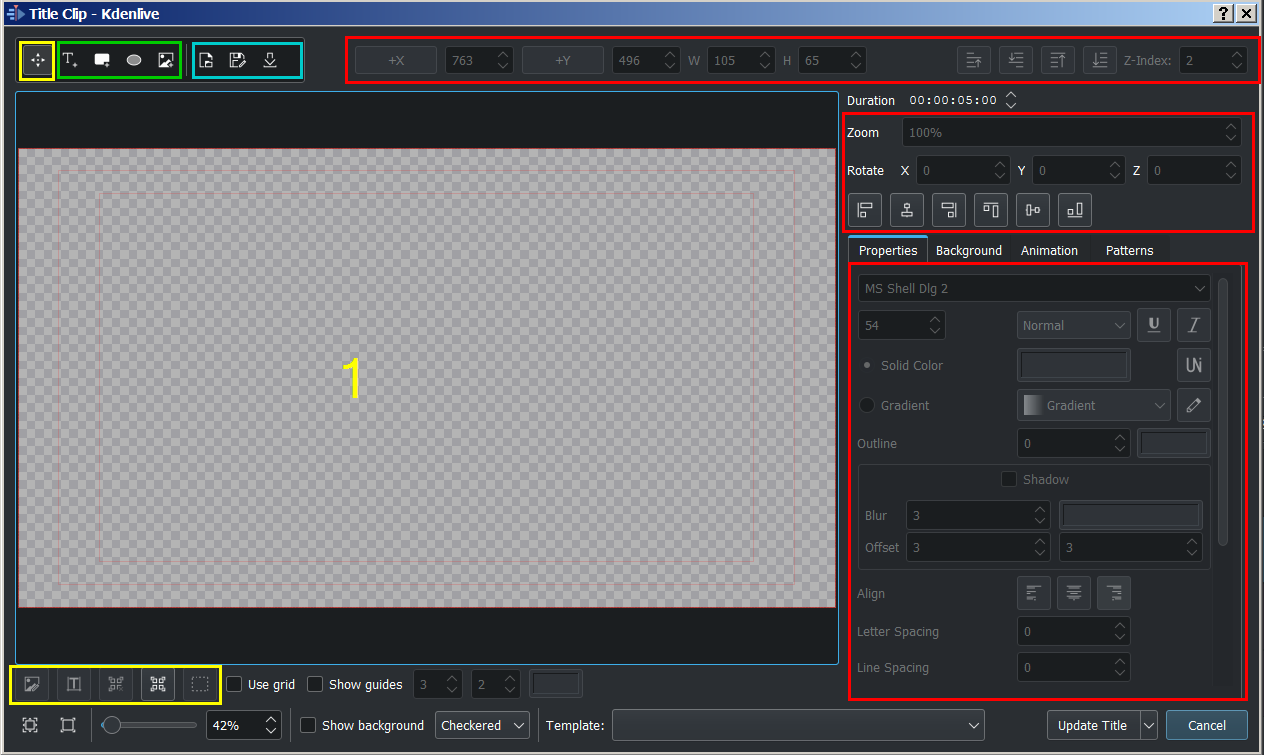
En la ventana del título (1):
Seleccione un elemento haciendo clic en él.
Edite el texto haciendo doble clic.
Cuando haya terminado las modificaciones, pulse Actualizar título (en la parte inferior derecha).
Añadir elementos

En la barra de herramientas (área marcada en verde), escoja:
Texto Alt+T y haga clic en la ventana de título (1)
Rectángulo Alt+R y, en la ventana de título (1), arrastre el ratón para dibujar un rectángulo.
Elipse Alt+E y, en la ventana de título (1), arrastre el ratón para dibujar una elipse.
Imagen Alt+I muestra un selector de archivos para que escoja la imagen que se debe insertar en el título (1).
Default selection is Text for a new title clip.
Alt + S brings you back to (icon with the 4 arrows, yellow marked)
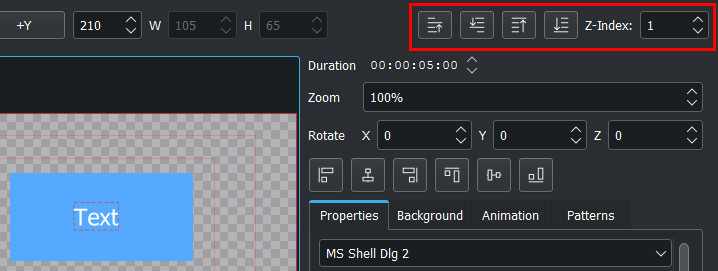
Items can be placed behind each other by selecting them and changing the Z-index: (top right corner) to a lower value or with the 4 icons left to the Z-index
Seleccionar elementos

Yellow marked area. Make sure Selection Tool is selected or press Alt + S.
In the title window (1) clicking on an item.
Holding Shift to select several items by clicking on it.
Ctrl + A selecciona todos los elementos.
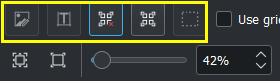
You can select items with one of the 5 selection possibilities (yellow marked area, bottom left), from left to right:
If you have a selection: Keep only images selected
If you have a selection: Keep only text items selected
Deseleccionar todo
Seleccionar todo
If you have a selection: Keep only rect items selected
Ajustar elementos
Red marked areas: All items can be adjusted in position, size, level, alignment and properties either with the mouse or by entering values.
Holding Shift move selected items vertical only.
Holding Shift + Alt move selected items horizontally only.
Once done click Create Title (bottom right) or Update Title.
Máquina de escribir
Nuevo en la versión 21.04.0.
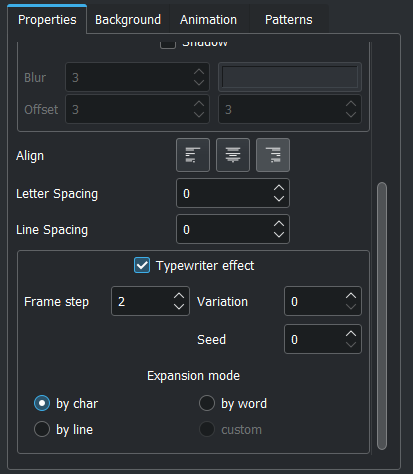
The beloved typewriter effect is back. By default it expands text by characters, but other modes like expansion by words and lines are also available.
- Frame step
Tells how fast next element will be displayed. The speed is constant over the whole clip and effect period.
Valores: 1-240, predeterminado: 25
- Variación/sigma
Allows for introducing small fluctuation to the step length.
Valores 0-20, predeterminado: 0
- Semilla
The random generator for fluctuations is initialized with constant seed to assure predictable pattern. The seed parameter changes the initial value of random generator.
Valores: 0-100, predeterminado: 0
- Modo de expansión
Por carácter: escribe carácter por carácter
Por palabra: escribe palabra por palabra
Por línea: escribe línea por línea
Personalizado: macros personalizadas (no implementado)
Desplazar título verticalmente
Put a long title onto the title window. Zoom out so you can see it all. The text should run off the top (or bottom) of the viewable area.
Select the Animation tab and check the Edit start viewport option. Now drag the start rectangle to above the viewable area.
Check the Edit end viewport option and drag the end rectangle to below the viewable area.
Press the OK button and preview the scrolled title.
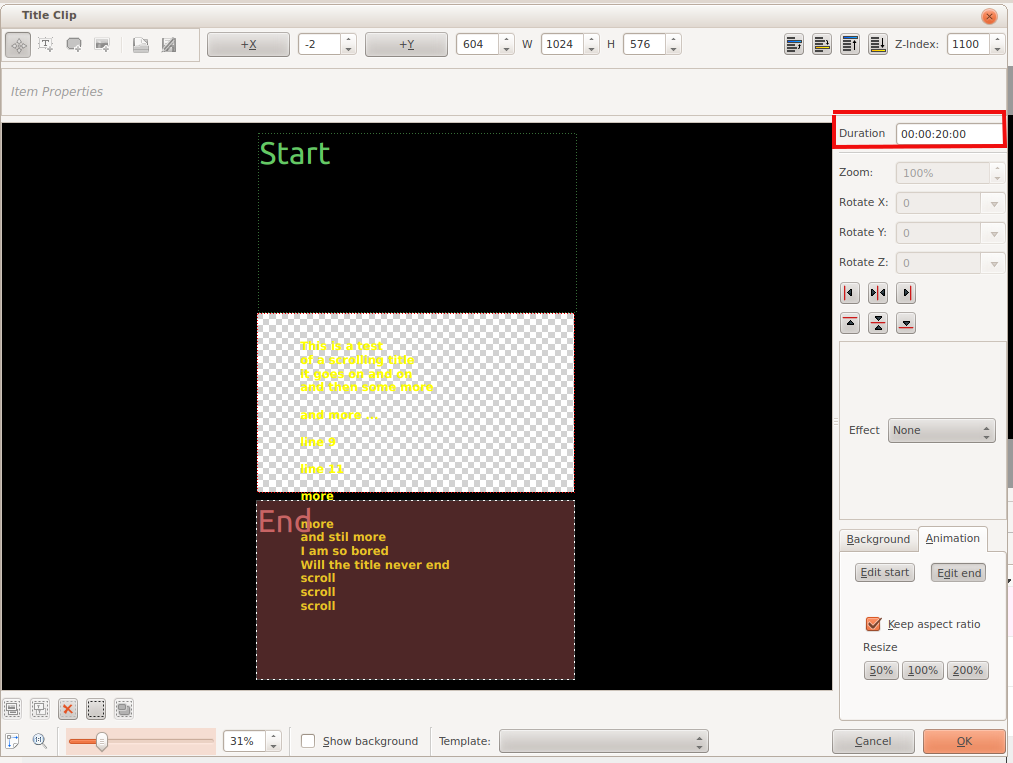
The text in the above title scrolls up the screen. It is as if the camera starts on the «start rectangle» and then pans down to the «end rectangle».
To make the text scroll faster, set the Duration: field (highlighted in red in the image above) to a smaller value. To make the text scroll slower, set it to a larger value.
Note: changing the length of the title clip on the timeline does not change the scrolling speed. If the length of the clip on the timeline is longer than the duration specified in the title editor, the titles will pause on the screen between the time the title’s duration expires until the end of the clip.
If the length of the clip on the timeline is shorter than the duration specified in the title editor, the scrolling will not complete before the title clip finishes.
Note: the above description of title behaviour with respect to duration only applies to titles that don’t get edited after they have been placed on the timeline. If you expand the length of a title clip on the timeline and then edit the title (by double-clicking it in the Project Bin), its apparent duration will become the length that it currently has on the timeline (i.e., the scrolling will not pause at the end anymore) but the duration displayed in the title editor will not have changed.
Desplazar título horizontalmente
Use the instructions for vertical scrolling - just put the start and stop rectangles off to the sides of the screen rather than the top and bottom.
Guardar un título

Blue marked area: Press the Save As button on the tool bar.
Title Editor toolbar when title editor is wide enough for the whole toolbar to display. The toolbar items are: Selection Tool, Add Text, Add Rectangle, Add Ellipse, Add Image, Open Document and Save As.
or select Save as from the toolbar overflow menu which can be found under the >> button on the toolbar - see picture.
Title Editor toolbar when title editor is not wide enough for the whole toolbar to display. The toolbar items that do not fit can be accessed from the >> button that appears at the end of the toolbar.
Choose a save location within your project.
The titles are saved as .kdenlivetitle type documents.
Cargar un título

Blue marked area: Press the Open Document button on the Title Clip editor toolbar or choose from the >> menu and load up a title saved earlier.
Plantilla de título
Integrada
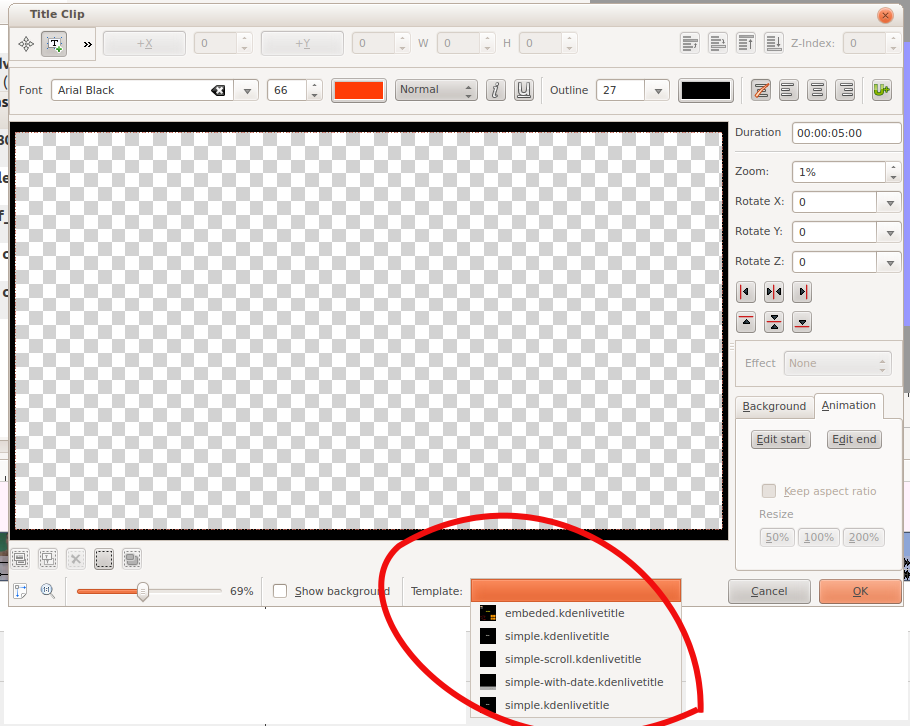
Kdenlive has some built-in title templates that can be accessed from the Template: drop-down list found on the bottom of the Title Clip window - see below.
Descargar nuevas plantillas de título

Blue marked area: To install more title templates press the Download New Title Templates… icon on the tool bar when you are in the title editor.
If you have a good title template, you can post it here so that other Kdenlive users can download it through and use it.
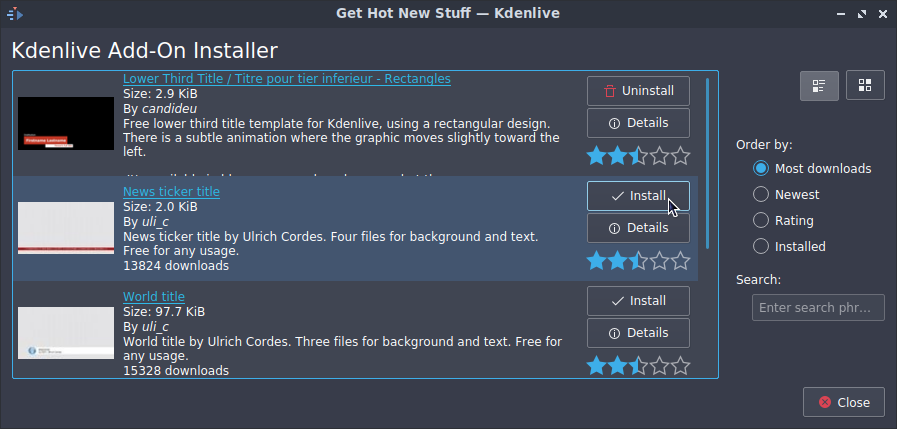
Once these title templates are installed, they can be accessed via the drop down on the template dialog.
The .kdenlivetitle files that supply these templates are installed to:
Linux
$HOME/.local/share/kdenlive/titles
Flatpak
$HOME/.var/app/org.kde.kdenlive/data/kdenlive/titles
Windows
%AppData%/kdenlive/titlesPress Win + R (Windows key and R key simultaneously) and copy %AppData%/kdenlive/.
Template Titles - User-Defined
Template Titles allow you to create a template for other titles in your project. You create the template title with the settings that all the titles in the project should have and then base subsequent titles on the template. If you decide to change the look of your titles, you only need change the template title and the titles based on this template will automatically update to reflect any formatting changes you made to the template title.
Create a Template Title
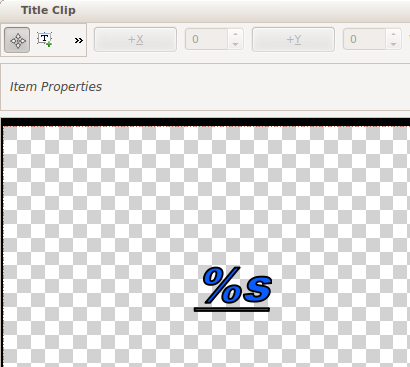
Choose the item from the Add Clip drop down and create a title with the text %s in it and formatted how you desire it. Save this title as described above.
Use the Template Title
Choose the item from the Add Clip drop down and choose the title with the %s in it that you just saved.
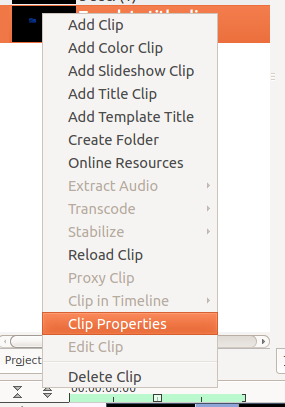
Right-click this clip in the Project Bin and select item.
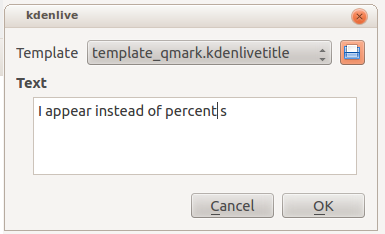
Enter the text that this title should display into the text field in the dialog that appears.
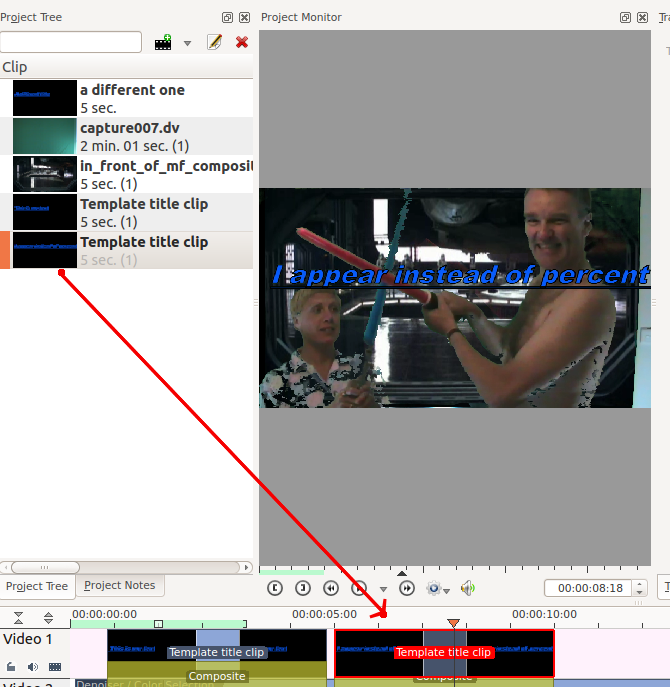
Drag the title to the timeline.
The %s in the template will be replaced with the text that you enter in the Text: field.
A known issue with template titles is that text centering does not work correctly for text replacing the %s.
How to fade titles in and/or out
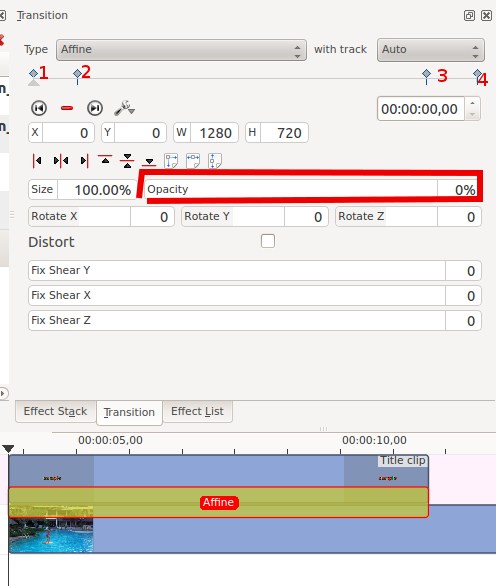
To make titles fade in and out, you modify the transition which gets automatically added between the title and the track below. The modifications consist of adding keyframes into the transition and adjusting the opacity of the transitions at these keyframes. In version 0.9.3 it is an Transformación transition that is automatically added between the title and the track below. In ver 0.9.2 it is a Composite Transition.
In the image below we have four keyframes (labeled 1 to 4). The first keyframe is the one currently displayed and we can see that the opacity on this keyframe is zero. The opacity at keyframes 2 and 3 is 100%. The opacity at the 4th keyframe is zero percent. The overall effect is that the title fades in between keyframe 1 and keyframe 2. And then it fades out between keyframe 3 and keyframe 4 .
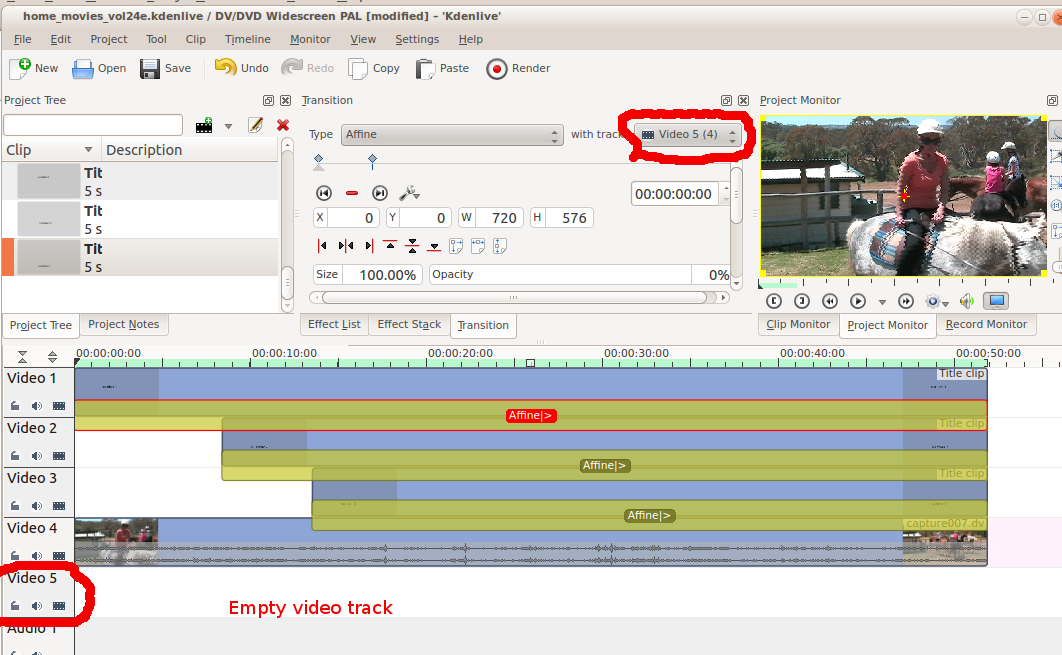
How to fade in more than one title sequentially
To create a title sequence like this …
You put three titles on three different tracks but you make all three affine transitions go to the same empty video track (instead of the tracks directly below them, which is the default). See timeline screenshot below.
Preguntas frecuentes
Q: How to duplicate a title clip to modify it slightly.
A: You can save a copy of the title (see Títulos) and then create a new title based on that saved version as described Títulos. Or you could use the Títulos functionality to base the two slightly different titles on the one template.