Attention
This page is not maintained anymore and contains information referring to features or functions from earlier versions of Kdenlive that are deprecated or have been superseded by something else.
The Audio Spectrum and the Spectrogram
This chapter is about audio scopes. It is also talking about audio in general (e.g. recording, perception, etc.).
The Scopes
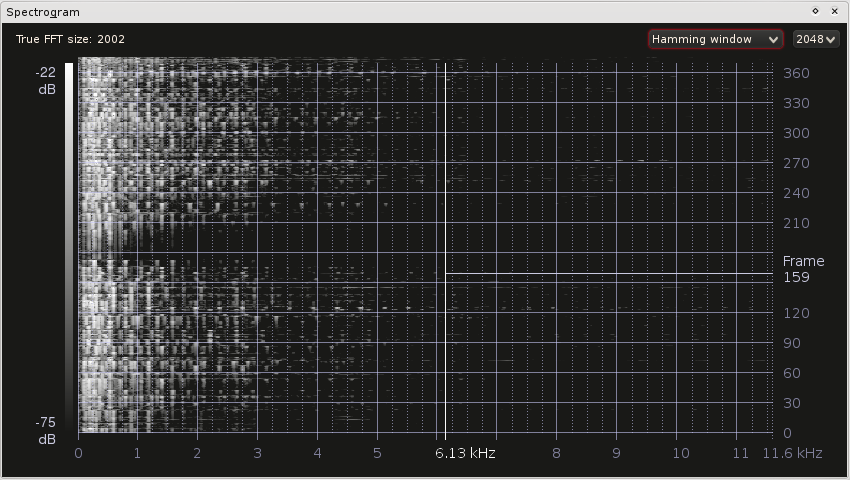
Spectrogram screenshot
The audio scopes are documented in-depth in Audio Scopes for Kdenlive (PDF) by Simon “Granjow” Eugster[1]. You may skip the technical/mathematical part — it is not necessary for understanding the scope, and the maths behind it is not trivial. The rest might be interesting, though.
Nevertheless, a quick overview over the features currently available.
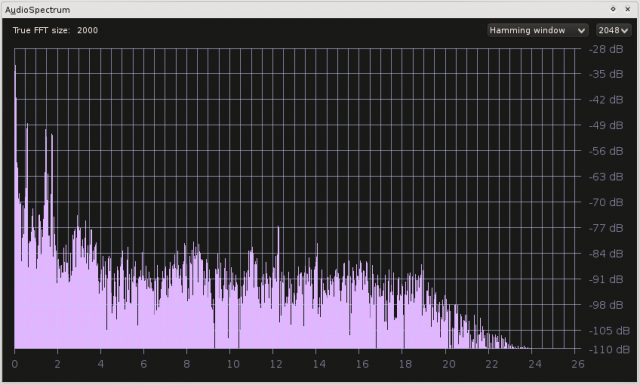
Audio Spectrum
This scope displays the frequency spectrum for each frame. Low frequencies are on the left, high frequencies on the right. And the higher the bar, the louder this frequency.
Loudness is measured in decibel in the spectrum[2]. If all frequencies have equal loudness, you can adjust the range to display by dragging vertically. Simply dragging adjusts the lower threshold, Shift+drag adjusts the maximum loudness to display. Horizontal dragging adjusts the maximum frequency to display samples for.
But what is this display useful for? One thing is that, as described in the PDF linked at the top, you can visually distinguish between good and bad sound quality: If there are no frequencies higher than, for example, 3 kHz, then the audio quality most likely is not too good.
Hint
If you have no clue how high 3 kHz are, which is nothing unusual since our ears do not deliver numerical values to our brain, you can use a program like SignalGen or Audacity to generate a sine wave with 3 kHz (which is 3,000 Hz).
Something else the frequency spectrum is useful for is to avoid clipping. The same effect that can be seen with colors, e.g. in the RGB parade, and actually with every signal that is digitalized. More about this below.
Spectrogram
The Spectrogram does the same as the Audio Spectrum: It shows the frequency distribution with the difference, though, that the frequencies are not shown for one frame only. Similar to the RGB Parade for colors, stronger (louder) frequencies are represented by brighter pixels; this allows to put a whole frame’s spectrum in one line.
What the Scopes Might Help in as Well
Consider this review about the Nikon D7000, and listen at 7:00 and 11:00. At 7:00 you can hear the reviewer loud and clear, at 11:00 you need to turn up the volume to even understand something. This should not happen. The audio scope helps to maintain equal loudness over multiple shots.
Sound
Now a few interesting details about sound.
Clipping
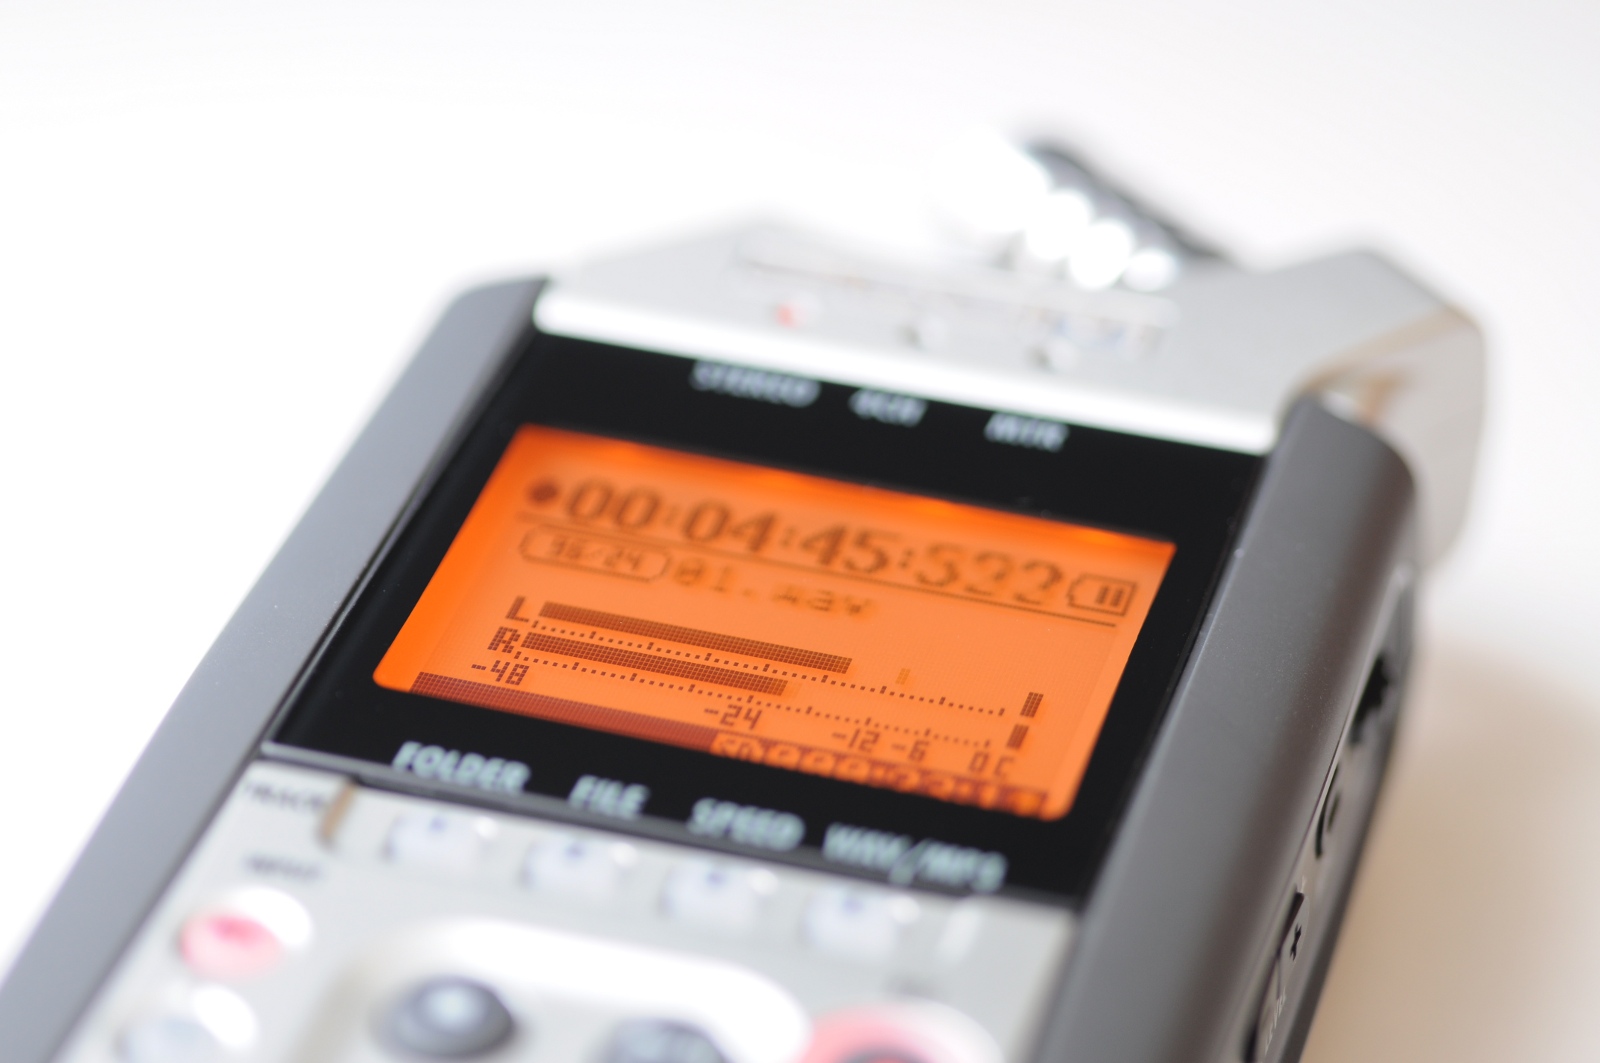
Audio levels on a Zoom H4n
As mentioned above sound can clip as well. Everyone has heard this already. This is how it sounds (extracts from James Edwards’ Greensleeves[3]):
Volume increased by 24 dB - massive clipping!
Volume afterwards decreased by 24 dB - the clipping effect is irreversible
Clipping is also very well visible in the audio wave itself, if you e.g. open the samples above with Audacity. (If you want to reproduce the above effect with Audacity, make sure to select «allow overdrive», otherwise it will prevent clipping. When decreasing the volume afterwards do not use the same project since Audacity actually stores values that are bigger than the maximum amplitude value (.aup files only). This is great for editing, and perhaps one day we will have that for color as well in Kdenlive …)
So, when may clipping occur?
When recording audio. The input gain can be adjusted on the audio recorder. If the gain is too high, it might record for example low talking at a good volume, but clip as soon as someone rises their voice. Therefore input gain is usually adjusted such that the mean volume and peaks do not exceed a certain limit.
This limit depends on the expected dynamic audio range. A common choice is -12 dB for the mean volume and maximally -6 dB for peaks.
When editing. There are multiple volume effects in Kdenlive. If you raise the volume too much, you will experience clipping.
To prevent clipping in kdenlive, you actually do quite the same as when recording audio. Try to keep peak values below -6 dB. If you need one cut to be really much louder than the rest and you cannot raise it any further, then you need to lower everything else.
Damping
The further away you are from the sound source, the quieter you hear it. Until finally it will be as loud as the noise floor of your microphone and audio recorder. To maintain a good SNR you will therefore usually try to keep your microphone as close as possible to the sound source. Such that the signal is much stronger than the noise (and with the input gain adjusted such that no clipping occurs).
But that is not everything yet. (Actually the above point was not about dampening at all but merely about wave propagation.) There is one interesting aspect, which is that higher frequencies are absorbed much stronger than low frequencies. Unlike the previous points this is not a problem but rather an interesting variable: If you record someone’s voice and want to put him far away in the video (next room for example), lower the higher frequencies (using Audacity’s Equalizer effect for example).
Our Ear
What is louder: A sine wave of 200 Hz or a sine wave of 4 kHz?
They have both been generated with the same amplitude (volume). But our ear is most sensible on the frequencies we talk in. To read more about our ear, the Wikipedia article about Hearing is a good starting point.
Notes
- Further Information and Suggested Reading
Acoustics I - Sound Propagation Outdoors, ETH Zurich
Capturing Good Sound at Vimeo, about microphones
Thread about audio and clipping in the forum at dvxuser.com