Waveform and RGB Parade
Waveform and RGB Parade are two closely related scopes. They do the same - Waveform for Luma, RGB Parade for the RGB components. Therefore, we will not always explicitly point out what properties hold for both scopes and speak of Waveform only.

How the Waveform Works
The Waveform is kind of a 3D Histogram. That has nothing to do with the fact that the above image looks kind of 3D. So where are the three dimensions?
The most obvious dimension is Luma: Dark pixels are at the bottom, bright ones are at the top. So if all pixels in the Waveform stick at the very top, your video is most likely white.
The second dimension is the horizontal position of the pixel in the original image. That is one of the things that makes the Waveform cool. Pixels in the first column of your input video will also be painted in the first column of the Waveform. This goes on until the scope reaches the last column of the input video, which will be painted in the last column of the Waveform.
The third dimension is the brightness of a pixel in the Waveform. The brighter a point there, the more pixels in this column share this specific brightness value.
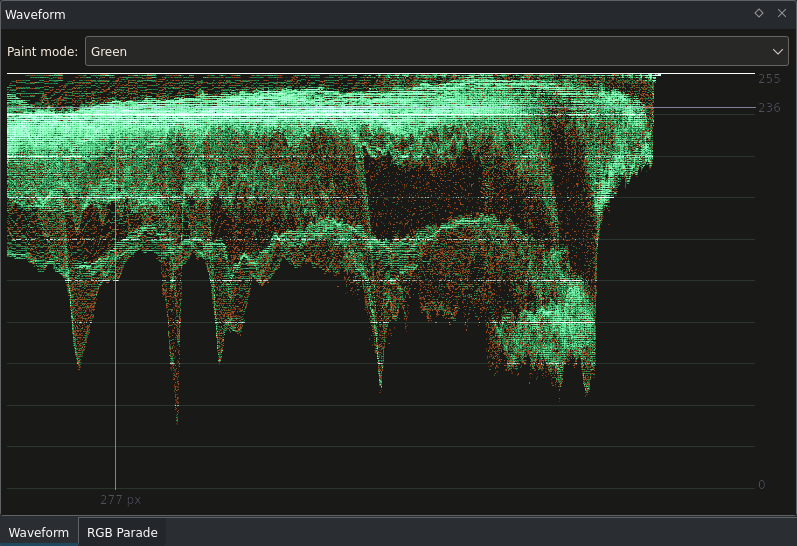
Waveform Example 1: Sunset
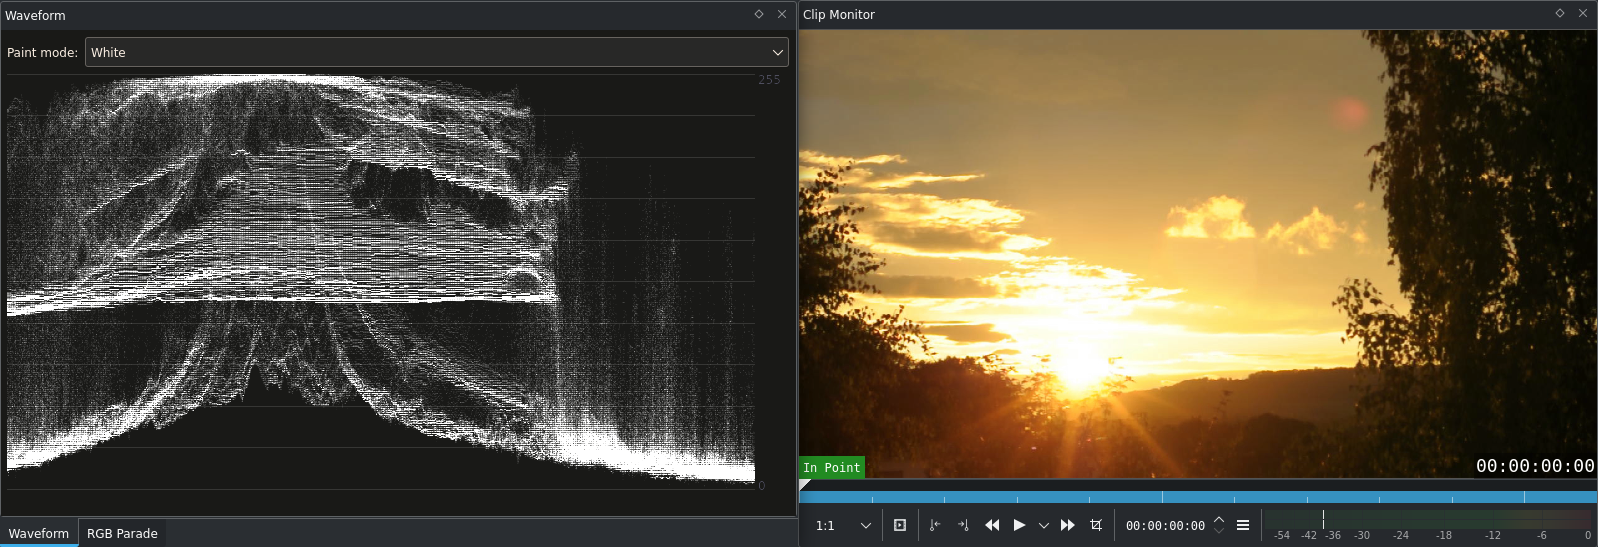
Waveform example 1
The Waveform looks quite impressive here. But what can we learn about the image?
In the left third we have got some clipping. There are some bright spots which are the sun and the clouds.
The last third of the image is dark, but not black (no crushing). This means that there is still a chance for color information. The image confirms that: The tree does not look neutral but green with an orange touch. Or is it the other way round?
That is where the RGB Parade drops in now.
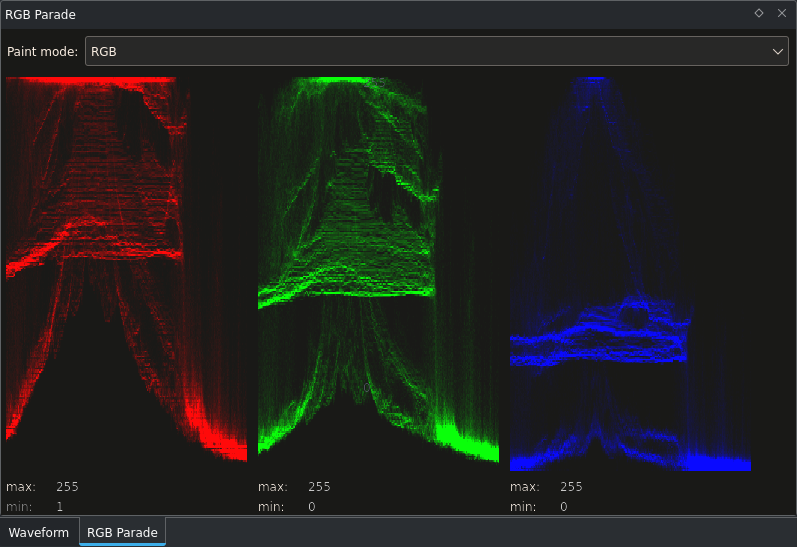
What we see is very slight crushing for blue on the tree, and more or less equal parts of red and green as well. So if you thought the tree were green, your brain fooled you. It is not. (Actually there is no green at all in the image.) Also, blue nearly does not clip at all, even in the sun. So it is still a little bit orange, which is great.
Now, did the Histogram not show clipping and crushing as well? Yes, it did. But it did not show where. That is a big benefit. As in some cases, if you see that there is some clipping on a light bulb, you perhaps do not mind increasing the overall brightness of the image. It does increase clipping as seen on the Histogram, but the Waveform shows that only the light bulb is clipped a little more, which you can afford in our imaginary case.
RGB Parade Example: Light Bulb
Wait … imaginary? Actually there is a short clip with light bulbs. Which is quite interesting, not only due to the wrong white balance. See the how-to guide White Balance - An Important Tool for more details about white balance and how to use it in Kdenlive.
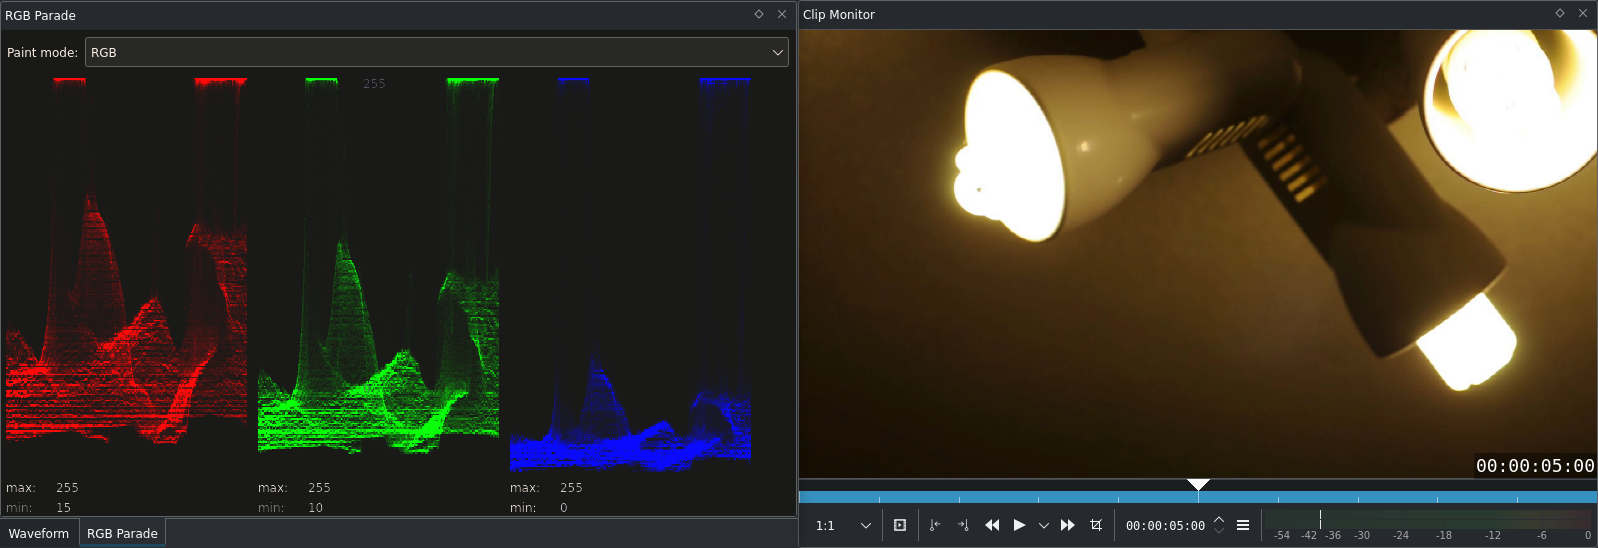
RGB Parade example 1
The RGB Parade reveals two things at first glance. You will at least recognize the first one as well.
The fluorescent lamps are clipped. All channels are at 255 there, so they are totally white.
The white balance is wrong. This can be told for sure. The ceiling is white in reality. And the left-most quarter of the image consists exclusively of the ceiling. This part should look equal in the RGB Parade, but when e.g. comparing Red to Blue, you see that Red starts at 19 whereas Blue starts at 0. Furthermore, the Blue channel is much more compressed. Its height in this area is 25, whereas the height of the Red channel is about 50.
To achieve proper white balance here we make use of a new effect called SOP/Sat. Curves would work as well (actually curves could do everything), but let’s use a new effect here.
The first thing to decide is how bright the darkest spot should be. This can be controlled with the Offset parameter. Reference is again the left part of the Parades, the soon-to-be white ceiling. You can use your mouse to make the Waveform or RGB Parade draw a horizontal line and display the value there. All channels were lifted to around 50 in this example:
Note
The SOP/Sat uses a different scale than the RGP Parade widget. The lifting of the channels refers to the RGB Parade scale (0…255) as one can see in the Min in the RGB Parade display. The idea is to lift the channels so that their bottoms are aligned.
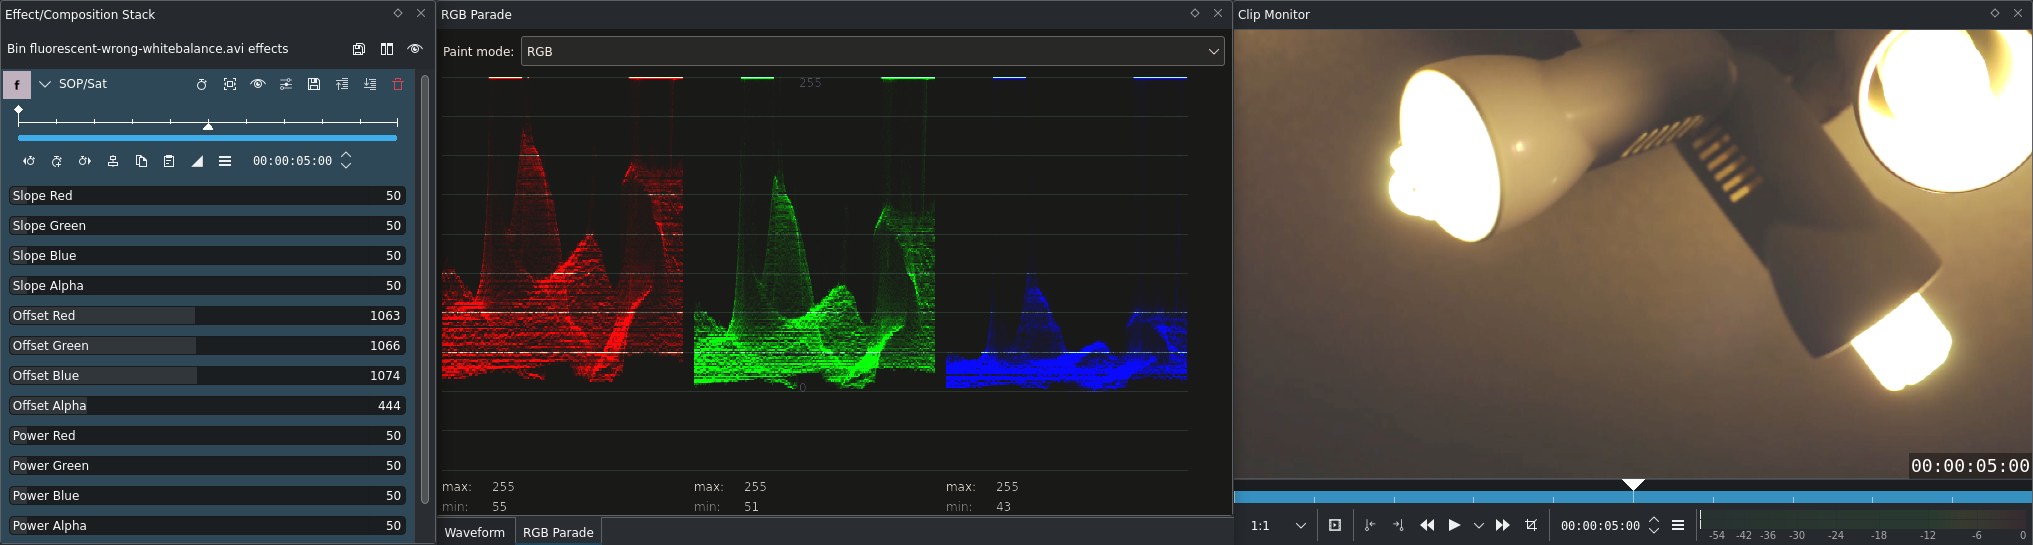
Second step is stretching the channels. This is done with the Slope sliders. The goal is again to find a neutral spot in the RGB Parade and use it as reference. We could again use the ceiling on the left, but after some testing it turned out that the little wave in the middle of the scope works as well. Its advantage is that it is slightly brighter than the ceiling allowing to correct the color cast more precisely.
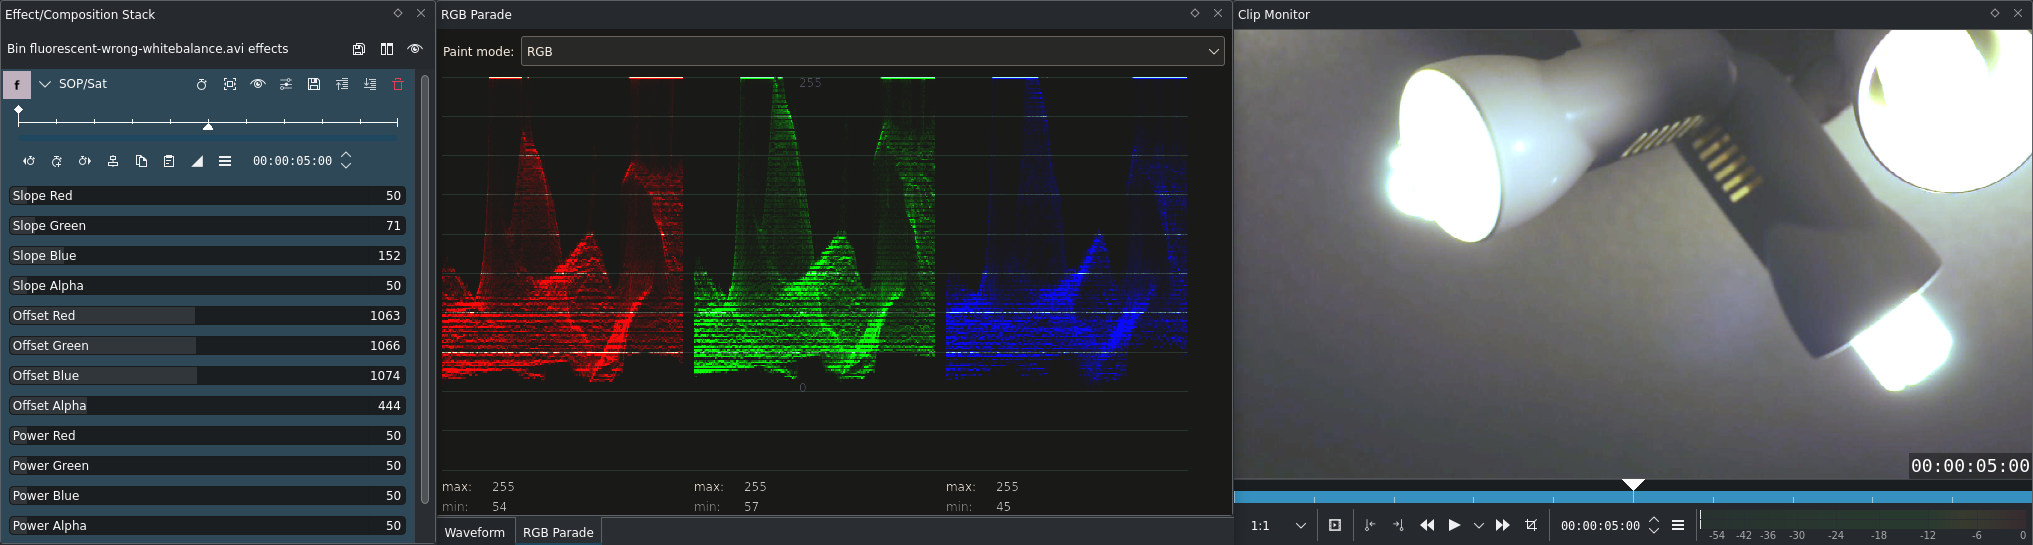
And voilà, exposure and white balance are corrected.
When taking a look at the full-sized image (or when trying it yourself with the sample clip available for download at the end of this article) you will notice color waves in the image. This is the result of the stretching: We have blown up the ceiling on the left from 25px height to nearly 100px. If the clip had been exposured and white-balanced correctly when shooting, we would have 100 distinct values there, but now there are only 25 different blue levels causing these steps. Also in the histogram the image looks torn apart. (Another reason might be the high compression of the Nikon D90 clips.) This effect is called Posterization[1].
This is one of the reasons why more expensive cameras (and with that we mean really expensive ones, like the RED One[2], to name an extreme example) record videos in higher bit depth[3]. Perhaps all clips you will ever encounter only store 8 bits per channel, so there are 28 = 256 possible values for each channel. Having for example 10 bits per channel would already result in 210 = 1024 possible values. This would already have solved our problem.
But before you buy a RED One now - Kdenlive does not support more than 8 bit (yet).
Where you already can play with more than 8 bits per channel are RAW images from DSLR cameras. Supported by many image processing applications such as digikam or RawTherapee.
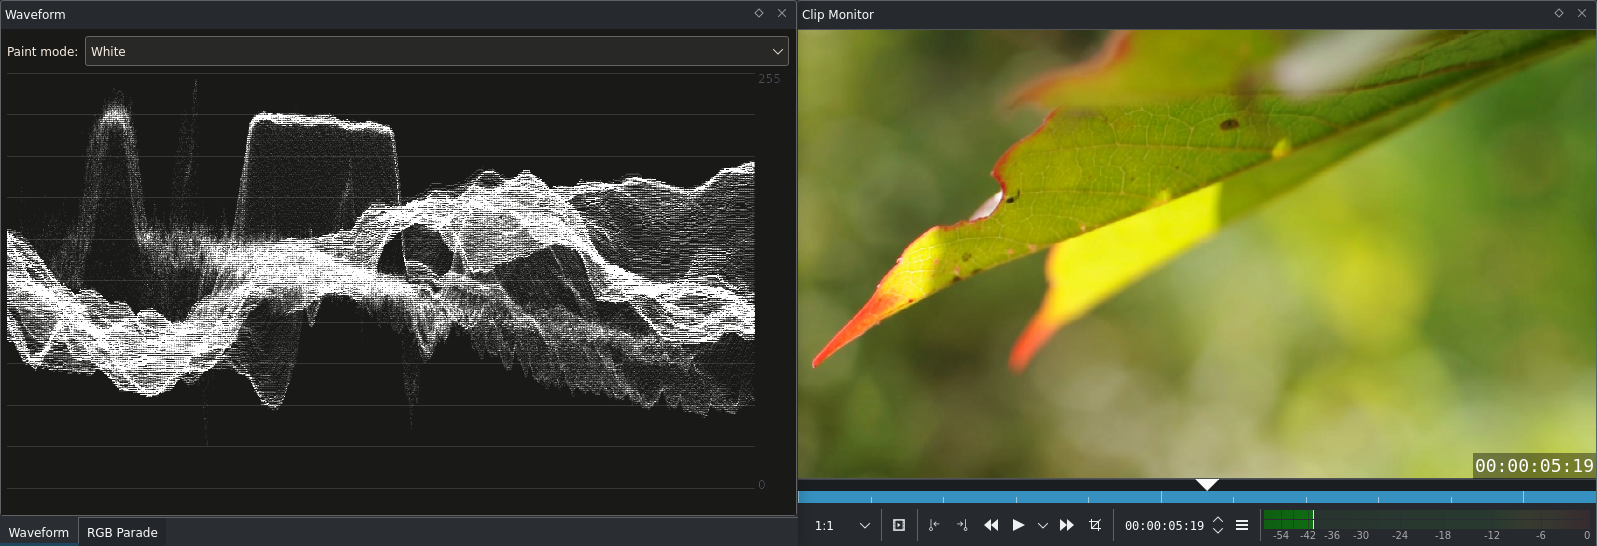
Waveform Example 3: High Key Clip
Waveform example 3
This is a classical High-Key shot. Bright subject (but not clipped yet), white background.
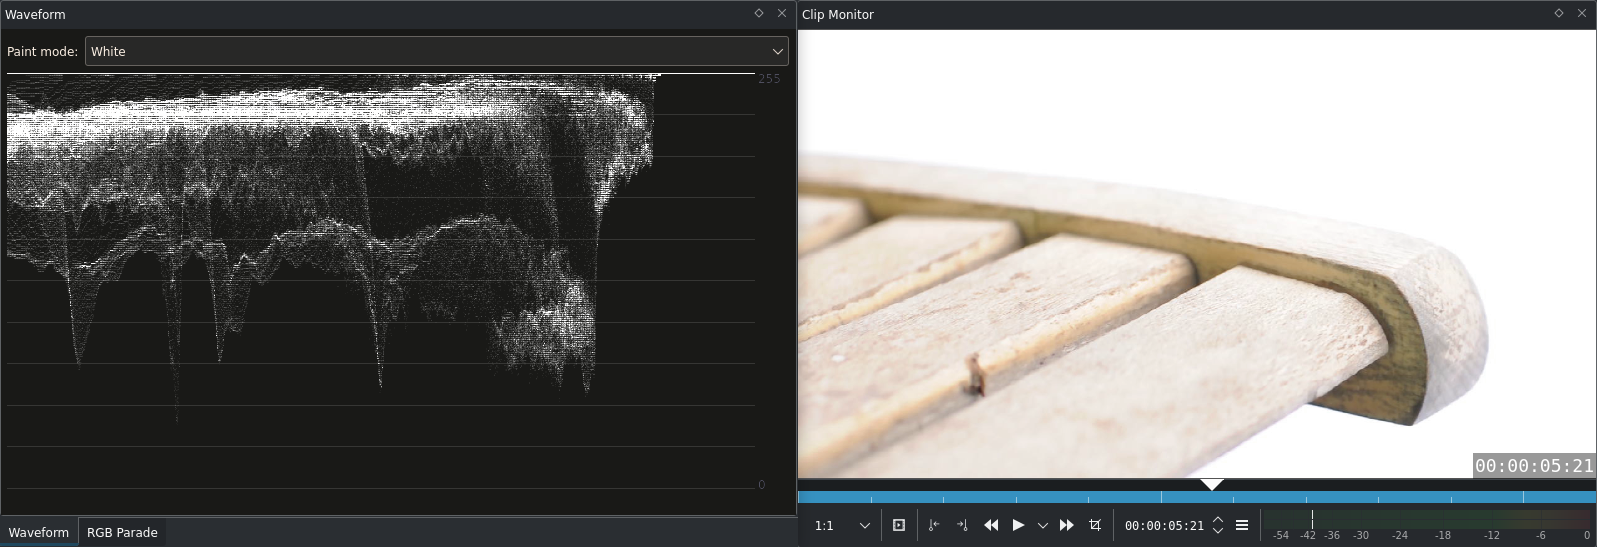
Waveform Options
Paint Mode - Changes the paint mode for the Waveform. Usually changes its brightness as well. Green also highlights pixels with values 0 or 255.
Luma mode (Context menu) - As for the Histogram you can choose how to calculate Luma (Rec.601 or Rec.709).
Interesting detail: When color grading, some colorists prefer scopes with neutral colors and basically with neutral everything. Just greyscale except for the video itself. Why is that? Quick answer and fun fact: Afterimages. If you look at a green surface and then immediately color grade an image by eye, there will be too much green in it.
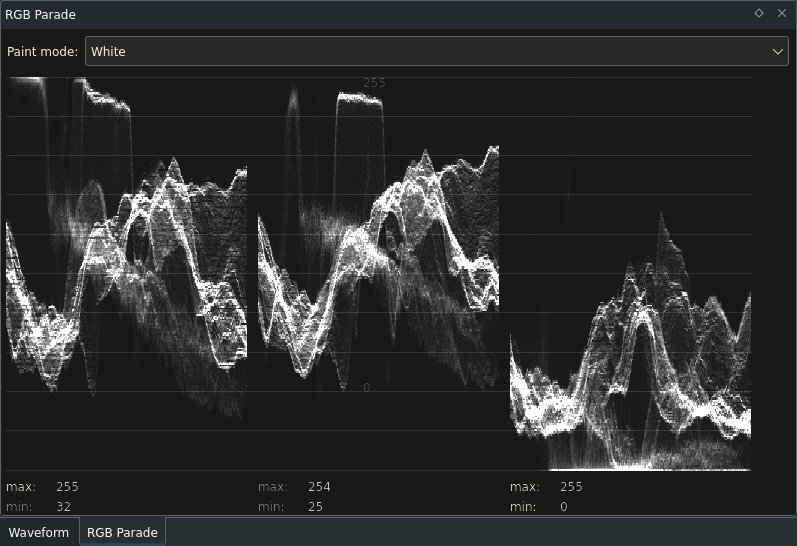
RGB Parade Options
Paint Mode - Changes the paint mode; see above.
Draw Axis (Context menu) - Draws an axis with 10 steps
Gradient reference line (Context menu) - Draws a line from bottom left to top right. This is useful when testing color correction on a linear gradient clip (Black on the left, White on the right), to observe changes in each channels.
To explain the last point a little more in detail: A black/white gradient draws a line from the bottom left to top right on the Waveform. When changing the colors, e.g. with the SOP/Sat effect or with Curves, the line will change.
Attention
Effects working on the saturation will not have any effect on a grayscale gradient!
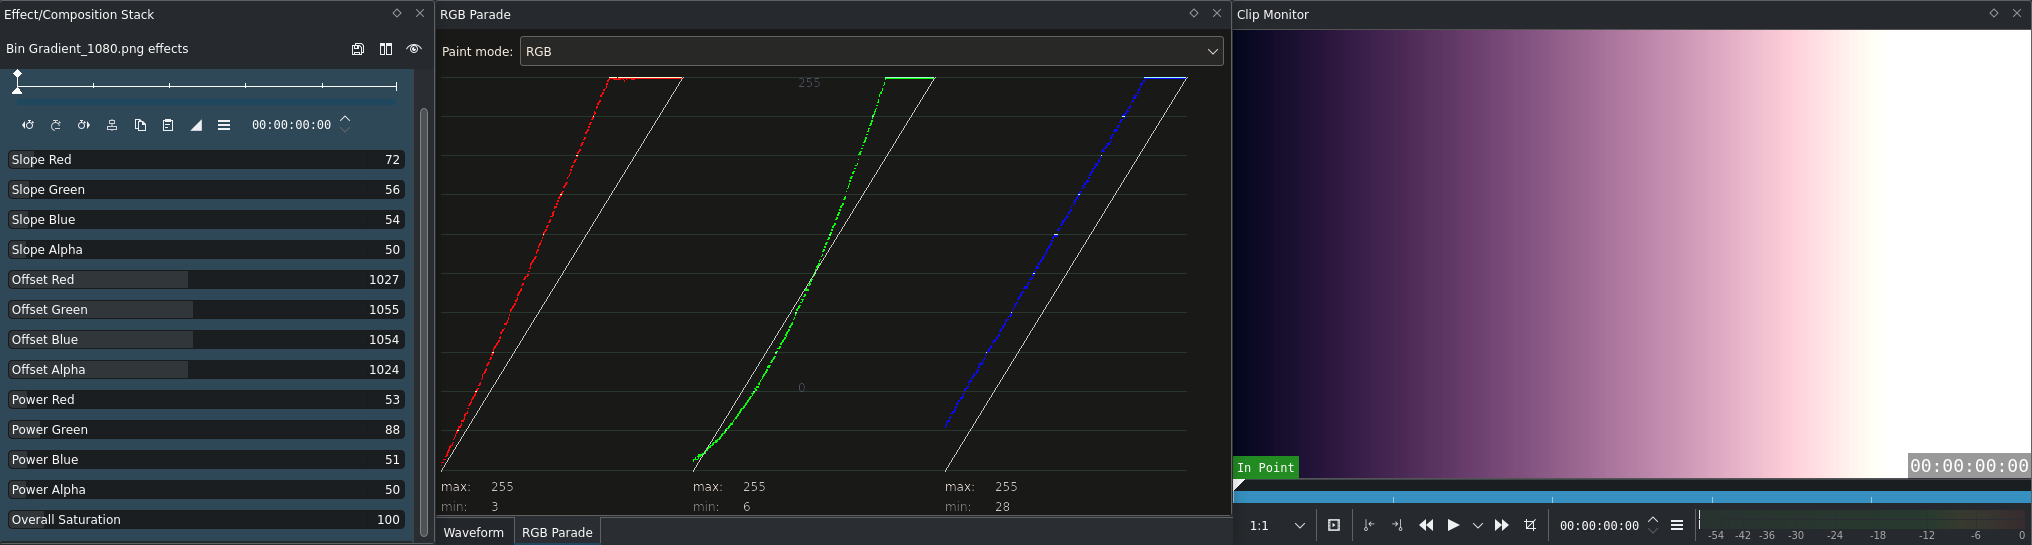
In this gradient above a SOP/Sat effect was applied to give the blacks a blueish touch and the mids and highs a warm touch. You can play around with the gradient file and some color correction effects on the gradient file as well. What the above is good for will be in the next part.
Summary
Waveform and RGB Parade are powerful scopes. Especially the RGB Parade. Correcting the exposure is easy, and with these scopes you can always keep track of the levels of each color component. It is also possible to do white balance by adjusting blacks first and whites afterwards because the horizontal axis in the Scopes correspond to the horizontal axis in the video which allows to detect spots that should be neutral.
Notes
- Sources
windy-sunset.avi(22 MB; 720/24p)fluorescent-wrong-whitebalance.avi(22 MB; 720/24p)red-leaf-tips.avi(13.5 MB; 720/24p)highkey.avi(13 MB; 720/24p)Gradient_1080.png(10 kB, 1920x1080)
Note
Depending on your browser settings you may get an error that the file download is insecure.
The original text was submitted by Simon A. Eugster (Granjow) on Tue, 09/14/2010 - 15:01 to the now defunct kdenlive.org blog. For this documentation it has been lifted from web.archive.org and adapted to match the overall style.