Masking
You create a mask with one of these effects:
Note
The effects with (Mask) in the name need to be used in conjunction with Mask Apply to work. It allows to apply other effects and filters only to the masked area (can also be inverted to apply to everything but the masked area). The effects without (Mask) simply create an alpha channel to allow clips on lower tracks to show through.
Effect Stack Example
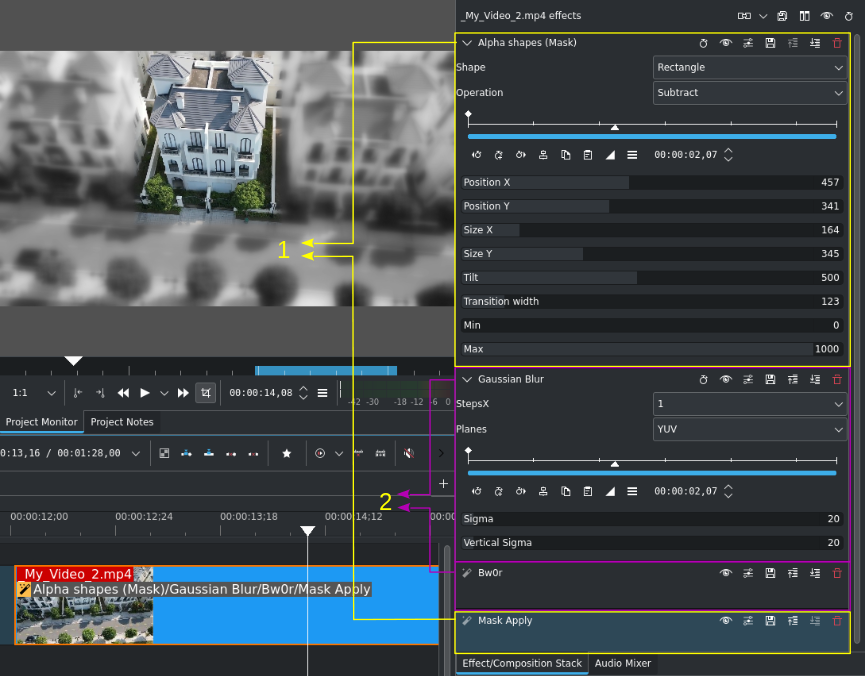
Example of using (Mask) effects to apply effects/filters
This example shows the effect stack with an Alpha Shapes (Mask) and Mask Apply effect as brackets (1) around the actual effects Gaussian Blur and Bw0r (2).
Note that effects are always applied top down.
Steps to create a mask
Depending on your use case apply one of the masking effects.
- Alpha Shapes:
Creates a rectangle, ellipse, triangle, and diamond shape that can be adjusted in position, size, rotation, and feathering. For illustration purposes, Operation Subtract has been selected.
- Rectangular Alpha Mask:
Is a simple mask whose edges are defined in number of pixels from the edge of the frame.
- Rotoscoping:
Is best suited for complex shapes, for example when persons or animals or other irregular objects need to be masked.
- Shape Alpha:
Allows to use an image or video to be used as a mask. The resource must have an alpha channel. This is particular useful for using masks created by online background removal service like those from a Google search.
Adjust the mask to your needs
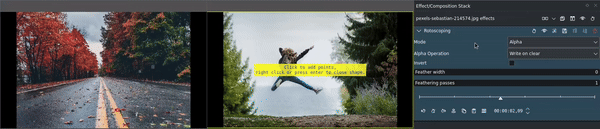
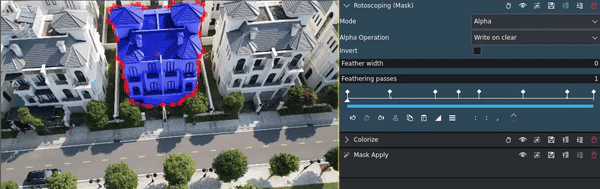
Rotoscoping (click to enlarge)
In this example the jumping person shall be composited into the scene with the road. For this complex shape the Rotoscoping effect is best. It creates a mask[1] outside the shape. Using the Alpha Operation the mask can be inverted.
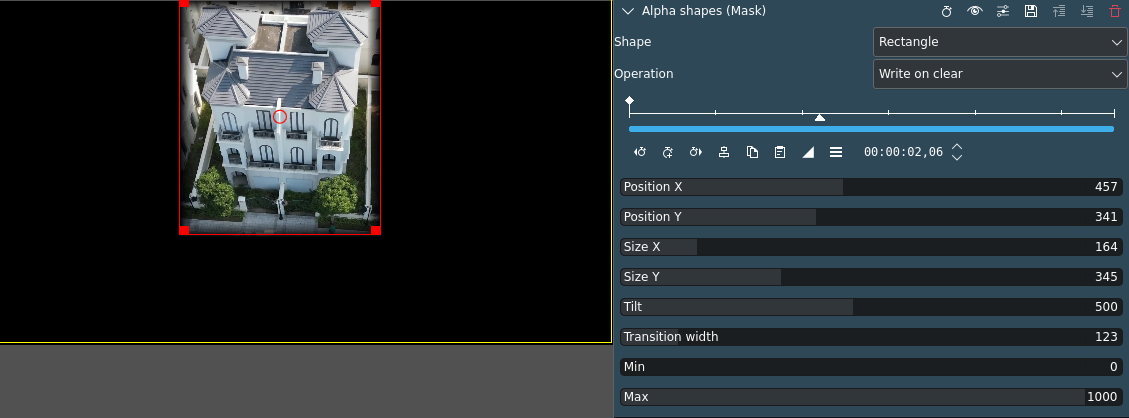
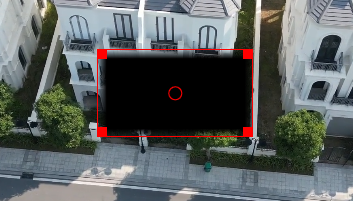
An Alpha Shapes (Mask) applied
In this example the alpha shape rectangle has been adjusted in size, position, and transition width to cover the house in the middle. For better adjustment, Operation has been set to Write on clear. For the mask to work (protecting the masked area) Operation must be set to Subtract.
Apply the desired effect(s) to the clip and adjust as needed
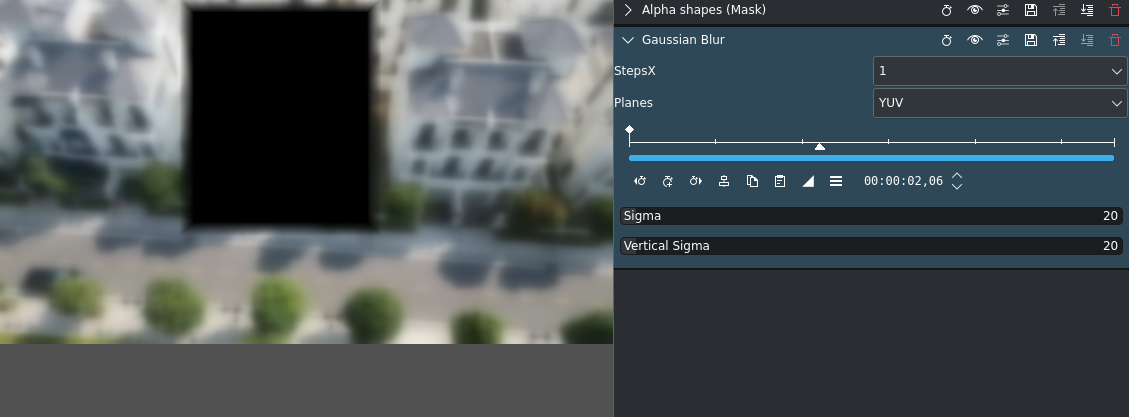
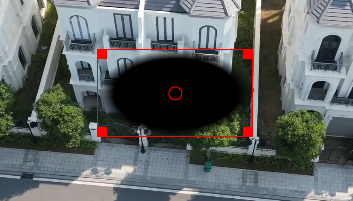
Gaussian Blur effect applied
This will blur the rest of the image but not the part covered by the mask.
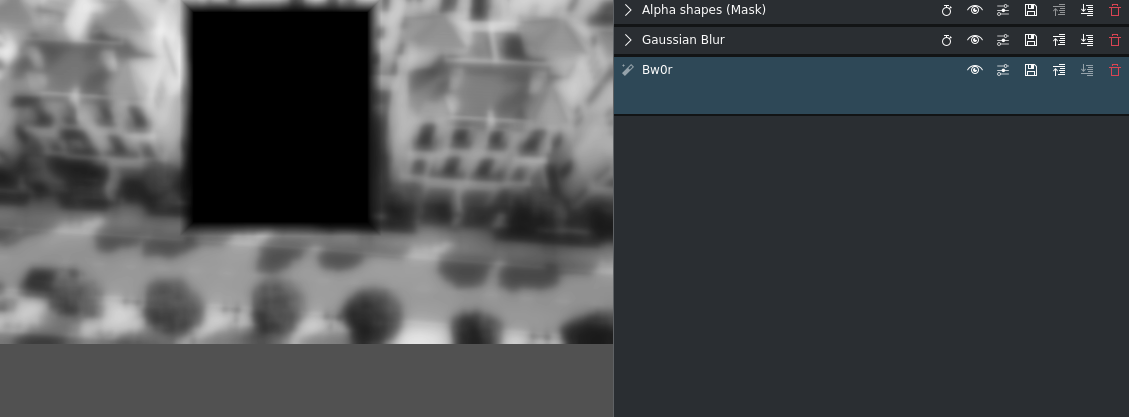
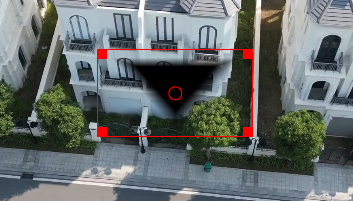
bw0r effect (b&w) applied
This will make the rest of the image black and white but not the part covered by the mask.
Add the Mask Apply effect to the clip
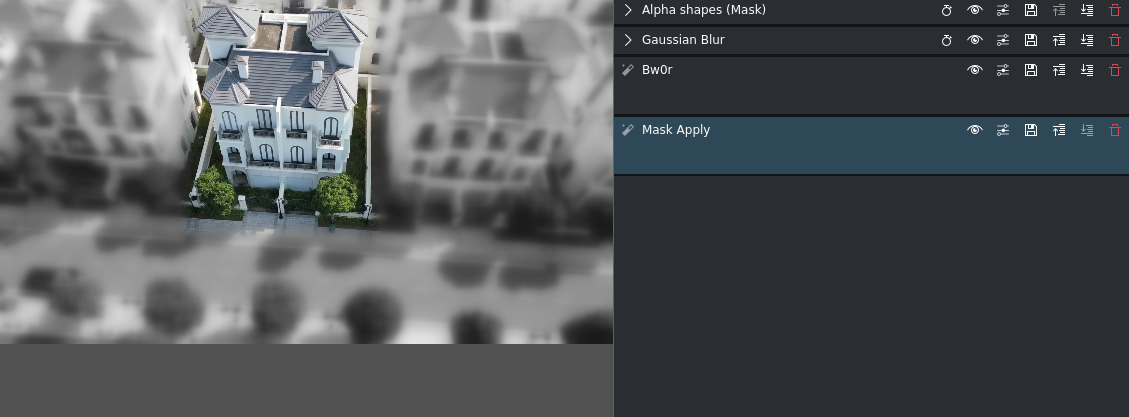
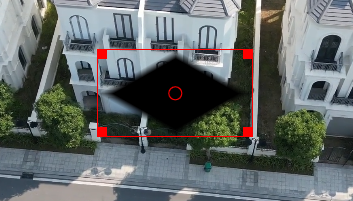
Result of the mask
The masked area is protected from the effects of the two effects/filters. In this example the house in the middle stands out and is in focus.
To adjust for camera movement, you can use keyframes in the Mask effect to change position, size, rotation, and other parameters.
You can repeat this as often as needed for the same clip or add other effects after the Mask Apply for affecting the entire clip.
Other Examples
This is an example for using rotoscoping with keyframes to highlight an object in a video: