Alpha Shapes
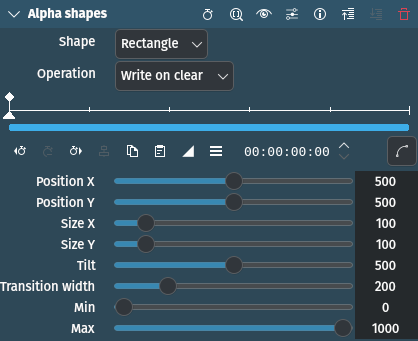
Description
This is the frei0r.alphasp0t MLT filter, see also the frei0r.alpha0ps readme file.
This effect creates an area of transparency in the clip such that the underlying clip shows through in places defined by geometric shapes. By default, the area of transparency is outside the shape that is drawn. Inside the shape is an area of opacity where the overlaying clip is visible. The effect can be stacked to create odd shaped or many areas of transparency.
Parameters
Parameter |
Value |
Description |
|---|---|---|
Shape |
Selection |
Controls the shape of the area of opacity that the effect will create. |
Operation |
Selection |
Defines what is to happen when you have more than one alpha effect on the clip |
Position X / Y |
Integer |
Defines the position of the shape on the screen. The range of values is from 0 to 1000 where 500 defines the middle of the screen. |
Size X / Y |
Integer |
Defines the size of the shape. The range of values is from 0 to 1000 where 500 defines 100%, |
Tilt |
Integer |
Controls the angle the shape appears on the screen. The units are in 1000ths of a full rotation. For example, a value of 250 is one quarter of a circle turn and 500 is a 180-degree turn. That means, 1000 tilt units = 360 degrees. |
Transition width |
Integer |
Defines the width of a border on the shape where the transparency grades from the inside to the outside of the shape. Can be used for feathering or creating a frame. |
Min |
Integer |
|
Max |
Integer |
The following selection items are available:
Shape
Rectangle |
Draws a rectangle |
Ellipse |
Draws an ellipse/circle |
Triangle |
Draws a triangle |
Diamond |
Draws a diamond |
Operation
Write On Clear |
Existing alpha mask is overwritten |
Max |
Take the maximum between the existing alpha mask and the mask generated by this filter |
Min |
Take the minimum between existing alpha mask and mask generated by this filter |
Add |
Add the existing alpha mask and the mask generated by this filter |
Subtract |
Subtract from the existing alpha mask the mask generated by this filter |
Working Examples
Min and Max values and operations

Alpha Shapes example timeline
For the examples we are using a video clip on video track V1 and a title clip (blue background and “Video 1” as text) on video track V2. The Alpha Shape effect is applied to the overlaying clip on V2. This is important to understand the explanations of the various parameters and operations in the examples below.
The Alpha Shapes effect draws areas of opacity onto the clip. The addition of this filter (with the default settings of Min = 0 and Max = 1000) makes the whole clip transparent except for an area of opaqueness defined by the shape and its position and size where the clip can be seen. If you reversed the Min and Max values the result would be that the whole clip is opaque (can be seen) except for an area of transparency defined by the shape and its position and size.
The Max and Min values adjust the opacity of the clip inside and outside of the shape, respectively. A setting of 1000 is 100% opaque. A setting of zero is 0% opaque (i.e. 100% transparent).
Max control
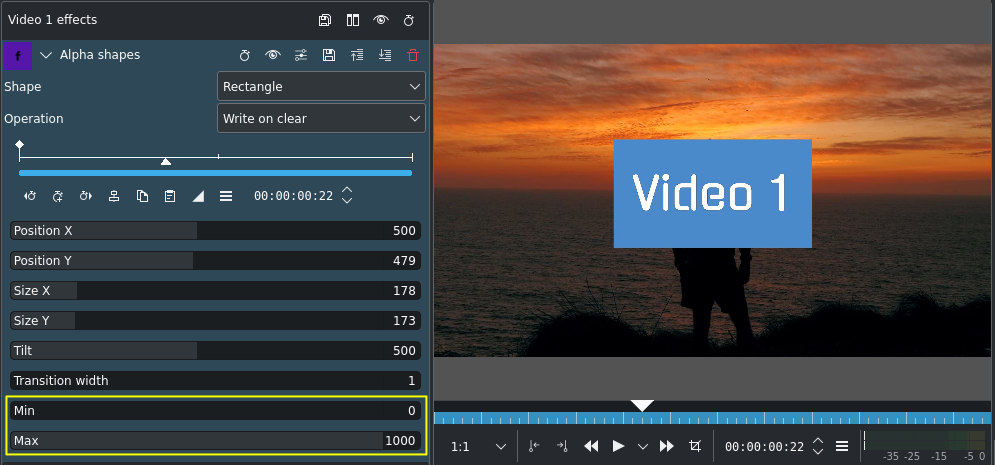
Max parameter at 1000
The Max parameter controls how opaque it is inside the shape. At Max = 1000 it is completely opaque inside the shape and nothing of the clip on V1 (background) shows through.
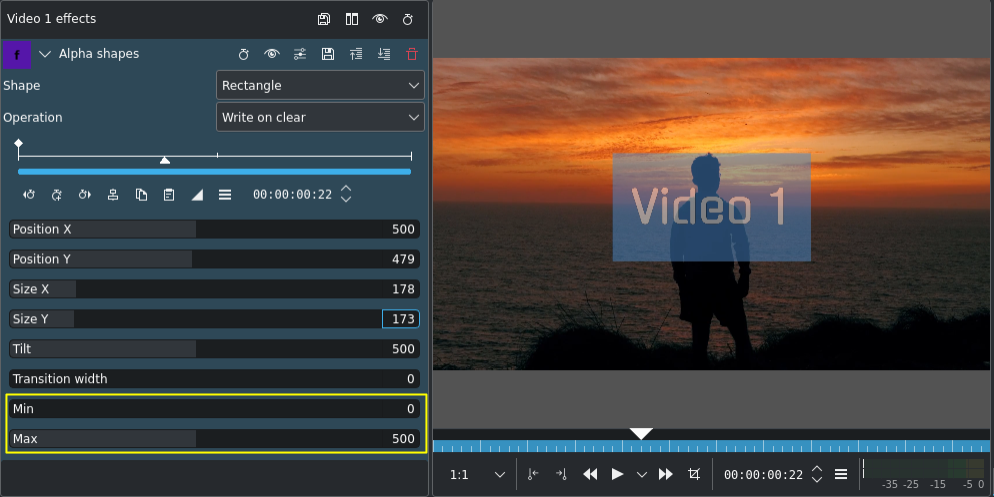
Max parameter at 500
At Max = 500 it is semi-transparent inside the shape and you can see the clip on V1 bleeding through.
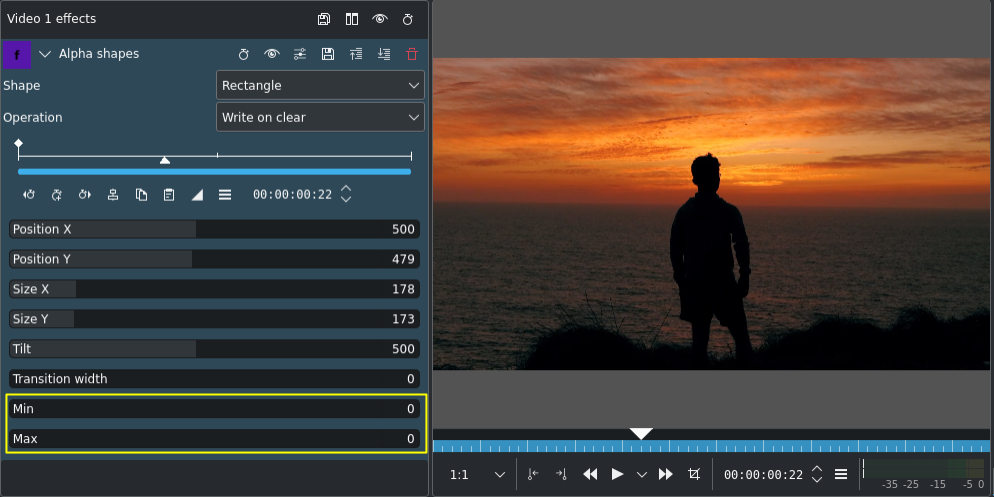
Max parameter at 0; Min parameter at 0
At Max = 0 the inside of the shape is completely transparent - the same as the rest of the clip on V2 (foreground) - and you can see all of the background.
Min Control
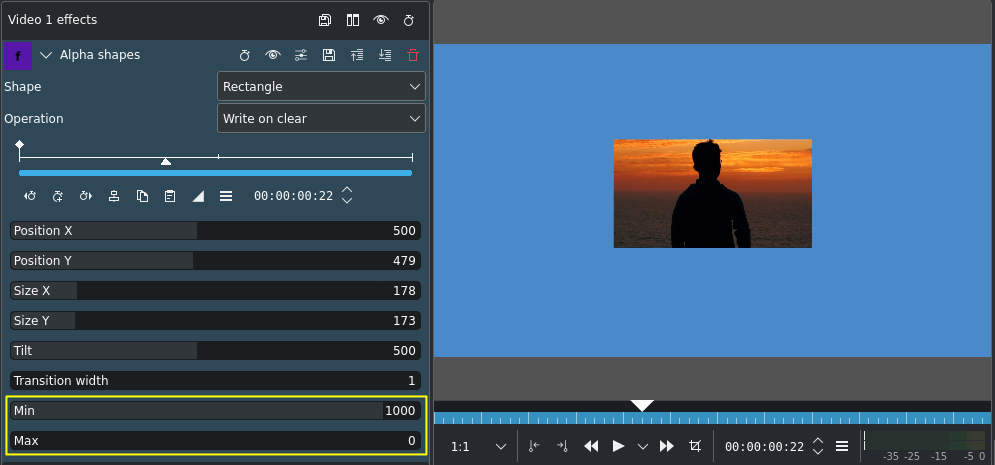
Min parameter at 100
The Min parameter adjusts how opaque it is outside the shape. When Min = 1000 the outside of the shape is completely opaque (opacity of 100%), and at Min = 500 we see something of the foreground appear outside the shape.
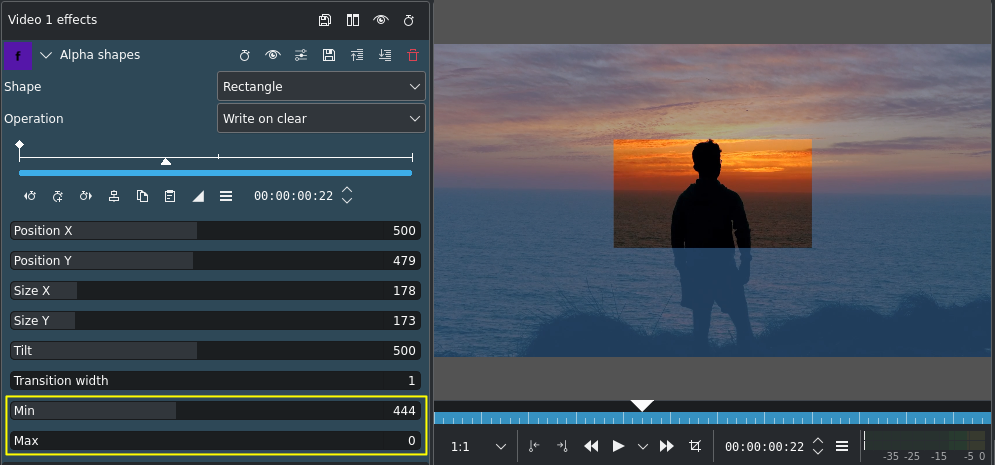
Min parameter at 1000
At Min = 1000 the opacity outside the shape is 100% and nothing of the background appears.
Combining Alpha Shapes - Operations
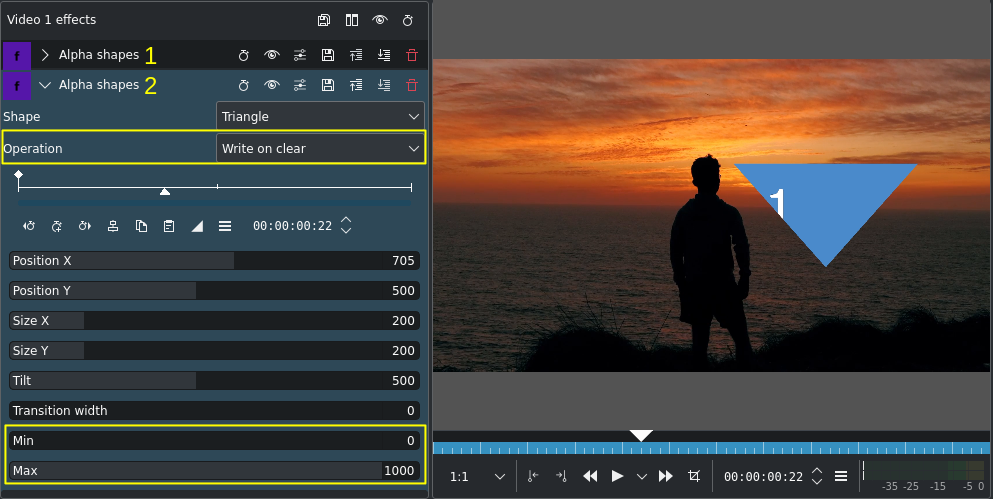
Alpha Shape effects stacked: (1) & (2)
In this example, we added a second alpha shape effect (2) using a triangle as the shape. As effects are processed from the top down the two effects interact with each other. At the onset we are using the operation Write on clear so the second alpha shape effect appears on its own.
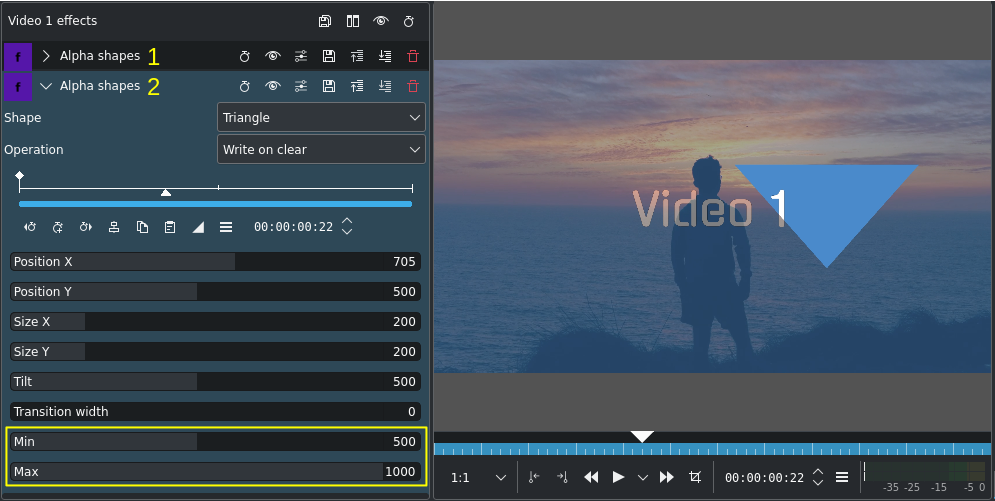
Max at 1000; Min at 500
With Max = 1000 the opacity inside the triangle is 100% while Min = 500 determines an opacity of 50% outside the triangle which makes the background and foreground blend together. Still, the operation Write on clear makes Kdenlive ignore the previous alpha shape effect (1) - it is simply overwritten.
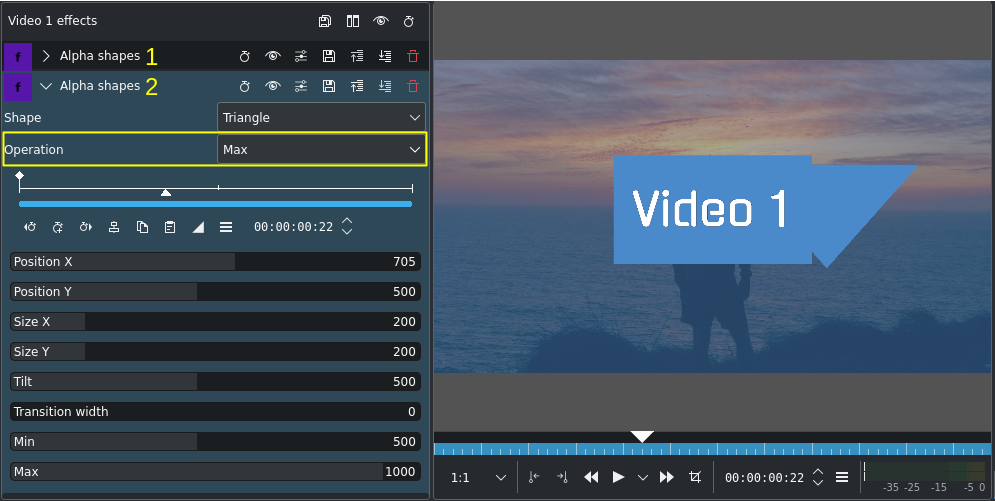
Operation set to Max
Now that we changed the operation to Max the previous alpha shape effect is taken into consideration and both areas defined by the respective shapes - the rectangle from effect (1) and the triangle from effect (2) - show up because both have the Max parameter value set to 1000 (= 100% opaque).
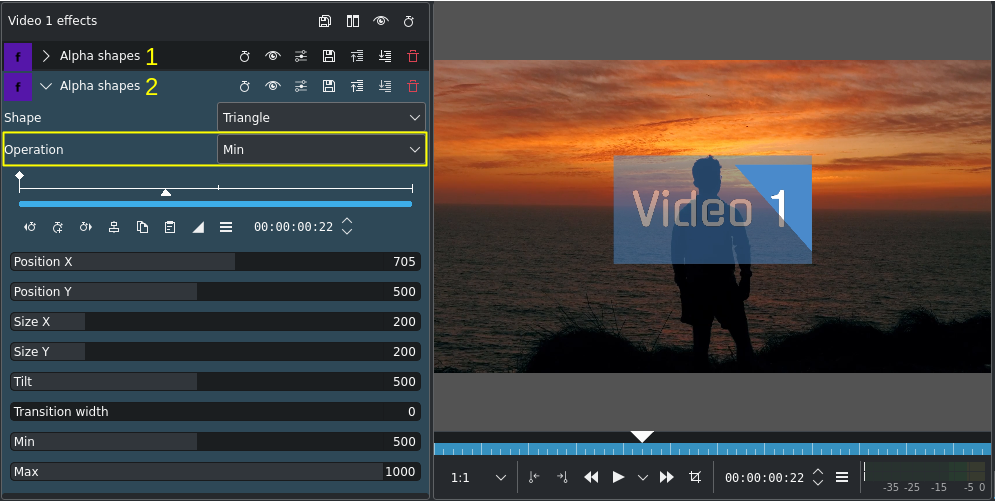
Operation set to Min
With the operation set to Min the blending is different. Kdenlive takes the minimum values of the Min and Max parameter values: Min value for effect (2) is 500 in areas where the Max value of effect (1) is 1000. There is no distinction between Min or Max, only the value of that pixel is taken into account.

Operation set to Add
The operation Add performs a simple mathematical addition of the respective Min and Max values (and caps it at 1000 or 100%). Now the areas defined by both effect shapes are visible.
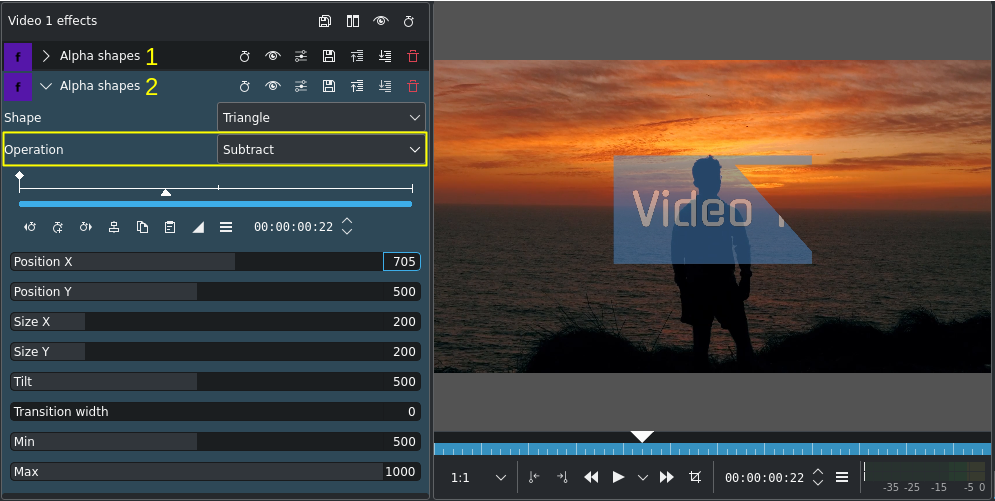
Operation set to Subtract
The operation Subtract performs a simple mathematical subtraction of the respective Min and Max values (and floors it at 0 or 0%). In this example because the Max value of effect (2) is 1000, it practically brings the opacity down to 0 hence the background is visible (the area of the shape is 100% transparent).
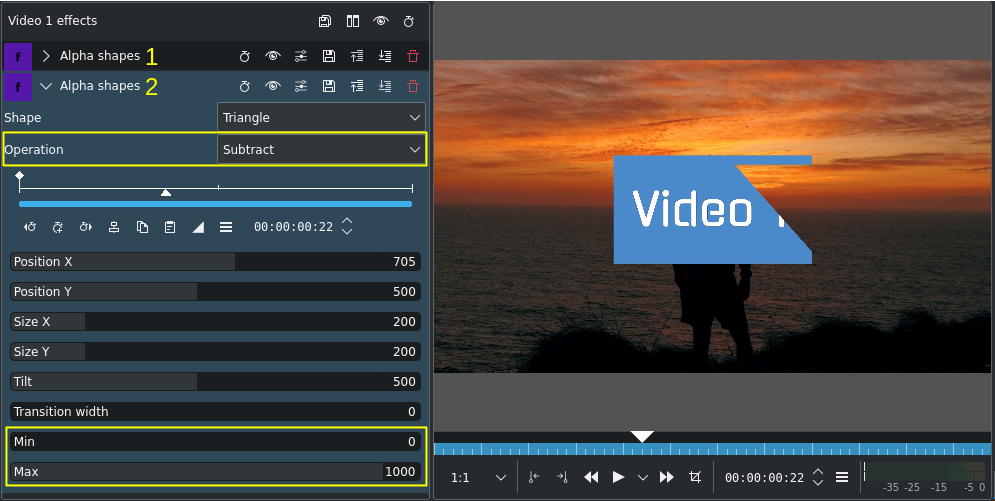
Operation set to Subtract; Min = 0
In this example we have reduced the Min value of effect (2) to 0 making the area outside the triangle 0% opaque (= 100% transparent). This results in the rectangular shape from effect (1) being cut by the triangle shape from effect (2) because the Max values in both effects are at 1000 (100% opaque), and with the Subtract operation the Max value of the pixels in the overlapping area is 0.
Feathering
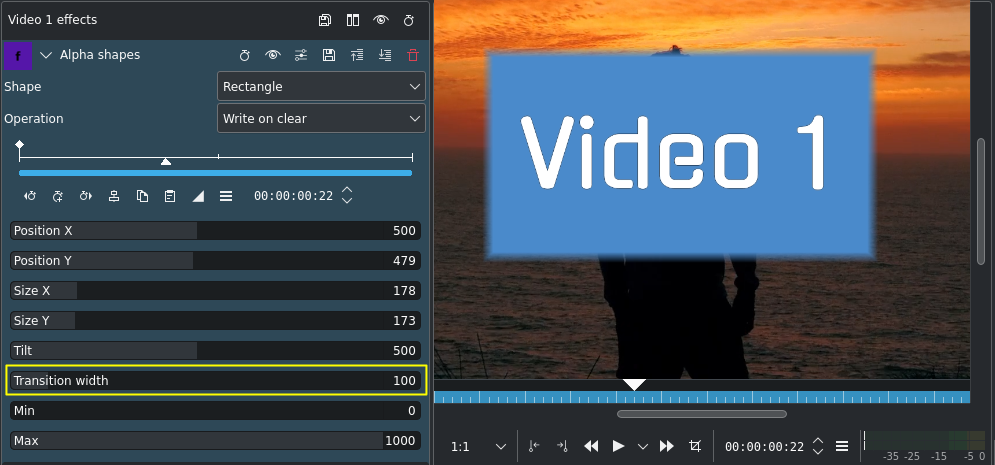
Transition width set to 100 (default = 200) for feathering
Use the Transition width parameter to create a bleeding edge (aka feathering) for the alpha shape.