Marcadors de la línia de temps
Els marcadors de la línia de temps en la imatge de sota són les etiquetes de color vermell. No s'han de confondre amb els Marcadors (color groc a la imatge de sota). Els marcadors de la línia de temps són estàtics o es poden moure. Els marcadors estan dins dels clips i es mouran amb ells.
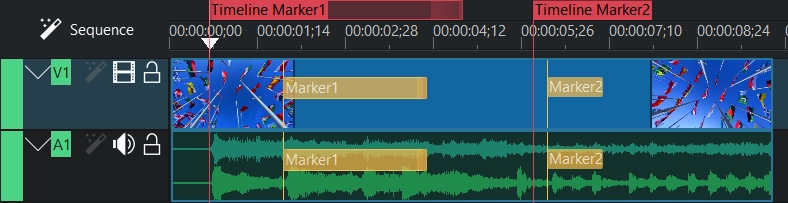
Els marcadors de la línia de temps es poden utilitzar per a certs punts (Marcador de la línia de temps2) o intervals (Marcador de la línia de temps1).
Els marcadors de la línia de temps es poden utilitzar per a definir regions per a la renderització. Vegeu Renderitzar mitjançant marcadors de la línia de temps.
Els marcadors de la línia de temps també es poden utilitzar com a capítols per a vídeos de DVD. Vegeu Renderitzar mitjançant marcadors de la línia de temps.
3 maneres d'afegir marcadors de la línia de temps
Els procediments següents afegeixen un marcador de la línia de temps a la posició del capçal de reproducció de la línia de temps:
Menú
Feu clic dret a regle de la línia de temps i trieu al menú Afegeix/Elimina el marcador de la línia de temps
Feu clic dret a la línia de temps i trieu Afegeix/Elimina el marcador de la línia de temps
Teclat
G afegeix un marcador de la línia de temps.
1 - 0 (número 1 a 0 del teclat numèric)
Ratolí
Feu doble clic a la part superior del regle de la línia de temps i s'afegirà el marcador de la línia de temps a on hàgiu fet clic
Menú del clic dret del regle de la línia de temps
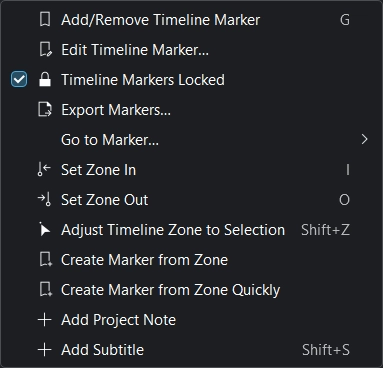
Afegeix/Elimina el marcador de la línia de temps
Edita el marcador de la línia de temps: vegeu Moure i editar els marcadors de la línia de temps
Marcadors de la línia de temps bloquejats: vegeu Moure i editar els marcadors de la línia de temps
Exporta marcadors: obre el diàleg d'exportació de marcadors.
Ves al marcador.... Selecciona un marcador al qual hauria de saltar el capçal de reproducció.
Estableix una entrada/sortida de zona: també vegeu Renderització de la vista prèvia de la línia de temps.
Ajusta la zona de la línia de temps a la selecció
Crea un marcador a partir d'una zona
Crea ràpidament un marcador a partir d'una zona
Afegeix una nota del projecte: vegeu Notes del projecte
Afegeix subtítols: vegeu Subtítols
Marcador de la línia de temps amb interval
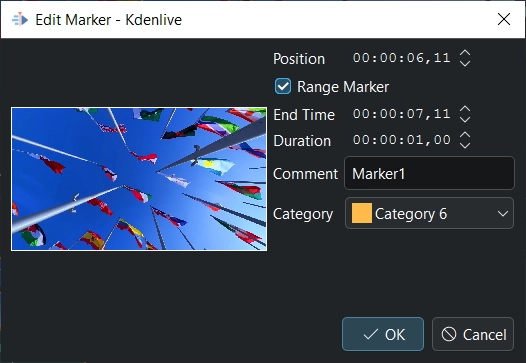
A la finestra d'edició de marcador podeu activar el Marcador d'interval que permet determinar una Durada del marcador. La Durada predeterminada és 1 segon.
Gestió de les categories i els marcadors
Categories
En iniciar un projecte nou, les categories per al projecte s'extreuen de les Categories de marcadors a l'opció Configura els colors i els marcadors. Aquestes categories són per a marcadors i marcadors de la línia de temps.
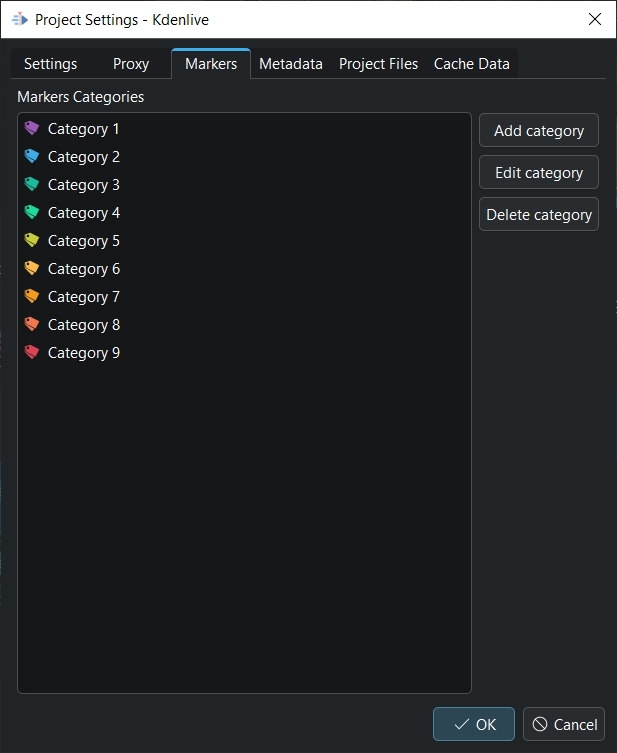
Es poden afegir, editar i suprimir categories específiques del projecte a
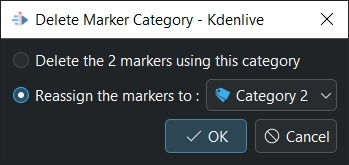
Suprimeix la categoria En suprimir una categoria que té marcadors assignats, el Kdenlive us preguntarà si realment voleu suprimir-la o si voleu reassignar els marcadors a una altra categoria.
Visualització dels marcadors
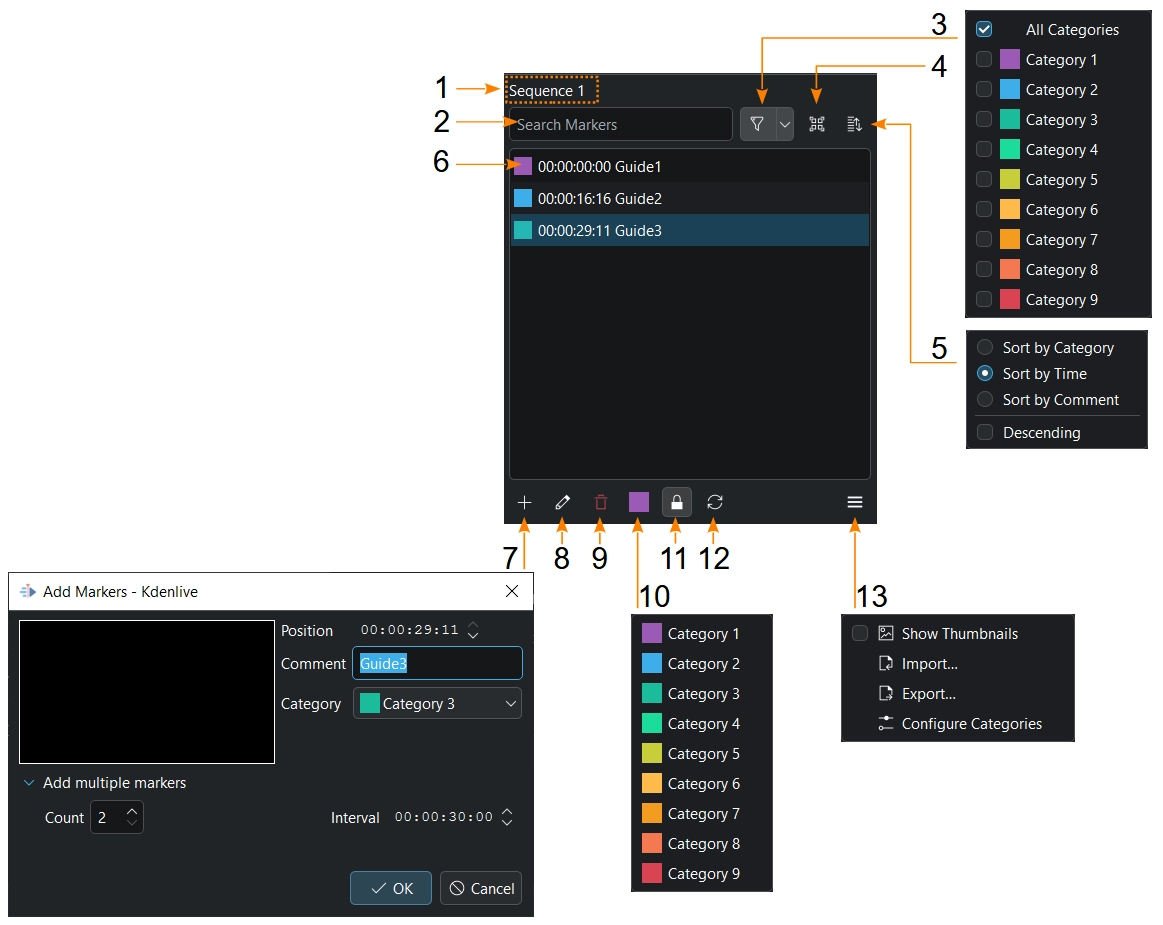
obre la finestra dels marcadors a on podeu gestionar els marcadors.
- 1:
Mostra l'objecte seleccionat: Clip-Nom, Seqüència-Nom
- 2:
Cerca marcadors de la línia de temps/marcadors de clip. Si introduïu 2 en aquest exemple només es mostrarà guide2 / marker2 a la llista i a la línia de temps/en el monitor de clips.
- 3:
Mostra només les categories seleccionades a la llista i al monitor de la línia de temps/clips.
- 4:
Mostra els marcadors de tots els clips al projecte
- 5:
Ordena per categories, hora o comentari, i canvia el sentit d'ordenació (ascendent o descendent).
- 6:
En fer clic sobre un marcador o fletxa-amunt fletxa-avall, se seleccionarà i el capçal de reproducció saltarà a aquest marcador en el monitor de la línia de temps/clips. Selecció múltiple: manteniu premuda Maj per a seleccionar un interval de marcadors o Control per a afegir marcadors individuals a una selecció. Control+A selecciona tots els marcadors. Un doble clic o prement F2 en un marcador obrirà la finestra d'edició de marcador/finestra d'edició de marcador.
- 7:
Afegeix un marcador. Només aquí teniu la possibilitat d'afegir diversos marcadors amb un interval.
- 8:
Edita un marcador seleccionat. El mateix que quan feu doble clic en un marcador segons el punt 4 o als marcadors de la línia de temps en el regle de la línia de temps.
- 9:
Suprimeix els marcadors seleccionats.
- 10:
Estableix la categoria predeterminada per als marcadors nous.
- 11:
Només marcadors de la línia de temps: Bloqueja els marcadors de la línia de temps. Bloquejats quan el fons és gris clar (com es mostra a la captura de pantalla).
- 12:
Actualitza totes les miniatures quan les miniatures estiguin habilitades
- 13:
Activa/desactiva les miniatures. Importa/exporta marcadors/marcador o configura les categories del projecte.
Podeu posar un comentari al marcador i fer que el comentari es mostri escollint Editar en el menú o prement el botó Editar.
Exporta els marcadors de la línia de temps com a descripció dels capítols
Els marcadors de la línia de temps poden marcar capítols o seccions diferents d'un vídeo mentre s'edita. En pujar vídeos editats a plataformes com YouTube, els marcadors de la línia de temps es poden exportar com a marques de capítol compatibles amb YouTube. Això es pot fer amb Copia al porta-retalls i enganxar després a YouTube.
Feu clic dret al regle de la línia de temps i trieu Exporta els marcadors o o . Després apareix la finestra Exporta els marcadors com a descripció dels capítols.
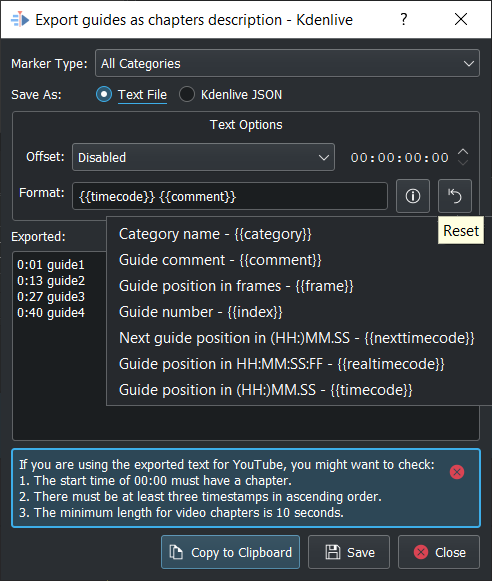
Tipus de marcador: trieu un dels tipus de marcador de la línia de temps per a marcar els capítols i useu els altres tipus per a fer altres coses.
Desa com a: Text (per a Youtube) o com un fitxer de dades JSON que es pot tornar a importar.
Desplaçament: això afegeix la possibilitat de definir un desplaçament general (hh:mm:ss:ff) a cada marcador de la línia de temps.
Format: això defineix com s'exporten les marques dels capítols. Quan s'utilitzen les 2 cadenes de format predeterminades (com es mostra a la imatge), el Kdenlive comprova si el marcador de capítol coincideix amb la guia de YouTube, i mostra un avís si no coincideix.
i: mostra totes les cadenes d'exportació possibles. Seleccioneu la cadena que voleu i el Kdenlive l'afegirà al Format per a l'exportació. Afegeix espais entre les cadenes segons sigui necessari.
{{timecode}} afegeix la posició del marcador de la línia de temps a HH:MM.SS (predeterminat)
{{comment}} afegeix el text del marcador de la línia de temps (predeterminat)
{{frame}} afegeix el número de fotograma de cada marcador de la línia de temps
{{index}} afegeix el número de marcador de la línia de temps
{{nexttimecode}} afegeix la posició del marcador de la línia de temps següent a HH:MM.SS
{{realtimecode}} afegeix la posició del marcador de la línia de temps a HH:MM:SS:FF
Reinicialitza: restableix la configuració al valor predeterminat: {{timecode}} {{comment}}
Exportat: mostra què s'ha exportat. Per a canviar el text del marcador de la línia de temps cal editar el marcador de la línia de temps a la línia de temps.
Copia al porta-retalls: copia les dades visualitzades a Exportat al porta-retalls per a utilitzar-les en altres aplicacions (Youtube).
L'avís en el quadre blau només apareix si no es compleix un dels 3 punts.
Moure i editar els marcadors de la línia de temps
Els marcadors de la línia de temps es poden moure amb un clic en el text del marcador de la línia de temps a la línia de temps i arrossegar-lo a la posició desitjada.
Els marcadors de la línia de temps es poden moure canviant la Posició a la finestra d'edició.
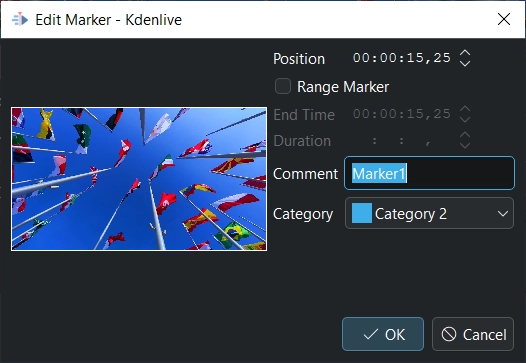
Un doble clic en el text d'un marcador de la línia de temps en el regle de la línia de temps obrirà la finestra d'edició (a part de la possibilitat a Visualització dels marcadors).
El text del Comentari i de la Categoria es pot canviar a la finestra d'edició.
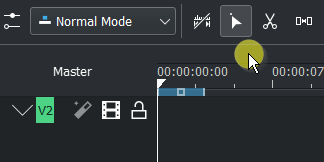
Moure els marcadors de la línia de temps amb l'eina espaiadora
Moveu amb facilitat els marcadors de la línia de temps juntament amb els clips emprant l'eina espaiadora mitjançant l'opció nova . Quan es bloquegen, els marcadors de la línia de temps es queden al seu lloc. Quan es desbloquegen, els marcadors de la línia de temps es mouen amb el clip.