Image Sequence
Image sequence clips are clips created from a series of still images. The feature can be used to make an animation from a collection of still images or to create a slideshow of still images. To create the former, use a short frame duration; to create the latter, use a long frame duration.
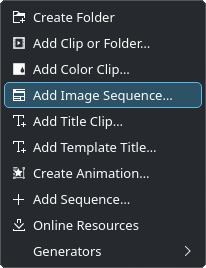
Right-click on empty space in the project bin, or click the 
 Add Clip icon on the project bin toolbar, and select Add Image Sequence.
Adding an image sequence
This opens a dialog window to specify further details.

Image sequence details
Name: Enter the name of the image sequence. You can change it later from within the project bin.
MIME Type: When enabled, the images get imported in ascending order using a simple alphabetic sorting method. It is recommended to get the images into the right order before adding the image sequence.
Filename pattern: When enabled, you can point to the first image you like to import. The remaining images get imported in ascending order.
Folder: Browse to the location of the images which will make up your image sequence and select the first image. The subsequent images that are to be used in the slide show will be selected based on some sort of filename algorithm that predicts what the next image file name should be.
Frame Duration: Enter the duration for each image to be displayed. Select the format you want to use from the drop-down list. By default, the hh:mm:ss:ff format is used; alternatively you can use frames.
Loop: When enabled, you can lengthen the image sequence clip in the timeline by dragging. Otherwise the image sequence clip is only as long as the number of images times the frame duration.
Center Crop: When enabled, it automatically fills the output video frame with the images while maintaining their aspect ratio by zooming the image and cropping equal amounts from each edge until they fill the full frame. Without this option, the images will not be zoomed, but black bars will appear when the photo orientation or aspect ratio does not match the project settings.
Dissolve: When enabled, you can adjust the length of the dissolve (format depends on the selection of format at Frame duration), choose the type of Wipe, and adjust it with the Softness slider.
Animation: When enabled, it adds preset slow smooth pan and zoom effects also known as the Ken Burns Effect[1]. You can choose None (no animation), Pan, Pan and Zoom, or Zoom. Each option also has a low pass filter to reduce the noise in the images that may occur during this operation. Low pass filtering is much slower, so you should preview without it, and then enable it for the final render.
The box a the bottom of the window shows the files that will be included in the image sequence. Check Show thumbnails to switch on thumbnails for the files.
When you press OK, a video file made up of all the images you selected will be added to the project bin.
You can then drag this video to the timeline.
To edit the slideshow parameters and to switch on Low pass, either double-click the image sequence in the project bin or right-click and choose Clip Properties.