Clip Properties
You can display and edit clip properties by selecting a clip in the Project Bin and using the , or selecting Clip Properties from the right-click clip context menu.
Clip Properties are displayed in their own widget. You enable it from the . If it is not enabled when selecting Clip Properties as described above, Kdenlive will automatically enable it. By default, the widget is part of the same workspace dock as the project bin. As with any other widget, you can move it around within the same dock or put it to another or even into its own dock. See the chapter about Workspace Layout.
The Clip Properties widget has several tabs[1]:
 File Info - displays general File Info
 Properties - allows editing some Properties
 Audio Properties - displays properties of the audio stream
File Info
The first tab is the File Info tab. It displays general information about the file, its streams, and other technical data.
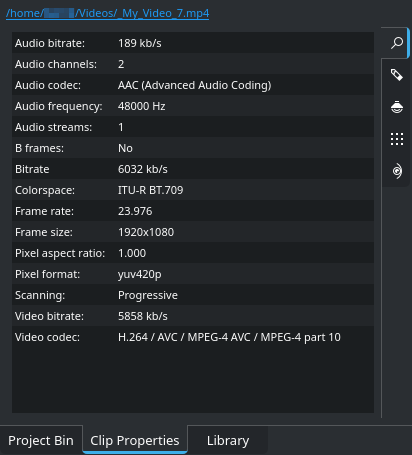
The File Info tab
At the top, the filename with its full path is displayed as a link. Clicking it opens your OS file manager at that particular location.
Properties
The Properties tab displays those properties of the clip that Kdenlive allows you to change.
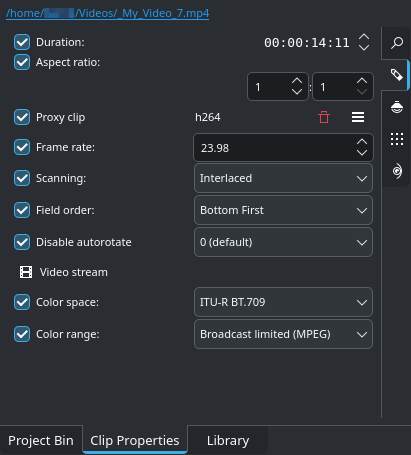
Editable properties of the selected file
Check the property you want to change, and then enter or select the new value.
- Duration:
The duration of the original clip. Not really useful for video clips, but color clips, title clips, images, and image sequences. However, if set for a video clip the following rules apply: If the new duration is shorter than the clip duration, then the clip is trimmed. If the new duration is longer than the clip duration, then the last image is repeated (freeze frame) until the new duration is reached.
- Aspect Ratio:
The current aspect ratio of the clip
- Proxy clip:
If proxy clips are enabled for the project (see the chapter Project Settings), you create a proxy file for the selected clip. If a proxy file exists already, this is checked and the encoder format is displayed. Click on
 Delete proxy file to delete the proxy file. The
  icon opens a flyout with additional options:
- Frame rate:
The current frame rate in fps
- Scanning:
The current scan format (interlaced or progressive)
- Field order:
The current field order (only applicable to interlaced scanning)
- Disable auto-rotate:
If checked will prevent the image to be rotated according to its embedded rotation setting (not present in all images)
- Color space:
The current color space of the clip
- Color range:
The current color range of the clip. This is mostly relevant for videos intended for broadcasting.
Sequence Properties
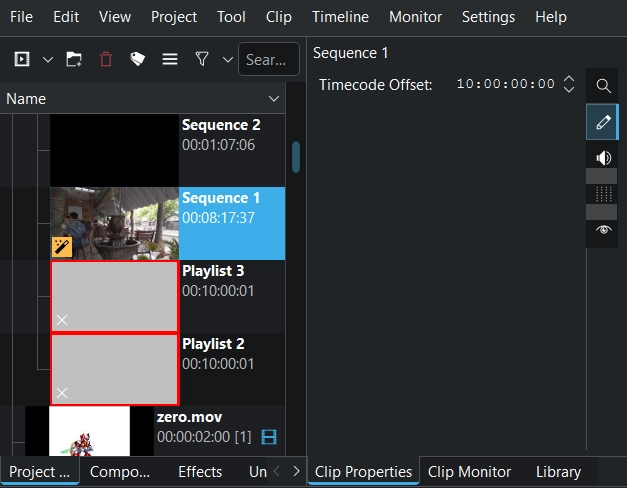
When a sequence is selected in the project bin you can change the timecode offset. More details see under sequence timecode offset.
Audio Properties
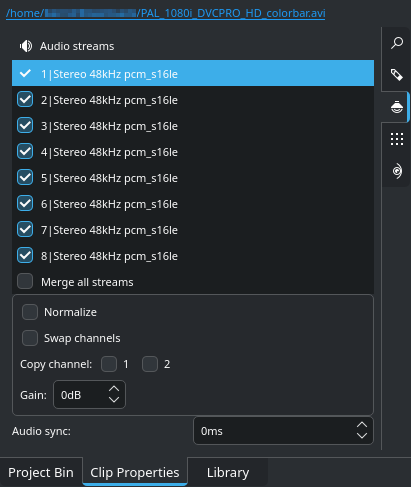
The Audio properties tab
Choose which audio channel[2] should be enabled or disabled.
Rename with double click.
Select each channel in the list individually to perform any of the following functions:
- Normalize:
Normalize the channel
- Swap channels:
Swap the channels
- Copy channel:
Copy a channel on the other one
- Gain:
Adjust the volume
Adjusting the Audio sync in increments of one millisecond (1 ms) applies to all channels.
Notes
The Marker tab has been removed. Clip markers are shown in their own widget Marker. You enable it in . More details see Značky.