Texto
Hacer clic en el botón  o usar el atajo Alt+T, luego hacer clic en el espacio te trabajo principal para crear un nuevo campo de texto, que contendrá la palabra predeterminada Texto dentro. Ya quedará seleccionado, por lo que será posible comenzar a introducir un nuevo texto, que reemplazará a esta palabra.
Las propiedades del texto podrán ser establecidas en la pestaña Propiedades.
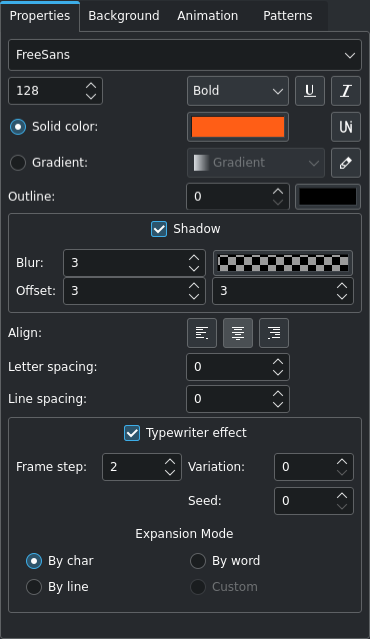
La pestaña con las Propiedades de texto
Nota: El ancho del menú desplegable de tipografías estará dinámicamente ajustado en base al nombre más largo de las tipografías instaladas en el sistema. En caso de que la flecha hacia abajo del lado derecho del menú no estuviera visible, será posible accederla mediante el uso de la barra de desplazamiento del panel de Propiedades, en su parte inferior.
- Tipografía:
Permite seleccionar la tipografía a ser usada en el texto. Kdenlive utilizará las tipografías instaladas en el SO. En caso de necesitarse tipografías adicionales, se podrán usar luego de instalarlas en el sistema, usando el método estándar provisto por el sistema operativo
- Tamaño:
Permitirá establecer el tamaño deseado de la tipografía, de manera directa o usando las flechas hacia arriba/abajo
- Cuerpo:
Permite seleccionar el estilo de la tipografía. Los estilos disponibles dependerán de cada tipografía
- Subrayado:
 Activar este botón para crear un texto subrayado
- Cursiva:
 Activar este botón para crear un texto en cursiva
- Unicode:
 Haciendo clic en este botón se abrirá un diálogo desde el cual será posible seleccionar caracteres especiales (Unicode) que no se encuentran normalmente disponibles en un teclado convencional.
- Color pleno:
Seleccionar esta opción en caso de desear que el texto tenga un único color
- Selector de color:
Hacer clic en la muestra de color para abrir el diálogo de selección de colores estándar del sistema operativo
- Gradiente:
Seleccionar esta opción en caso de desear que el texto tenga un gradiente de colores
- Selector de gradiente:
Permitirá seleccionar uno de los gradientes disponibles en Kdenlive
- Editar gradiente:
 Hacer clic en este botón para abrir una ventana de edición de gradientes. Allí será posible crear, editar y borrar gradientes.
- Contorno:
Un valor de cero (0) significará que el texto no tendrá contorno; valores mayores crearán un contorno (medido en píxeles) para el texto.
- Color del contorno:
Hacer clic en esta muestra de color para seleccionar el color para el contorno
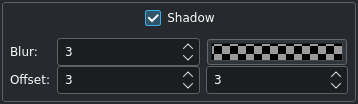
- Sombra:
Permitirá que el texto proyecte una sombra
- Desenfoque:
Establecerá la cantidad de desenfoque de la sombra (predefinido: 3)
- Color de la sombra:
Hacer clic en la muestra de color para seleccionar el color de la sombra
- Desplazamiento:
Introducir el desplazamiento que tendrá la sombra con respecto al texto, expresado en píxeles en X e Y. Valores positivos crearán, respectivamente, una sombra proyectada hacia abajo y derecha del texto; valores negativos la proyectarán respectivamente hacia arriba e izquierda.
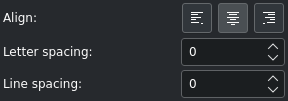
- Alinear:
Hacer clic en uno de los botones para alinear el texto a la izquierda
 , el centro
  o la derecha
  . En caso de seleccionarse solo una parte del texto, la alineación se aplicará únicamente a los caracteres seleccionados; en caso de que el marco de texto se encontrara seleccionado, la alineación se aplicará a todo el texto en su interior.
- Espaciado entre caracteres:
Esta opción permitirá controlar el espacio (en píxeles) entre los caracteres del texto. Se admiten también valores negativos.
- Interlineado:
Esta opción permitirá controlar el espacio (en píxeles) entre las líneas de texto. Se admiten también valores negativos.
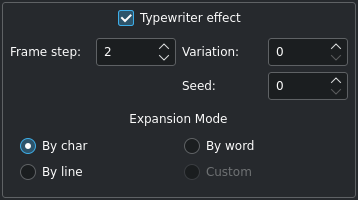
- Efecto Máquina de escribir:
Este efecto permitirá hacer que el texto se escriba, caracter a caracter, palabra a palabra o línea a línea.
- Intervalo de fotogramas:
Determinará la velocidad con que se mostrará el siguiente elemento. La misma será constante a lo largo de toda la duración del clip de título. Los valores admitidos irán de 1 a 240, predeterminado: 2.
- Variación:
Permitirá la introducción de pequeñas fluctuaciones en el tiempo entre un elemento y el siguiente. Los valores admitidos irán de 0 a 20, predeterminado: 0.
- Semilla:
Los valores aleatorios usados para las fluctuaciones utilizan un valor inicial, conocido como semilla, para asegurar que sigan un patrón de valores predecible. El valor de semilla producirá distintos patrones a distintos valores de semilla. Los valores admitidos irán de 0 a 100, predeterminado: 0.
- Modo de expansión:
Permitirá determinar la forma en que los elementos del texto serán mostrados.
Ampliación y rotación de objetos
Los objetos podrán ser ampliados y rotados.

A veces, ampliar resultará más sencillo que introducir nuevos valores de An y Al. Introducir un porcentaje de ampliación en el campo Ampliación.
Será posible rotar un objeto introduciendo los grados de rotación en los campos Rotación X, Y y Z. Tomar en cuenta que el centro de rotación se encontrará en la esquina superior izquierda del objeto.
Ordenamiento de objetos
Los objetos serán ubicados unos sobre otros de acuerdo a la secuencia en que hubieran sido creados. En caso de que fuera necesario cambiar la profundidad de un objeto que fue creado anteriormente, será posible usar el campo Profundidad o hacer clic sobre uno de los respectivos botones ( ,
,  ,
,  ,
,  ) en la barra de herramientas del titulador.
Alineación de objetos
Será posible alinear objetos a las dimensiones del proyecto, usando los siguientes botones de la barra de herramientas:
 Alinear a izquierda o
  Alinear a derecha moverán el objeto seleccionado hacia el borde izquierdo o derecho, deteniéndose en las distintas áreas de seguridad del titulador, con cada sucesivo clic en el botón.
 Alinear arriba o
  Alinear abajo moverán el objeto seleccionado hacia el borde superior o inferior, deteniéndose en las distintas áreas de seguridad del titulador, con cada sucesivo clic en el botón.
 Centrar horizontalmente o
  Centrar verticalmente centrarán el objeto seleccionado con respecto a los ejes horizontal y vertical del marco exterior.