Kdenlive wordt ongeveer elke drie maanden uitgegeven. Zie de Kdenlive news page om de laatste informatie en uitgavenotities te krijgen. En bekijk Wat is er nieuw voor de meest recente toevoegingen aan mogelijkheden.
U kunt een Kdenlive op twee verschillende manieren installeren:
Door een installatie-programma te gebruiken
Als een zelfstandige executable (Windows: standalone; Linux: appimage).
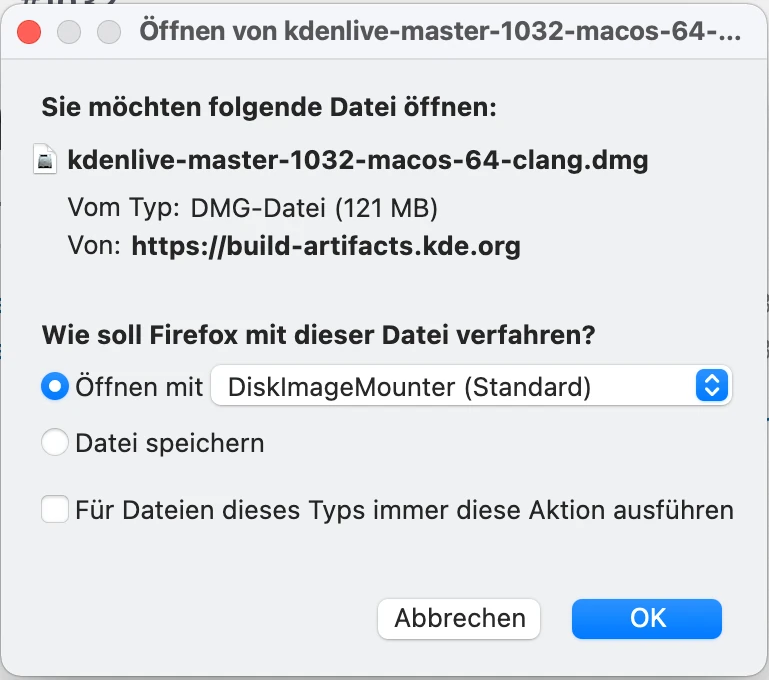
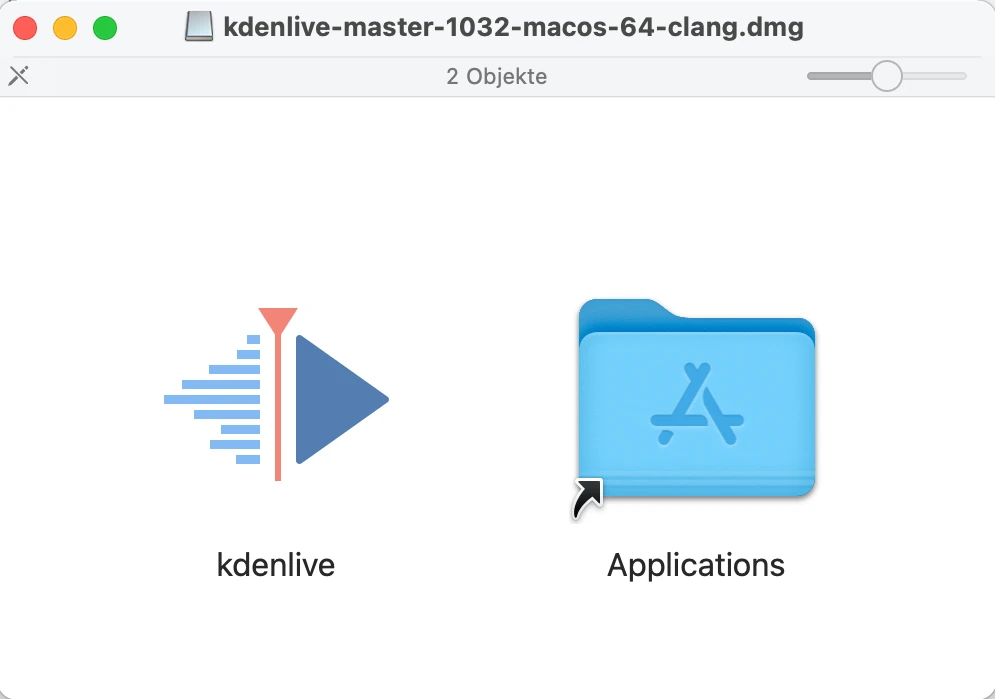
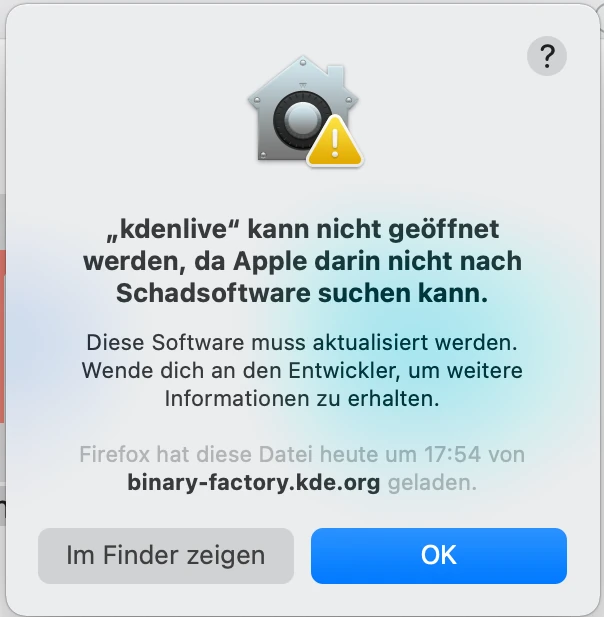
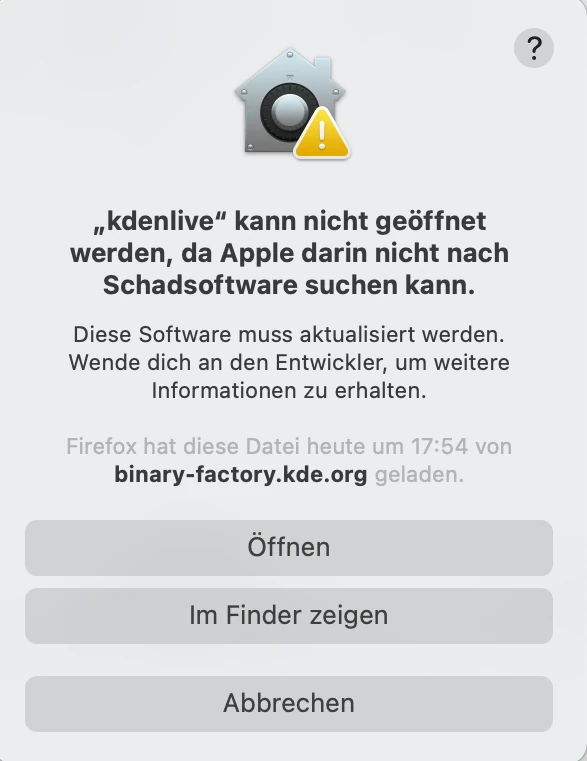
Bij macOS kunt u alleen de installatie-versie gebruiken.
Bezoek de download page van de Kdenlive website om de laatste uitgave voor uw besturingssysteem op te halen.
U kunt alle vorige versies van Kdenlive op de attic vinden.
Bewerken van video leunt in het algemeen zwaar op CPU power. Terwijl Kdenlive profielen voor renderen heeft met ondersteuning van GPU, gebruikt afspelen op de tijdlijn de CPU. Dus, hoe krachtiger uw CPU hoe beter de presentatie van het afspelen van Kdenlive is. Meer en betere ondersteuning van de GPU staat op nabije routekaart.
Kdenlive kan zonder enig probleem geïnstalleerd worden op niet-KDE bureaubladen.
Pakketten: AppImage of Flatpak zijn de officiële pakketten die Kdenlive onderhoudt.
Notitie
Vanaf Kdenlive uitgave 24.02, wordt PPA niet langer ondersteund. Alleen worden AppImage en Flatpak uitgaven officieel ondersteund.
Als u de Flatpak versie gebruikt, installeert het juist in uw bureaubladomgeving. Geen verdere actie is vereist.
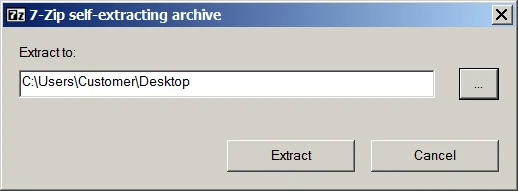
Als u de AppImage wilt gebruiken, download u deze en verplaats u hem naar een map naar keuze. Maak het bestand vervolgens uitvoerbaar. Normaal gesproken kun u dit doen met de bestandsbeheerder van uw bureaubladomgeving (zoals Dolphin in KDE Plasma). Klik met de rechtermuisknop op de AppImage en selecteer Eigenschappen en vervolgens Uitvoerbaar maken. U kunt ook de Linux-shellopdracht chmod 777 <naam_toepassing> in een terminal gebruiken. Nu kun u dubbelklikken op het AppImage-bestand om Kdenlive te starten of de naam van de AppImage in een terminal typen.
Kdenlive werkt alleen op de 64bit versie van Windows. Kdenlive werkt op Windows 10 (1809 of later) en nieuwer. We kunnen niet beloven dat Kdenlive werkt op een server of op de embedded Windows versie.
Kdenlive is beschikbaar in een versie om te installeren en als alleenstaand.
Versie om te installeren: heeft rechten van systeembeheerder nodig en wordt geïnstalleerd op uw lokale machine. Het wordt ook als een programma getoond.
Het is beschikbaar voor alle gebruikers op uw computer.
De bestanden van Kdenlive zitten altijd in dezelfde map.
Alleenstaande versie: heeft geen admin-rechten nodig en is niet geïnstalleerd. Het wordt niet in de lijst met programma’s getoond. Het alleen beschikbaar voor de gebruiker die het bestand heeft gedownload.
Als u als een normale gebruiker op uw computer werkt, dan kunt u Kdenlive gebruiken.
U kunt de Kdenlive map naar een externe schijf kopiëren en het op een andere computer laten werken zonder het te moeten installeren. Echter, uw persoonlijke instellingen en in Kdenlive gedownloade bestanden worden opgeslagen op de computer waarop u werkt.
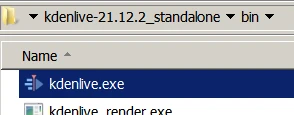
Om Kdenlive te starten navigeert u naar de bin-map en dubbelklikt u op kdenlive.exe. U kunt ook een sneltoets op uw Bureaublad aanmaken voor gemakkelijker toegang. Klik rechts op kdenlive.exe. en selecteer Verzenden naar … en daarna Bureaublad (sneltoets aanmaken).
Als u Kdenlive wilt gebruiken met domeingebruikers die Windows Active Directory en/of Group Policies (GPO’s) gebruiken, controleer dan of alle gebruikers lees/schrijfrechten hebben in de volgende mappen:
%AppData%\kdenlive
%LocalAppData%\kdenlive
%LocalAppData%\kdenliverc
%LocalAppData%\kdenlive-layoutsrc
%LocalAppData%\kxmlgui5\kdenlivekdenliveui.rc
%AppData%\kdenlive\.backup
%LocalAppData%\knewstuff3
Zorg ervoor dat geen GPO de toegang tot deze mappen blokkeert.