Snel aan de gang
Een nieuw project starten
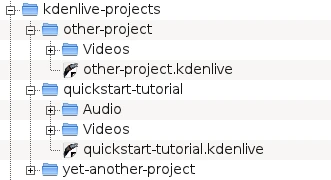
Structuur van Kdenlive mappen
De eerste stap is het aanmaken van een nieuwe (lege) map voor ons nieuwe project. We zullen het in deze inleiding quickstart-tutorial/ noemen. Haal dan enige voorbeeldvideoclips op, of download ze vanaf hier Kdenlive-tutorial-videos-2011-avi.zip (7 MB)[1] en pak ze uit naar bijv. een submap quickstart-tutorial/Videos/ in de projectmap.
De afbeelding links toont de gesuggereerde mapstructuur: elk project heeft zijn eigen map, met videobestanden in de submap Videos, audiobestanden in de map Audio, etc. (zie ook Mappenstructuur)
Notitie
In deze tutorial wordt ervan uitgegaan dat de gedownloade video’s worden gebruikt, maar andere videos kunnen ook gebruikt worden.
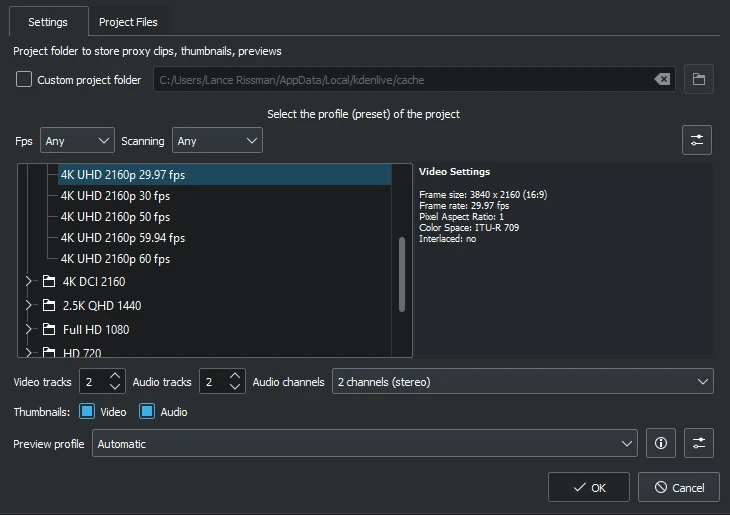
Nieuw Project dialoog
Open Kdenlive en maak een nieuw project aan .
Kies de eerder aangemaakte projectmap (quickstart-tutorial/) en selecteer een toepasselijk projectprofiel. De boven geleverde videobestanden zijn 720p, 23.97 fps.[2] Als u uw eigen bestanden gebruikt en niet weet welk profiel te gebruiken, zal Kdenlive een toepasselijke suggereren wanneer de eerste clip is toegevoegd [3] , u kunt het veld dus laten op wat het is.
Als u dat prettig vindt kunt u naar het donkere thema gaan: .
Clips toevoegen
Project-bin: een videoclip toevoegen
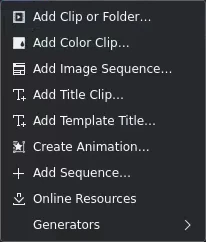
Nu het project gereed is, laten we beginnen met het toevoegen van enige clips (d.w.z. die u hebt gedownload). Dit wordt gedaan via het Project Bin widget; een klik op het pictogram  opent direct het bestandsdialoog, een klik op de kleine pijl toont een lijst met extra typen clips die ook toegevoegd kunnen worden. Videoclips, audioclips, afbeeldingen en andere Kdenlive projecten toegevoegd worden via de standaard dialoog .
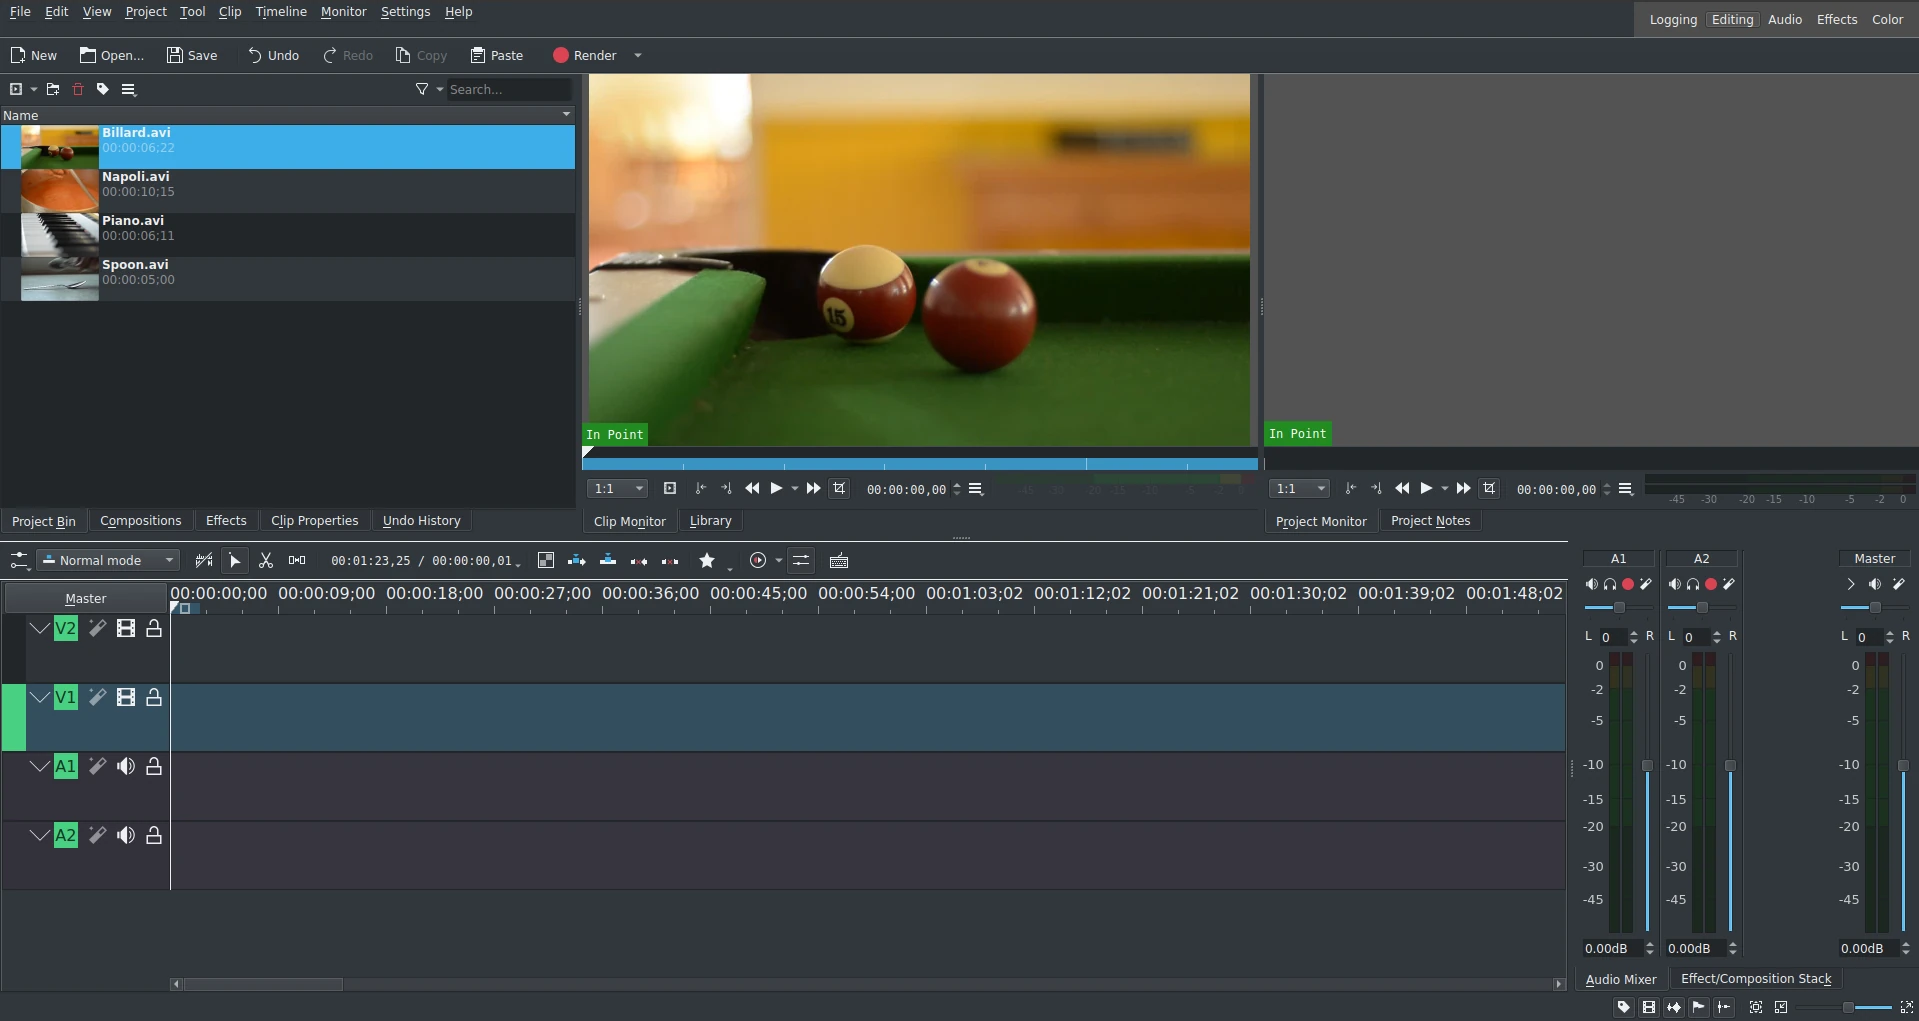
Kdenlive venster met de instructie-bestanden
Nadat de clips zijn toegevoegd, zal Kdenlive er uitzien zoals dit. Linksboven is de al bekende project-bin, Rechts daarvan zijn monitors die video’s laten zien; De clip monitor laat de originele video zien, de projectmonitor laat het resultaat zien, met alle effecten, overgangen, etc. Het derde, ook erg belangrijke, onderdeel is de tijdlijn (onder de monitors): dit is de plek waar de video clips bewerkt zullen worden. Hier zijn twee verschillende soorten tracks, Video en Audio. Video tracks kunnen elk soort clip bevatten, audio tracks kunnen dat ook - maar wanneer een video bestand in een audio track wordt gestopt, dan zal alleen de audio worden gebruikt.

Een Kdenlive project opslaan
Laten we het werk opslaan via . Dit slaat ons project op, d.w.z. waar we de clips op de tijdlijn hebben geplaatst, welke effecten we hebben toegepast, enzovoort. Het kan niet afgespeeld worden.[4] Het proces van maken van de uiteindelijke video wordt Renderen genoemd.
Tijdlijn
Notitie
In deze sectie van snel aan de gang zullen we niet in de details van de tijdlijn en zijn componenten gaan. Meer gedetailleerde informatie is beschikbaar in de sectie Tijdlijn van deze documentatie.
Nu komt het eigenlijke bewerken. De clips worden gecombineerd op de tijdlijn om tot het uiteindelijke resultaat te komen. Ze kunnen daarheen komen met slepen en loslaten [5] : sleep enkele Napoli (aangenomen dat de bovenstaand gedownloade bestanden worden gebruikt, zoals in de rest van deze instructie voor “snel aan de gang”; zo niet, zorg dat uw scherm waterproof of tomaatproof is) uit de project-bin en laat ze los op de eerste track in de tijdlijn. In dit geval track V2.
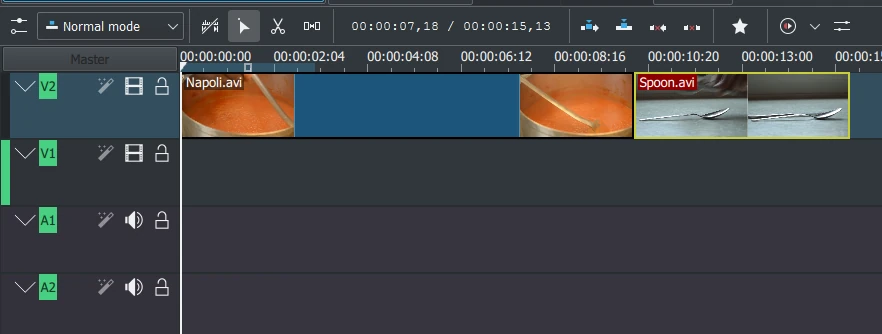
De eerste clips in de tijdlijn
Er is ook het nodige snijwerk nodig, laat ook de Spoonclip op de eerste track vallen (track V2). Versleep de Napoli naar het begin van de tijdlijn (anders begint de gerenderde video met enige seconden zwart) en de Spoon onmiddellijk achter de Napoli, zoals het eruit ziet als de afbeelding links. (Waar ik heb ingezoomd met Ctrl+MW.)

Tijdlijncursor
Het resultaat kan al bekeken worden door op Space te drukken (of op de knop Afspelen in de projectmonitor). Napoli wordt getoond, onmiddellijk gevolgd door Spoon. Als de tijdlijncursor niet aan het begin staat, zal de projectmonitor ergens in het midden starten met afspelen; dit kan verandert worden door de de tijdsbalkcursor of die in de projectmonitor te verslepen. Als u de voorkeur geeft aan sneltoetsen, Ctrl+Home doet hetzelfde voor de monitor die actief is. (Selecteer de als deze nog niet geselecteerd is voordat de sneltoets wordt gebruikt.)
Markering verschalen
Na het eten komt het spelen, er is een Biljardclip. Plaats ook deze toe op de tijdlijn (track V1). Er gebeurt de eerste 1,5 seconde niets in de clip, daarom moet er misschien een knip gedaan worden, om te voorkomen dat de video saai wordt. Een makkelijke manier[6] hiervoor is om de tijdlijncursor naar de gewenste positie te slepen (d.w.z. naar de positie waar u de video wilt knippen), sleep vervolgens de linker kant van de clip totdat de marker voor grootte wijzigen verschijnt. Het klikt aan de tijdlijncursor vast wanneer het er dichtbij genoeg is.
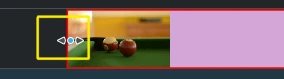
Overlappende clips
Om een overgang toe te voegen tussen het eten (de Spoon) en biljard spelen, hebben de twee clips een overlap nodig. Om precies te zijn: plaats de tweede clip boven of onder de eerste clip. De eerste clip moet enkele frames later eindigen dan waar de tweede begint. Inzoomen totdat de markeringen van de afzonderlijke frames zichtbaar zijn zal hier helpen; het maakt het ook makkelijker om altijd dezelfde tijdsduur voor een overgang te krijgen, vijf frames in dit geval.
U kunt inzoomen door de in de rechtsonder hoek van het Kdenlive venster te gebruiken, of met Ctrl+muiswiel. Kdenlive zal inzoomen bij de tijdlijncursor, breng deze eerst op de positie die u wilt vergroten en zoom vervolgens in.

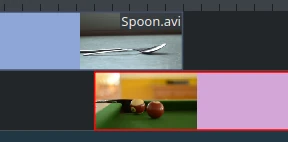
Overgangmarkering
Nu de clips overlappen, kan de transitie toegevoegd worden. Dit wordt gedaan ofwel met rechts klikken op de bovenste clip en en te kiezen of, gemakkelijker, door met de muis te zweven boven de lagere rechter hoek van de Spoon clip totdat de wijsvingeraanwijzer getoond wordt en de melding “Klik om compositie toe te voegen” verschijnt. De laatste voegt, standaard, een wipe-overgang toe, wat in dit geval het beste idee is omdat de Spoon niet vereist is voor het spelen.
De wipe-overgang laat de eerste clip overgaan in de tweede. Zie ook Wipe.
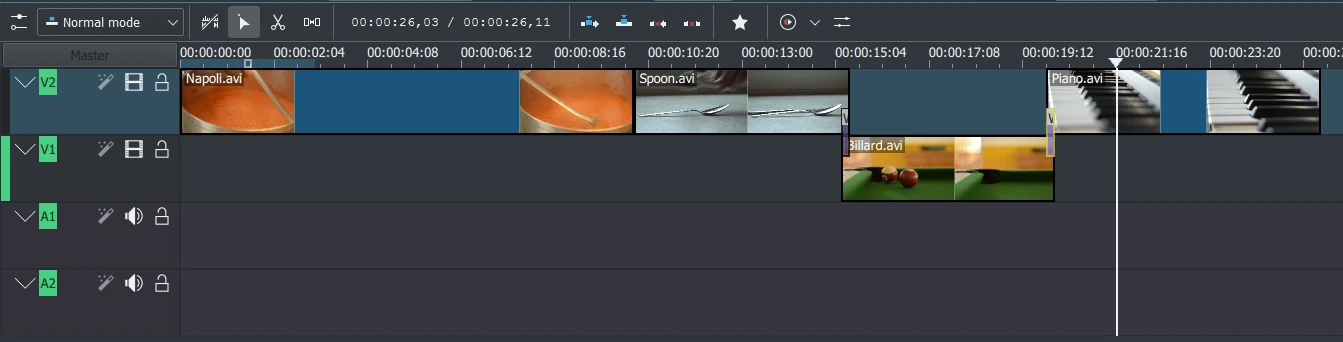
Laten we nu de laatste clip toevoegen, de Piano, en we passen opnieuw een wipe-overgang toe. Nadat het op de eerste track van de tijdlijn (track V2) is geplaatst, moet u op de hoek linksonder van de nieuwe clip klikken om de overgang naar de vorige clip toe te voegen.
Effecten
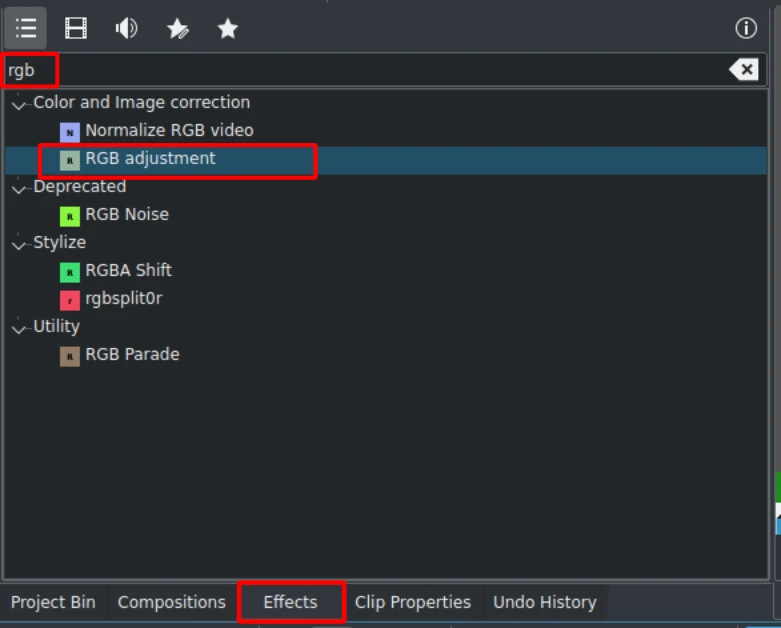
Effectenlijst
De Piano kan gekleurd worden door er een effect aan toe te voegen. Klik op de weergave effect (als weergave effect niet zichtbaar is schakel dan weergave in: ). Typ rgb in het zoekveld en dubbelklik op het effect .
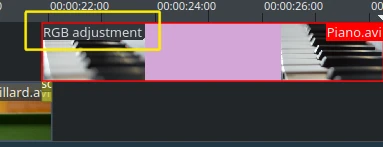
Nadat het effect is toegevoegd, klik op een leeg gedeelte op de tijdlijn en u ziet zijn naam op de tijdlijnclip. Het zal ook getoond worden in het widget .
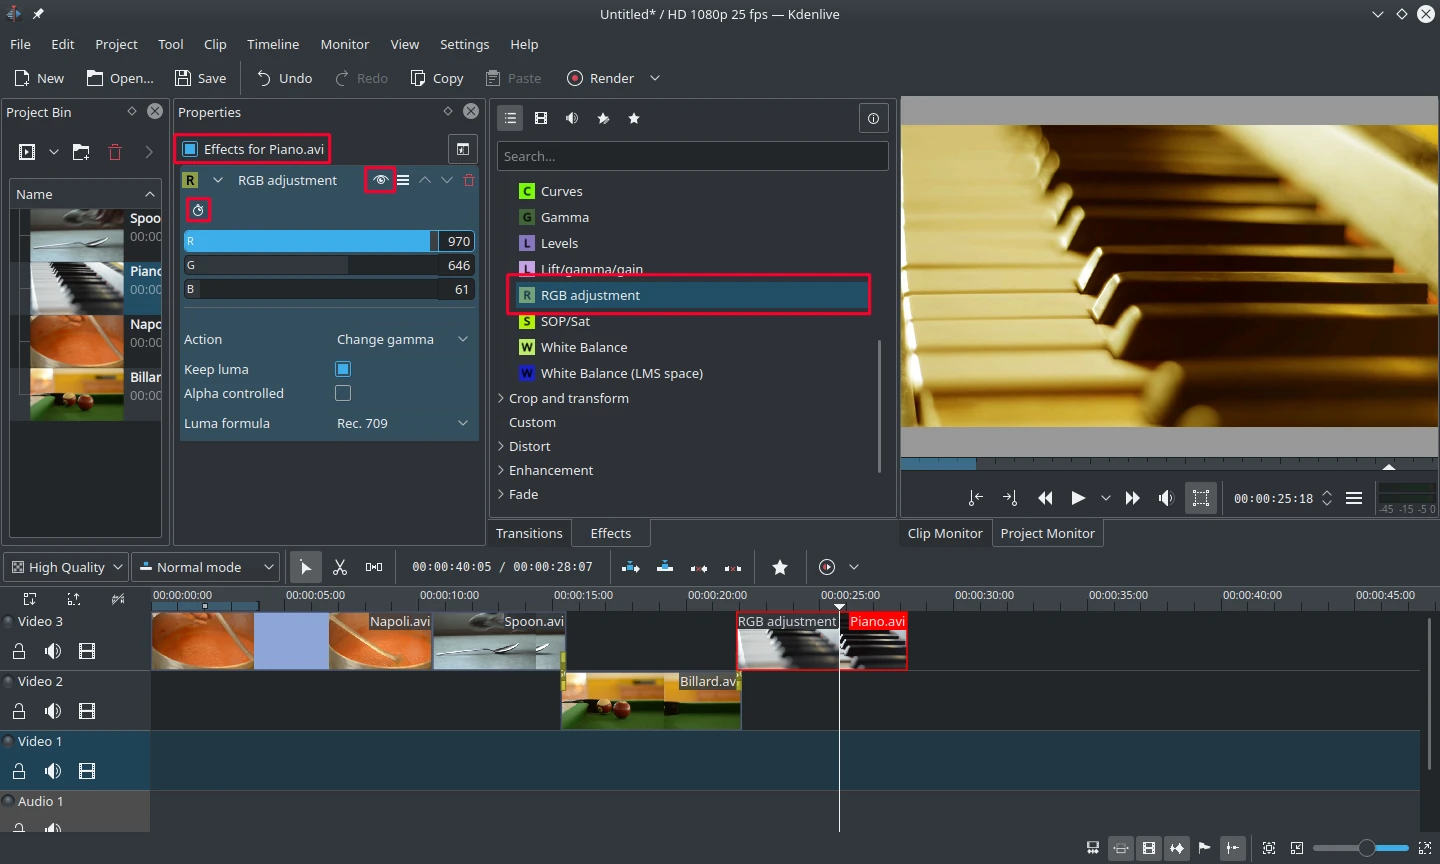
Effecten stapel met RGB aanpassingen
Om de afbeelding een warm geel-oranje kleur te geven, passend bij een comfortabele avond, moet er minder blauw en meer rood en groen komen.
De waarden in het widget Effecten/Compositiestapel kunnen gewijzigd worden via de schuif (de middelste muisknop zet het weer terug op de standaard waarde), of door een waarde direct in te voeren door dubbel te klikken op het getal rechts naast de schuif.
Het widget Effecten/Compositiestapel verwijdt altijd naar de tijdlijnclip die op dat moment is geselecteerd. Elk effect kan tijdelijk uitgeschakeld worden door te klikken op het oog-pictogram of alle effecten voor die clip kunnen uitgeschakeld worden met het keuzevakje bovenaan het widget Effecten/Compositiestapel (de instellingen worden echter opgeslagen). Dit is bijv. nuttig voor effecten die veel rekenkracht nodig hebben, zodat ze uitgeschakeld kunnen worden bij bewerken en opnieuw ingeschakeld voor rendering.
Voor sommige effecten, zoals die we hier hebben gebruikt, is het mogelijk om keyframes toe te voegen. Het stopwatch icoon in de afbeelding geeft dit aan. Keyframes kunnen worden gebruikt om de effecten in de loop van de tijd een andere instelling te geven. In onze clip maakt het mogelijk om de kleur van de piano te laten veranderen van een warme avond kleur naar een koele nacht kleur.
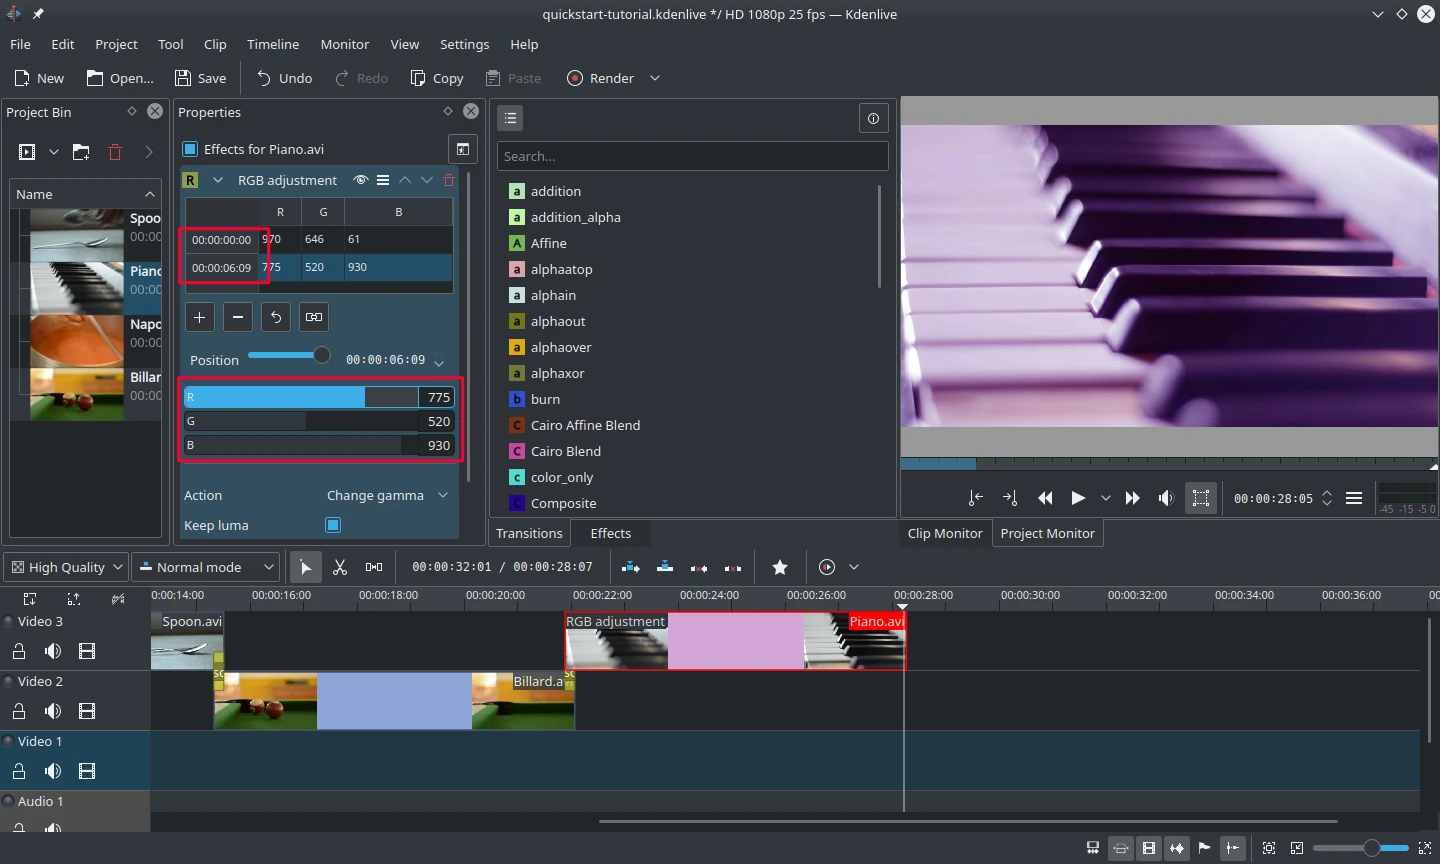
Keyframes voor effecten
Na het klikken op het pictogram (het pictogram stopwatch in de vorige afbeelding), zal het widget Eigenschappen opnieuw worden geordend. Standaard zijn er twee keyframes, een aan het begin van de clip in de tijdlijn en een aan het eind. Beweeg de tijdlijncursor naar het eind van de clip op de tijdlijn, zodat de project monitor de nieuwe kleuren laat zien wanneer de instellingen van de keyframe aan het eind worden veranderd.
Zorg ervoor dat de laatste keyframe is geselecteerd in de lijst Eigenschappen. Dan is alles klaar om de piano te overspoelen met een diep blauw.
Beweeg de tijdlijncursor naar het begin van het project en speel het af (met:kbd:Spatie, of de knop Afspelen in het menu ), de piano zou nu volgens wens van kleur moeten veranderen.
Keyframing was het moeilijkste gedeelte van deze handleiding. Als dit beheerst wordt, dan is de rest van Kdenlive makkelijk!
Notitie
In deze sectie Snelle start zijn we erg snel over de effecten gestapt. Meer details over effecten en een uitleg van elk effect is beschikbaar in de sectie Effecten en composities van deze documentatie.
Muziek
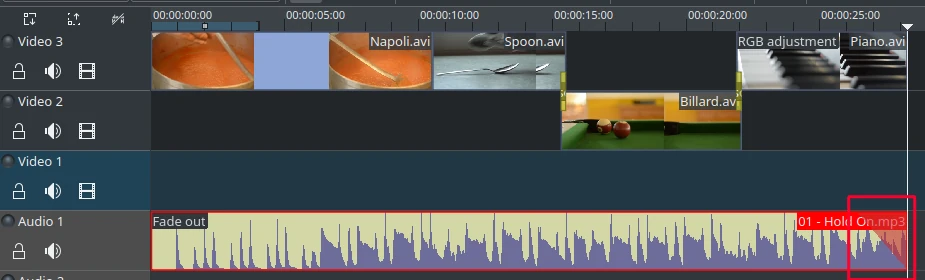
Audio uitvagen
Omdat de clips geen geluid leveren, gaan we op zoek naar wat leuke muziek, uit uw eigen verzameling of op webpagina’s zoals Jamendo. Nadat de audio clip toegevoegd is in de Project-bin, moet ook deze naar een audiotrack op de tijdlijn gesleept worden.
De audio clip kan in lengte verandert worden net zoals dat met de video clips kan. De cursor zal automatisch vastklikken aan het eind van het project. Om een uitvaageffect toe te voegen aan het eind van de audioclip (behalve als de audio clip precies de juiste lengte heeft) kunt u boven de rechtsboven (of linksboven) hoek van de tijdlijnclip zweven en de rode driehoek met schaduw naar de plek slepen waar het uitvagen zou moeten beginnen. [7]
Renderen
Renderingsdialoog
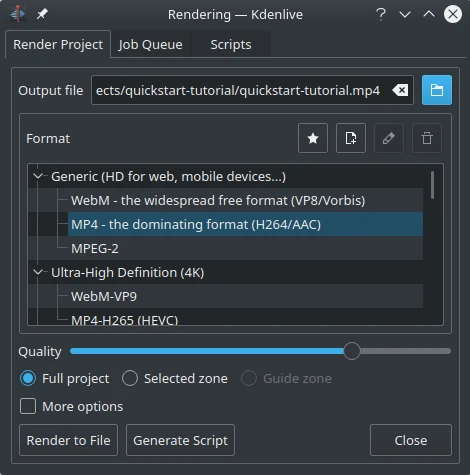
Nog een paar minuten en het project is klaar! Klik op de knop Render (of ga naar , of druk op Ctrl+Enter) om de dialoog die links getoond wordt te krijgen. Selecteer het gewenste uitvoerbestand voor uw nieuwe video met al zijn effecten en overgangen, kies MP4 (werkt bijna altijd en overal), selecteer de locatie van het uitvoerbestand en druk op de knop Naar bestand renderen.
Voortgang van renderen
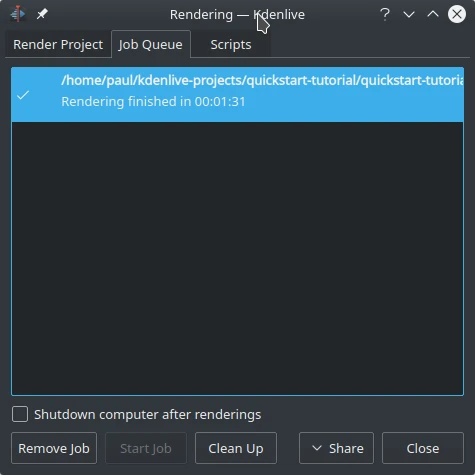
De rendering is na enkele secondes klaar en het eerste Kdenlive project is nu compleet. Gefeliciteerd!