遮罩
您可以使用以下其中一种效果创建遮罩:
备注
名称中带有*(蒙版)*的效果需要与**蒙版应用**配合使用才能生效。它允许将其他效果和滤镜仅应用于蒙版区域 (也可反选以应用于蒙版之外的区域)。不带*(蒙版)*的效果仅创建 Alpha 通道,使下方轨道的剪辑能够透显。
特效堆栈示例
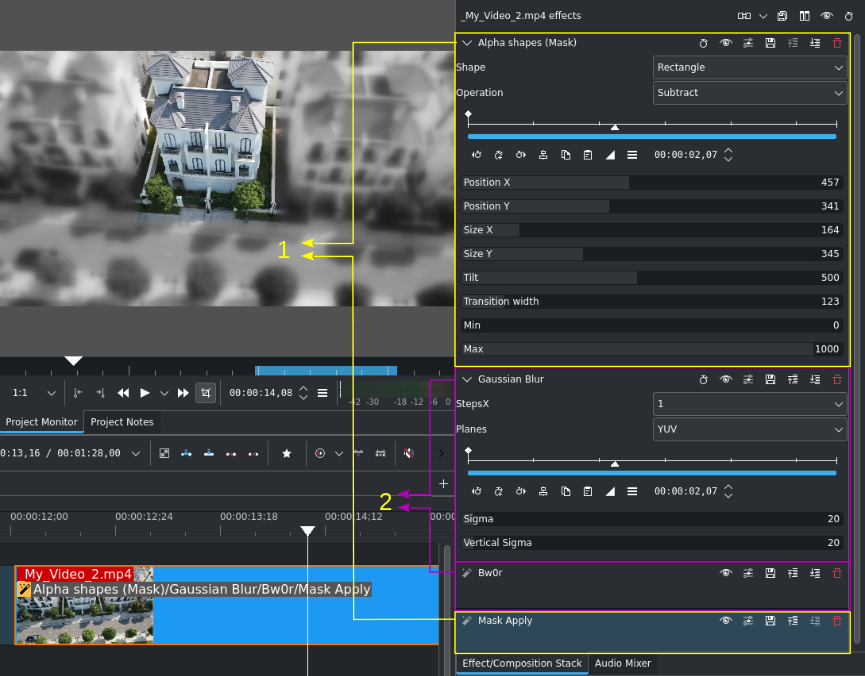
使用**(遮罩)**效果来应用效果/滤镜的示例
本示例展示了效果堆栈以 Alpha 形状(遮罩) 和 应用遮罩 效果作为括号 (1) 包裹实际效果 Gaussian Blur 与 Bw0r (2)。
注意特效始终自上而下应用。
创建蒙版的步骤
根据您的使用场景应用其中一种遮罩效果。
- Alpha 形状:
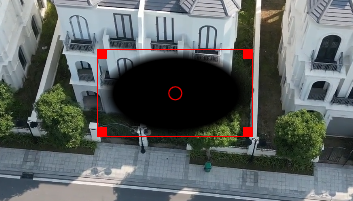
创建矩形、椭圆、三角形和菱形遮罩,可调整位置、尺寸、旋转及:abbr:羽化(平滑或模糊特征边缘)。为演示目的,已选择 操作 减去。
- 矩形Alpha遮罩:
是一个简单遮罩,其边缘由距离画面边缘的像素数定义。
- 动态遮罩:
最适合复杂形状,例如当人物、动物或其他不规则物体需要被遮罩时。
- 形状透明度通道:
允许使用图像或视频作为蒙版。该资源必须包含 Alpha 通道。此功能特别适用于使用由在线背景去除服务(例如 Google search)创建的蒙版。
根据您的需要调整蒙版
动态遮罩(点击放大)
在此示例中,需将跳跃的人物合成到道路场景中。对此类复杂形状,Rotoscoping - 转描 效果最为合适。它会在形状外部创建遮罩[1]。通过 Alpha 操作 可将遮罩进行反转。
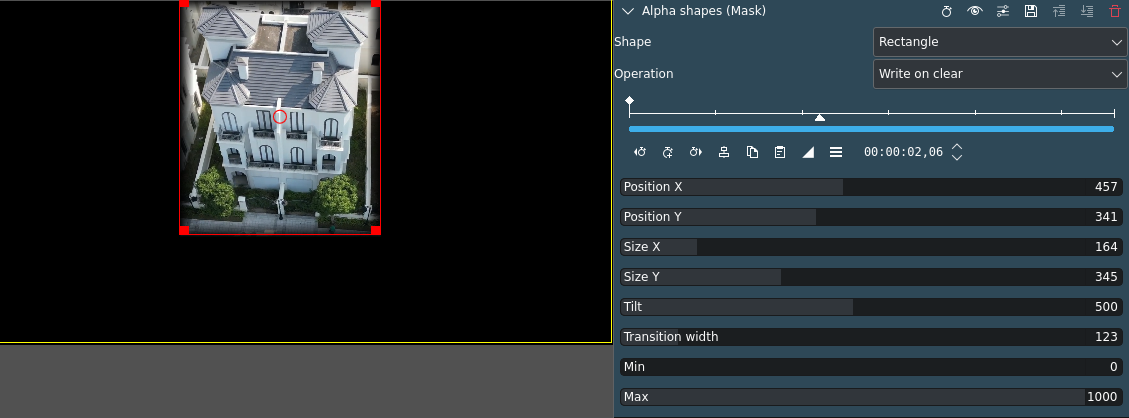
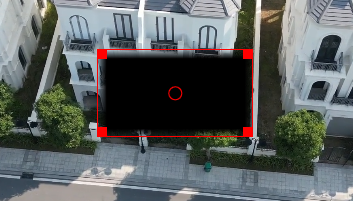
Alpha 形状(遮罩)已应用。
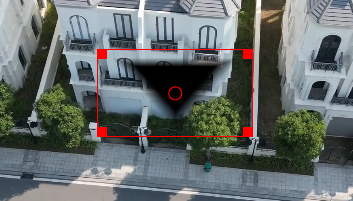
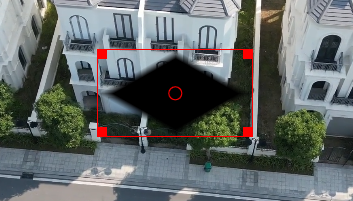
在此示例中,已调整 Alpha 形状矩形的大小、位置和过渡宽度以覆盖中间的房屋。为进行更好调整,操作 需设为 写入清除区域。要使遮罩生效(保护遮罩区域),必须将 操作 设为 减去。
对剪辑应用所需效果并根据需要进行调整
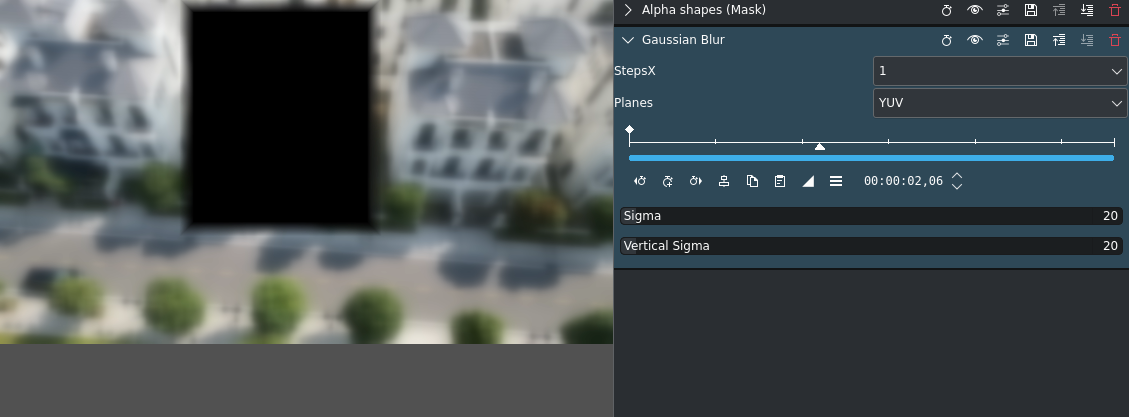
高斯模糊效果已应用
此操作将模糊图像的其余部分,但不会模糊被遮罩覆盖的区域。
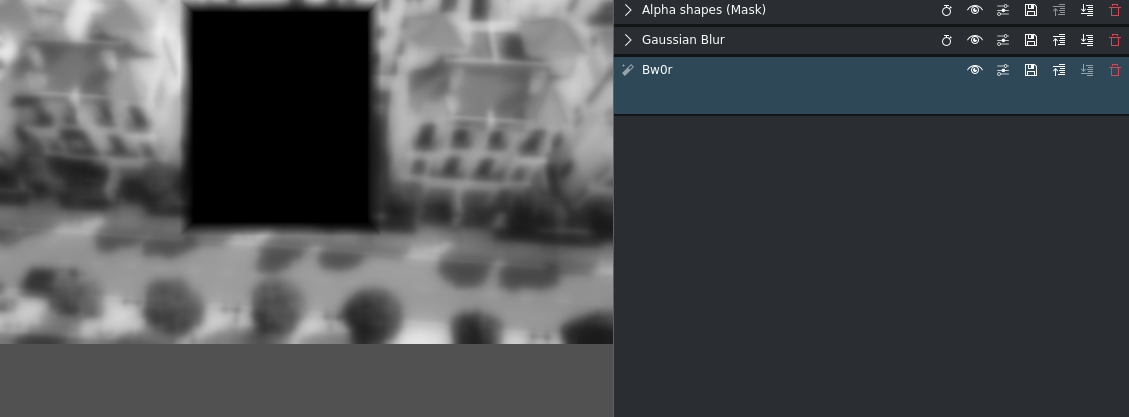
bw0r 效果 (b&w) 已应用
此操作将使图像的其余部分变为黑白,但遮罩覆盖的部分除外。
将 遮罩应用 效果添加到剪辑
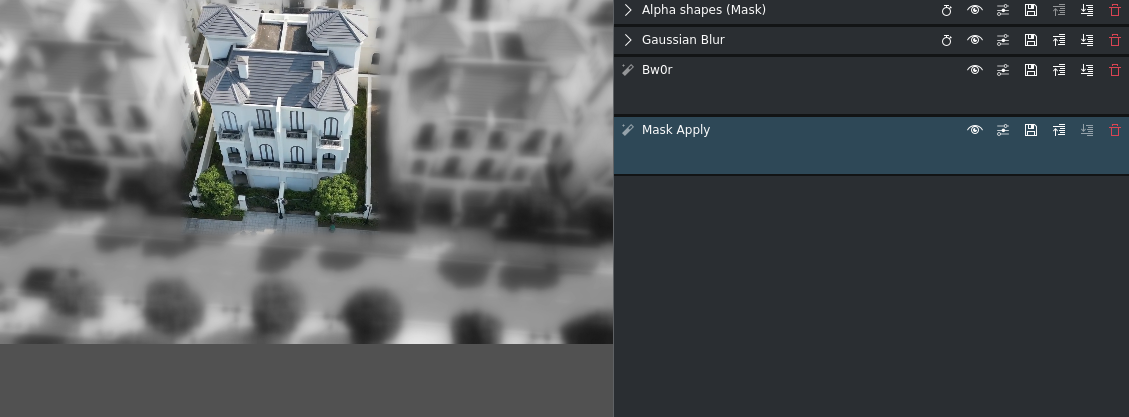
对于同一剪辑,可根据需要多次重复此操作,或在**应用遮罩**后添加其他效果以影响整个剪辑。
其他示例
以下示例演示了如何使用 rotoscoping(动态遮罩) 结合关键帧来突出视频中的对象: