Effects and Filters
Effects and Filters are very important components in video editing. In Kdenlive, effects and filters are provided by frei0r or avfilter (Kdenlive does not have built-in effects or filters of its own).
效果用于更改剪辑的外观或对其进行操作。例如,Transform 效果允许缩放和移动剪辑; Brightness 效果更改剪辑的亮度;Alpha, Mask and Keying 类别中的效果提供了用于遮罩或旋转示波器的非常具体的过滤器。
有几种方法可以将效果应用于剪辑:
在项目素材箱中,该效果可用于时间轴中该剪辑的所有实例
在时间轴中,该效果只适用于时间轴中该剪辑在该点
在轨道上,该效果应用于该特定轨道中的所有剪辑
在主音上,该效果应用于所有轨道中的所有剪辑
备注
并非所有效果都可以在轨道或主音级别使用,也不需要这样做。
Built-in Effects
The built-in effects are disabled by default. So you have to enable it before you can use it.
All built-in effects can be disabled/enabled globally in
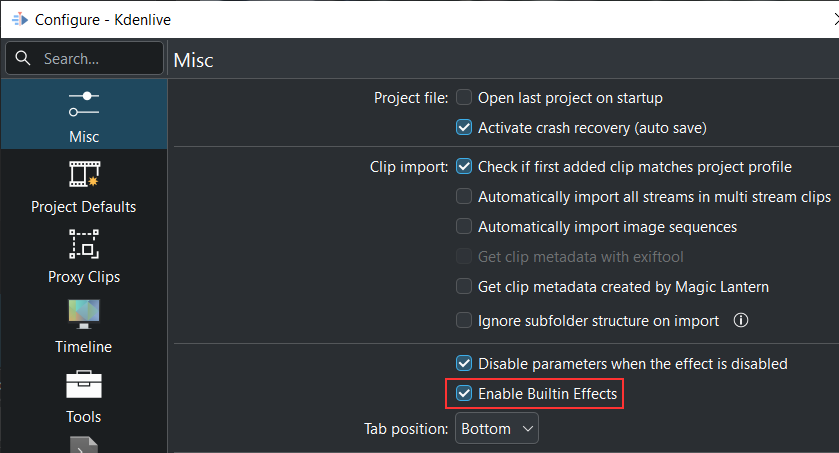
Under Misc you can disable/enable all built-in effects. Default is disabled.
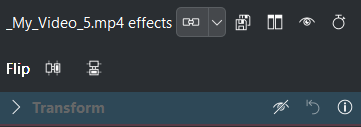
When dragging a clip into the timeline, the Flip and Transform effects are always added to the video part of the clip; for the audio part the Volume effect is added by default.
These are the most used effects which you now have at your fingertips without the need to add them manually.
Built-in effects can be used in four places:
效果选项卡
在 中显示效果选项卡。
The Effects widget has eight control icons that show or hide the different effect categories:
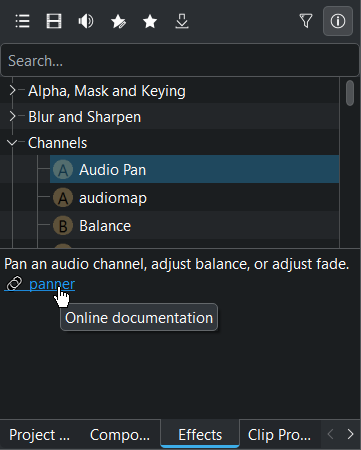
Kdenlive 效果选项卡在项目素材箱区域
Main effects shows all video and audio effects (default view)
Show all video effects shows all video effect categories only
Show all audio effects shows all audio effects categories only
Show all custom effects shows all effects you have created by saving an effect stack.
Show all favorite items shows all effects that were flagged as a favorite effect. This is the same list that appears when selecting Insert an effect from the right-click menu of a clip in the Timeline, or by clicking the Favorite Effects in the Timeline toolbar.
Download New Effects opens a dialog window where effect templates are listed from the KDE Store
Only show reviewed assets toggles between the effects which are reviewed and tested by the Kdenlive team and not tested effects (still in test phase).
Show 10 bit compatible only it hides assets not compatible with a 10-bit pipeline. Use the 10 Bit category or the NVENC H265 ABR 10 bit codec for rendering.
Show/hide description of effects toggles the information display below the effect list where a short description of what the effect does is displayed when on. Click on the blue effect text opens the online documentation to this effect.
效果/组合堆栈
这个小部件也被称为属性选项卡,因为它列出了当前选定剪辑应用的所有效果,以及每个效果的设置或属性。如果选择了一个组合,则小部件显示组合的设置或属性。
备注
只有效果可以堆叠,合成不能。
效果/组合堆栈功能
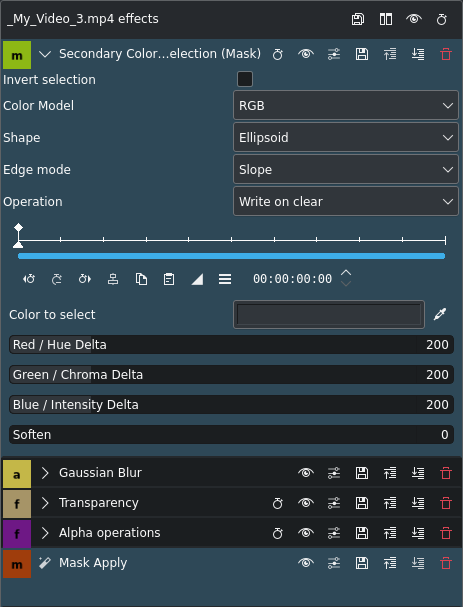
Kdenlive效果堆栈
保存效果 - 打开一个对话窗口,用于输入效果堆栈的名称,该名称将在 自定义 效果类别中列出,并显示一个注释,该注释将在信息显示中显示
比较效果 - 将预览监视器垂直分割,以便比较剪辑与无效果的剪辑
效果启用 - 切换效果堆栈的开关。这相当于在效果堆栈中禁用所有效果。
在时间轴中隐藏/显示关键帧 - 切换在时间轴中的剪辑中显示关键帧的开关
当效果应用于时间轴中的剪辑时,您可以在效果按钮上单击以启用/禁用该剪辑的剪辑堆栈。当禁用时,剪辑上的效果名称是划掉的。
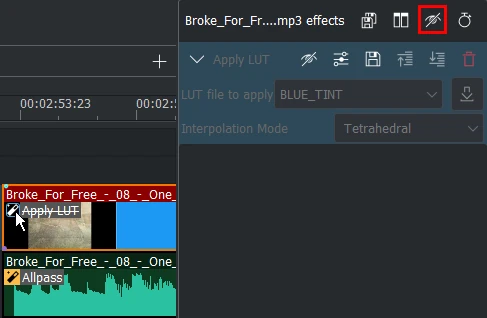
点击剪辑的效果时,Kdenlive效果堆栈被禁用
效果功能
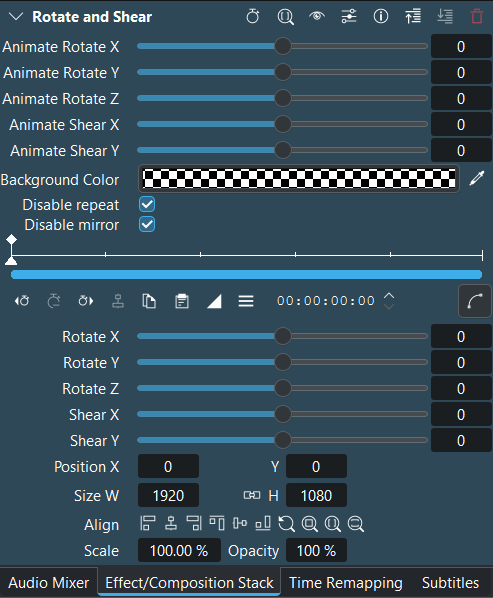
Kdenlive效果面板
- 1:
Expand/collapse the effect panel. Shift + click to expand/collapse all effects
隐藏/显示关键帧 - 打开或关闭关键帧标尺的显示
Use effect zone - Toggles the display to show the effect zone
禁用效果 - 打开或关闭效果。效果仍然保留在堆栈中,但在播放或渲染期间不应用。
 Presets - Opens a list of advanced options to manage presets for the effect (e.g. reset the effect to its default parameters).
保存效果 - 打开一个对话窗口,用于输入效果的名称,以便将其列在 自定义 效果类别中,并显示一个注释,该注释将在信息显示中显示
Open effect documentation in browser - This opens the online documentation to this effect
 移动效果上升 - 将效果向上移动一个等级(效果序列从顶部到底部很重要)
 移动效果下降 - 将效果向下移动一个等级(效果序列从顶部到底部很重要)
删除效果 - 从效果堆栈中删除效果
arrow up/down goes to the next effect in the list
- 2:
Effect function with check box only
- 3:
Effect function with selector
- 4:
Effect with keyframes
- 5:
Effect values and action button (
).
Reset value to default by click with the MMB [3] on the slider or value.
应用效果
那里可以应用效果
一个效果可以在你项目的四个不同级别上应用:
On a clip in the timeline: it will affect only this clip
On an clip in the bin: it will affect all the occurrences of this clip in the timeline
On a track: it will affect all the clips on this track
On the Master: it will affect your global output
如何应用一个效果
对于将效果应用于剪辑的剪辑或时间轴上,你可以从效果选项卡中选择一个,并将其拖动到剪辑上。
You can also double-click on an effect in the Effects Tab which adds the effect to the clip in the Project Bin which appears in the clip monitor. In the Timeline, it adds the effect to the clips which are selected. So you can apply an effect to several clips at once in the timeline.
另一种方法是使用时间轴工具栏中的 F收藏效果 图标,并从那里选择效果(您可以通过右键单击效果选项卡中的效果并选择 添加到收藏 将效果添加到收藏夹中)。
Alternatively, you can use to select an effect from the various categories and add it to the selected clip(s) in the Timeline.
最后,您还可以从任何剪辑(时间轴或项目板)复制所有设置的效果,并将其粘贴到其他剪辑中。
对于将效果应用于轨道,请参阅 轨道效果
对于将效果应用于主音,请参阅 主音效果
备注
Effects are always added at the bottom of the effect stack, and since the effect order is important, can be re-arranged.
效果中的关键帧
许多效果都使用“关键帧”的概念。关键帧是剪辑中用户定义的点,您希望在效果开始、停止或更改时使用效果。您可以在不同的关键帧上设置效果的参数,以便在视频到达下一个关键帧时,Kdenlive 将逐渐改变参数,以便在到达下一个关键帧时,参数将适应该关键帧。它插值关键帧。
关键帧类型,插值
Select the keyframe interpolation icon for selecting the keyframe type. See 快速入门 for an example on keyframing the RGB adjustment effect.
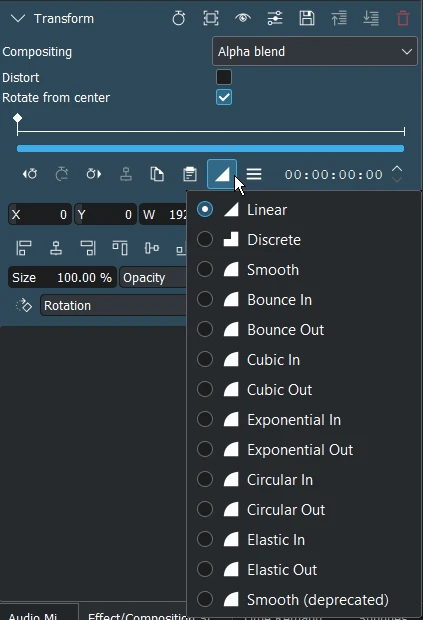
Kdenlive关键帧类型
The first three keyframes are: Linear, Discrete and Smooth (Centripetal Catmull-Rom spline interpolation). This are standard keyframes. More details about keyframes are here.
接下来的十个关键帧是缓动关键帧,其计算基于罗伯特·彭纳的方程式[2] 。
现实生活中的物体不会立即开始和停止,而且几乎从不以恒定速度移动。当我们打开抽屉时,我们首先以快速速度移动它,然后将其减慢速度,直到它出来。将某物放在地板上,它首先会加速向下,然后在撞到地板后反弹回上方。
缓动关键帧: 左端是运动的开始,蓝色和绿色段代表更快的运动。
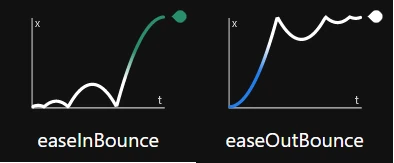
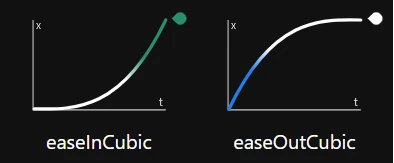
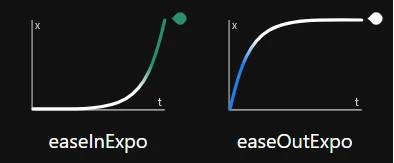
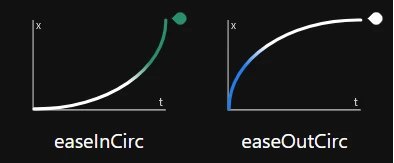
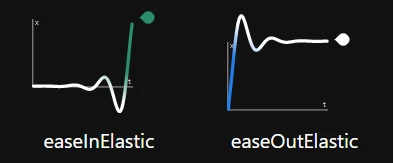
平滑(已弃用): 是在Kdenlive 24.02之前平滑的Catmull-Rom插值关键帧。
关键帧标尺
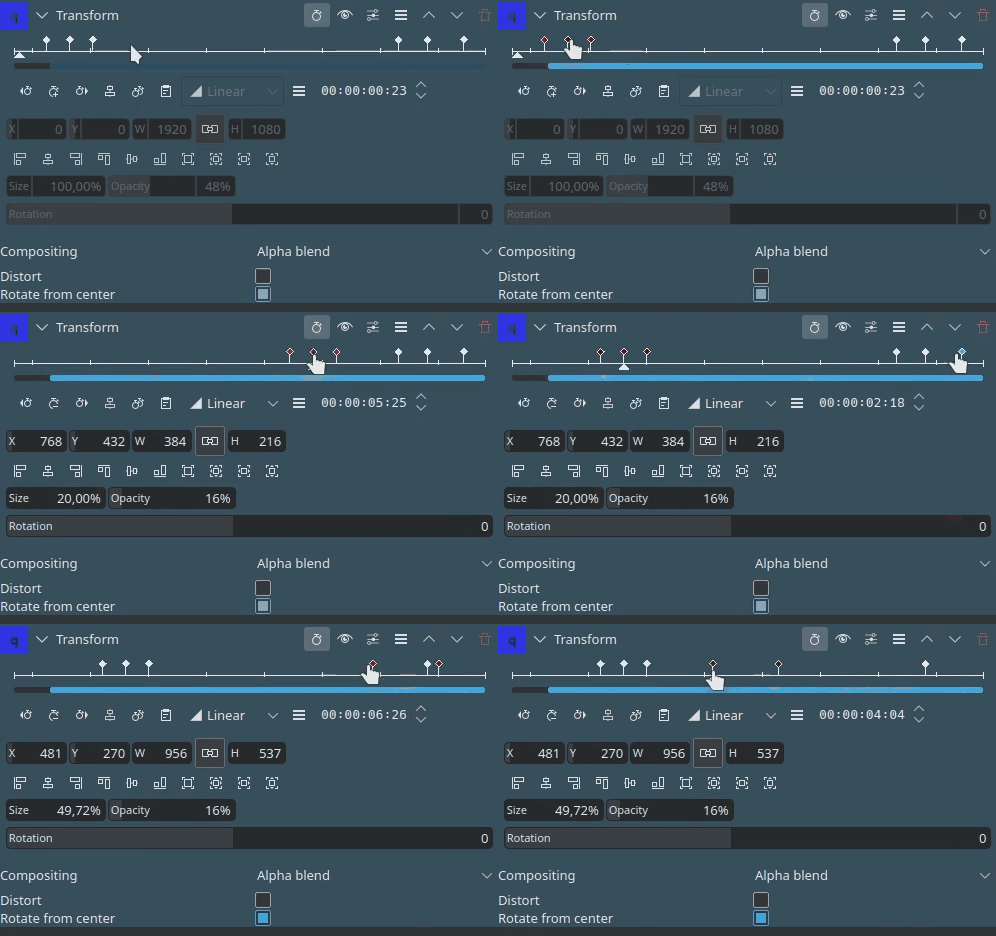
关键帧标尺具有缩放栏,如果剪辑的持续时间相对较长,并且效果堆栈小部件太窄,无法整齐地显示所有关键帧,则调整关键帧会更容易。
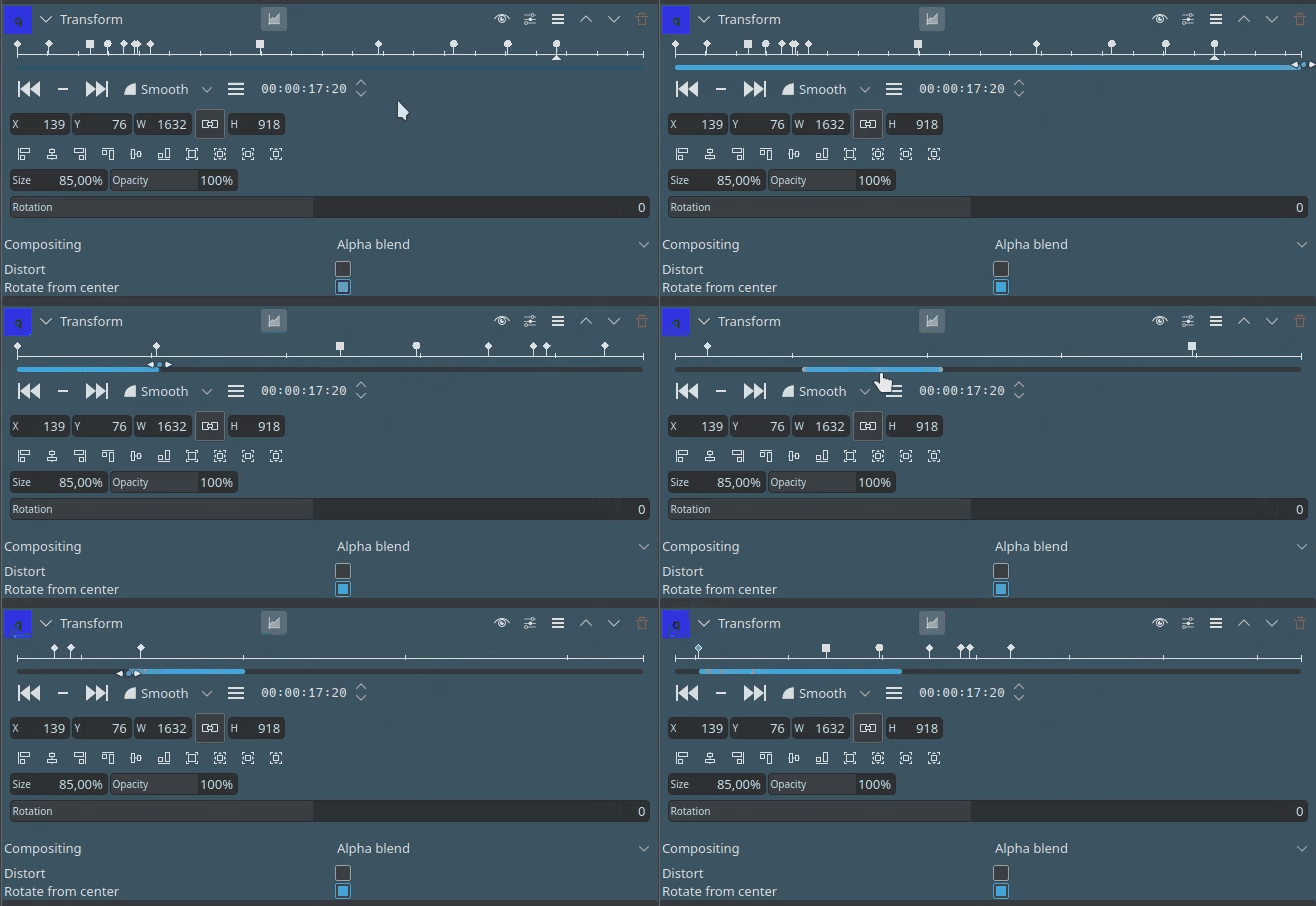

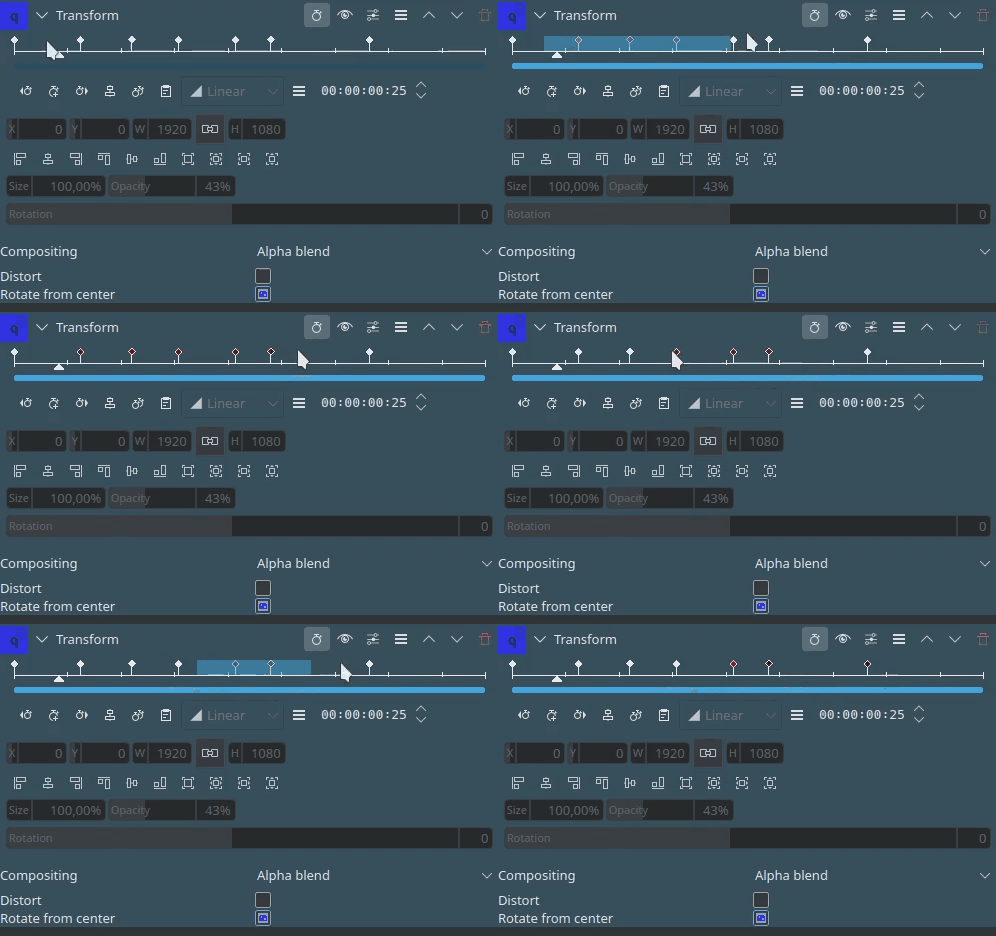
Keyframes can be copied and pasted between effects and even across clips using the standard shortcuts Ctrl+C, Ctrl+V
Keyframe Curve Editor
Implemented with version 24.08 the keyframe curve editor is still in alpha state. Improvements will come with upcoming versions.
The curve editor is showing the keyframe type and their curves.
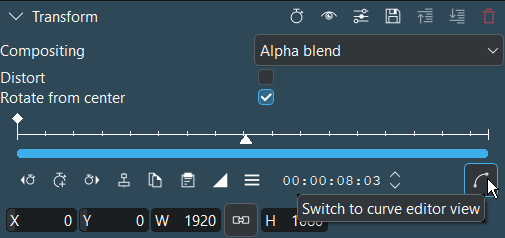
To switch to the curve editor click on Switch to curve editor view.
The curve editor can only be enabled on effects which have the following parameters: X, Y, width, height, opacity (alpha, optional) and rotation. For all other effects the curve editor is greyed out.
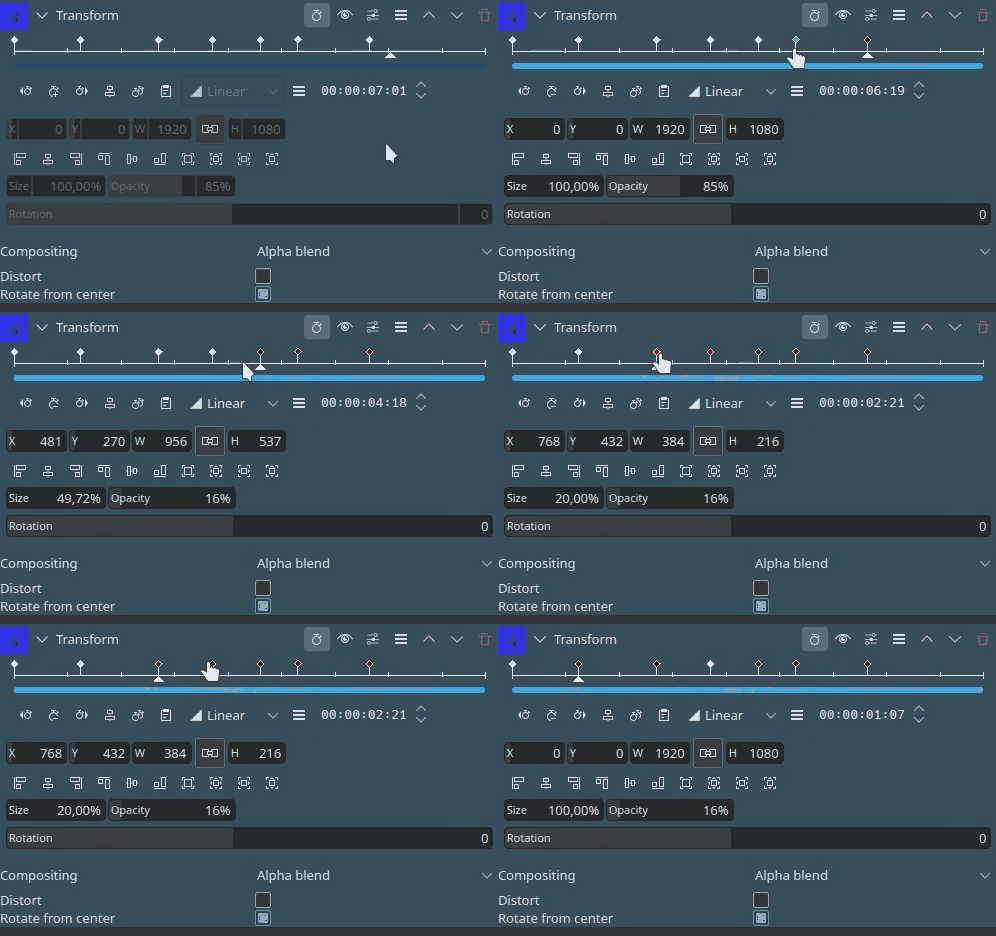
By double clicking into the window new keyframes get added. Hovering over a keyframe, the cursor changes to a cross and you can:
move the keyframe to change the value, depending on which tab you are (X position, Y position, Width, Height, Opacity, Rotation). Hold Ctrl moves the keyframe vertically only.
click on the keyframe and change the keyframe type
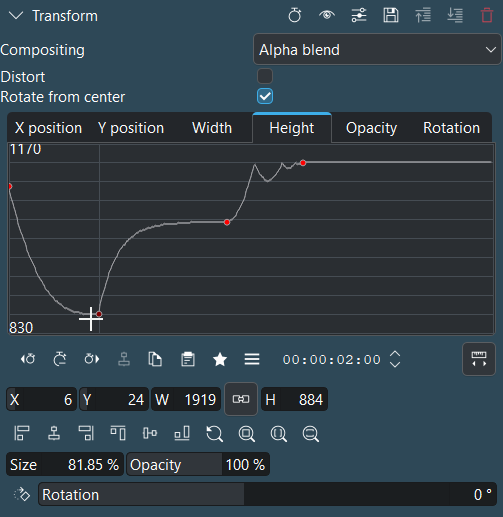
In this example, the cursor enables the second keyframe and you can either change the values by moving the keyframe or change the values directly in the boxes below the curve editor view.
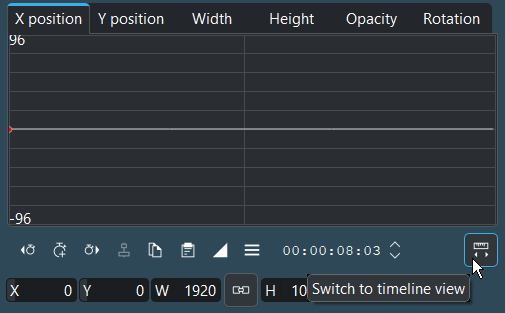
To switch back to the timeline view click on Switch to timeline view.
在效果堆栈中使用关键帧
The effect keyframe panel allows comprehensive manipulation of keyframes:
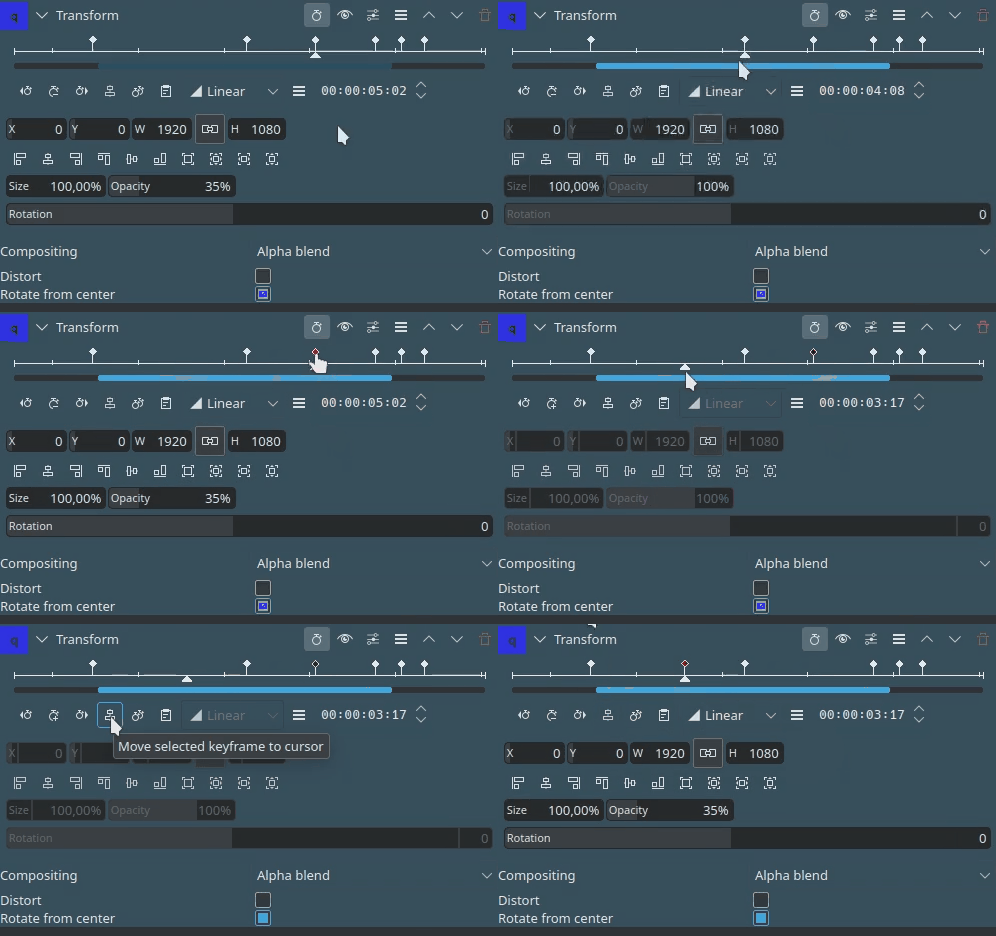
选择要移动的关键帧
将光标移动到您希望将关键帧移动到的位置
点击
将选定的关键帧移动到光标
Keyframe Types
Easing functions are based on Robert Penner's Easing Functions.
交换效果之间的关键帧
你可以从/向剪贴板导入和导出关键帧。这个功能不仅仅适用于从一个剪辑复制关键帧到另一个剪辑,还可以用于例如将运动跟踪器的结果复制到变换效果。
要导出关键帧到剪贴板,请点击关键帧面板中的[1] 选项 并选择 复制关键帧到剪贴板
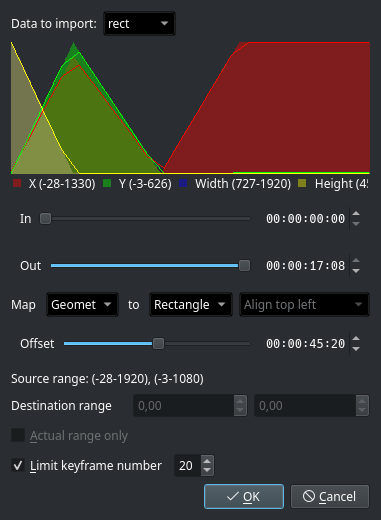
导入关键帧
要导入剪贴板中的关键帧,请点击关键帧面板中[1] 的 选项 并选择 从剪贴板导入关键帧。如果您在剪贴板上有有效的数据,您应该会看到这个对话框窗口,您可以在其中调整数据的映射。
在大多数用例中,默认设置就足够了。但您可能只想复制一部分数据,也许要输入一个偏移值,例如。
轨道效果
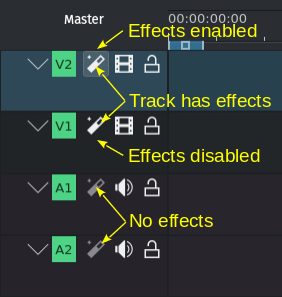
轨道效果指示器
效果可以添加到整个轨道,影响该轨道中的所有剪辑。只需从效果标签页中拖动一个效果到所需轨道的标头,或单击 轨道效果 图标,并将效果拖到轨道效果堆栈中。
主效果
如果你想在整个视频中应用音频或视频效果。点击轨道标头上面的 主 按钮,以查看主效果堆栈,您可以在其中添加效果,就像使用剪辑或轨道一样。
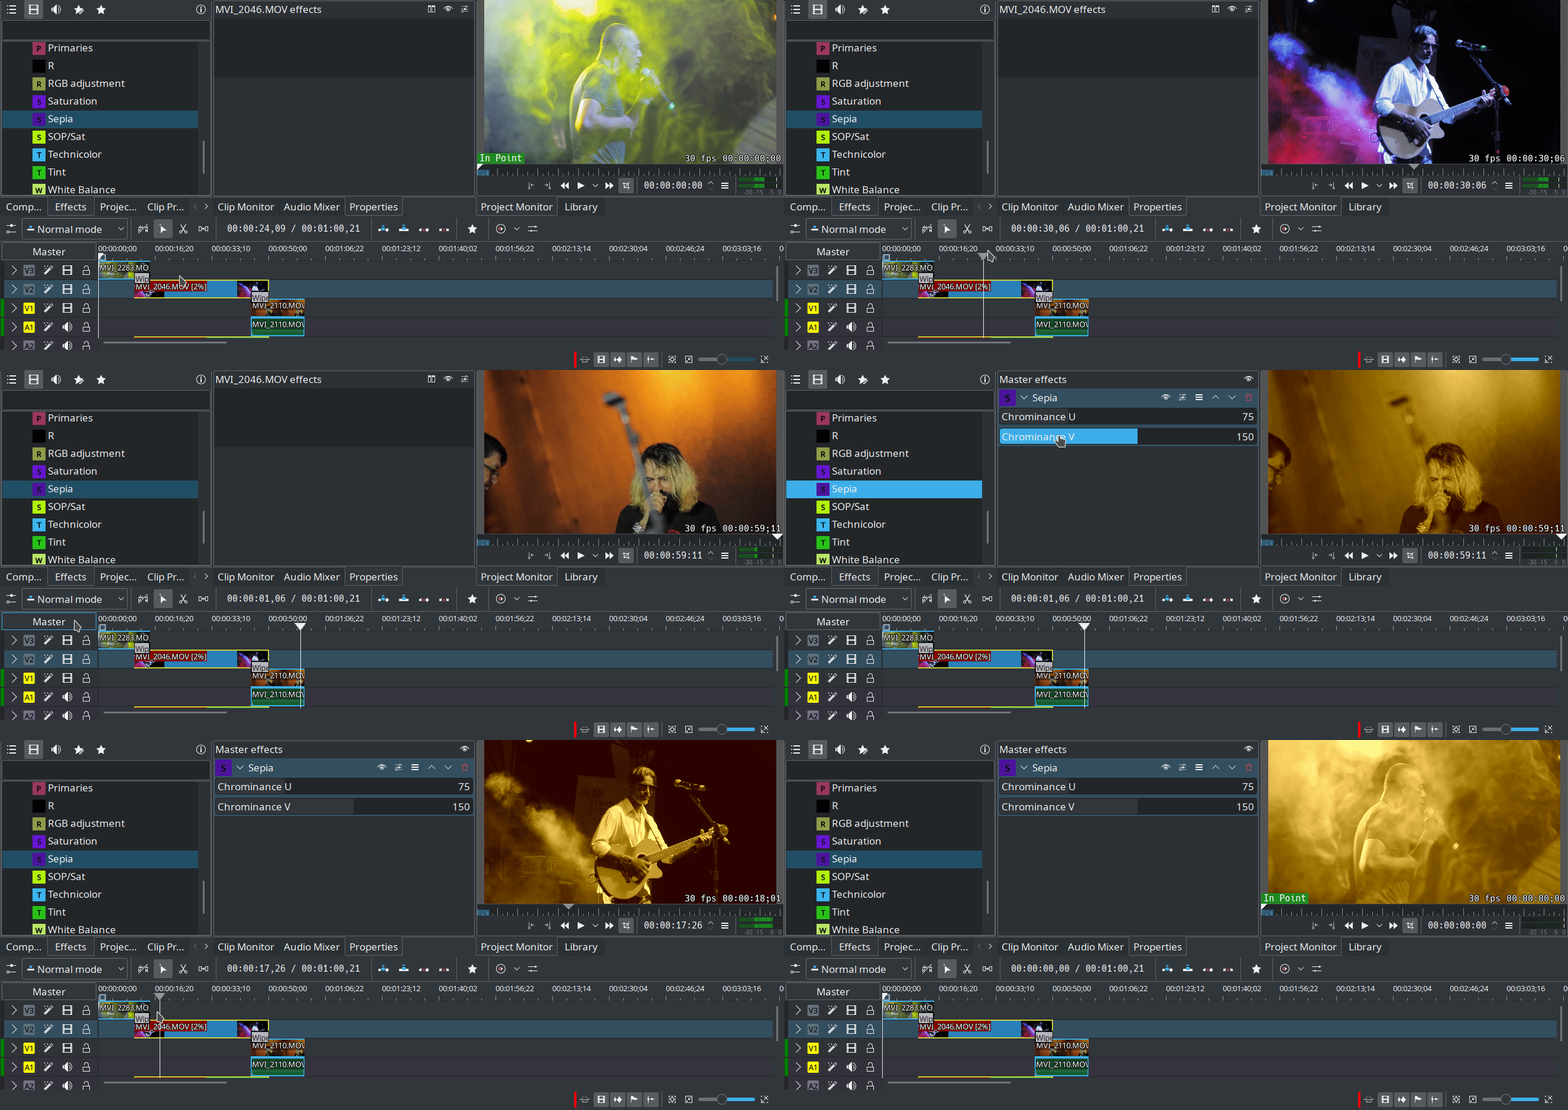
添加一个棕色效果到整个视频
只有特定的效果和过滤器才能在 主效果 工作。
效果区域
效果区域允许您将效果应用到轨道或时间轴中的特定区域。区域可以从时间轴中的效果区域栏设置,也可以从效果面板中的界面设置。
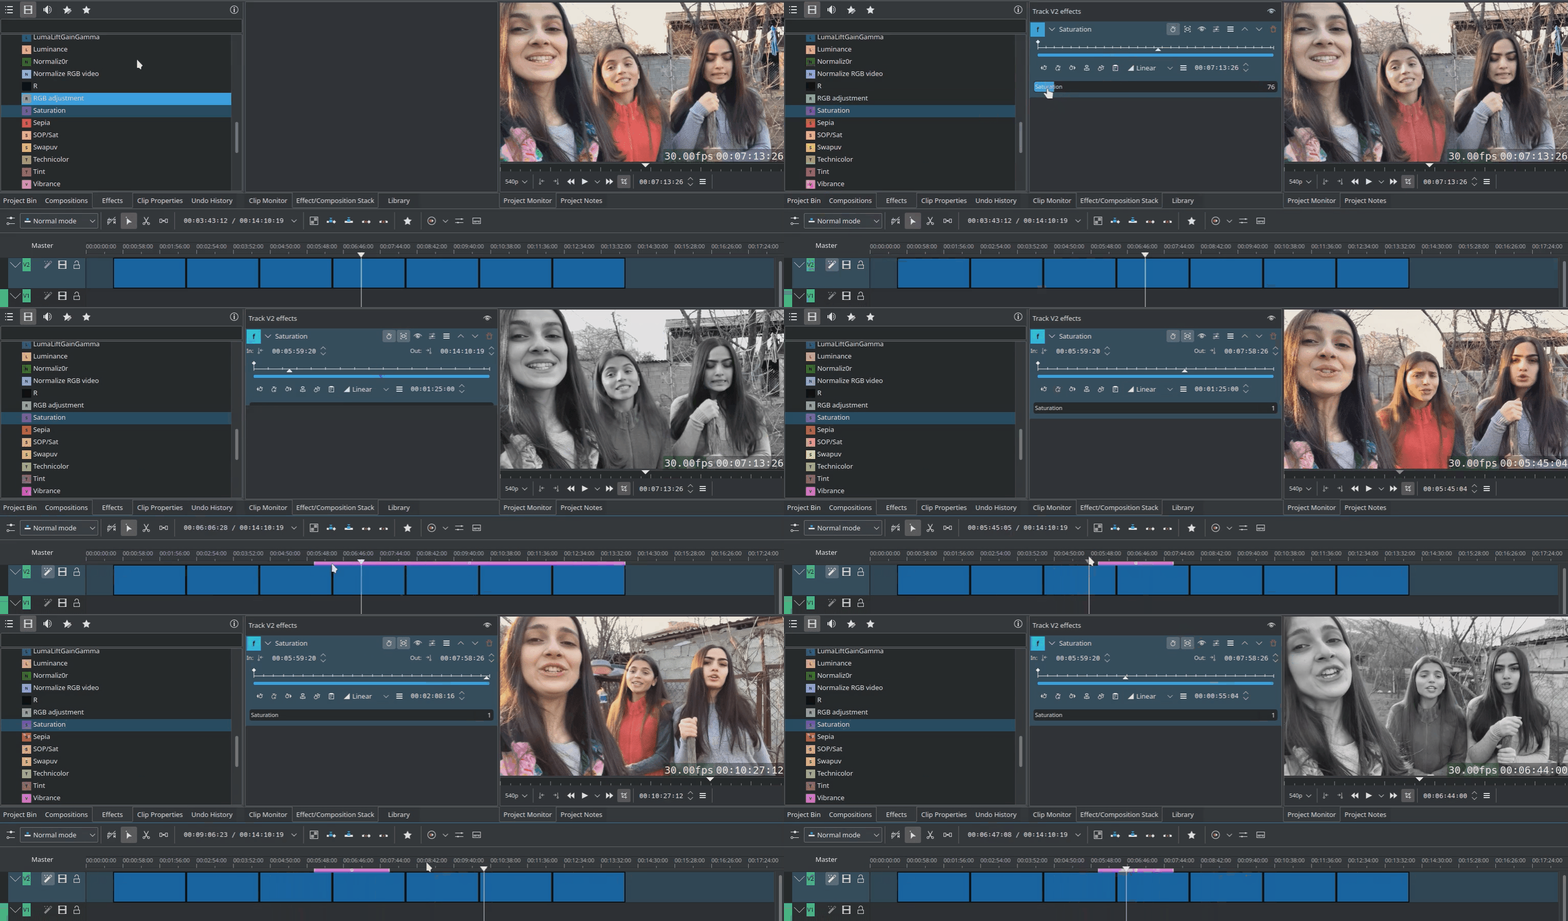
轨道效果区域
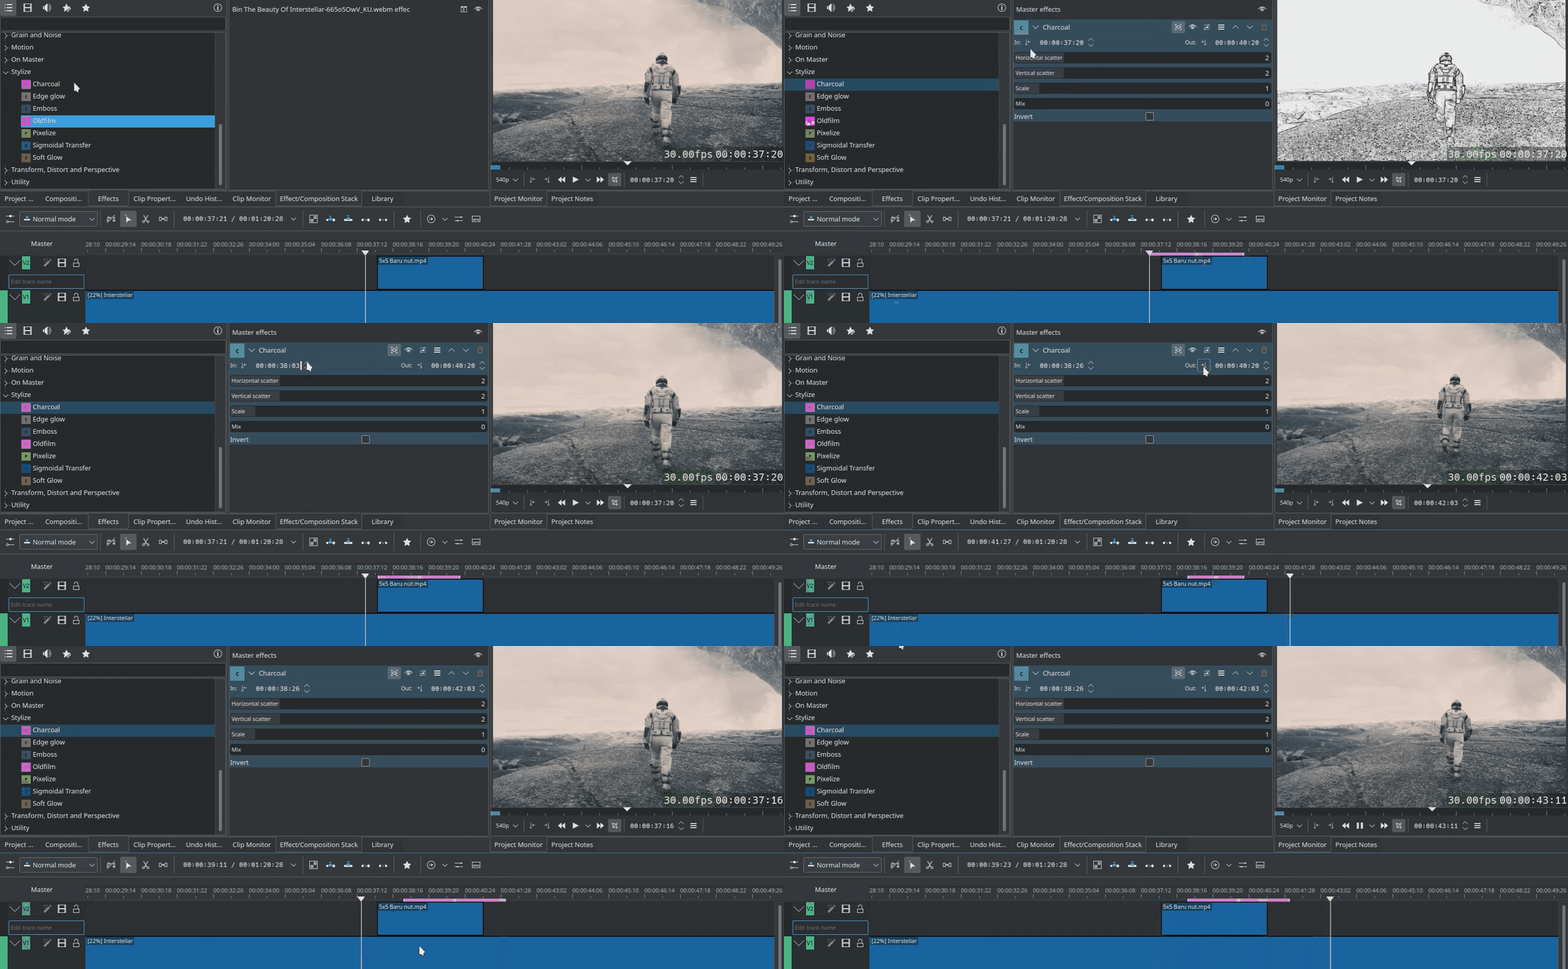
主效果区域
遮罩效果
该功能允许通过使用遮罩仅将效果应用于剪辑的特定区域。在当前实现中,该过程需要三个步骤:
添加其中一个可用的遮罩:形状透明度(遮罩)、旋转扫描(遮罩) 或 透明形状(遮罩)。
添加一个(或多个)效果(或效果)应用于遮罩区域
添加 应用遮罩 效果以激活步骤2中的效果的遮罩

使用旋转扫描(遮罩)仅在一个特定区域中应用饱和度效果
您可以按照相同的三个步骤为一个剪辑应用多个遮罩。
视频效果
视频效果分为以下几个类别:
可用的效果由 .xml 文件定义,这些文件位于 .local/share/kdenlive/effects (例如 /usr/share/kdenlive/effects)。
这些 .xml 文件包含 Kdenlive 中效果参数的默认值。因此,如果您不喜欢 Kdenlive 中效果的默认值,您可以修改这些 .xml 文件。
See also here for an alphabetical list of effects and filters.
音频效果
音频效果分为以下几个类别:
可用的效果由 .xml 文件定义,这些文件位于 .local/share/kdenlive/effects (例如 /usr/share/kdenlive/effects)。
这些 .xml 文件包含 Kdenlive 中效果参数的默认值。因此,如果您不喜欢 Kdenlive 中效果的默认值,您可以修改这些 .xml 文件。
See also here for an alphabetical list of effects and filters.
Alphabetical List of all Effects and Filters
音频工具
时间重映射
时间重映射功能允许对剪辑的速度进行关键帧操作,以实现速度渐变等效果。

使用时间重映射进行速度渐变的示例
See also this tutorial.
语音转文本
普通字幕
效果演示
以下三个 YouTube 视频显示了 Kdenlive 中可用的视频效果的效果演示(西班牙语字幕)。
其它 YouTube 视频(英文字幕)。
参看这个 YouTube 播放列表 Franz M.P.
