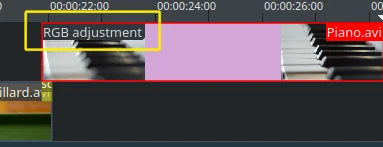
快速入门
创建一个新项目
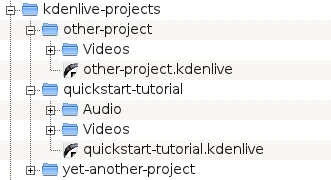
Kdenlive 目录结构
The first step is creating a new (empty) folder for our new project. We will call it quickstart-tutorial/ in this tutorial. Then get some sample video clips, or download them from here Kdenlive-tutorial-videos-2011-avi.zip (7 MB)[1] and extract them to e.g. a quickstart-tutorial/Videos/ subfolder inside the project folder.
The image on the left shows the suggested directory structure: Each project has its own directory, with video files in the Videos subdirectory, audio files in the Audio directory, etc. (see also chapter Folder Structure)
备注
从现在起,本教程假设您使用提供的示例视频,但它也适用于其它任何视频。
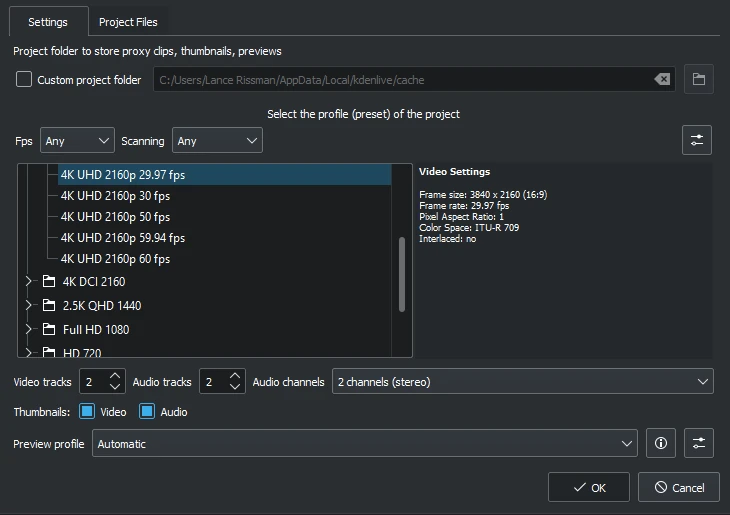
新建项目对话框
打开 Kdenlive 并创建一个新项目
Choose the previously created project folder (quickstart-tutorial/) and select an appropriate project profile. The video files provided above are 720p, 23.97 fps.[2] If you are using your own files and do not know which one to use, Kdenlive will suggest an appropriate one when the first clip is added [3] , so you can leave the field on whatever it is.
If you like you can change to the dark theme: .
添加片段
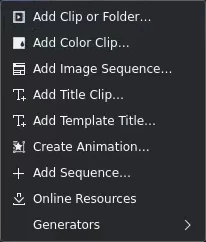
项目素材库: 添加视频素材
Now that the project is ready, let us start adding some clips (i.e. the ones you downloaded). This is done via the Project Bin widget; a click on the icon directly opens the file dialog, a click on the small arrow shows a list of additional clip types that can be added as well. Video clips, audio clips, images, and other Kdenlive projects can be added via the default dialog.
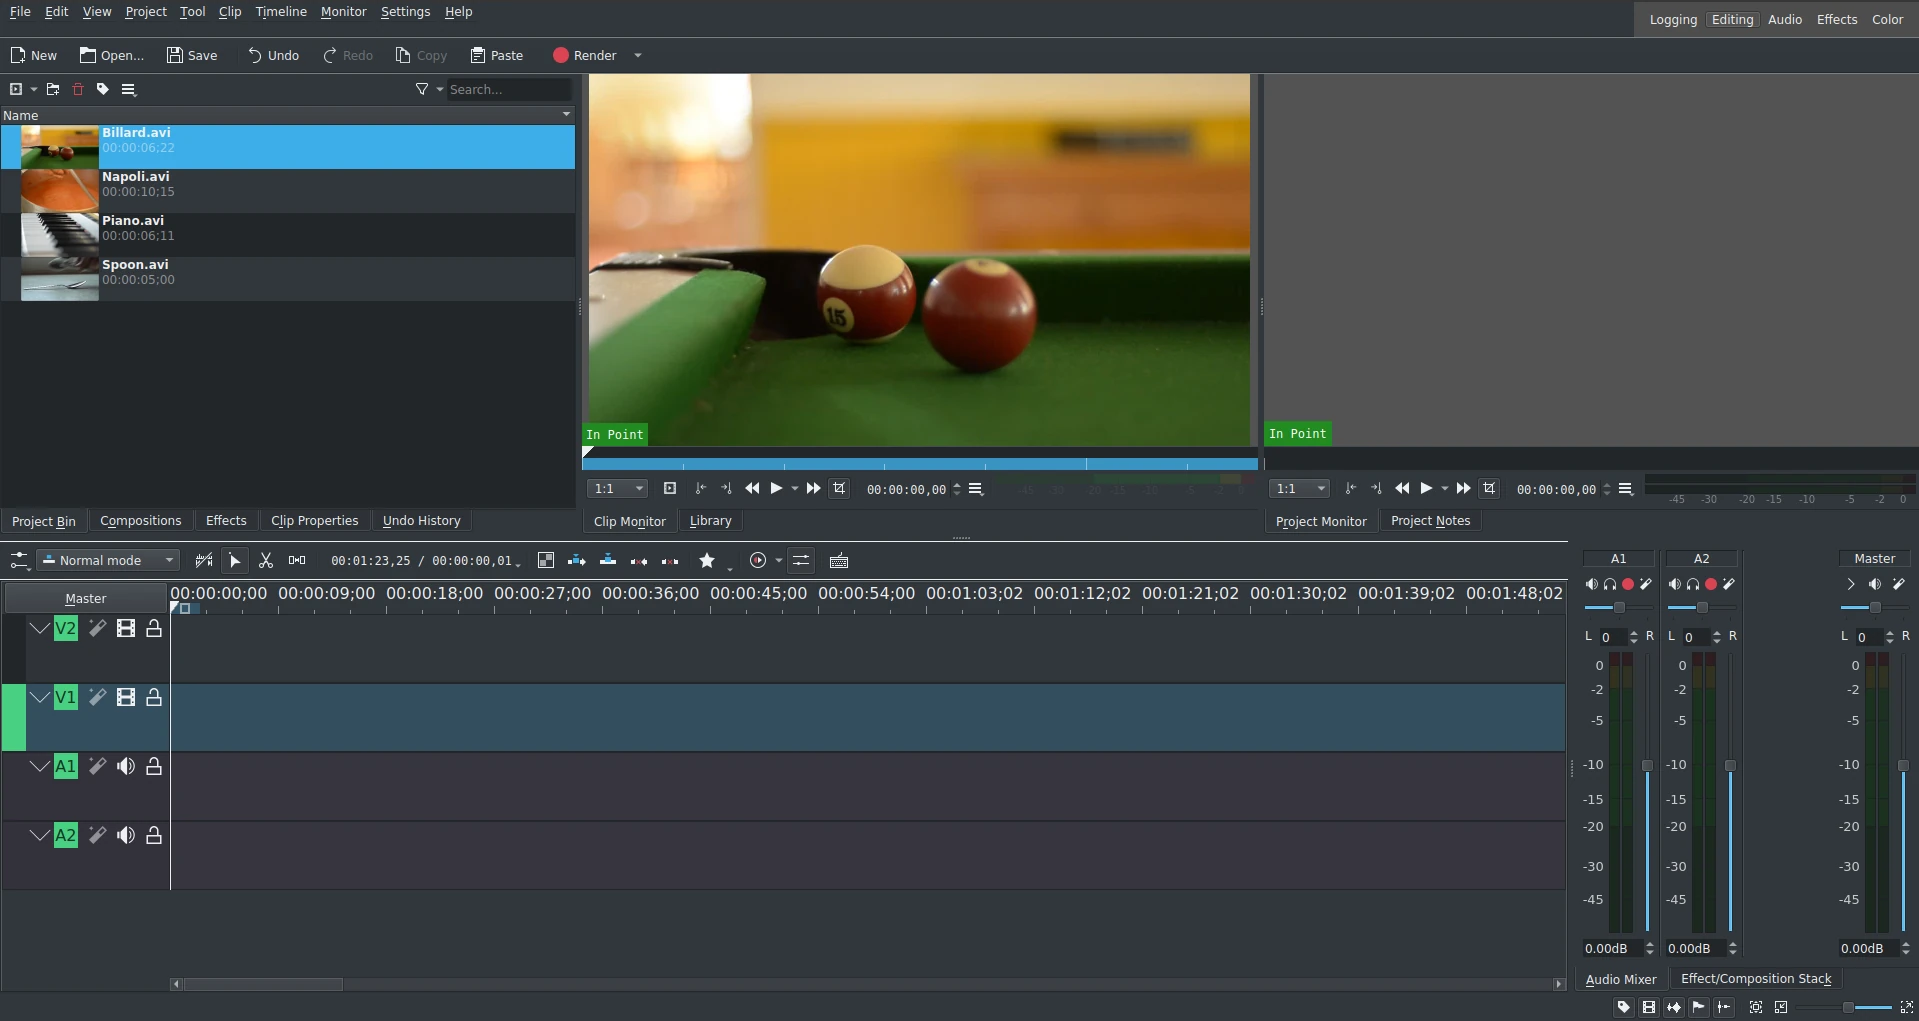
带有教程文件的 Kdenlive 窗口
加载片段后,Kdenlive 将看起来与此相似。左上方是项目素材箱,右侧是视频的监视器: 剪辑监视器显示原始片段中的视频,项目监视器显示包含所有应用了的效果、过渡等的输出视频。 第三个非常重要的项目是时间轴 (在监视器下方):这是编辑视频剪辑的地方。 有两种不同类型的轨道:视频和音频。 视频轨道可以包含任何类型的片段,音频轨道也是,但当将视频文件拖放到音轨时,Kdenlive 只会使用其中的音频。
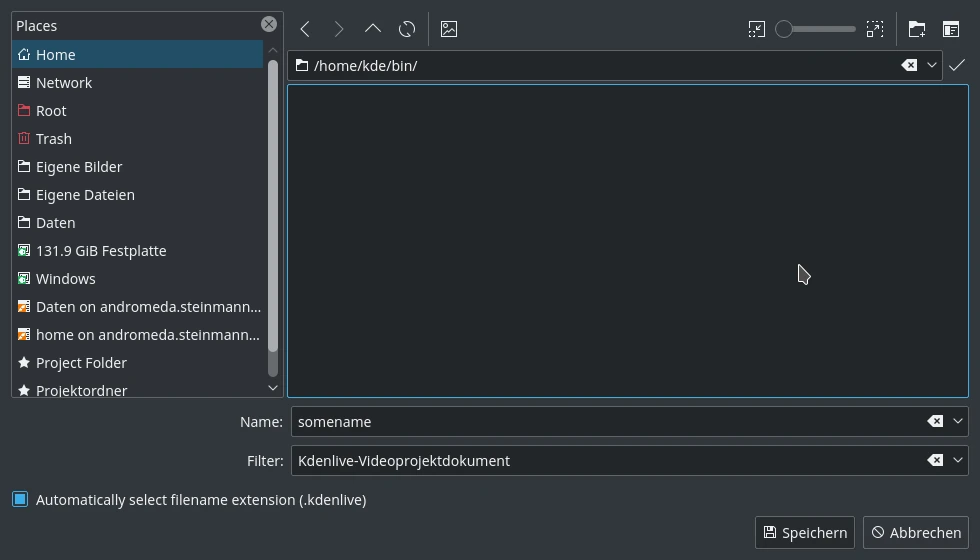
保存 Kdenlive 项目
Let us save the work via . This saves our project, i.e. where we placed the clips on the timeline, which effects we applied, and so on. It can not be played.[4] The process of creating the final video is called Rendering.
时间轴
备注
在快速入门部分,我们将不详细介绍时间线及其组件。更多详细信息请参阅本文档的 时间轴 章节。
Now comes the actual editing. Project clips are combined to the final result on the timeline. They get there by drag and drop[5]: Drag some Napoli (assuming you are using the files provided above, as in the rest of this quick start tutorial; if not, please make sure your screen is waterproof, and perhaps tomatoproof) from the project bin and drop it onto the first track in the timeline. In this case track V2.
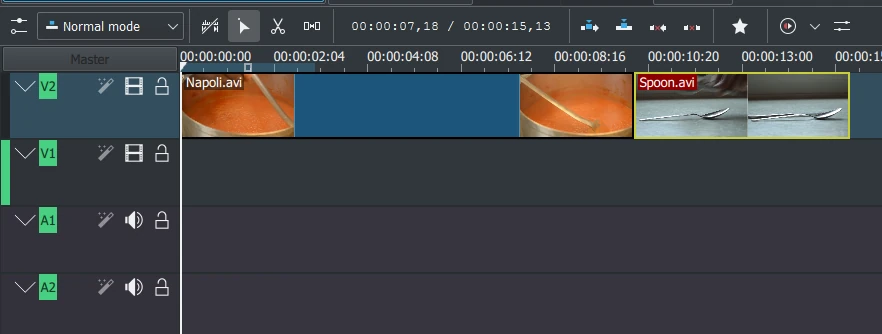
时间轴中的第一个素材
Since some cutlery is needed as well, grab the spoon clip and drop it on the first track as well (track V2). Then drag the Napoli to the beginning of the timeline (otherwise the rendered video would start with some seconds of plain black), and the Spoon right after the Napoli, such that it looks like in the image on the left. (Where I have zoomed in with Ctrl+MW.)

时间轴光标
按 Space (或项目监控器中的 播放 按钮) 即可预览结果。您将看到 Napoli 后直接出现 Spoon。如果时间轴光标不在开头,项目监视器将在中间位置开始播放;您可以在时间轴标尺上或项目监视器中拖动光标移动。如果您更喜欢键盘快捷键,Ctrl+Home 对激活的监视器也有同样的作用。(在使用快捷键之前,如果未选中 ,请先选择该监视器。)

长度调整标记
Since after eating comes playing, there is a Billiards clip. Add it to the timeline as well (track V1). For the first 1.5 seconds nothing happens in the clip, so it should perhaps be cut to avoid the video becoming boring. An easy way[6] for this is to move the timeline cursor to the desired position (i.e. the position where you want to cut the video), then drag the left border of the clip when the resize marker appears. It will snap in at the timeline cursor when you move close enough.
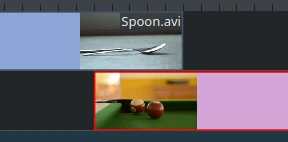
重叠的片段
要在吃饭 (Spoon) 和打台球 (Billiards) 之间添加 转场,两个片段需要重叠。准确地说:将第二个片段放在第一个片段的上方或下方。第一个片段应在第二个片段开始后几帧结束。放大时间轴直到出现单帧的刻度为止,这样做很有帮助;而且还能很容易地始终保持相同的转场时长,在本例中为五帧。
您可以使用 Kdenlive 窗口右下角的 或 Ctrl+Mousewheel 来缩放时间轴。Kdenlive 相对于时间轴光标进行缩放,因此请先将时间轴光标设置到您想要放大的位置,然后再放大。
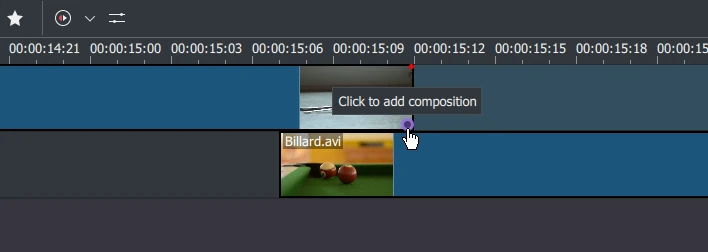
转场标记
现在片段重叠了,可以添加转场效果了。方法是右键单击上面的片段,选择 并选择 ,或者更简单的方法是将鼠标悬停在 Spoon 片段的右下角,直到指针显示显示为点击图标,并出现“点击以添加合成”的信息。后一种方法在默认情况下会添加 Wipe 转场,在本教程中这是最好的办法,因为之后不再需要播放 Spoon 了。
The wipe transitions fades the first clip into the second one. See also Wipe.

Let us now add the last clip, the Piano, and again apply a wipe transition. When adding it on the first track of the timeline (track V2), you need to click on the new clip’s lower left edge to add the transition to the previous clip.
效果
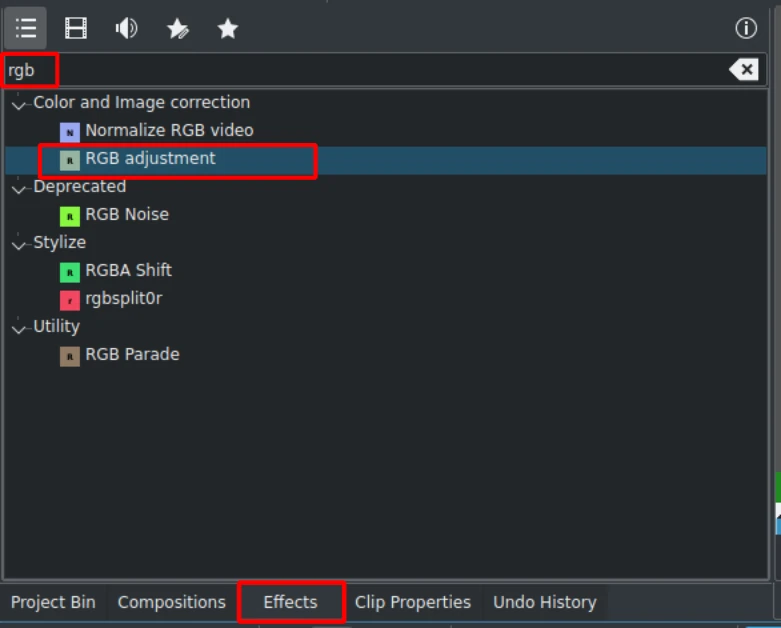
效果列表
The Piano can be colorized by adding an effect to it. Click on the effect view (if effect view is not visible enable the view: ). Type rgb in the search field, then double-click the effect.
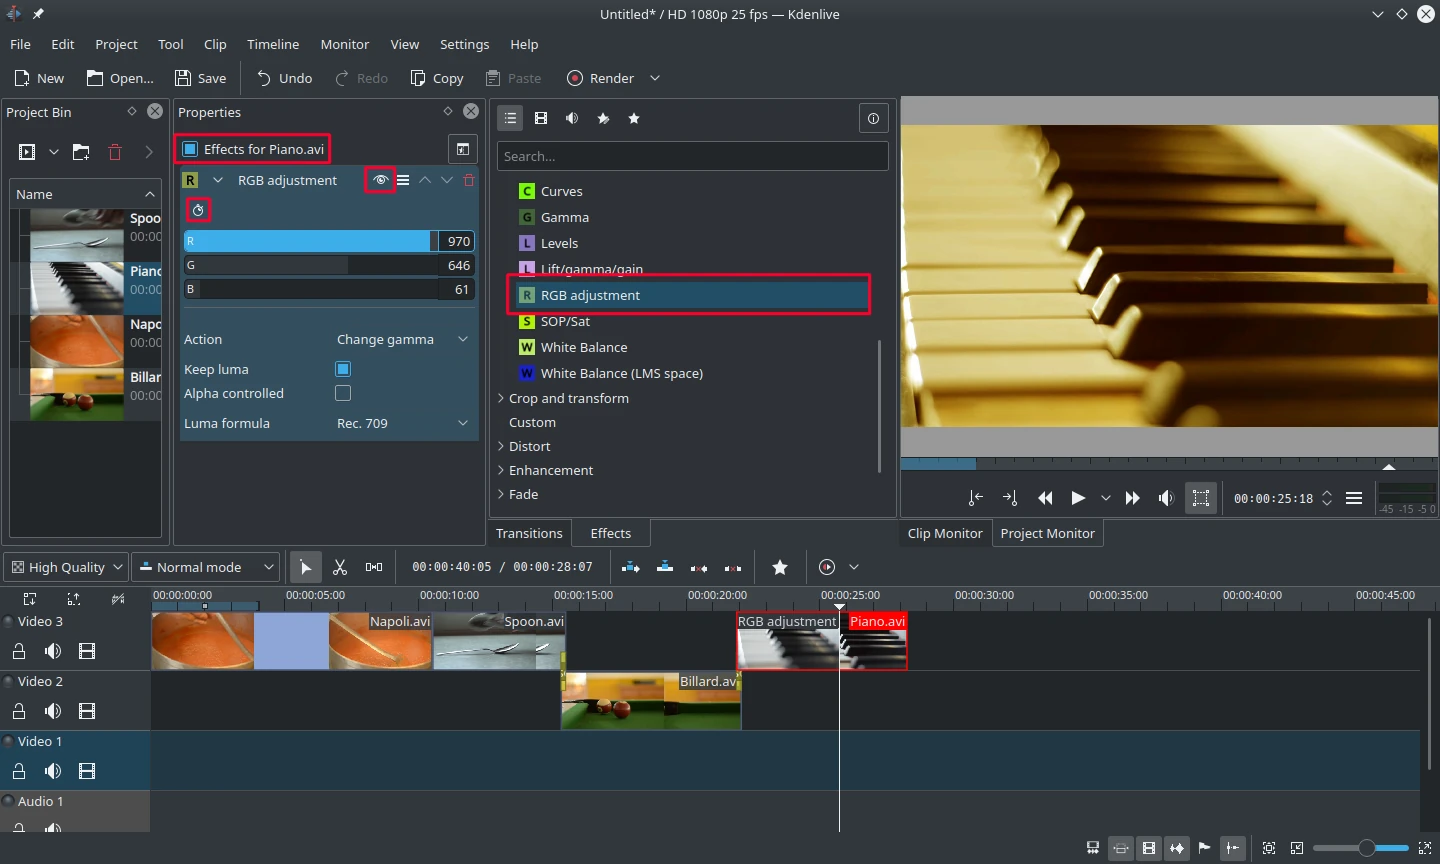
带有 RGB 调整功能的效果栈
为了将图像的色调改为橙黄色,使其适宜在晚上观看,我们需要减少蓝色,增加红绿色。
效果/合成堆栈中的值可以通过滑块更改(鼠标中键将其重置为默认值),或者直接通过双击滑块右侧的数字来输入一个值。
效果/合成堆栈窗口始终显示当前选定的时间轴片段的效果与合成。单击眼睛图标可暂时禁用每种特效,也可使用效果/合成堆栈窗口顶部的复选框禁用该片段的所有特效 (不过效果的设置会被保存)。这对需要大量算力的特效非常有用,因为可以在编辑时禁用这些特效,在渲染时再启用。
For some effects like the one used there it is possible to add keyframes. The framed watch icon indicates this. Keyframes are used for changing effect parameters over time. In our clip this allows us to fade the piano’s color from a warm evening color to a cold night color.
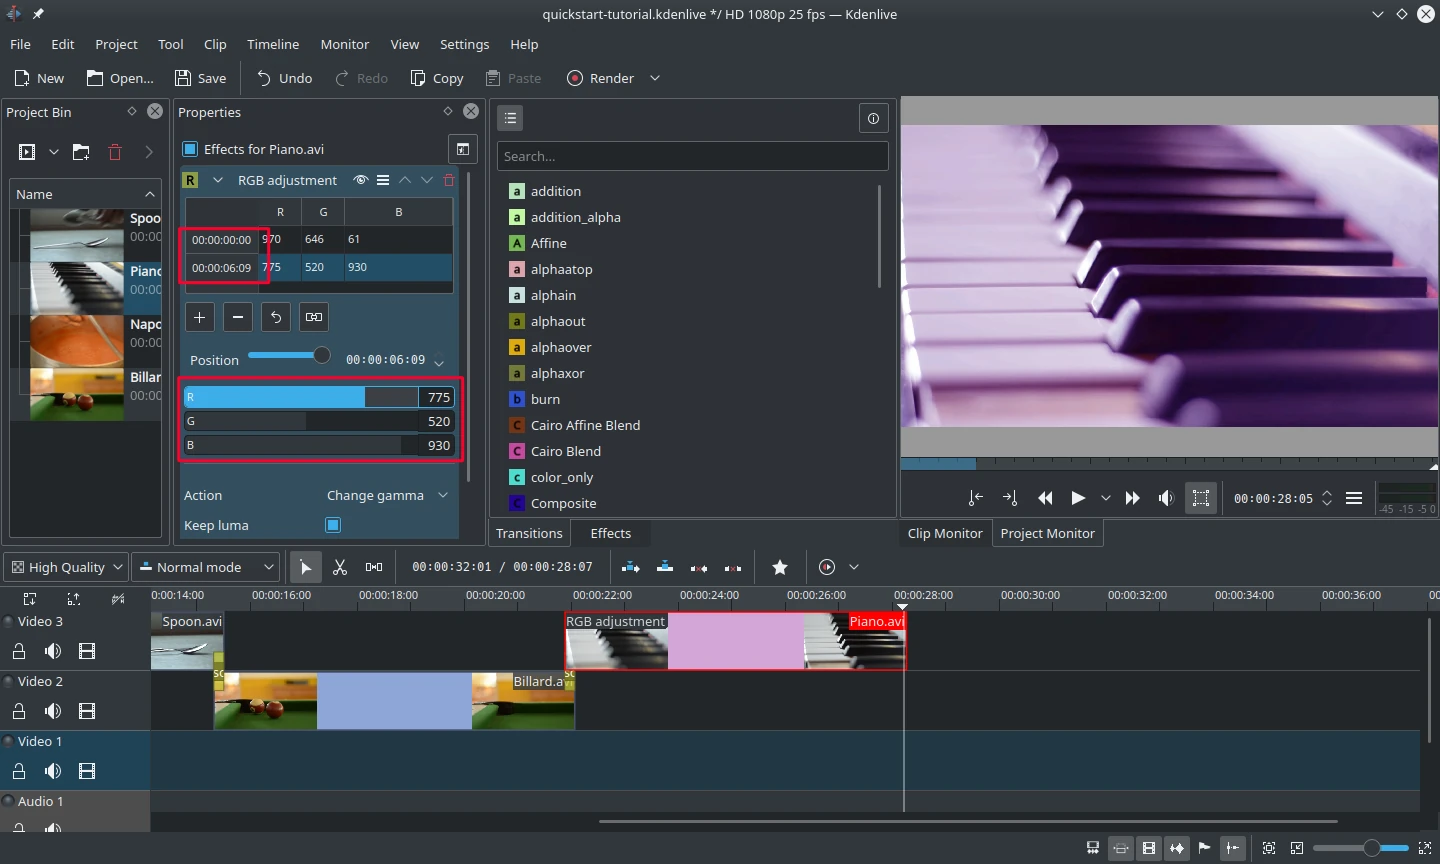
效果的关键帧
After clicking the icon (the clock icon framed in the previous image), the Properties widget will re-arrange. By default there will be two keyframes, one at the beginning of the timeline clip and one at the end. Move the timeline cursor to the end of the timeline clip, such that the project monitor actually shows the new colors when changing the parameters of the keyframe at the end.
确保在属性列表中选择了最后一个关键帧。然后就可以为钢琴涂上深蓝色了。
将时间轴光标移至项目的开头并播放 (使用 Space 或 按钮),钢琴现在应该会按要求改变颜色。
关键帧的使用是本教程中最困难的部分。如果你做到了,你就能轻松地掌握 Kdenlive 了!
备注
In this Quick Start section we brushed over the effects very quickly. More details about effects and an explanation of each effect is available in the Effects and Filters section of this documentation.
音乐

音频淡出
Since the clips do not provide any audio, let us search for some nice piece of music from your local collection or on web pages like Jamendo. After adding the audio clip to the Project Bin, it should be dragged to an audio track on the timeline.
The audio clip can be resized on the timeline the same way as video clips can. The cursor will snap in at the end of the project automatically. To add a fade out effect at the end of the audio clip (except if you found a file with exactly the right length) you can hover over the top right (or left) edge of the timeline clip and drag the red shaded triangle to the position where fading out should start.[7]
渲染(导出)
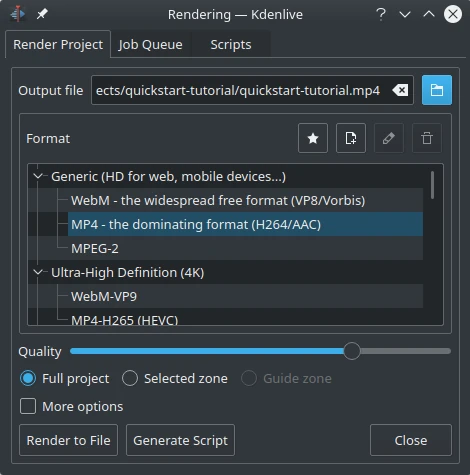
渲染对话框
A few minutes left, and the project is finished! Click the Render button (or go to , or press Ctrl+Enter) to get the dialog shown on the left. Select the desired output file for our new video with all effects and transitions, choose MP4 (works nearly everywhere), select the output file location and press the Render to File button.
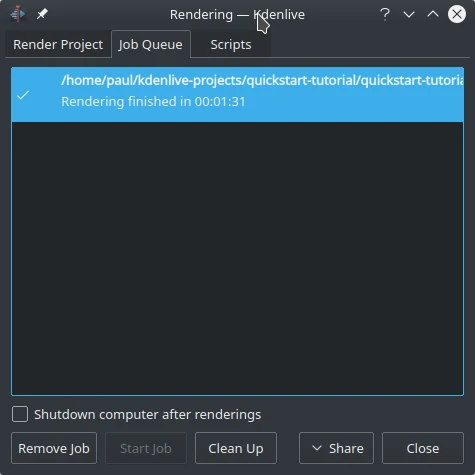
渲染进度
几秒钟后渲染将完成,您的第一个 Kdenlive 项目也就完成了。恭喜您!
