标记
Markers in the picture below are the yellow flags inside the clip. Not to be confused with timeline markers (red flags in the picture below). Markers are inside the clips and move with the clips.
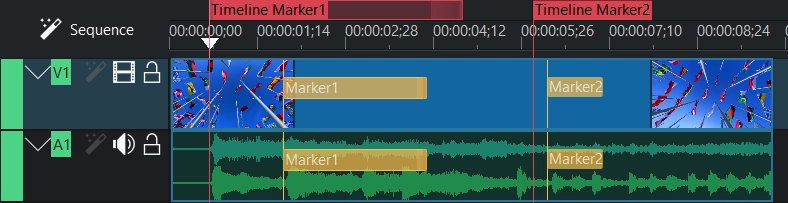
Markers can be used for certain points (Marker2) or ranges (Marker1) in a clip that are important.
标记与剪辑相关,并“固定”在此剪辑上。当你将同一剪辑再次放入时间轴,并更改标记,则此标记同时更改两个剪辑。
2 种添加标记的方式
Add markers to your clips via the 剪辑监视器. That allows you to preview the clip at the location where you are adding a marker.
以下过程在播放头位置(剪辑监视器,时间轴)添加一个标记:
菜单
Clip monitor: From the main menu choose , Add Marker
Timeline: Click on the clip. From the main menu choose , Add Marker
Clip monitor: Right click on the clip monitor and choose
Timeline: Right click the clip in the timeline and choose . The marker is added at the play-head position.
键盘
剪辑监视器:数字键盘 * 添加标记
时间轴:将播放头移动到剪辑上所需的位置。点击剪辑。数字键盘 * 添加标记
1 - 0 (number 1 to 0 on the NumPad)
鼠标
不可能
Markers With Range
The following two procedures generate markers with a range:
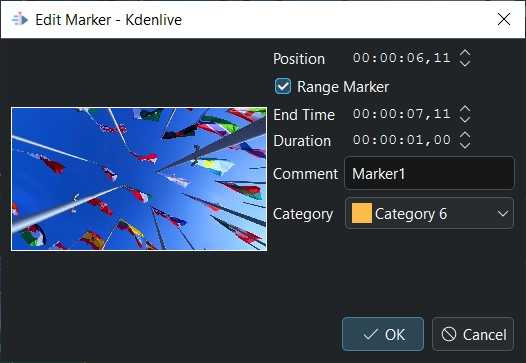
In the Edit Marker window you can enable Range Marker which allows you to determine a Duration of the marker. Default Duration is 1 second.
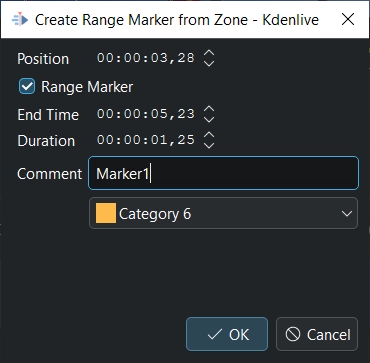
You can create a marker with range from a clip zone.
注意
Make sure you select the desired clip in the project bin.
Define a zone in the clip monitor with I and O. Then you can:
Right click on the zone and choose Create Marker from Zone. This opens a window (see above) and you can adjust all settings.
Right click on the zone and choose Create Marker from Zone Quickly. This creates a marker with the text Zone Marker in the currently active category.
Now the advantage is, that you can select this zone marker in the markers windows and drag it to the timeline. In this way you can mark interesting parts of a clip with zone marker instead of Insert Zone in Project Bin and creating sub clips.
管理类别和标记
类别
在剪辑监视器中的标记
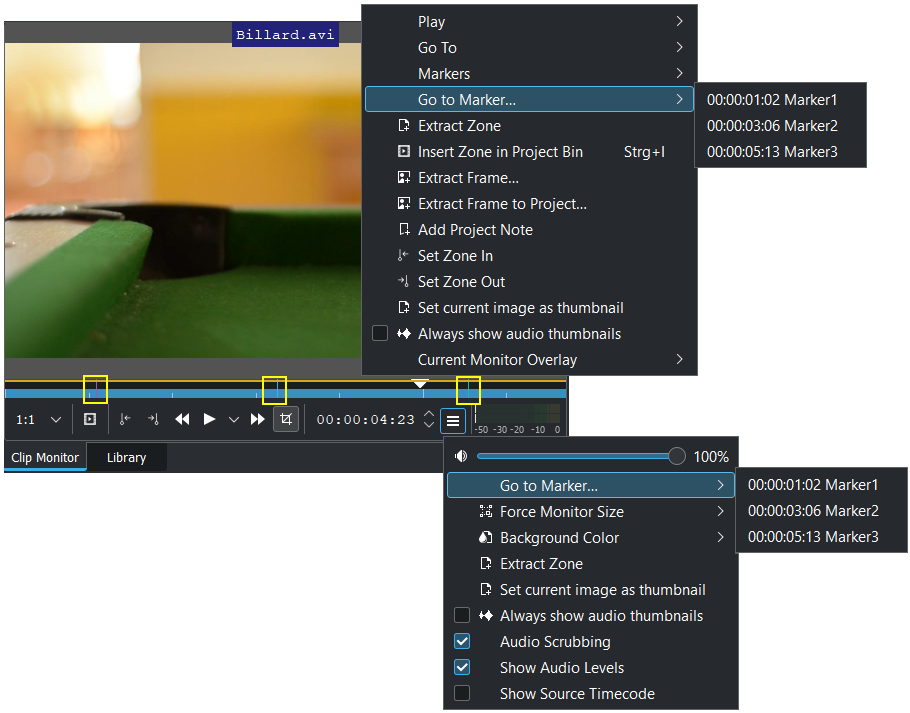
一旦标记放在你的剪辑中,你就可以在 剪辑监视器 通过右键点击并选择 或多层菜单 (见图片) 来访问它们。还要注意标记如何根据你选择的类别颜色显示为垂直线(见图片中高亮显示的区域)。你也可以在时间轴上打开显示标记注释(见 编辑 )。
标记视图
Markers are using the same window as timeline marker. Yellow markings show the differences compared to the guide view.

opens the markers window where you can manage your markers.
要在这个视图中显示剪辑标记,您必须:
项目素材箱: 点击所需的剪辑,剪辑的标记就会显示在窗口中。
在时间轴上: 在所需剪辑上右键点击并选择 ,该剪辑的标记就会显示在窗口中。
完整的视图描述见 辅助线视图 。
导出标记为章节说明
你可以将单个剪辑的标记导出为章节,就像导出辅助线一样。在导出之前,您必须选择一个剪辑。
更多细节请参见 导出辅助线
Move and Edit Markers
A double-click on a marker text in the timeline opens the edit window (besides the possibility in markers view)
标记只能通过在编辑窗口中更改 位置 来移动。
注释 文本和 类别 可以在编辑窗口中更改。