Timeline Markers
Timeline markers in the picture below are the red flags. Not to be confused with 标记 on a clip (yellow in the picture below). Timeline markers can be either stationary or moved when clips are moved around. Markers are inside the clips and move with the clips.
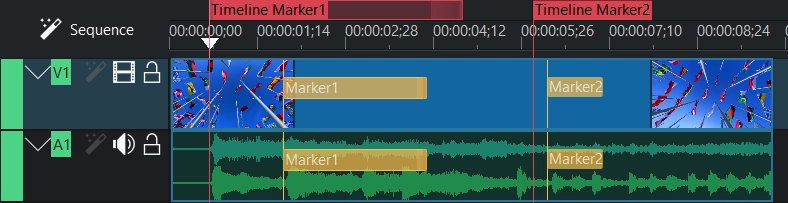
Timeline markers can be used for certain points (Timeline Marker2) or ranges (Timeline Marker1).
Timeline markers can be used to define regions for rendering. See Rendering Using Timeline Markers.
Timeline markers can also be used as chapters for DVD videos. See Rendering Using Timeline Markers.
3 Ways to add Timeline Markers
Following procedures add a timeline marker at the timeline playhead position:
菜单
Right click on timeline ruler and choose in the menu Add/Remove Timeline Marker
Right click in the timeline and choose Add/Remove TimeLine Marker
键盘
G adds a timeline marker.
1 - 0 (number 1 to 0 on the NumPad)
鼠标
Double-click on top of the timeline ruler and the timeline marker gets added where you have clicked
时间轴标尺右键菜单
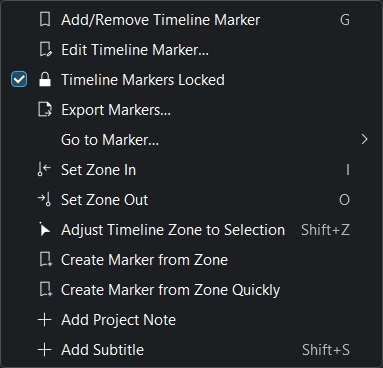
Add/Remove Timeline Marker
Edit Timeline Marker: See Move and Edit Timeline Markers
Timeline Markers Locked: See Move and Edit Timeline Markers
Export Markers: Opens the Export Marker dialog.
Go To Marker…. Select a marker to which the playhead should jump.
设置区域 入/出 点: 请参阅 时间轴预览渲染.
Adjust Timeline Zone to Selection
Create Marker from Zone
Create Marker from Zone Quickly
Add Project Note: See Project Notes
Add Subtitle: See Subtitles
Timeline Marker With Range
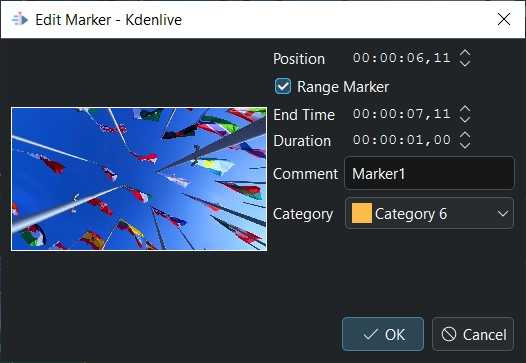
In the Edit Marker window you can enable Range Marker which allows you to determine a Duration of the marker. Default Duration is 1 second.
Managing Categories and Markers
类别
When starting a new project the categories for the project are pulled in from Markers Categories in setting Configure Colors and Markers. These categories are for markers and timeline markers.
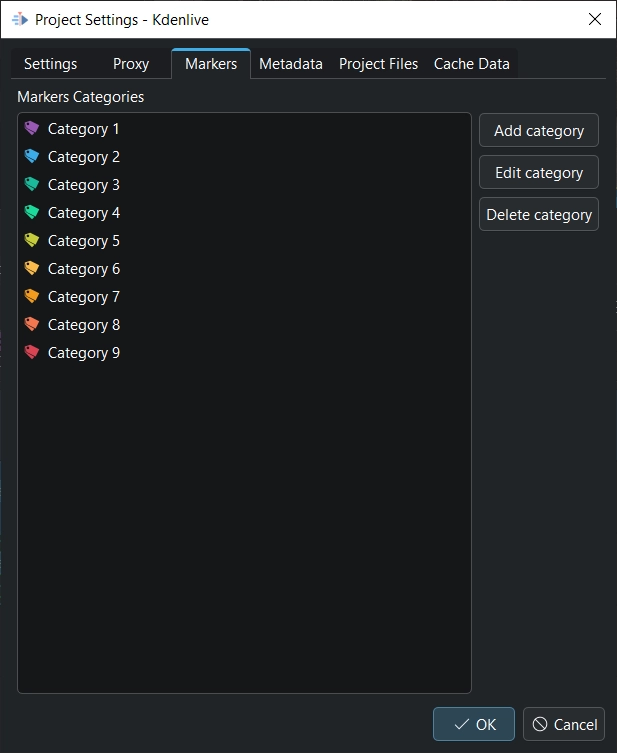
Project specific categories can be added, edited and deleted in
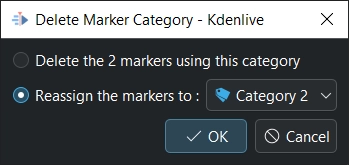
Delete category When deleting a category where markers are assigned, Kdenlive asks if you really want to delete it or if you want to reassign the markers to another category.
Markers View
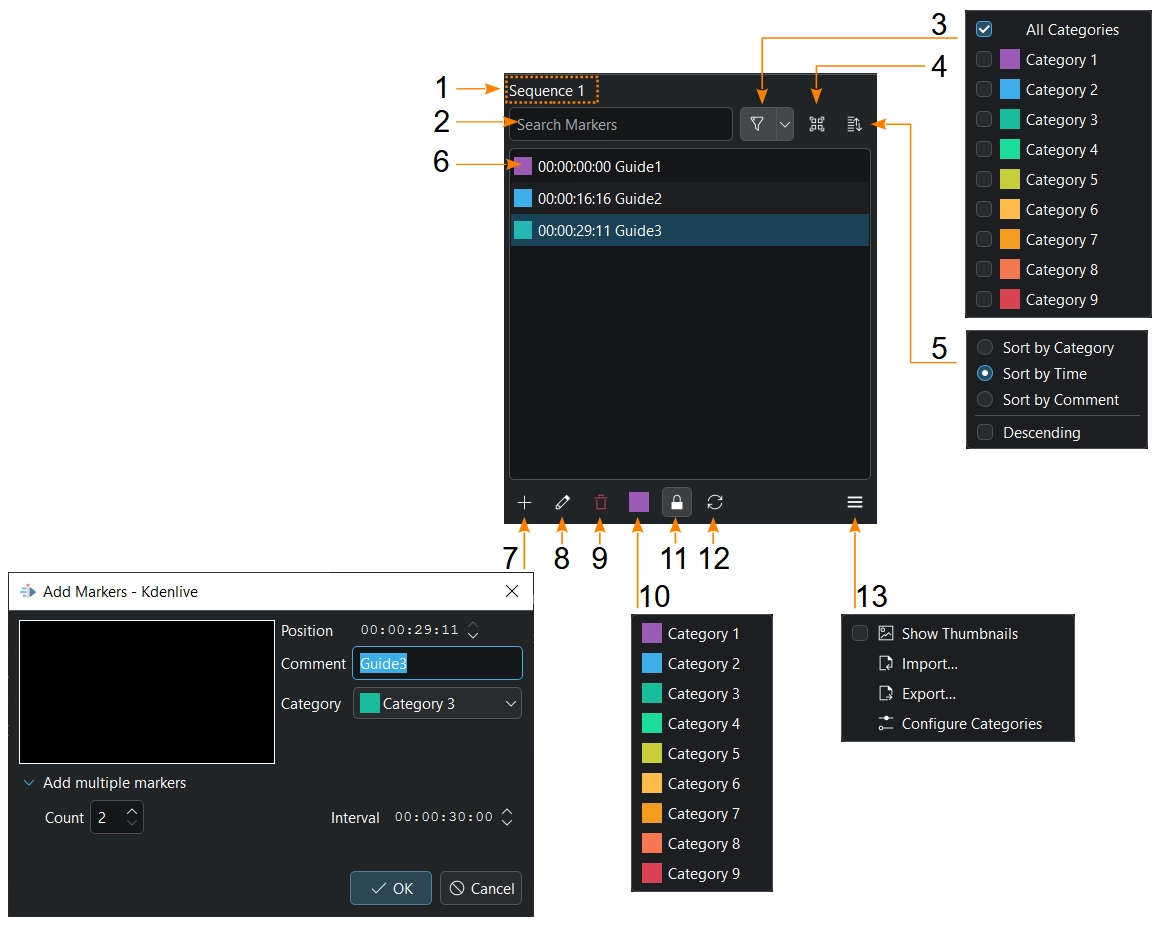
opens the markers window where you can manage your markers.
- 1:
Shows the selected object: Clip-Name, Sequence-Name
- 2:
Search Timeline Marker / Clip Markers. If you enter 2 in this example, it shows only guide2 / marker2 in the list and in the timeline/on the clip monitor.
- 3:
在列表和时间轴/剪辑监视器中仅显示所选的类别。
- 4:
Show markers for all clips in the project
- 5:
Sort by categories, time, or comment, and change sort order (ascending/descending).
- 6:
Clicking on a marker or arrow-up arrow-down will select it, and the playhead jumps to this marker in the timeline/clip monitor. Multi-selection: holding down Shift to select a range of markers, or Control to add individual markers to a selection. Control+A selects all markers. Double-click or press F2 on a marker to open the edit marker window/edit marker window.
- 7:
Add a marker. Only here you have the possibility to add multiple markers with an interval.
- 8:
Edit a selected marker. The same as double-clicking a marker under point 4, or timeline markers in the timeline ruler.
- 9:
Delete the selected marker(s).
- 10:
Set the default category for new markers.
- 11:
Timeline Markers only: Locks Timeline Markers. Locked when the background is light gray (as shown on the screenshot).
- 12:
Refresh all thumbnails when thumbnails are enabled
- 13:
Enable/disable thumbnails. Import/export markers/marker or configure the project categories.
You can put a comment in the marker and make the comment display by choosing 编辑 in the menu or by clicking on the 编辑 button.
Export Timeline Markers as Chapters Description
Timeline markers can mark chapters or different sections of a video while editing. Uploading edited videos to platforms like YouTube, the timeline markers can be exported as chapter marks that are supported by YouTube. This can be done by Copy to Clipboard and paste then into YouTube.
Right click in the timeline ruler and choose Export Markers or . Then the window Export markers as chapters description appears.
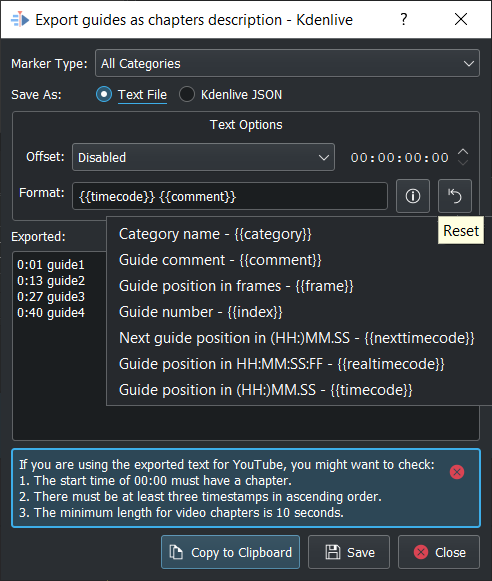
Marker Type: Choose one of the timeline marker types to mark chapters and use other types to do other things.
另存为:文本(用于 YouTube)或作为 JSON 数据文件,可以重新导入。
Offset: This adds the ability to set a general offset (hh:mm:ss:ff) to each timeline marker.
格式:这定义了如何导出章节标记。当使用 2 个默认格式字符串(如上图所示),Kdenlive 检查章节标记是否与 YouTube 的指南相匹配,如果不匹配,则显示一条通知。
i :显示所有可能的导出字符串。选择您想要的字符串,Kdenlive 将它添加到 格式 进行导出。根据需要添加空格。
{{timecode}} adds timeline marker position at HH:MM.SS (default)
{{comment}} adds the timeline marker text (default)
{{frame}} adds the frame number of each timeline marker
{{index}} adds timeline marker number
{{nexttimecode}} adds next timeline marker position at HH:MM.SS
{{realtimecode}} adds timeline marker position at HH:MM:SS:FF
重置:将设置重置为默认值:{{timecode}} {{comment}}
Exported: Shows what gets exported. To change the timeline marker text you have to edit the timeline marker in the timeline.
复制到剪贴板:将 导出 中显示的数据复制到剪贴板中,以在其他应用程序中使用(YouTube)。
蓝色方框中的警告仅在以下3个点之一不满足时显示。
Move and Edit Timeline Markers
Timeline markers can be moved by clicking on a timeline marker text in the timeline and dragging it to the desired position.
Timeline markers can be moved by changing the Position in the edit window.
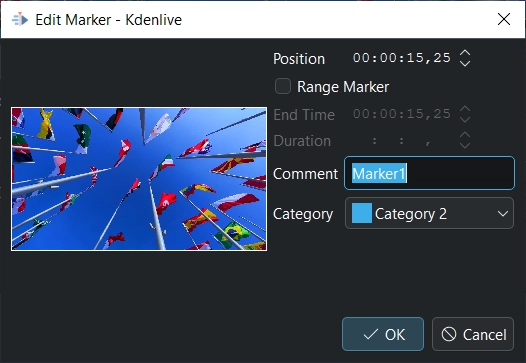
Double-click on a timeline marker text in the timeline ruler opens the edit window (beside the possibility in Markers View).
注释 文本和 类别 可以在编辑窗口中更改。
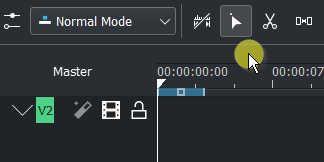
Move Timeline Markers With Spacer Tool
Easily moves timeline markers along with clips using the spacer tool by using the new option. When locked, the timeline markers stay in place. When unlocked, the timeline markers move with the clip.