Chroma Key: avanzato
Descrizione
This effect is a more advanced version of the Chroma Key: Basic effect. It allows for some basic feathering (by changing the Edge Mode) and much more fine-grained control over how much and in which way you remove the background.
This is better for backgrounds that have less contrast with the foreground or for more complex backgrounds. For simple (uniform) backgrounds (such as green, blue, red or possibly black), use the Chroma Key: Basic effect.
Parametri
Parametro |
Valore |
Descrizione |
|---|---|---|
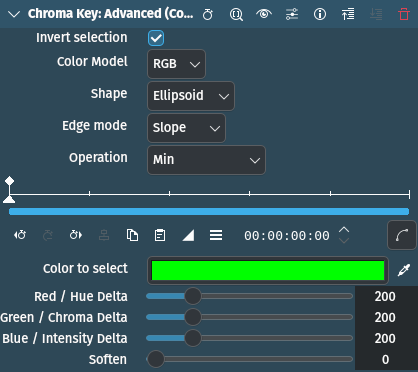
Inverti la selezione |
Interruttore |
When ON (default), the selected color will be transparent. When OFF the selected color will be opaque. Keeping the selected color opaque may be more effective if the foreground is simple and the background is complicated. |
Modello di colore[1] |
Selezione |
These different options yield different results. While RGB should yield the sharpest and best results, sometimes the other options HCI and ABI can yield much better results than RGB. So if RGB is not producing good results, try one of the other options. |
Forma |
Selezione |
Determines the shape for subspace selection |
Modalità bordo |
Selezione |
Determines the amount of feathering |
Operazione |
Selezione |
Determines how the alpha channel is processed |
Colore da selezionare |
Selettore |
The color to select. This is the color that will be transparent or the only color that is opaque depending on the setting for Invert selection. |
Delta rosso/tonalità
Delta verde/croma
Delta blu/intensità
|
Intero |
These three parameters determine the tolerance of the chroma keying. The higher the value, the more of the background is removed; the lower the value, less is removed. A bit of experimenting is required to find the correct values for each clip. |
Sfoca |
Intero |
This slider determines the smoothness of the edges. The higher the value, the smoother the edges of your color selection will be. Only works if Edge mode is set to Slope. |
Sono disponibili le seguenti voci di selezione:
Modello di colore[1]
RGB |
Rosso Verde Blu |
ABI |
Advanced Baseline Imager |
HCI |
Hue Chromacity Intensity |
Suggerimento
These different options yield different results. While RGB should yield the sharpest and best results, sometimes the other options HCI and ABI can yield much better results than RGB. So if RGB is not producing good results, try one of the other options.
Nota
Previews of video clips that were chroma keyed using HCI will be slow since values for every single pixel have to be calculated. Either lower the Project Monitor playback resolution or use the Preview Render function.
Forma
Riquadro |
Utilizza un riquadro per selezionare i pixel, senza lasciare degli spazi tra di essi |
Ellissoide |
Utilizza un ellissoide per selezionare i pixel, lasciando degli spazi tra di essi |
Diamante |
Utilizza una forma a diamante per selezionare i pixel, lasciando degli spazi tra di essi |
Box is the most thorough selection method, and Diamond the one with the largest gaps.
Modalità bordo
Forte |
No feathering (edges are not smooth at all). Any part of the image/video is either fully opaque and fully transparent. This means there will be none of the selected color between the removed parts and the remaining parts whatsoever. This option is useful if your chroma key turned out to be perfect. |
Fat |
|
Normale |
|
Skinny |
|
Inclinazione |
Allows to use the Soften slider |
The options Fat, Normal and Skinny create a gradual transition between transparent and opaque. The fatter the choice, the more the selected areas are filled towards the rim (more feathering for fatter choices). This is useful if your color selection did not turn out that well.
Operazione
Write on clear |
|
Massimo |
|
Minimo |
|
Aggiungi |
|
Sottrai |
Tecnica di base
Find a clip with a background (preferably multiple, or slightly complex, because the Chroma Key: di base effect can do easy backgrounds such as green or blue). Add the Chroma Key: Advanced effect to the clip.
Now either choose the color using the color palette by clicking on the colored bar. Or use the little pipette button and then click in the Project Monitor on the background part of the clip you want to remove. Adjust the Delta sliders until the background is removed correctly. This might need some experimenting. If you find it is not removing the background well try changing the Color Model and experiment again. If you experimented and cycled through all the Color Models, and the background is still not removed properly then it is probably too complicated for Kdenlive to remove. At this point, you will most likely need to use Rotoscopio.
If the effect took lots of time to experiment, and you want to use this effect again, then click on the  Save effect icon. Give the effect a name and a comment and click on Ok. Your custom Chroma Key: Advanced effect will be saved in the Custom effect category from where you can use it just like any other effect.
Note
Vedi anche
Chroma Key: Basic which also does color-based alpha selection, but is a bit simpler.