自定义界面
The user interface model allows you to freely adjust the different panels to support your workflow. You can add widgets to and delete them from the different panels, rearrange them, change the size of the panels, and save the workspace layout so you can have different layouts with different widgets depending on the stage of your post-production work. For example, you can have different workspace layouts for video editing, color correction and sound editing. Kdenlive comes with four different workspace layouts already defined. See the 工作区布局 chapter.
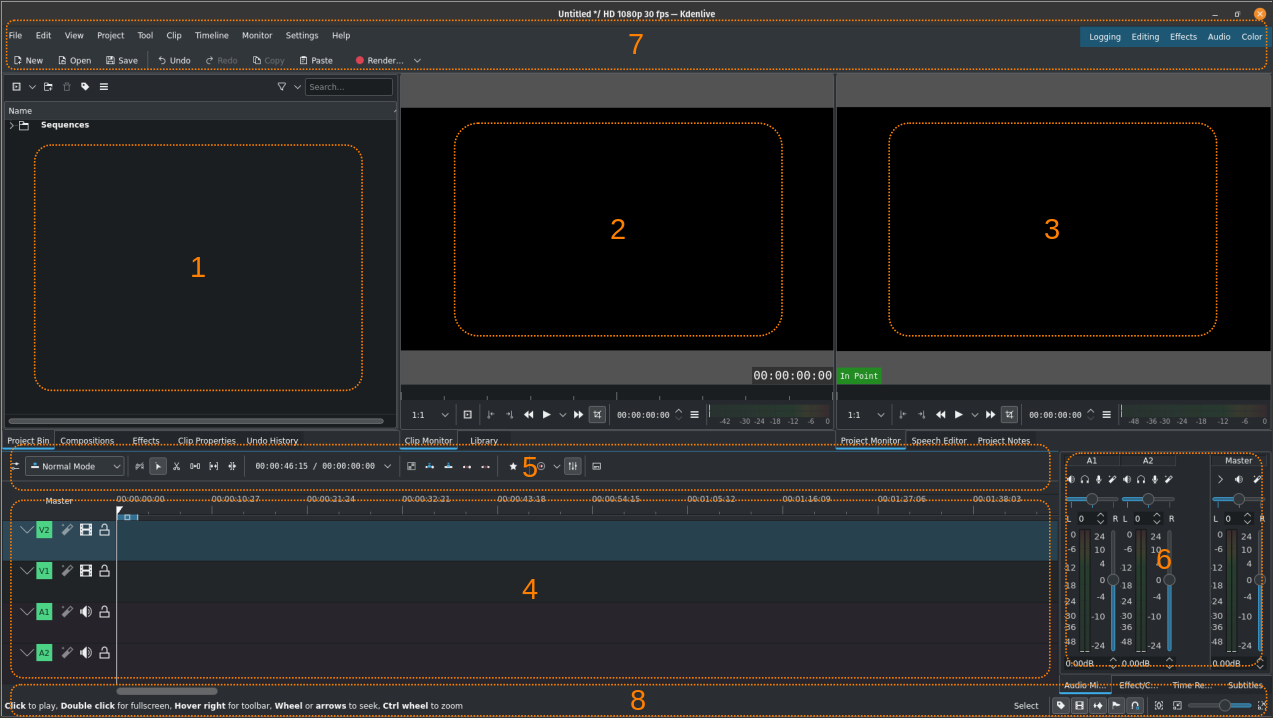
Kdenlive 的默认工作区(示例使用编辑视图;点击以放大)
这是 Kdenlive 不同工作区面板的快速提醒(参看 用户界面)。在本节中,我们想关注面板 1 到 4 和面板 #6。面板 #5(时间轴工具栏)并不是一个真正的面板,而是时间线的部分。面板 7 和 8 在 状态栏 (#8) 和 工具栏 (#7) 章节中有更详细的描述。
Kdenlive allows you to arrange the predefined five panels as you like by grabbing an empty part where there are no tabs.
Widgets can be rearrange the same way.
Here an example where the layout is arranged in column or rows:
O |
|
列 (点击以放大) |
行 (点击以放大) |
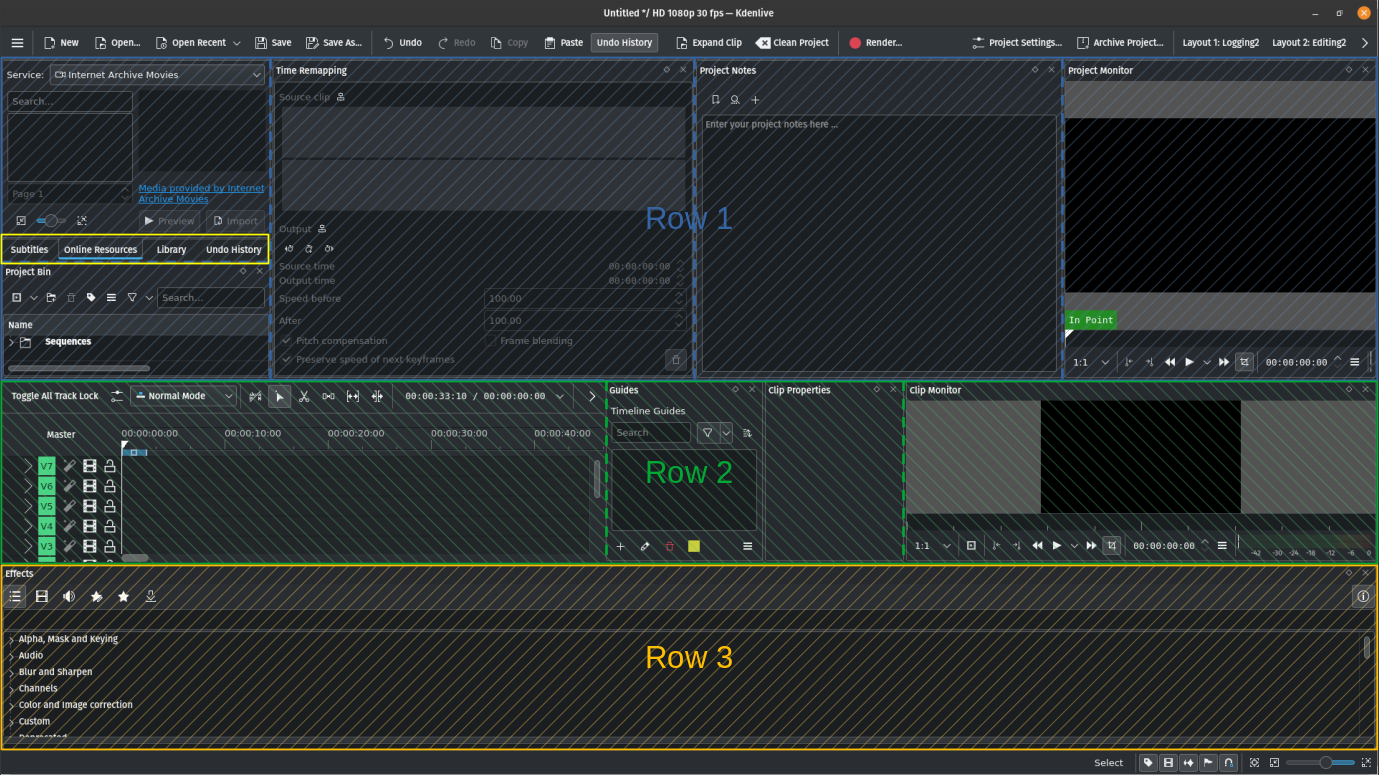
You can have widgets as tabs (see the yellow box in the screenshots above) regardless of the dock orientation setting.
Rearranged layouts are stored in the project file when saving.
添加小部件
You can add widgets (e.g. Library, Project Notes) by enabling them in . Likewise, disable them by taking off the check mark right next to their entry in the menu.
移动小部件
您可以通过抓取选项卡或 标题栏 并将其移动到新位置来移动 小部件。将小部件移动到同一面板中的不同位置是可能的,因此只需更改选项卡的顺序。
A widget can also be moved to a new panel, to its own (new) column or row, or undocked as a floating window. Put a floating window on a second screen on which you can dock other widgets to create a new panel.
备注
In order to move widgets without a tab they must have title bars. You can switch them on and off in .

Make sure Show Title Bars is enabled
This shows you the title bar of each widgets when un-docked

Title bar of the timeline view
On the title bar are 3 icons
Auto-hide. Let’s you save space by hiding window until needed.
Undock window. The window get undocked and ready for moving.
Close. The window get closed and can be re-opened in
In the example below the Clip and Project Monitor widgets are being undocked and turned into floating windows:
将剪辑和项目监视器移动到它们自己的独立窗口(解锁)
The Kdenlive layout reacts to your dragging of the widget and you need to pay close attention which docking indicator change color when you move over them.

Docking indicators when a widget is undocked and hovered over a panel
- 1:
Panel docking indicator. Docking inside the panel: top, right, bottom, left or center. In this example it would be placed to the left side showed by the blue indicator.
- 2:
Edge docking indicator. Docking outside of a panel: top, right, bottom, left. Here a window can be auto-hided
- 3:
Blue indicator where the widget would land if you release it
小技巧
当尝试将浮动窗口移动到新位置时,Kdenlive可能会认为您想要将其移动到面板或创建新行或列。建议使用窗口管理器的标准大小手柄来相应地调整左上角和右下角。
Auto-hide

Space Saving: Displays more content by hiding panels until needed.
Click the pin icon (first icon in the title bar) to enable the auto-hide feature which lets you pin dockable window (widgets) to the edges (top, right, bottom, left; See point 2 above) of the main window, making them disappear into a sidebar and reappear as overlays when clicked.
Restoring: Click the pin icon again (now on the overlay) to restore it to its original docked position.
设置小部件的大小
您只能调整 小部件 所在的列或行的大小。将鼠标指针悬停在边缘上,鼠标指针将变为重新调整大小的指针。现在拖动边缘,直到达到所需的大小。您只能单独拖动水平或垂直方向。
保存布局
Once you have arranged the widgets to your liking you can save the layout via . A dialog windows opens where you can name the new layout. If you enter the name of an existing layout a warning will appear but you can overwrite the layout.
The current layout is saved within the Kdenlive project file.
有不同布局对于后期制作的不同任务非常有用。有关更多信息,请参阅 工作区布局 章节。
加载布局
您可以通过从 中选择它,或者通过单击 菜单栏 (屏幕右上角)中列出的所需布局来加载布局。
管理布局
当选择 时,Kdenlive 只显示八个保存的布局,在 菜单栏 中只显示四个。但是您可以拥有更多的布局。
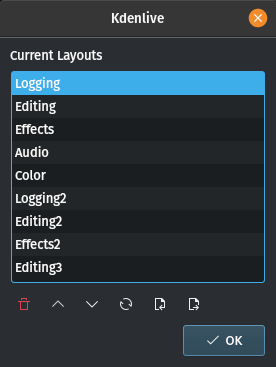
列出可用的布局
选择 打开这个窗口,您可以在其中管理可用的工作区布局。
使用  和
和  将高亮显示的布局向上和向下移动在列表中。这个列表中的前八个将从菜单中可用。
点击  刷新列表。使用
  删除高亮显示的条目。
你可以导出  和导入
和导入  保存的布局。