Configure Kdenlive
New in version 24.02.
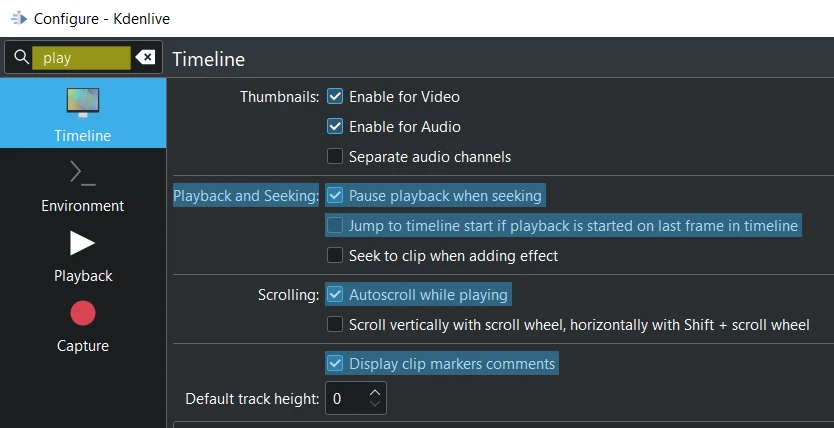
Search for “play” show the findings highlighted
With the search function you can look for notes which then get highlighted in the respective section.
Following settings applies when you start a project with New.
Misc
Changed in version 24.12.
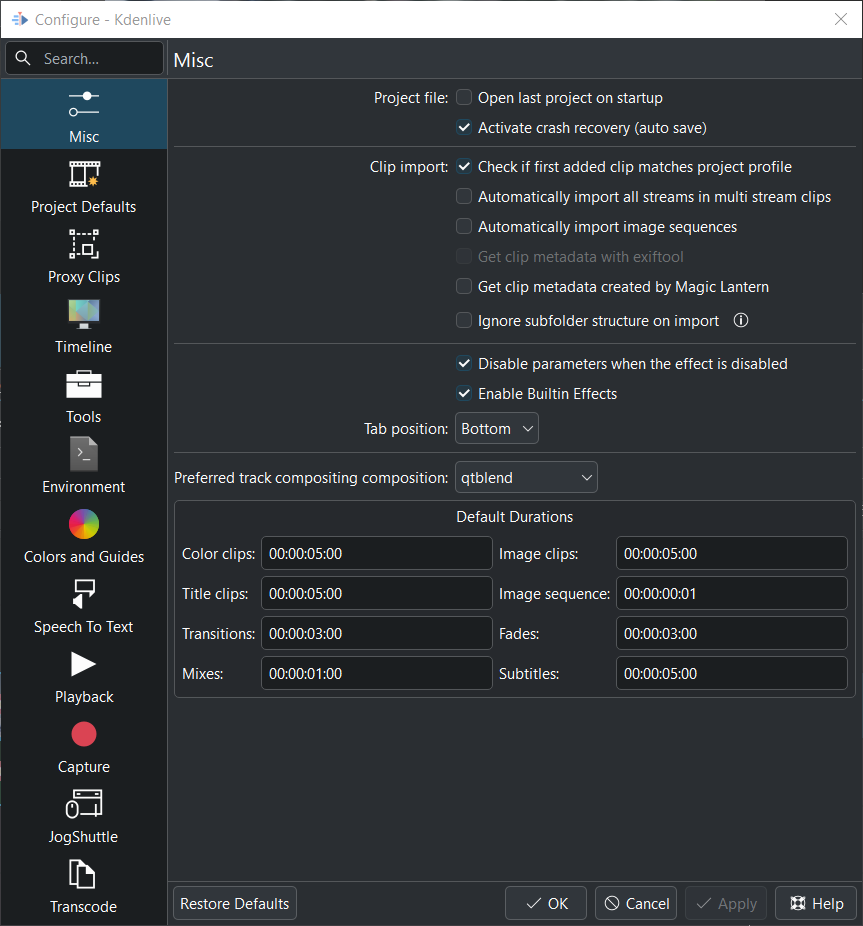
Project file
Open the last project on startup
Activate Crash recovery (auto_save)
Clip import
Check if the first added clip matches the project profile
Automatically import all streams in multi stream clips Here you set if all audio streams are loaded/imported.
Automatically import image sequences
Get clip metadata with exiftool
Get clip metadata created by Magic Lantern
Ignore subfolder structure on import (import all files into toplevel folder)
——-
Disable parameters when the effect is disabled
Enable Builtin Effects Enable or disable all builtin effects
Tab position Set the tab position when a window is open.
——-
Preferred track compositing composition: Select , , .
Changed in version 22.12.
Qtblend brings back a much better playback performance when there is no compositing. When there is a compositing, performance is slightly worse than frei0r.cairoblend (Kdenlive lose 1-2 fps on playback).
Default Durations
Here you set the default duration of below items.
Deprecated since version 22.08.
Bypass codec verification
Use KDE job tracking for render jobs
Project Defaults
Changed in version 22.12.
Configures what the project settings will look like by default when you choose File –> New.

Proxy Clips
Configures what the proxy settings will be when you choose File –> New.
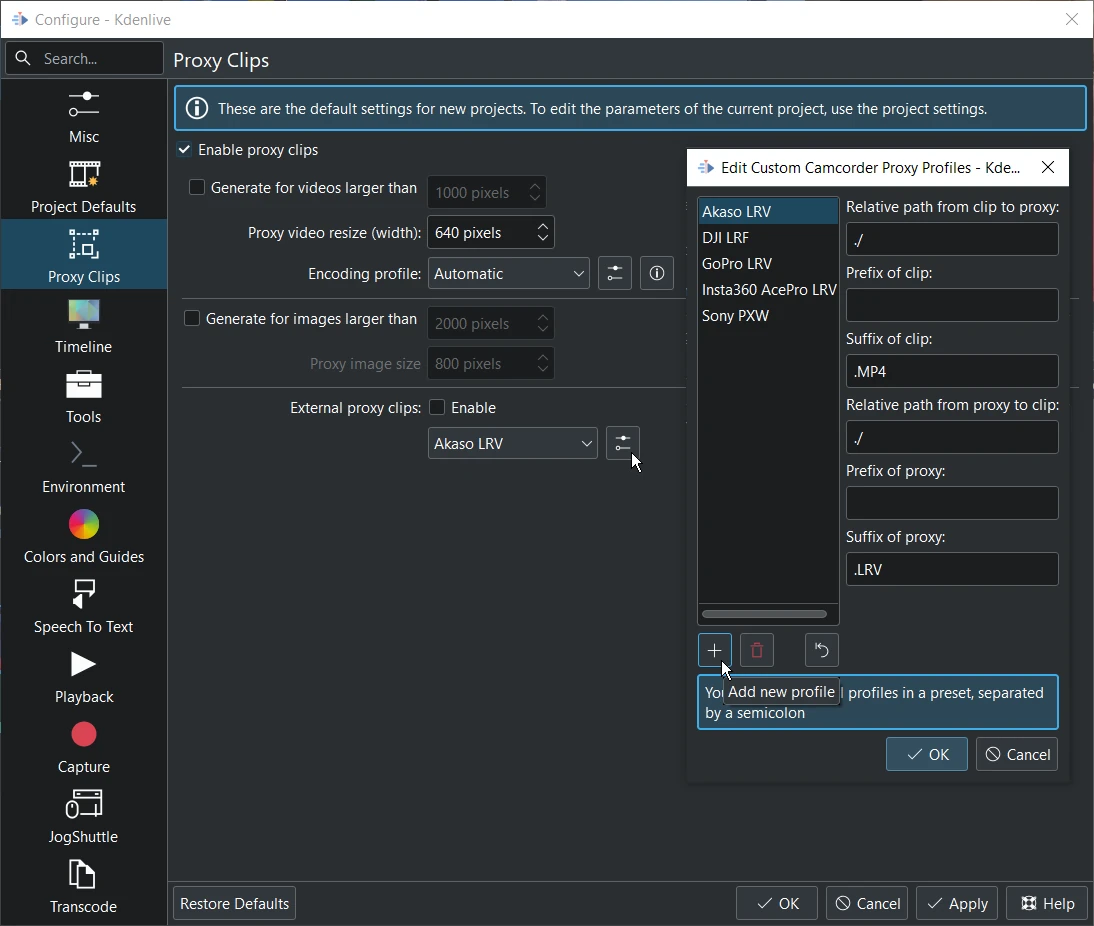
External proxy clips When enabled it reads the proxy clips generated by your video camera. More details see: Using Camera Proxy Clips.
You can create your own external camcorder proxy links directly here. Enable Enable proxy clips. Click on the icon right to Akaso LRV. In the new opened window click on add new profile and enter the data.
Timeline
Changed in version 22.12.
Configure how the timeline appears in Kdenlive

Thumbnails
Enable for Video Turns on video thumbnail by default.
Enable for Audio Turns on audio thumbnail by default.
Separate audio channels If checked you will get a separate waveform in the audio thumbnail for each audio channel in the audio track. If unchecked you will get a single waveform as the audio thumbnail.
Deprecated since version 22.12.
Use FFmpeg for audio thumbnails (faster)
Playback and Seeking
Pause playback when seeking Enabled: It stops playback while you click on a new position in the timeline. Disabled: Playback is ongoing while you click on a new position in the timeline. It allows looping playback, see Continuously loop playback.
Jump to timeline start if playback is started on last frame in timeline
Seek to clip when adding effect
Scrolling
Autoscroll while playing
Scroll vertically with scroll wheel, horizontally with Shift + scroll wheel
———
Display clip markers comments
Default track height: Defines the default track height in pixels for the tracks on the timeline.
Raise properties pane when selecting in timeline
More details here.
Multi stream audio clips
On import, enable: Select if , , should be imported.
Check if project contains enough audio tracks If enabled Kdenlive asks if it should generate the additional audio tracks needed automatically.
Tools
New in version 23.04.
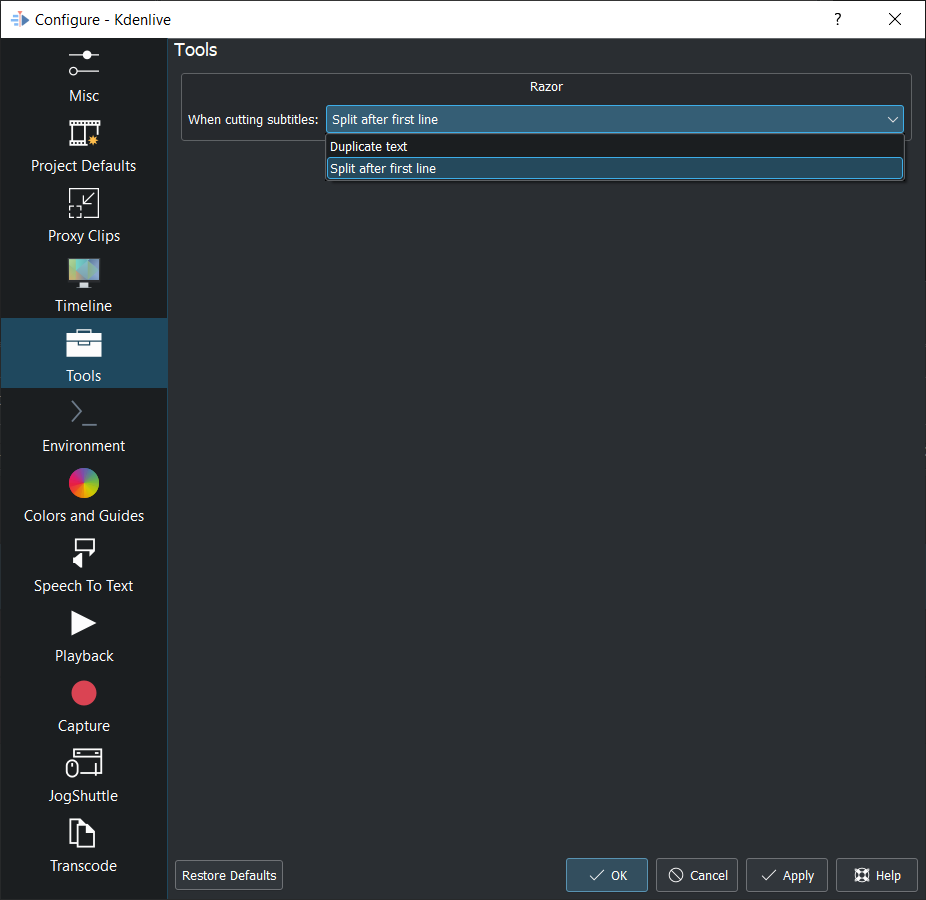
Duplicate text If selected, a 2-line subtitle gets split into two subtitles by copying the content
Split after first line If selected, a 2-line subtitle gets split into two subtitles by considering the line break
More details see Split subtitle after first line
Environment
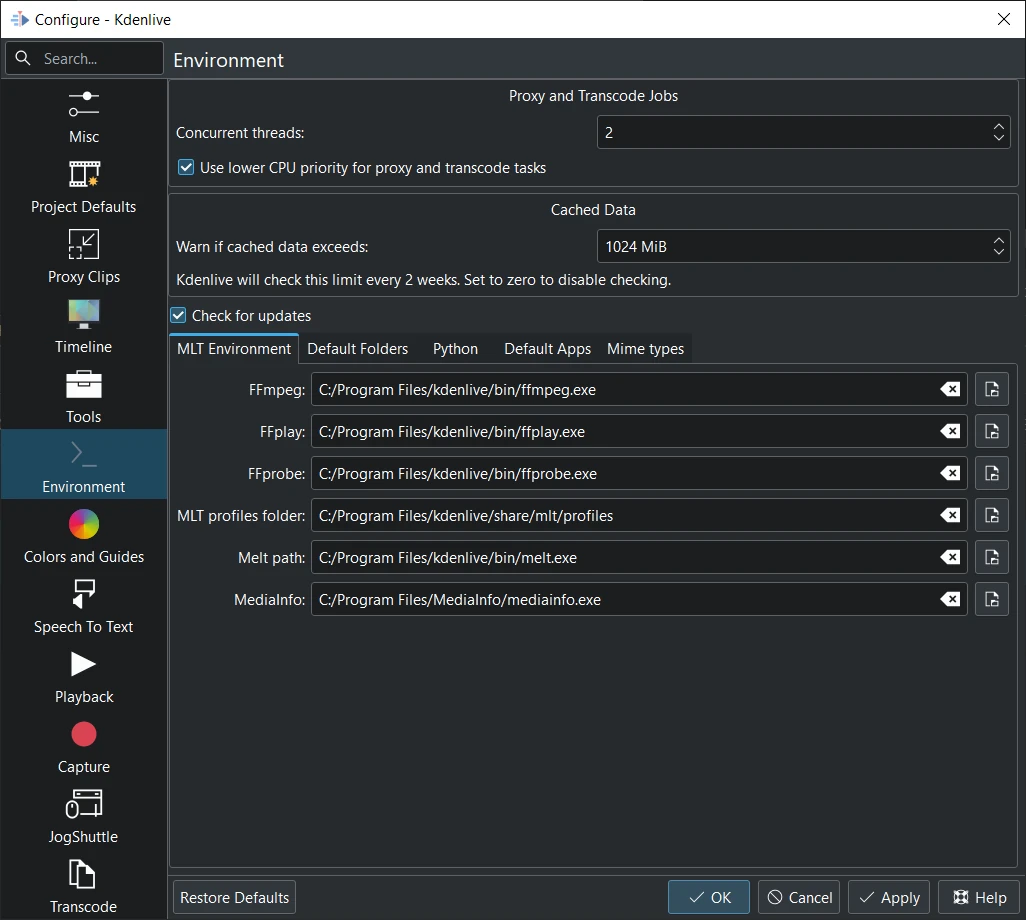
Environment on Windows
Proxy and Transcode Jobs
Concurrent threads This will set the number of threads the program will attempt to use when calling ffmpeg to encode clips. This will be what kdenlive passes to the ffmpeg -threads parameter. Increasing this parameter may not have an effect if you have changed the proxy encoding settings using project_settings to a codec that ffmpeg does not do multi-thread on. (Multi-threading is supported for MPEG-2, MPEG-4, H.264, and VP8)
New in version 22.08.
Use lower CPU priority for proxy and transcode tasks This adds a Kdenlive setting to lower the priority of the proxy rendering (QProcess). This helps keep the main UI responsive when proxies are rendering.
New in version 22.12.
Warn if cached data exceeds Add a maximal cache size so that Kdenlive can check every 2 weeks if the total cached data size exceeds this limit and warn the user.
New in version 24.02.
Check for updates When enabled Kdenlive shows a pop-up menu for updating Kdenlive if your version is older then 6 months.
MLT Environment
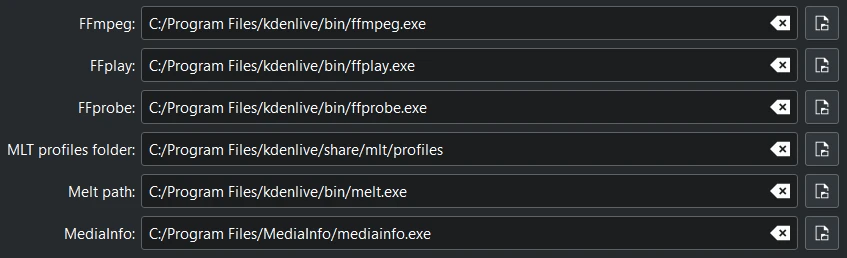
Environment variables on Windows
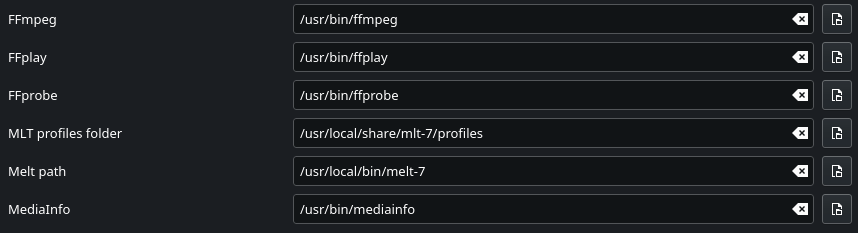
Environment variables on Kdenlive normal installed on Linux (Appimage, Flatpak, Snap may have integrated paths)
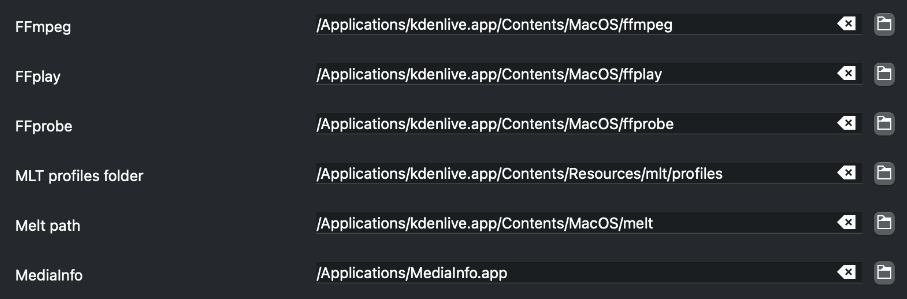
Environment variables on MacOS
This setting tells Kdenlive where to find the MLT executables and profile files. Only advanced users would really need to change these settings. Kdenlive is basically a front end to the MLT program and this setting tells Kdenlive where to find the engine that runs the whole application.
Path to the MediaInfo file. If filled in Kdenlive shows more details in clip properties.
Deprecated since version 19.04.
Processing and transcode jobs: This is experimental and was removed in ver 0.9.10. This number was passed to melts real_time consumer property. This parameter increases the number of threads the program uses for video decoding and processing (but not encoding which is controlled via Rendering). See mlt doco. Using this has potential side effects - see this forum post from the author of the Melt program.
If you want to experiment with multi threading in versions higher than 0.9.10 you could add something like “real_time=-4” to a custom render profile. And yes that is a minus 4 in the example - as per the mlt doco - numbers <0 implement threading without dropping frames.
Default Folders
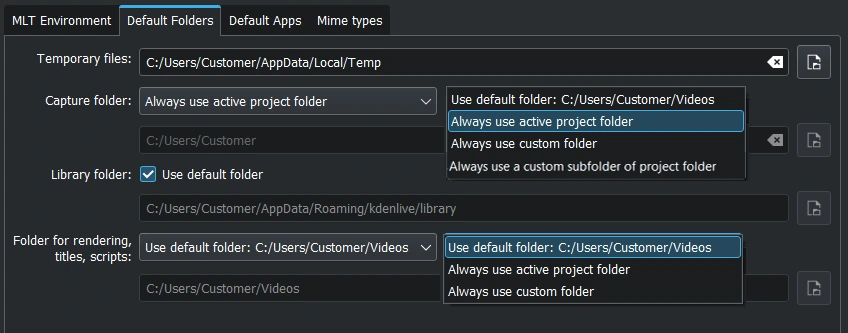
Default folders on Windows.

Default folders on Linux.
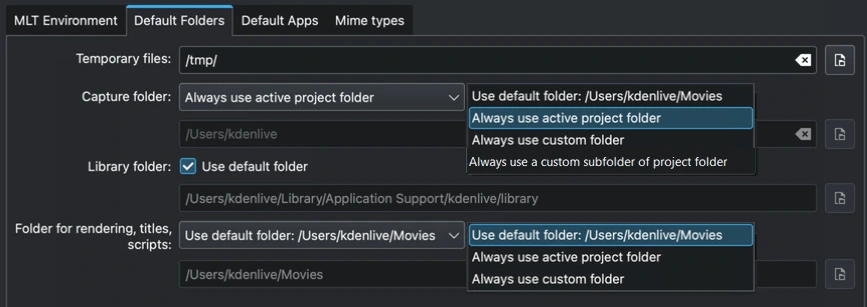
Default folders on MacOS.
This setting controls where Kdenlive expects project files to be by default. It also controls what folder Kdenlive will use as a temporary file storage location and it controls where files captured from an external source will be saved.
Always use a custom subfolder of project folder: Type in the subfolder name. Captures will be stored in a subdirectory of the project folder on disk. Once a recording is done, Kdenlive creates the folder if it’s pointing to a non-existent folder.
Python

Python tab on Windows
Use python virtual environment (recommended) When enabled Kdenlive creates a venv folder and copies/symlinks Python into this folder.
Using the virtual environment (venv) stores Python, as you have installed it on your system in the venv folder. If you install speech to text the VOSK and Whisper libraries will be installed in the venv folder as well.
This has many benefits including easier dependency management and reduced risk of package conflicts and errors caused by software deprecation.
Path for venv:
Linux:
~/.local/share/kdenlive/venvWindows:
%LocalAppData%\kdenlive\venv
To remove the installed venv packages click on Delete. This will completely remove the venv folder with all installed packages. Note that this does not remove the downloaded models (vosk/whisper) that can still take quite some HD space.
Default Apps

This setting controls what external application opens when you choose Edit Clip for a clip in the project bin.
Image editing: A free software would be Krita.
Audio editing: A free software would be Audacity.
Animation editing: Kdenlive updates automatically files which are saved in Glaxnimate. Glaxnimate can be downloaded from here (Linux, Windows, Mac).
Mac user: Instruction how to install and run dmg files.
Windows user: Make sure all the paths points to an .exe file. Glaxnimate.exe is in folder C:/YourPath/glaxnimate-x86_64/glaxnimate/bin/glaxnimate.exe.
Hint
There is no application for video editing - because Kdenlive is a video editor.
Mime types
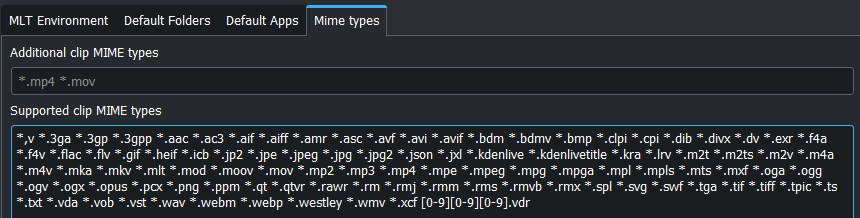
Specifies the Media Types (formerly known as MIME types) which Kdenlive can working with.
New in version 22.08.
Added file type: AVIF, HEIF and JPEG XL
Added animation file type: Json (Lottie animations) and rawr (Glaxnimate animation)
Colors and Guides
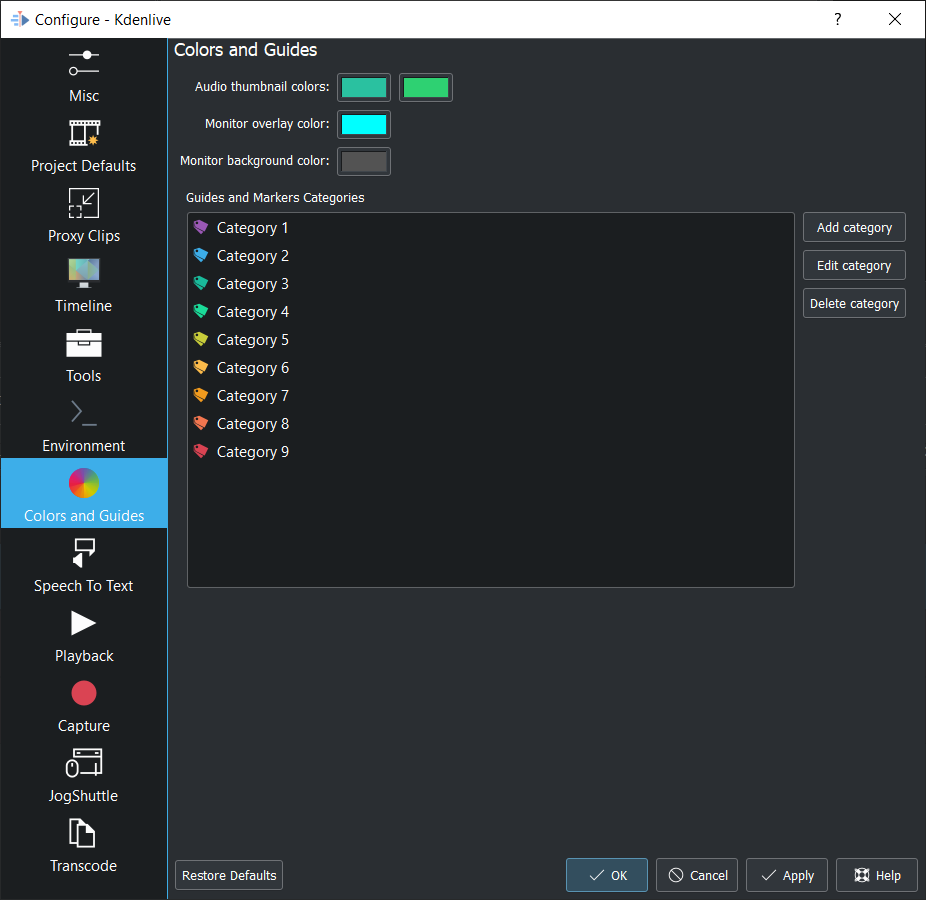
Audio thumbnail colors Click on the color bar and change the color of the audio wave thumbnail.
New in version 22.08.
Monitor overlay color Click on the color bar and change the color of the monitor overlay lines. See Monitor Display Toolbar
Changed in version 22.12: Moved from tab Playback
Monitor background color Click on the color bar and change the color of the monitor background.
New in version 22.12.
Guides and Markers Categories This allows you to add categories. Selected categories can be edited and deleted.
Speech To Text
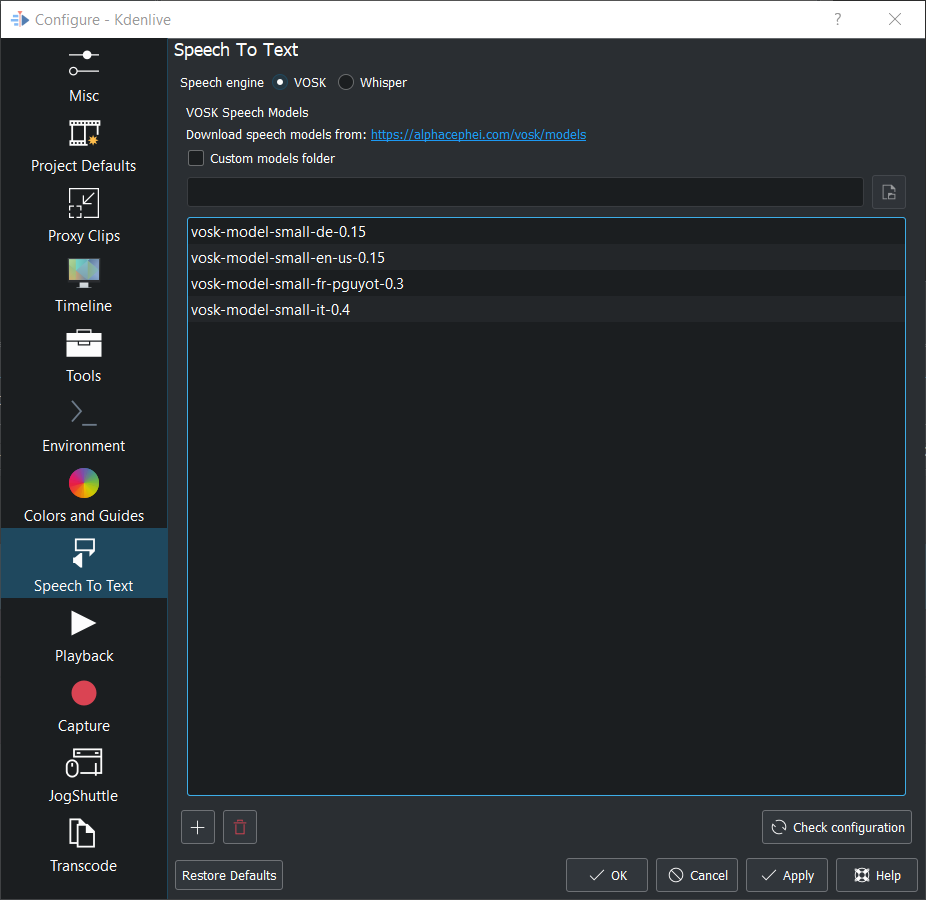
More details about speech to text see here.
Playback
Configure the Video and Audio drivers and devices. For advanced users only.
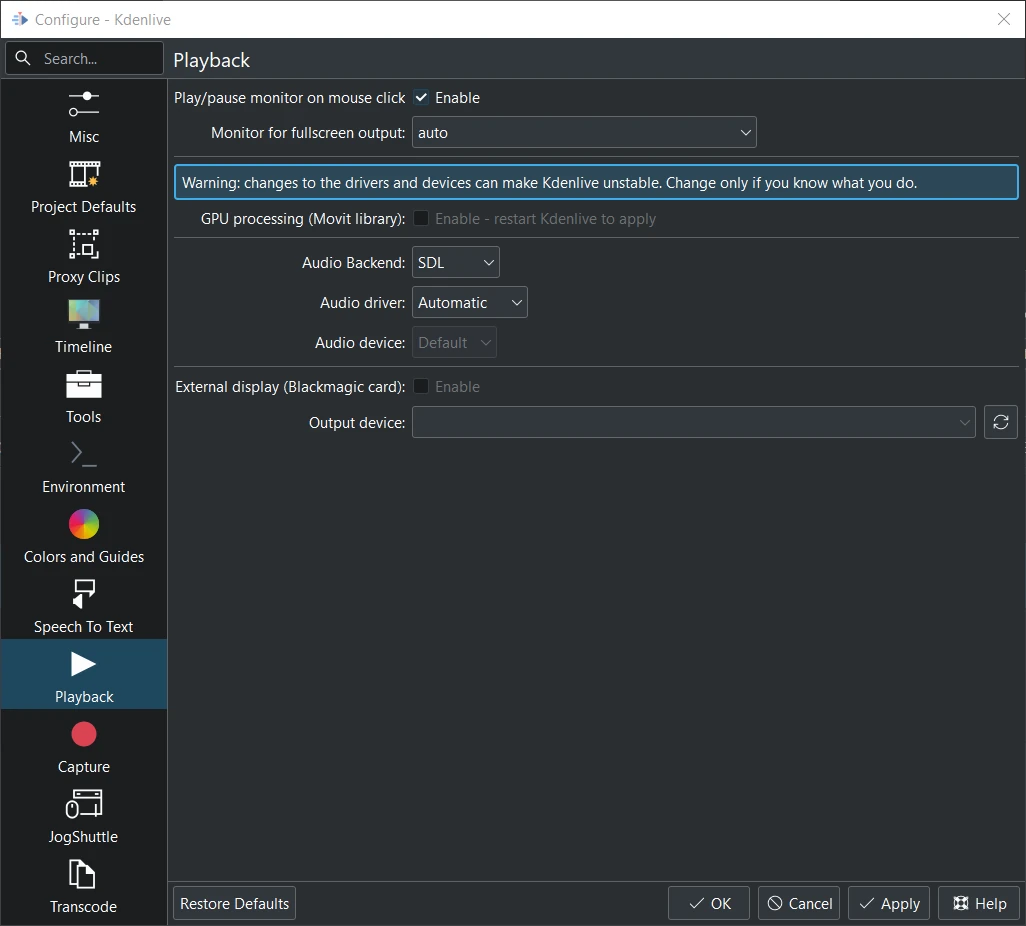
Playback view on Windows.
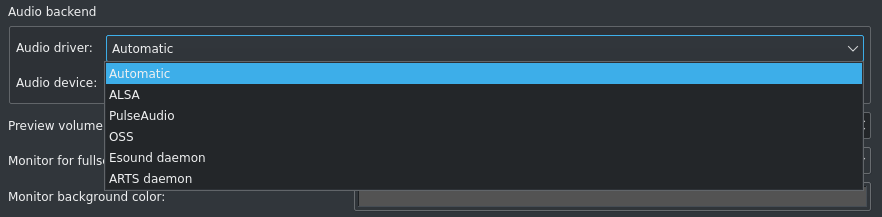
Audio driver on Linux.
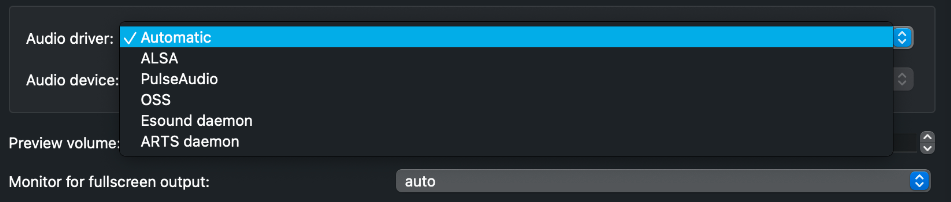
Audio driver on MAcOS.
Audio driver on Windows
WinMM (Win7), Wasapi (Win10), DirectSound. If you have any audio issue or playback stuttering you may change to another audio driver.
Changed in version 22.12.
Monitor background color moved to Colors and Guides
Enable Audio Scrubbing and Preview Volume are removed as the UI element is a duplicate of the volume slider in the monitors hamburger menu. See Clip Monitor and Project Monitor
Capture
Configure Screen Grab Capture

These settings configure screen grab within Kdenlive. More details see here.
Blackmagic
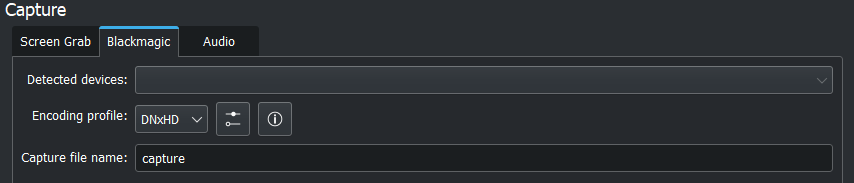
If you have a Blackmagic DecLink video capture card you can set here the import parameter.
Audio
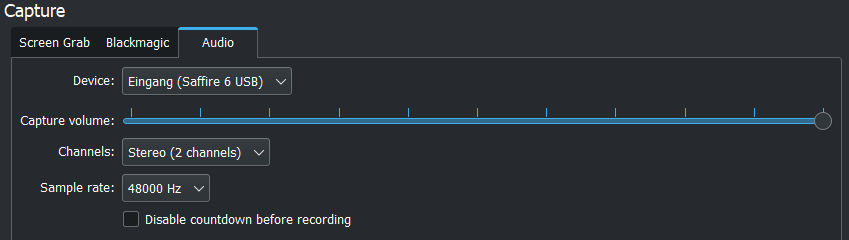
Microphone settings, either for screen capturing or for capturing audio direct into the timeline.
New in version 22.12.
Disable countdown before recording
Note
At least Firewire capture was removed in porting to KDE 5 due to lack of manpower.
Following paragraph is for history reason only.
Configure the capturing devices (Firewire, FFmpeg, Screen Grab, Blackmagic, Audio) from this section.
Configure Firewire Capture
The image shows the Configure Firewire capture tab which can be accessed from the menu or from the spanner icon in the capturing.
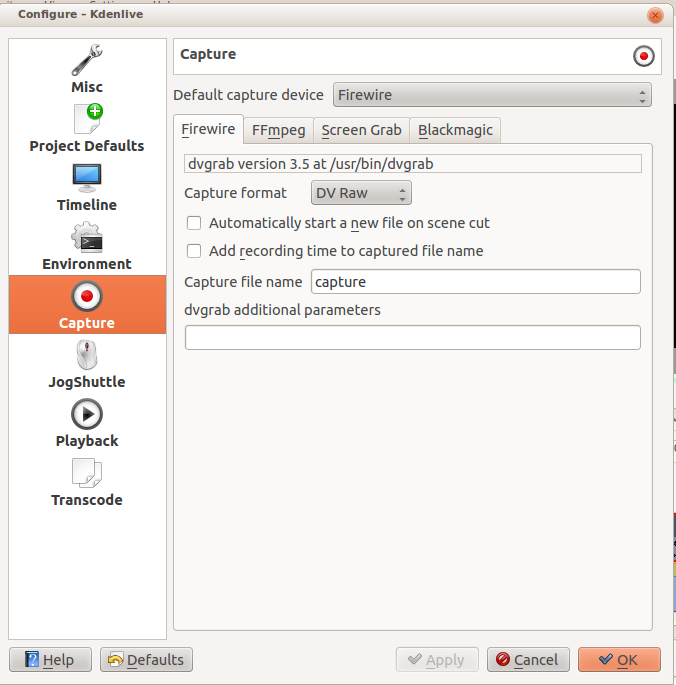
The firewire capture functionality uses the dvgrab program. The settings applied here to define how dvgrab will be used to capture the video.
Capture Format options are
DV RAW
DV AVI Type 1
DV AVI Type 2
HDV
The first three are quality-wise the same (exactly the same DV 25Mb/s standard definition codec), just packed differently into the file. Type 2 seems to be the most widely supported by other applications.
The raw format contains just the plain video frames (with audio interleaved) without any additional information. Raw is useful for some Linux software. Files in this format can also be played with Windows QuickTime when renamed to file.dv.
AVI files may contain multiple streams. Typically, they include one video and one audio stream. The native DV stream format already includes the audio interleaved into its video stream. A type 1 DV AVI file only includes one DV video stream where the audio must be extracted from the DV video stream. A type 2 DV AVI file includes a separate audio stream in addition to the audio data already interleaved in the DV video stream. Therefore, the type 2 DV AVI file is redundant and consumes more space.
HDV is a high-definition format used on tape-based HD camcorders.
Add recording time to captured file name option: If this is unchecked then each captured file will get a sequential number post-pended to the file names listed in the Capture file name setting. With this checked, date and timestamp (derived from when the footage was captured) is post-pended to the capture file name, e.g. capture2012.07.15_11-38-37.dv
Automatically start a new file on scene cut option: With this checked it tries to detect whenever a new recording starts, and store it into a separate file. This is the -autosplit parameter in dvgrab and it works by detecting timecode discontinuities from the source footage. Where a timecode discontinuity is anything backward or greater than one second it will start a new capture file.
The dvgrab additional parameters edit box allows you to add extra dvgrab switches to the capture process that will run. See dvgrab manual for more info.
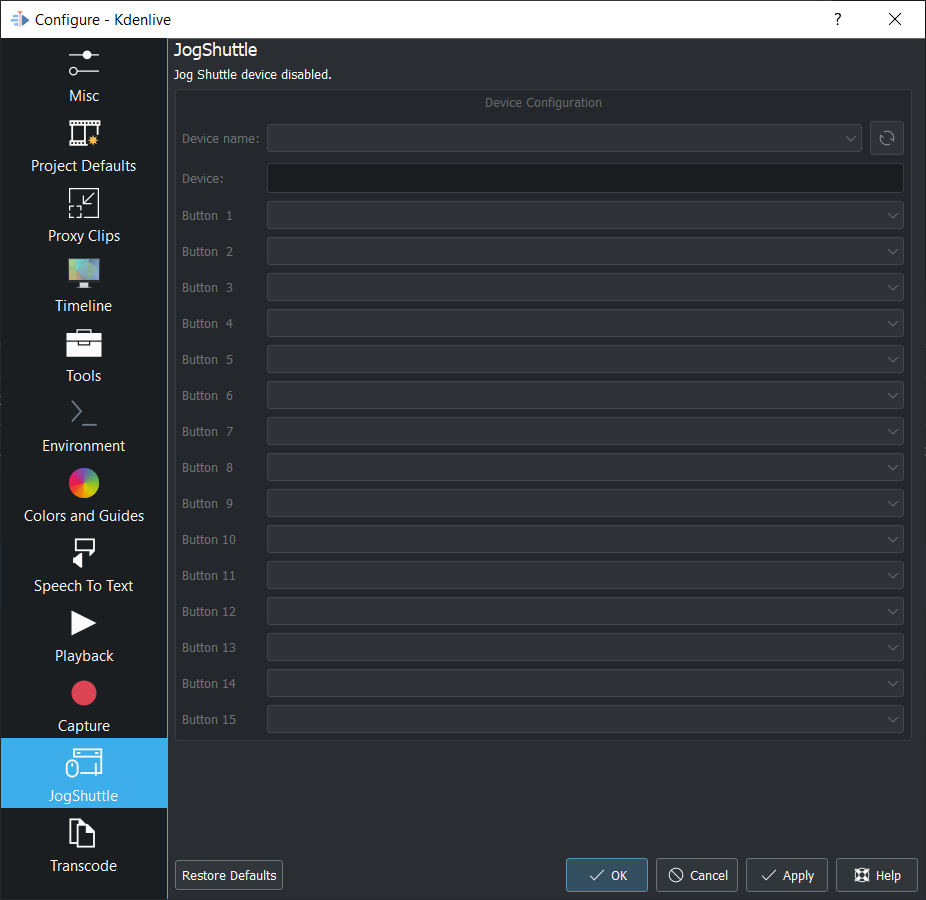
Jog Shuttle
Configure a connected Jog-Shuttle device. Contour ShuttlePro and Contour ShuttleXpress are known to work.
Linux
Ensure that your Jog-Shuttle device is connected via USB and working. An udev rule is necessary to correct the access rights to the device file: Create a file /etc/udev/rules.d/90-contour-shuttleXpress.rules with the line:
SUBSYSTEMS"usb", ATTRS{idVendor}
"0b33", ATTRS{idProduct}=="0020", MODE="0444"
for Contour ShuttleXpress or
SUBSYSTEMS"usb", ATTRS{idVendor}
"0b33", ATTRS{idProduct}=="0030", MODE="0444"
for Contour ShuttlePRO V2. Obtain the device file by a command
fgrep Contour -A4 /proc/bus/input/devices
The last line of the output says
H: Handlers=mouse0 event3
which should tell the device file to be entered into kdenlive’s setting dialog: In the text field enter /dev/input/event3 (use the last word on the line above to specify the device file in /dev/input), set the buttons and apply the changes.
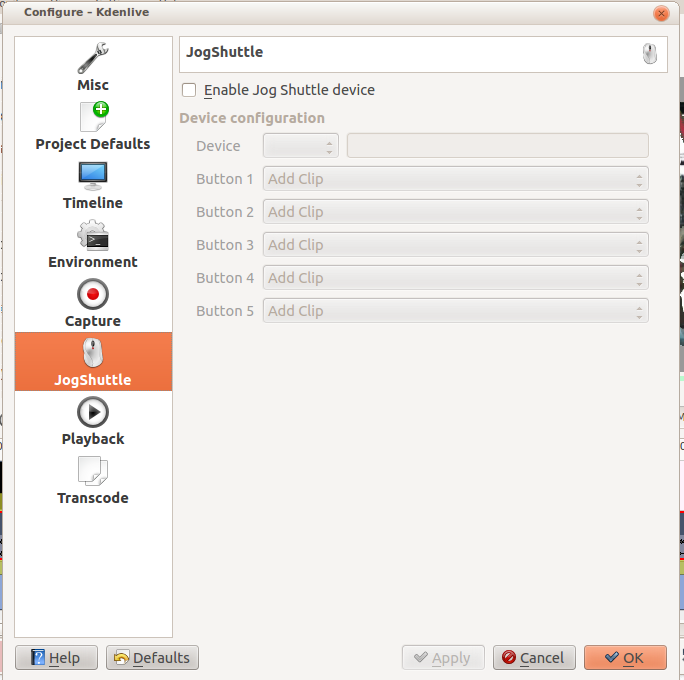
Enable Jog-Shuttle. For the Contour ShuttleXpress the buttons 5 - 9 are relevant, whereas Contour ShuttlePro uses all buttons. The actions for the jog- and the shuttle wheel are working as expected.
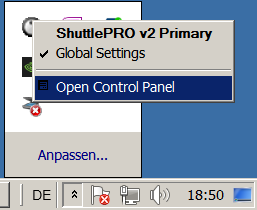
Windows
On the desktop, bottom-right opens the system tray. Right-click on the Contour icon and choose “Open control Panel”.
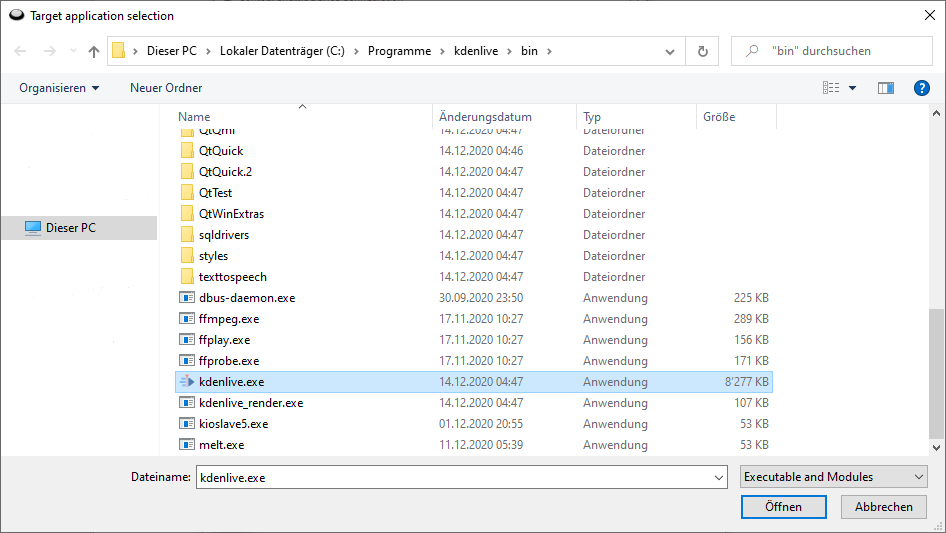
In the configuration window choose under “Application setting” the program “Adobe Premiere Pro CS&CC (Edit)”. Then click on .

Then choose Kdenlive.exe in C:Program Fileskdenlivebin.
Now the basic functionality should work. Adjust the buttons of the shuttle with shortcuts as you like.
Hint
You can make Kdenlive settings from scratch using when creating new settings.
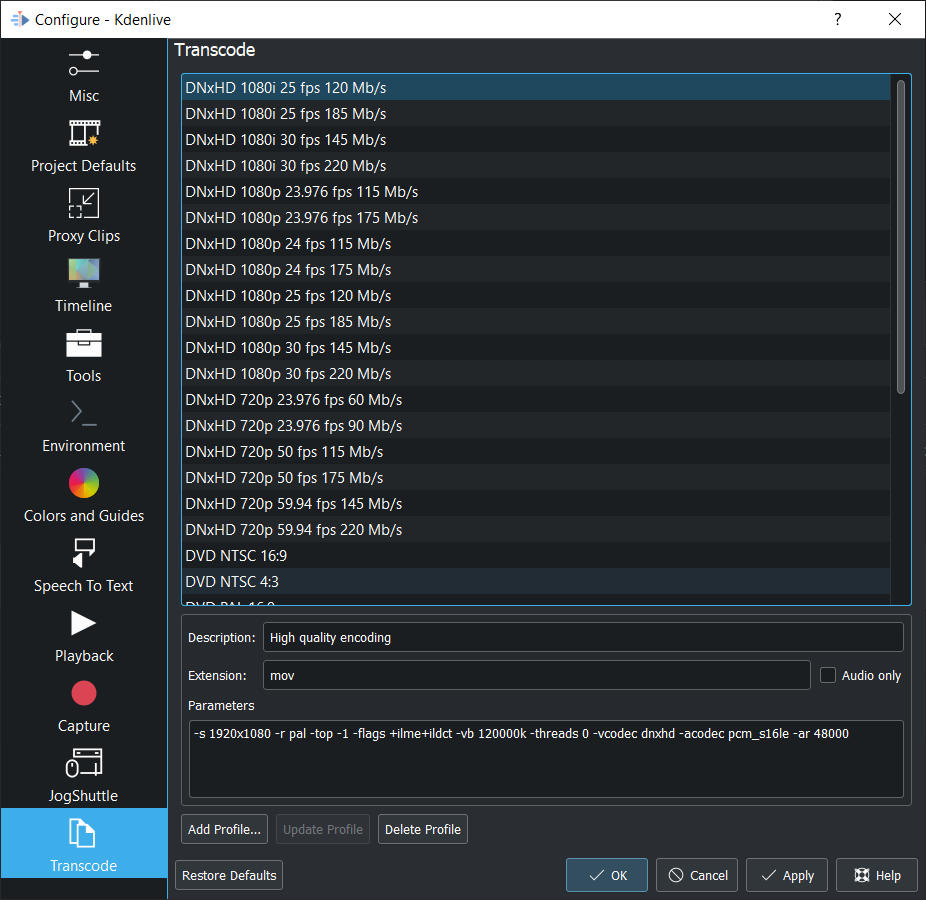
Transcode
This controls the Transcode functionality. The parameters section are ffmpeg parameters. Find help on them by issuing ffmpeg -h at a command line.
Transcode Options
Option |
Description |
Parameters |
Meanings of Parameters |
|---|---|---|---|
Wav 48000Hz |
Extract audio as WAV file |
-vn -ar 48000 |
-vn=disable video, -ar 48000 = set audio sampling rate to 48kHz |
Remux with MKV |
-vcodec copy -acodec copy -sn |
copy the video and the audio. -sn = disable subtitles |
|
Remux MPEG-2 PS/VOB |
Fix audio sync in MPEG-2 vob files |
-vcodec copy -acodec copy |
copy the video and the audio |