Media Menu
The functions in this menu affects media that is selected in the Timeline or in the Project Bin. Menu functions are available depending on whether a clip is selected in the Project Bin or in the Timeline.
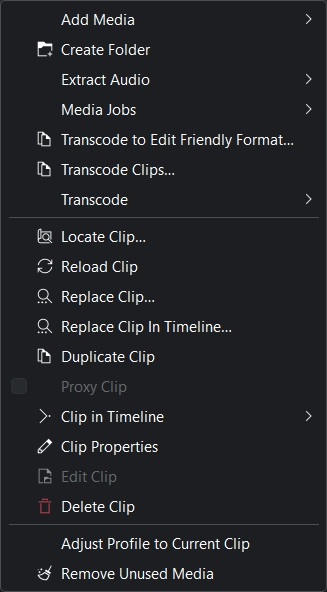
Kdenlive Media Menu
Add Media
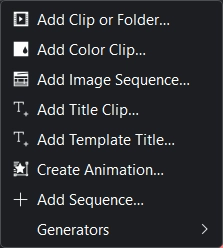
Kdenlive Add Media Menu
The purpose of this sub-menu is to allow you to add different types of media to the project bin.
Add Clip or Folder
This function allows you to add video, audio and (single) image files from your file system. It is also available from the menu bar of the Project Bin or by right-click or double-click on empty space in the Project Bin.
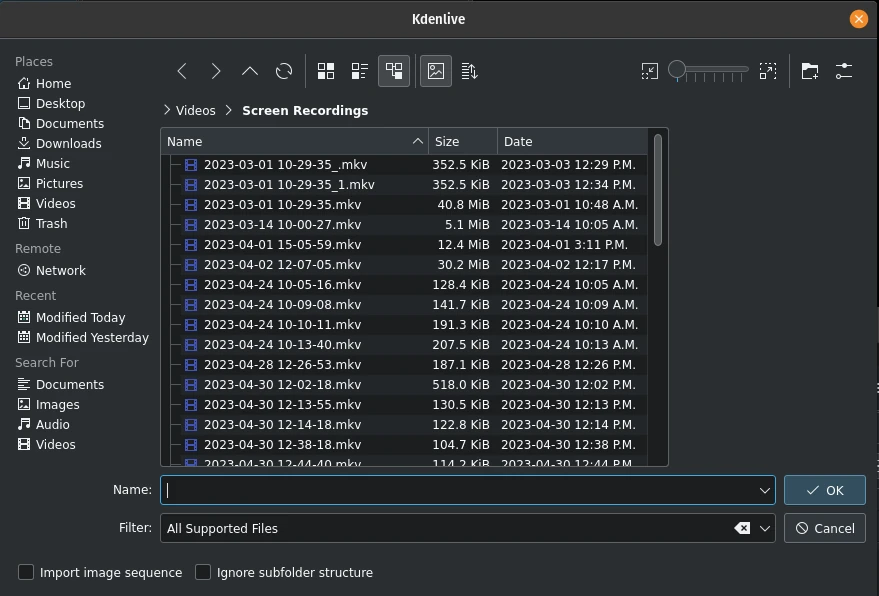
Adding a clip or entire folder
A more detailed explanation of this function is available in the clips section of this documentation.
Add Color Clip
This function allows you to create a clip with a single color.
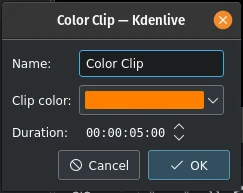
Adding a Color Clip
It is also available from the menu bar of the Project Bin and by right-clicking on empty space in the Project Bin.
For more details refer to the Color Clips section of this documentation.
Add Image Sequence
This function adds a series of still images as one clip to the Project Bin.
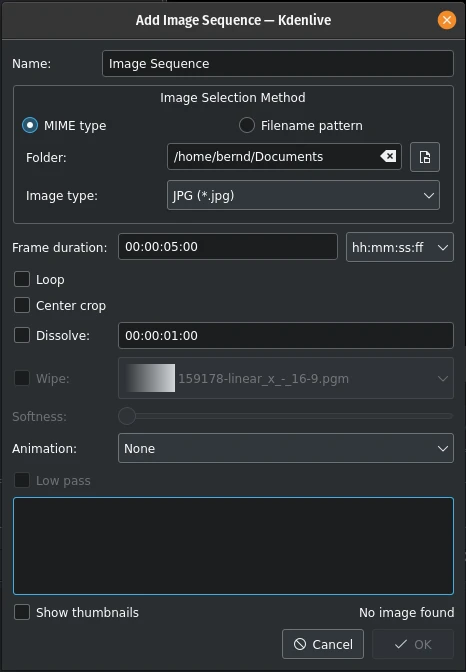
Adding an Image Sequence
It is also available from the menu bar of the Project Bin and by right-click on empty space in the Project Bin.
For more details refer to the Image Sequence section of this documentation.
Add Title Clip
This function adds a Title Clip to the Project Bin. First, it opens the title editor in a separate window where you create the Title Clip. Once saved it shows up in the Project Bin.
A more detailed documentation of the title editor is available in the Title Clips section of the documentation.
This function is also available from the menu bar of the Project Bin and by right-click on empty space in the Project Bin.
Add Template Title
This function creates a Title Clip based on a Template Title.
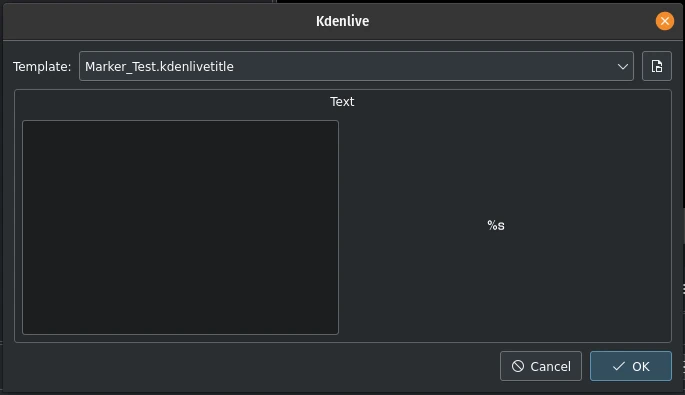
Adding a Template Title
You build the template in the Titler application like a normal Title Clip. The key is the placeholder %s. It will be replaced by the text you enter here.
This function is also available from the menu bar of the Project Bin and by right-click on empty space in the Project Bin.
Please refer to the Template Titles section of this documentation for more details about Titles and Templates.
Create Animation
This function creates an animation clip in the Project Bin and calls Glaxnimate, the application to actually create the animation.
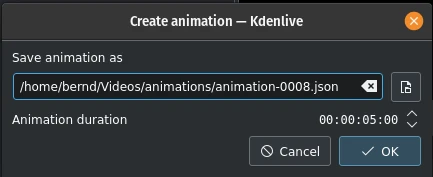
Creating an animation
Glaxnimate has to be installed on your computer and the path to it must be set in .
This function is also available from the menu bar of the Project Bin and by right-click on empty space in the Project Bin.
Add Sequence
This function creates a new Sequence in the Project Bin.
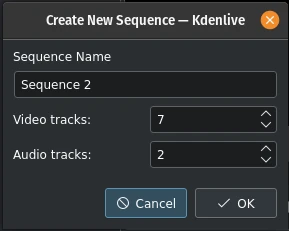
Add a new Sequence
Sequences were introduced with version 23.04 and are needed for nested timelines where you can edit clips separately and independently.
This function is also available from the menu bar of the Project Bin and by right-click on empty space in the Project Bin.
Please refer to the 序列 section of this documentation for more details.
Generators
This function allows to create generated clips in your Project Bin for
Counter
Color Bars (old TV test display)
White Noise
This function is also available from the menu bar of the Project Bin and by right-click on empty space in the Project Bin. See the Clips section in this documentation for more details.
Create Folder
This function creates a new folder in the Project Bin.
The folder is a virtual folder and very useful to keep your assets organized. You can also create separate bins from each folder (see the Multiple Bins section)
This function is also available from the menu bar of the Project Bin and by right-click on empty space in the Project Bin.
More details are available in the Create Folder section of this documentation.
小技巧
A good way to keep your Project Bin neat and tidy is to have bin folders or separate bins for your footage (main video), B-roll, audio, still images, SFX and VFX, titles and so on.
提取音频
仅在选定的剪辑为具有音频轨道的视频剪辑时可用。此功能从剪辑中提取音频,并将它作为48kHz wav 文件添加到项目素材箱中。该过程在项目素材箱中作为剪辑作业运行,可能需要一些时间。剪辑下方的进度条指示进度。
此功能也可通过项目素材箱中剪辑的右键菜单获得。
Media Jobs
打开一个弹出窗口以选择不同的选项:
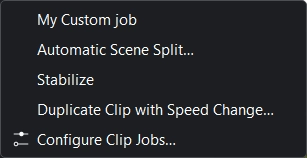
Media Jobs Menu
My Custom Job (this may look different in your environment)
此功能也可通过项目素材箱中剪辑的右键菜单获得。
选择一个具有正在运行的任务的剪辑,任务细节将出现在剪辑监视器的叠加层中。点击剪辑任务叠加层上的 X 将取消剪辑任务。要启用剪辑任务叠加层,请参阅 此处。
自动场景切分
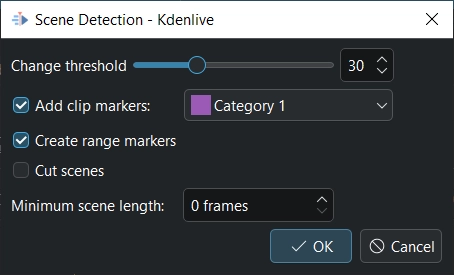
场景检测
This job detects scene changes in the clip and creates markers and/or range marker and/or cuts the clip into sub-clips. The Change threshold determines the difference in the video stream to be considered a scene change. You may need to experiment with this parameter to get satisfactory results for your specific situation and source material.
如果你想要Kdenlive为每个场景创建子剪辑,请选中 Cut scenes/剪切场景。
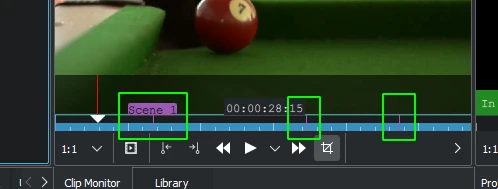
自动场景检测并标记
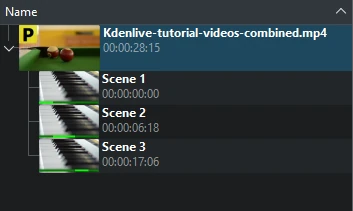
自动场景检测并切分
稳像
此功能将图像稳定算法应用于剪辑,可以减少剪辑的震动。它也可以通过剪辑在项目素材箱中的右键菜单中使用。
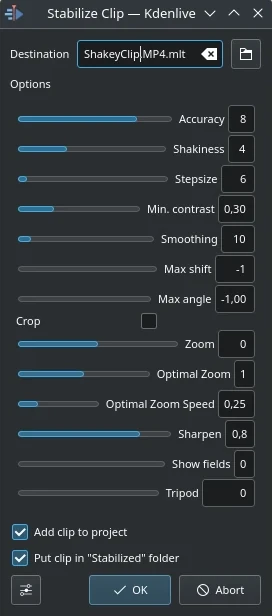
剪辑稳像对话框在版本21.12中
基于此屏幕的工具提示和 the docs here 所有选项的含义,这是所有选项的含义:
- 精度
抖动检测的精度。应大于等于抖动因子。1:低(快速处理)。15:高(慢处理)。默认值:4。建议:8。
- 抖动
视频有多抖动?摄像机有多快?1:很少(快速处理)。10:非常强烈/快速(慢处理)。默认值:4。注意:较大的值也可能降低精度。这是因为运动检测的内部。通常,您不需要大于7的值。
- 步长
搜索过程的步长。最小值周围的区域以1像素分辨率扫描。默认值=6。
- 最小对比度
低于此对比度的区域将被丢弃。范围0-1。默认值=0.3。对于一个非常低的对比度剪辑,您可能需要使用较小的值。
- 平滑
控制平滑化/稳定化的程度。平滑值越大,摄像机运动就越被补偿。结果剪辑中摄像机速度的变化就越低。从技术上讲,这是低通滤波的帧数=(平滑*2)+1。
例如,对于每秒25帧的剪辑,平滑因子的值为12意味着我们将在1秒内进行平滑处理-当前帧后的12帧+当前帧(1)+当前帧后12帧。默认值=10。
Demo of the difference (top:3, bottom: 30)
- 最大偏移量
转换图像的最大像素数。默认值=-1(无限制)
- 最大角度
以弧度为单位旋转的最大角度。默认值=-1(无限制)。
- 修剪
未选中表示变换帧的边界包含以前帧的像素。选中=黑色背景。默认为未选中。
- 缩放
变换过程中的附加缩放。缩放百分比>0=放大,<0=缩小。此处指定的缩放是在选中optzoom时程序计算的最佳缩放之外的缩放。默认值为0。
- 最佳缩放
使用最佳缩放(根据变换计算)。使视频缩放,直到90%的变换被隐藏。选中默认值。提示:您可以使用缩放选项进一步放大。
- 最佳缩放速度
每帧缩放(当 “Optimal Zoom/最佳缩放” =2时使用)
- 锐化
锐化变换后的图像。锐化量:0=不锐化。使用具有5x5矩阵的过滤器反锐化。默认值为0.8。
- 显示字段
0=不绘制任何内容,1或2=显示字段和变换。使用1或2预览过程将做什么。检查这个 example 。默认值为0。这个参数的非零值在 Kdenlive 实现中不相关-使用零。
- 三脚架
虚拟三脚架模式(=相对=0,平滑=0)
以下是运行稳像-由原始作者转码-的效果示例。
带速度变化的复制剪辑
This function is only available for clips selected in the Project Bin, and can be selected from the right-click menu of a clip. [1]
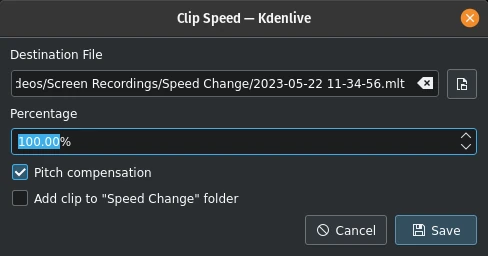
带速度变化的复制剪辑
Values above 100% speed the clip up, values below 100% slow it down. The sound in the clip is also reversed.
选择 Pitch compensation/变桨补偿 以避免在剪辑中加速时语音中的Mickey Mouse效果。如果勾选 Add clip to “Speed Change” folder/添加剪辑到”Speed Change”文件夹 ,则在项目素材箱中创建一个名为”Speed Change”的文件夹,并将剪辑添加到其中。

在项目素材箱中带速度变化的复制剪辑
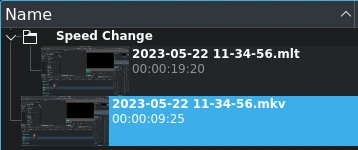
类似上文,但带有速度变化文件夹
当你点击 Save/保存 时,一个新的剪辑将在项目素材箱中创建。它具有你在对话框中提供的文件名,后缀为 .mlt。
你可以像任何其他一样将这个剪辑添加到时间轴,当你播放它时,原始源剪辑的视频将播放,但速度将变为新的速度(如果输入了负%值,则将以相反的速度播放)。
配置剪辑任务
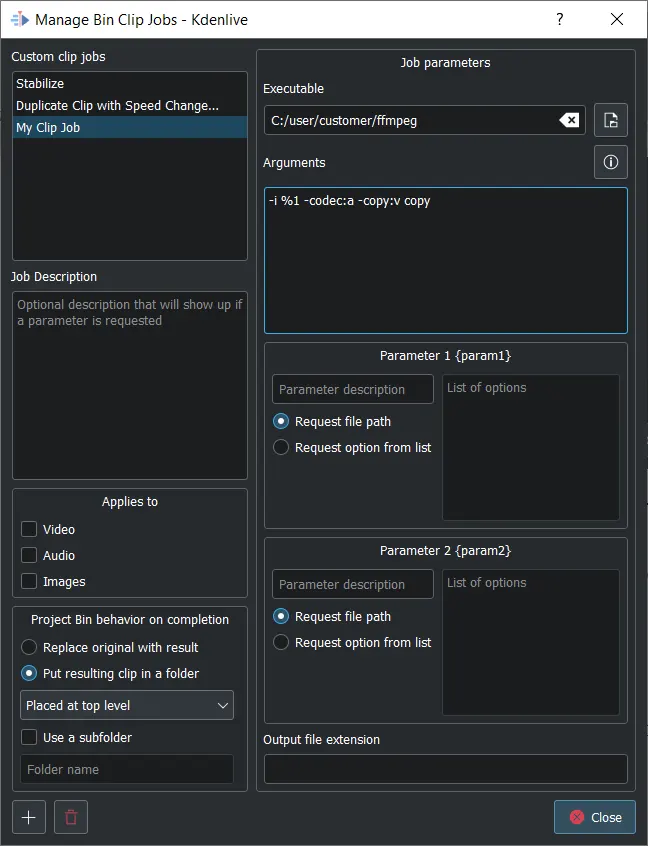
管理剪辑作业对话框
This opens the Manage Bin Clip Jobs dialog. Here you can create and manage your own jobs that can then be applied to clips in the Project Bin. Select the executable you want to be called and enter the arguments to be passed to the executable. %1 will be replaced by the path of the source clip. If you do not specify an output file extension the extension of the source file will be used.
除非您想用结果替换原始剪辑,否则选择结果剪辑是 放在原始剪辑文件夹,还是 放在顶级级别,还是Kdenlive应该 使用子文件夹 来保存它。在后一种情况下,您需要输入一个文件夹名称。
你可以有源剪辑路径{source},以及两个可配置的参数{param1}和{param2}。输入文件将替换{output}。参数应该是: {source} {param1} {output}
Click on  to create a new custom clip job. In order to delete one, select it first then click on
  .
.
转码为编辑友好格式
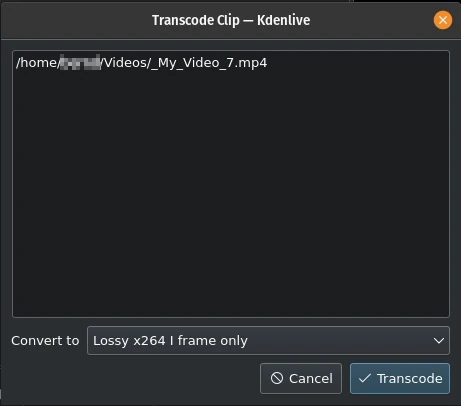
转码剪辑为编辑友好格式
这将打开一个对话窗口,您可以在其中选择一个适合非线性视频编辑的编辑友好格式。这个功能也可以通过右键菜单为项目素材箱中选择的剪辑使用。
你可以在这个功能中为项目素材箱中选择多个剪辑来使用这个功能。
有几种格式可用,有些是无损的(产生巨大的文件),有些会产生轻微的质量下降。
Transcode Clips
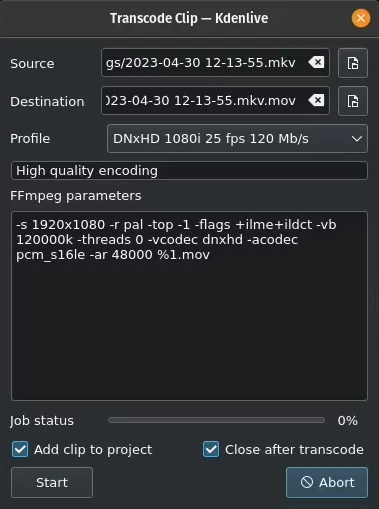
Transcode clips
Use this to convert a video or audio clip from one codec/format to another.
Choose one source file or multiple source files and a profile that represents the desired destination codec/format. Optionally change the destination path and file name and hit Start. Otherwise, hit Abort to close the windows.
Transcoding a clip should be faster than loading the clip into the timeline and re-encoding it into a different format.
Add clip to project controls if after the conversion, the new clip is added to the Project Bin.
Close after encode Uncheck this checkbox if there is the need to convert to another format after the conversion.
转码
使用此功能将您的源材料转码为各种其他格式的格式。这个功能也可以通过右键菜单为项目素材箱中选定的剪辑使用。
Choose a transcode profile from the available list to transcode the selected clip into a different video format. The options are controlled by Transcode Settings. The transcoding is done by the ffmpeg program.

转码任务运行中
转码任务运行时,项目素材箱将在剪辑的缩略图上显示一个进度条,并且项目素材箱的顶部将出现一个作业列表菜单项。
定位剪辑
定位剪辑将在系统文件浏览器中打开,该文件浏览器位于存储所选剪辑的文件系统的位置。对于在项目素材箱中跟踪剪辑源非常有用。
这个功能也可以通过项目素材箱中选定的剪辑的右键菜单使用。
请注意,根据剪辑的类型,某些菜单项可能不会显示。
重新加载剪辑
重新加载剪辑将从文件系统中重新导入剪辑到Kdenlive。当您在Kdenlive之外编辑剪辑时,这很有用,您希望Kdenlive更新项目中的剪辑。
这个功能也可以通过项目素材箱中选定的剪辑的右键菜单使用。
替换剪辑
替换剪辑将允许您选择不同的文件,但保持时间轴上的所有使用。如果使用占位符剪辑(例如低分辨率或项目模板),则在最终替换剪辑之前,这可能很有用。
如果你选择的是音频文件,Kdenlive会问你是否只想改变剪辑的音频部分(或相反)。如果使用外部程序优化了音频,并且您将更新视频剪辑,这将非常有用。

如果您只想更改剪辑的音频部分,请提问
这个功能也可以通过项目素材箱中选定的剪辑的右键菜单使用。
备注
确保剪辑替换至少与相同的长度/持续时间。否则,它可能会导致时间轴上出现意外的间隙。如果对这些剪辑使用了效果,则替换剪辑应该具有相同的尺寸,以避免效果的非预期行为。
Replace Clip In Timeline
With this function you can replace a clip which is in the timeline with another clip. This is helpful when you are working with placeholders or low resolution clips which you like to exchange with the final clip before rendering.
You need to select 2 clips (the replacement clip and the original clip) for this replacement
复制剪辑
这个功能将在项目文件夹中创建一个剪辑的副本。当应用于剪辑并允许您使用两个不同的集合效果的相同源文件时,或者一个没有效果时,这可能非常有用。
这个功能也可以通过项目素材箱中选定的剪辑的右键菜单使用。
代理剪辑
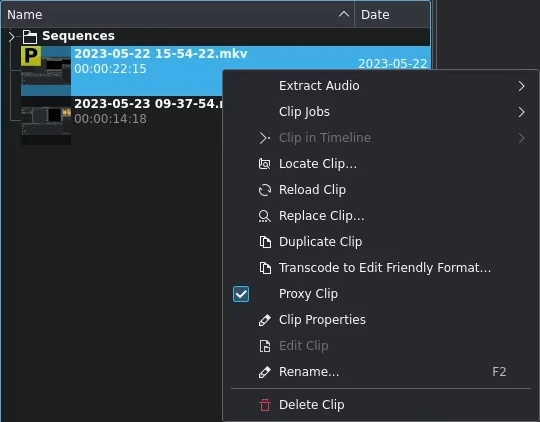
代理剪辑
如果项目设置中启用了代理剪辑,则此功能将创建代理剪辑的副本。在项目文件夹中的剪辑将显示为黄色方块,其中包含字母P,表示该剪辑实际上是代理剪辑(在剪辑或项目监视器中播放时,预期播放质量较低)。在最终渲染期间,代理剪辑将被原始源文件替换。
这个菜单项是一个切换按钮,这意味着如果选定的剪辑已经是代理剪辑,Kdenlive将返回到原始源剪辑。
这个功能也可以通过项目素材箱中选定的剪辑的右键菜单使用。
在时间轴中的剪辑
这个功能对于快速定位剪辑在时间轴上的所有位置非常有用。它也可以通过右键菜单在项目文件夹中选定的剪辑中使用。
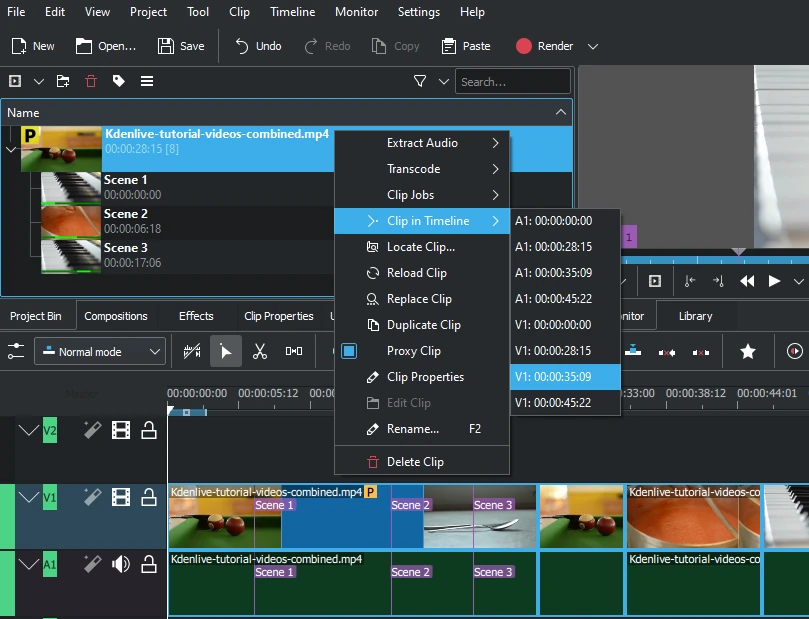
定位所有使用的剪辑
选择 Clip in Timeline/时间轴中的剪辑 菜单项将打开一个弹出窗口,列出所有选定剪辑的实例,通过其轨道(A代表音频,V代表视频)和时间轴中的位置来标识。单击列表中的条目将重新定位播放头到所指示剪辑的开始位置。
在示例中,我们单击了第三个视频条目,该条目位于视频轨道1的00:35;09标记,播放头现在位于该剪辑的开始位置。
如果剪辑未在时间轴中使用,则此选项将被禁用。
See also Clip in Project Bin available in the right-click menu on a clip in the Timeline.
剪辑属性
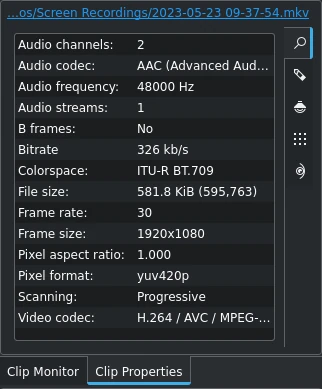
剪辑的属性
这个菜单项打开剪辑属性小部件,并在项目文件夹中显示所选剪辑的属性。根据剪辑的类型,它包括有关音频流、视频流、宽高比、尺寸或帧大小、帧速率等的信息。
这个功能也可以通过项目素材箱中选定的剪辑的右键菜单使用。
For more details see the chapter Clip Properties.
编辑剪辑
这个功能适用于以下剪辑类型:
音频
图像
animation
video
It opens the clip in an external software specified in Default Apps ready for editing.
这个功能也可以通过项目素材箱中选定的剪辑的右键菜单使用。
如果路径未设置,则会出现一个弹出窗口,用于定义计算机上外部软件的路径:
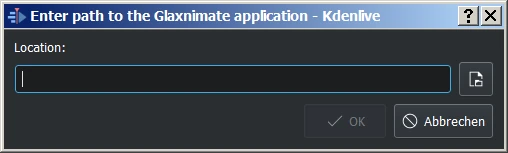
Glaximate缺少路径
Once the path is set, the application starts and opens the clip you had selected. The entered path gets added automatically to the default apps in .
More details for installing the needed external software and how to set the path refer to the Default Apps chapter.
提示
这个选项对于视频剪辑是灰色的,因为 Kdenlive 是视频编辑器 - 只有音频、图像和动画剪辑由外部软件编辑。
删除剪辑
This function removes the clip from the Project Bin. It does not delete it from the file system. If the clip is being used in the Timeline a warning message will appear, and if you click on Continue any occurrence of that clip in the Timeline will be deleted.
这个功能也可以通过项目素材箱中选定的剪辑的右键菜单使用。
Adjust Profile to Current Clip
This function offers up a suggested Project Profile that would be most suitable for the currently selected clip in the Project Bin.

Adjusting the project profile to the clip properties
Remove Unused Media
This function can be used to remove any unused clips from the Project Bin.
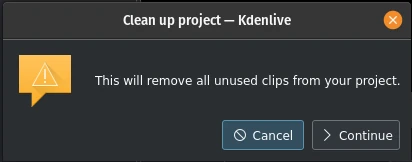
Clean up the project
You can undo this action with , through the Undo History or with the default keyboard shortcut Ctrl+Z.
备注
This is different from the Project Settings dialog button Delete Files in the Project Files tab which deletes files not used by the project from the hard drive.